WordPress Glossary Plugin (CMTG) - Getting Started - Use Case - Creating a Glossary Website With Tooltips From Scratch
Use Case - Creating a Glossary Website With Tooltips From Scratch
Note: This guide covers features from the Pro version of the WordPress Glossary plugin - This document uses eCommerce version 4.2.0
Introduction
The WordPress Glossary plugin allows you to create a site with a complete glossary of terms. Each term's definition can appear on mouse hover across the whole site.
Video Tutorial
Use Case Front-End
Glossary Index

Tooltip
Use Case Assumptions
In this example use case guide, we'll cover how to create a small glossary about internet terms. You can apply the same idea to the topic of your site.
We consider that you have already bought the plugin, but not installed it.
It follows:
- Installing the plugin
- Adding the first term
- Configuring glossary index
- Improving tooltip's visual
- Categorizing Terms
- Translating the interface
Installing the Plugin
The process is the same for all CM plugins.

- Download the plugin from your customer dashboard.
- Log in to WordPress and navigate to the WordPress Admin → Plugins settings.
- Click on Add New.
- Activate it and add the license.
Learn more: Getting Started - Installation And First Steps
TIP: Refresh the Permalinks Structure
This will help to prevent common 404 errors. Take these simple steps:
- Log in to your WordPress website as the admin.
- Visit Admin Dashboard → Settings → Permalinks.
- Click on Save Changes.
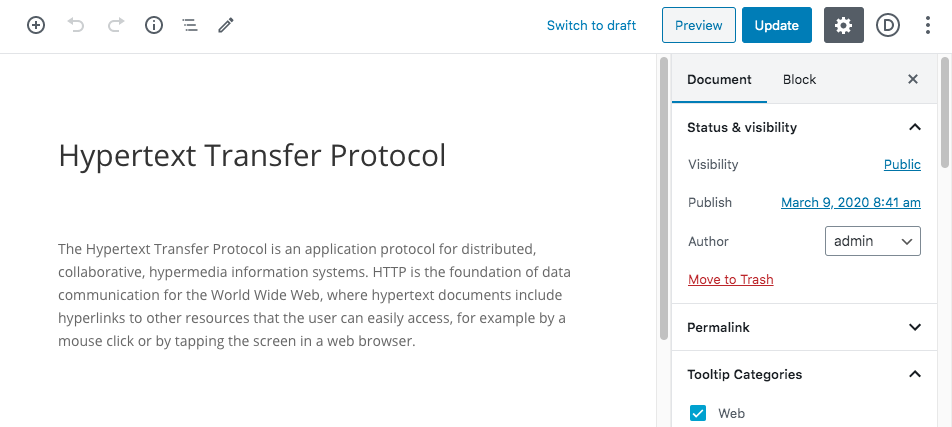
Adding First Term
With the plugin ready to go, it's time to add the first term! Head to Admin Dashboard → CM Tooltip Glossary → Add New.

The term title is the word or phrase which, when found on the post/page, would display the tooltip with the definition, and link to the Term Page or any other custom links according to the settings that you define.
Term descriptions is the actual content.
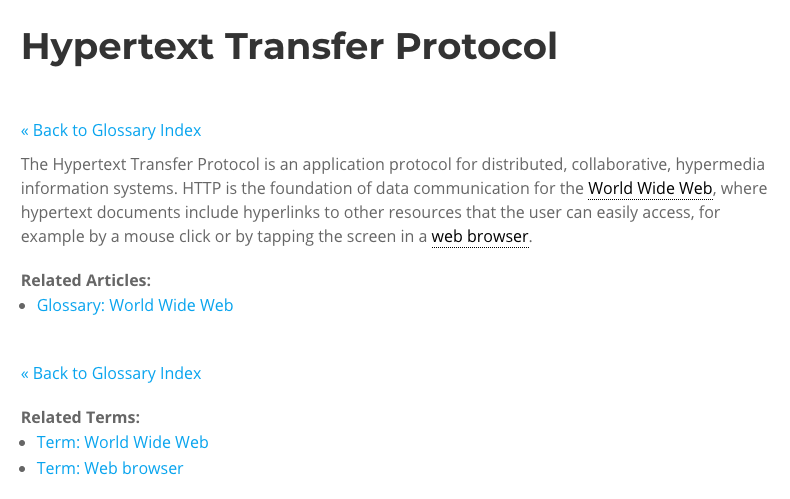
Adding a Term Example
Here we show the term Hypertext Transfer Protocol.
Aside from the content, this term has a category (Web), related articles and an abbreviation (HTTP).
Using the same process, we can add as many terms as we would like.
Improving Terms and Term Pages
Adding a term is only the beginning! There are many features to improve both terms and term pages.
Some suggestions:
- Learn how to access and edit the Glossary Term page.
- Enrich the Term page by linking Related terms and Related articles.
- Display persistent content before and after every term.
- Assign an icon to each of your terms.
- Use abbreviations (United States, US, USA), synonyms (program, software) and variations (child, children).
- You can also enable multiple meanings to the same term (eCommerce).
- Add a link back to the Glossary Index (Pro, Pro+, eCommerce).
- Get social by enabling users to embed and share your term. Also turn on the social share buttons (Pro, Pro+, eCommerce).
Learn more: Getting Started - Adding a Term
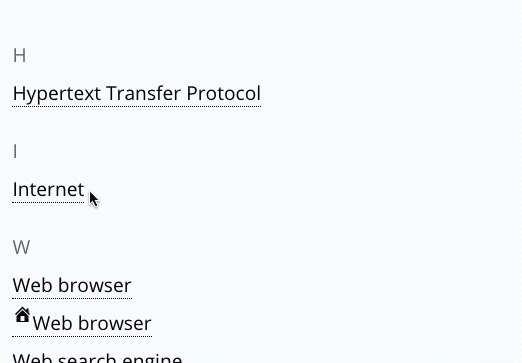
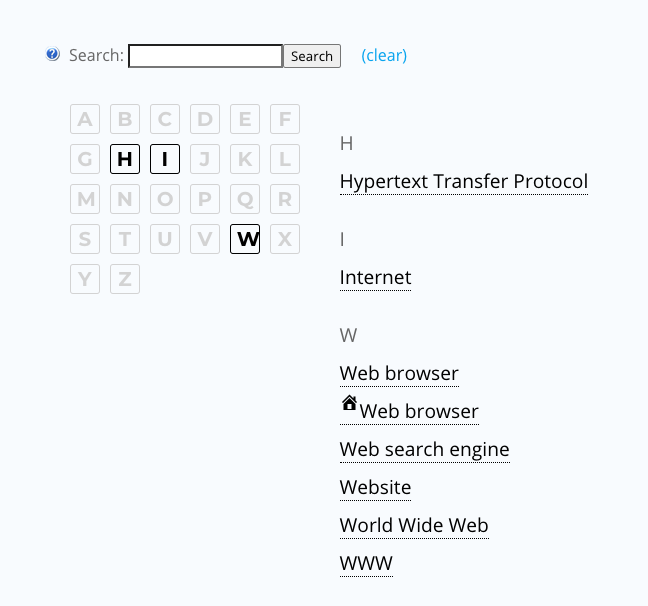
Configuring The Glossary Index
The Glossary Index Page is automatically created upon plugin installation in the address www.yoursite.com/glossary. As you add more terms, the Glossary Index Page will be automatically updated to present all of your glossary items.
It's a normal page with the shortcode [glossary] , which outputs your terms in alphabetical order. You can configure how it looks by default by heading to the plugin's settings → Glossary Index Page tab.
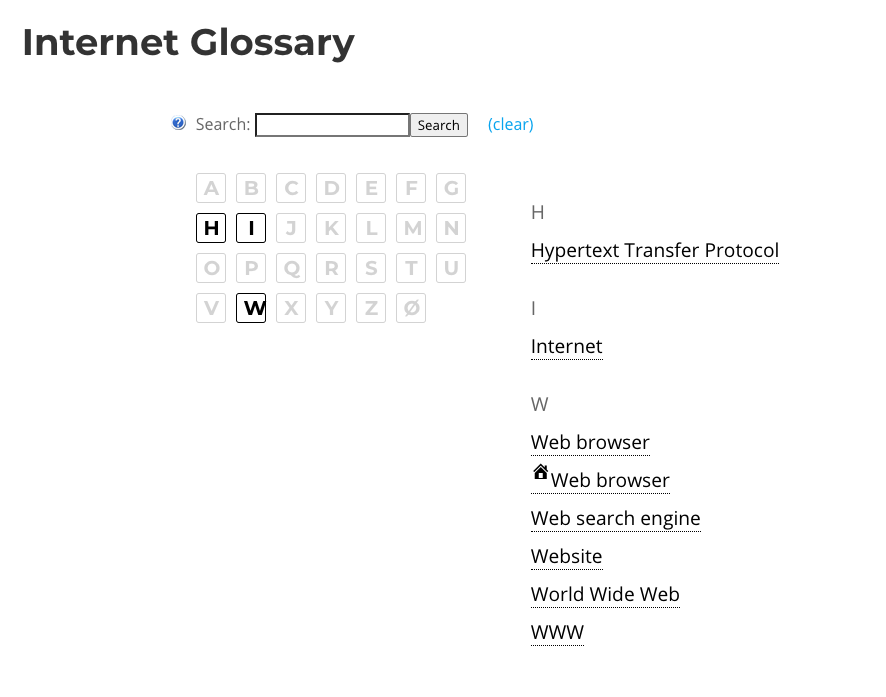
Example
For this demo, we:
- Set template to Cubes
- Enable the search with Fast-live-Filter
- Show the alphabetical index and added the character ø to the end
- Removed the tooltips on this specific page
TIP 1: Modifying The Index Content With Shortcodes
You can change what appears in the glossary by adding parameters to its shortcode, [glossary].
Parameters
There are many parameters. A small sample: of parameters
- cat - the name of the category you want to show the list for.
- title_show - controls whether to show the heading – setting this to 0 means the heading won’t be displayed at all (default: 1 – show heading).
- no_desc (Pro+/Ecommerce) - you can use this attribute (add no_desc="1″) to disable the descriptions on Glossary Index List.
- glossary_index_style Pro+/Ecommerce) - Accepts the following values:
- Classic "classic", Classic + definition "classic-definition", Classic + excerpt "classic-excerpt", Small Tiles "small-tiles", Big Tiles "big-tiles", Classic table "classic-table", Modern table "modern-table", Sidebar + term page "sidebar-termpage"
Example [glossary cat="web" title_show="0" no_desc="1]
Check all shortcodes and parameters: WordPress Glossary Plugin (CMTG) - Shortcodes - Available Shortcodes - CreativeMinds Products Documentation.
TIP 2: Modifying The Index Visual With Templates
Check some of the 17 templates:
Learn more: WordPress Glossary Plugin (CMTG) - Index - Index Templates
Improving The Tooltip's Visual
Now let's match the tooltip to our site's identity. Here are some examples of what we can achieve:
Head to Admin Dashboard → CM Tooltip → Settings → Tooltip tab. Then, check the Tooltip - Styling section.
Some of what you can change:
- Tooltip font
- Tooltip title font size
- Tooltip close icon
- Tooltip background color
- Tooltip border line properties
- Tooltip text color
- Tooltip positioning on the screen
Learn more WordPress Glossary Plugin (CMTG) - Tooltips - Change the Tooltip Style
What Else Can I do?
Check some useful tips:
- Dynamically Integrate with other services, such as Wikipedia, WooCommerce, ChatGPT and dictionaries (Merriam Webster, Glosbe Dictionary, Google Translate).
- Spice your tooltips up with image, video and audio content - check the video tutorial!
Learn more: Shortcodes - Using Shortcodes
Example

This example follows the following settings:
- Stem enabled / white
- Background color: #1e73be
- Tooltip title 13px / white
- Tooltip font 13px
- Padding 2px 12px 3px 7px
- Tooltip shadow enabled / black
- Animation: Grow 0.5s / Fade-out 0.5s
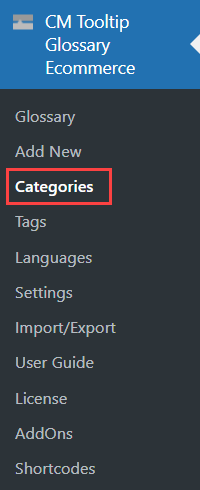
Categorizing Terms
You can classify your terms into different categories. It can be useful, if you want to have multiple separate glossaries on your site. Note: using categories is available in Pro+ and eCommerce versions only.
The first step in creating the term categories is by going to the Admin Dashboard → CM Tooltip Glossary → Categories as shown below:
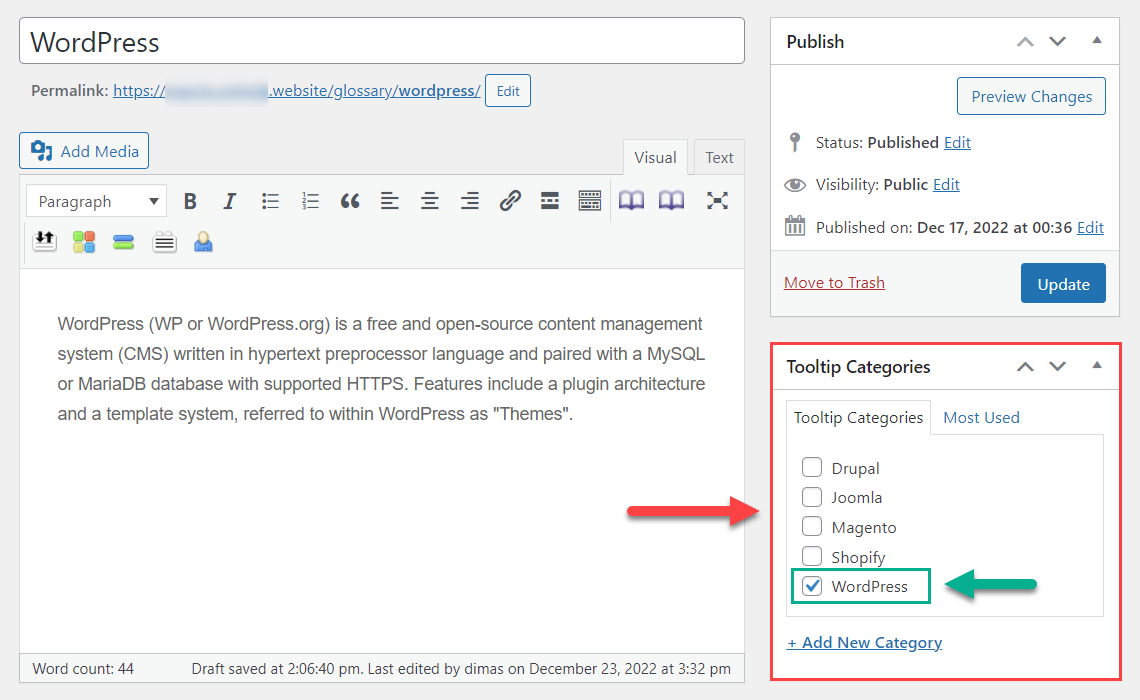
Next, using the WordPress built in category management system, create your term categories and assign different terms to each of them:

Note!
Despite the very similar look, these are not the same categories as the WordPress built-in Post Categories!
Once categories have been added, it is possible to assign each of your glossary terms to the category/categories it belongs to, as shown in the screenshot below:
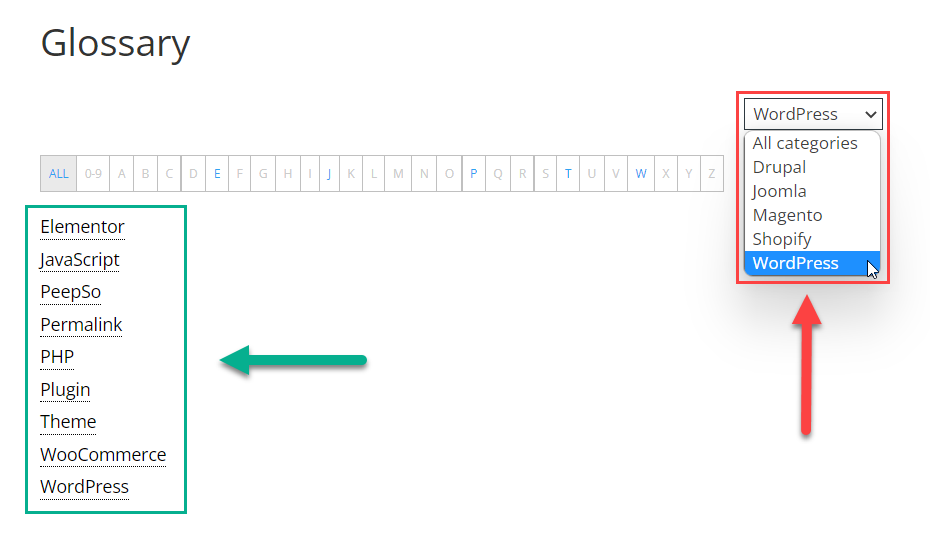
How will my term categories be made visible?
A Categories dropbox will appear in the Glossary Index Page, allowing users to choose between the different term categories, as shown below:
Category Settings
There are a few settings while creating/editing a category, which allow you to override global plugin settings:
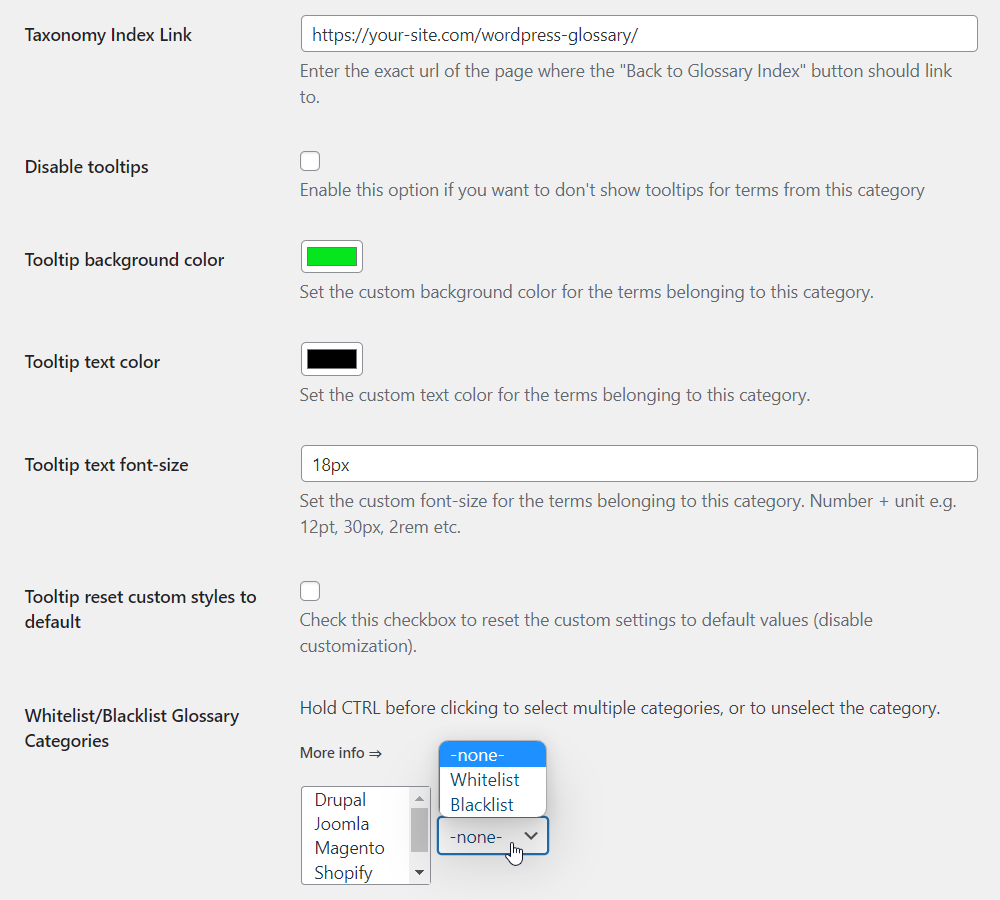
- Taxonomy Index Link - Enter here a link which will be used as a backlink for terms of that category. Learn more detailed about how this field works in this guide: WordPress Glossary Plugin (CMTG) - How To - Include Glossary Category In the Term Permalink
- Disable tooltips - Check it, if you want to disable displaying tooltips for terms of a certain category.
- Tooltip background color - Choose custom background color for a tooltip.
- Tooltip text color - Choose custom text color inside of a tooltip.
- Tooltip text font-size - Define the custom size of the text inside of a tooltip.
- Tooltip reset custom styles to default - Check it, if you want to reset custom styles to default (according to global plugin settings). Changes will be applied after updating the category.
-
Whitelist/Blacklist Glossary Categories - If you decide to use this field, and select Whitelist for this category - then only the terms from categories which are in this list and are defined in the Glossary will be highlighted in the content if found. If you choose Blacklist instead, terms from selected categories will not be highlighted on the posts/pages belonging to this category.
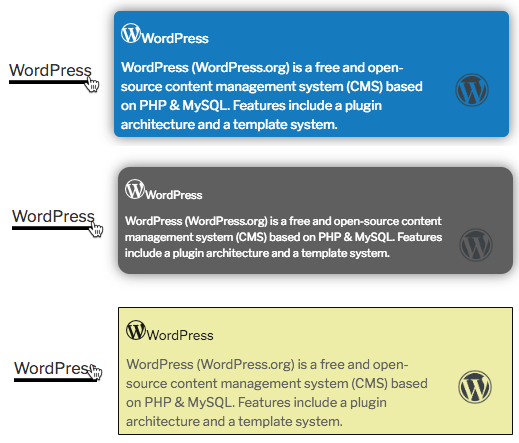
Front-end Example
This way you can diversify tooltip appearance for each category and it will help your site visitors to easily distinguish terms from different categories. Example:
- Default tooltip style defined in plugin settings.
- Custom tooltip style defined in a category.

Examples of regular and custom category tooltips

Translating Interface
If your site is not in English, that's ok. The WordPress Glossary plugin fully supports all UTF-8 languages. Translate it by adapting labels, and making a few tweaks. Pro+ and eCommerce also have RLT support and are even compatible with WPML (WordPress MultiLanguage).
Some examples of labels available for translation:
- Back to Top
- « Back to Glossary Index
- Read More
- Glossary Item
Learn more: Settings - Labels
End Result
Following instructions found in the plugin and guides, you should be able to complete a glossary of the theme of your choice.
 |
More information about the WordPress Glossary Plugin Other WordPress products can be found at CreativeMinds WordPress Store |
 |
Let us know how we can Improve this Product Documentation Page To open a Support Ticket visit our support center |