Points prices is a section where you can set the prices and value of your points.
Finding The Settings
To create points navigate to the CM Micropayment Platform → Settings.
Navigation to the plugin settings
Click on the Points tab.
Points settings
Click Add New.
Setting this up is required if you want to enable your users to buy the points packages. Starting from version 1.5.1, the plugin supports up to three decimals (for instance, 0.025).
Setting up the cost of points
Please note that the points value must be unique – so you always have one standard price for a given amount of points.
Multiple points values
"Points is lower than 0 or is not a number" message
Incorrect points value message
If you receive this error message while trying to add values, include 0 as decimals. For instance,
Right - 6.00
Wrong - 6
Step 2) Adding Wallets
As The Admin
Automatic Wallets
While WordPress MicroPayments is active, every time you add a WordPress user, they will receive a new wallet.
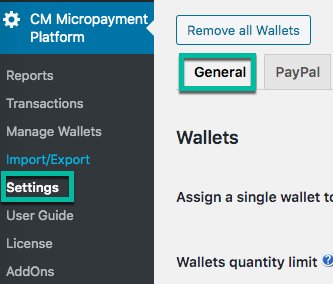
Head to the General tab.
General plugin settings
The relevant settings from the Wallets section.
Assign a single wallet to each customer - if this option is enabled a single Wallet will be tied with each of your WordPress user accounts. (so users won't need to remember their wallet names as long as they're logged in).
Note: This setting must be on for the Transfer Shortcode to display a dropdown menu with the accounts. Learn more.
Wallets quantity limit - You can set any number of wallets to each customer. To change this value, Assign a wallet to each customer has to be disabled
Click the Generate missing wallets button for existing users to create wallets.
To manage the Wallets you need to go to Settings → Manage Wallets.
Navigation to 'Manage Wallets' dashboard
This is a very important screen, as it allows you not only to see the details about Wallets but also to maintain control over all of your user's wallets.
Wallets details
On this page, you can:
list all of the Wallets that have been created on your site.
check the users they're assigned to - you can go to the user's profile by clicking on the login.
check their balance - in the Points column.
check if they're active - in the Status column.
go to the list of their transactions - by clicking on Transactions link in the menu under Wallet Code.
change their points value (charge manually) - by clicking on "Change points value".
after you click that the form will appear in place of the menu where you can put the number of points you'd like to set the wallet to.
eg. if the wallet now has 100 points and you put 300 in the form and click "Accept" - 200 points will be manually added to the wallet.
activate/deactivate the wallet - deactivated wallets cannot be used.
remove the wallet.
use PayPal Payout.
Step 3) General Settings
Important
This is one of the most important parts of the settings. It is where the most widely used options that affect many aspects of the plugin are gathered.
Head to Admin Dashboard → CM Micropayment Platform → Settings → General tab.
General plugin settings
Here you decide how the Wallets will work in your page.
Assign a wallet to each customer - if this option is enabled a single Wallet will be tied with each of your WordPress user accounts. (so users won't need to remember their wallet names as long as they're logged in). Note: This setting must be on for the Transfer Shortcode to display a dropdown menu with the accounts. Learn more.
Wallets quantity limit - You can set any number of wallets to each customer. To change this value, Assign a wallet to each customer has to be disabled.
Disable anonymous payments - If enabled, users will have to input a wallet ID when making purchases.
Hide 'create wallet' button after wallet has been generated - this is option related to the [create_wallet_button] shortcode. You can read about it in Shortcodes section of the documentation.
Number of transactions in My Wallet - this is the number of the last transactions which will be displayed using the [cm_wallet_history] shortcode.
Initial amount of points in the wallet - this is the amount of points each newly created wallet will contain (a great way to give a welcome bonus for new users).
Allow to charge inactive wallets - with this option you can disallow users to charge their wallets once they are deactivated.
Transaction fee for adding points - Every time a user receives points, he/she will be charged this amount. This deduction will be shown in the log. Example: buying points, receiving a transfer. The field accepts both flat amounts and percentages. The default value is 0. Examples:
5
15%
Transaction fee for subtracting points - Every time a user loses points, he/she will be charged this amount. This deduction will be shown in the log. Example: sending a transfer. The field accepts both flat amounts and percentages. The default value is 0. Examples:
5
15%
Allow decimals? (e.g. 2.34 points) - Supports decimals and centesimals for wallet operations. Milesimals and lower units will be disregarded - for example, 1.2399 = 1.23.
When points are shown, round decimals to - Rounds points every time the points are shown. Only works if you enable decimals. Choose between
Highest integer (e.g. 1.5 will become 2)
Lowest integer (e.g. 1.5 will become 1)
Admin Dashboard
This section allows you to enable the Dashboard widget and the Payment Currency.
If enabled the box displaying the wallet name and the amount of points will be displayed.
Dashboard widget with wallet info
The Payment Currency is used to calculate the value of your user's points and it's widely used across the plugin.
By default the Dashboard widget is disabled, and the base currency is US dollar ($).
Dashboard widget settings
Presentation
The presentation section allows you to select two most important pages from the users perspective:
Wallet page - where the user can see the information about their wallet - it's balance, the transaction history etc.
Checkout page - the page where user can purchase more points.
If you choose to use the EDD integration option, the only payment related setting within the WordPress MicroPayments you have to select is the Use Easy Digital Downloads for Checkout.
After saving the changes you’ll be notified about the fact that all MicroPayments Payments Settings have been disabled. For the setup of Payments in Easy Digital Downloads, please refer to the plugin’s EDD help.
The setting can be found on the General tab.
General plugin settings
Use Easy Digital Downloads for Checkout – all of the Payments will be forwarded to the Easy Digital Downloads checkout page.
Using EDD for checkout
The integration is transparent. You don’t have to manually add the products to the EDD product catalog. It will be done automatically for each entry from the Point Price table. The changes will be replicated as well. The products will have the category assigned so they stand out.
EDD integration settings
Grant MicropaymetPoints per purchase - This option allows you to grant virtual currency points for purchases users make in your Easy Digital Downloads shop. This can reward users for purchases they are making in your store which they can also convert later to coupon codes or purchasing directly with the virtual currency in your store (the last two options needs to be enabled to support this).
Allow to convert Micropayment Points into discounts - This setting option allows users to use the shortcode to use the accumulated points to buy the discounts for Easy Digital Downloads products. The conversion ratio between points to real money value is based on the MicroPayments setting.
Allow only to buy products with MicropaymentPoints - You can add the MicroPayments also as a payment gateway in your EDD checkout page. This means that once paying for products user can choose to pay with thier virtual currency. The conversion between the real value of the product and the virtual currency will be calculated based on the MicroPayments setting for conversion rate.
Of course, it'll still be possible to buy packages of points with the real money using the other defined gateways
Currency Settings
In the EDD currency settings (Admin Dashboard → Downloads → Settings, Payment Gateway tab) you can define the MicroPayment defined virtual currency as the default currency for your EDD shop.
This will display the price of each product as set in your product download page in MicroPayment currency value and will only allow you to pay with the MicroPayments payment gateway at checkout. Using this is of course optional.
Setting up MicroPayments as the default payment gateway in EDD
3) WooCommerce
Extra Setup
To properly set up this, it's necessary to adjust both WordPress MicroPayments and WooCommerce settings.
Part A) WooCommerce
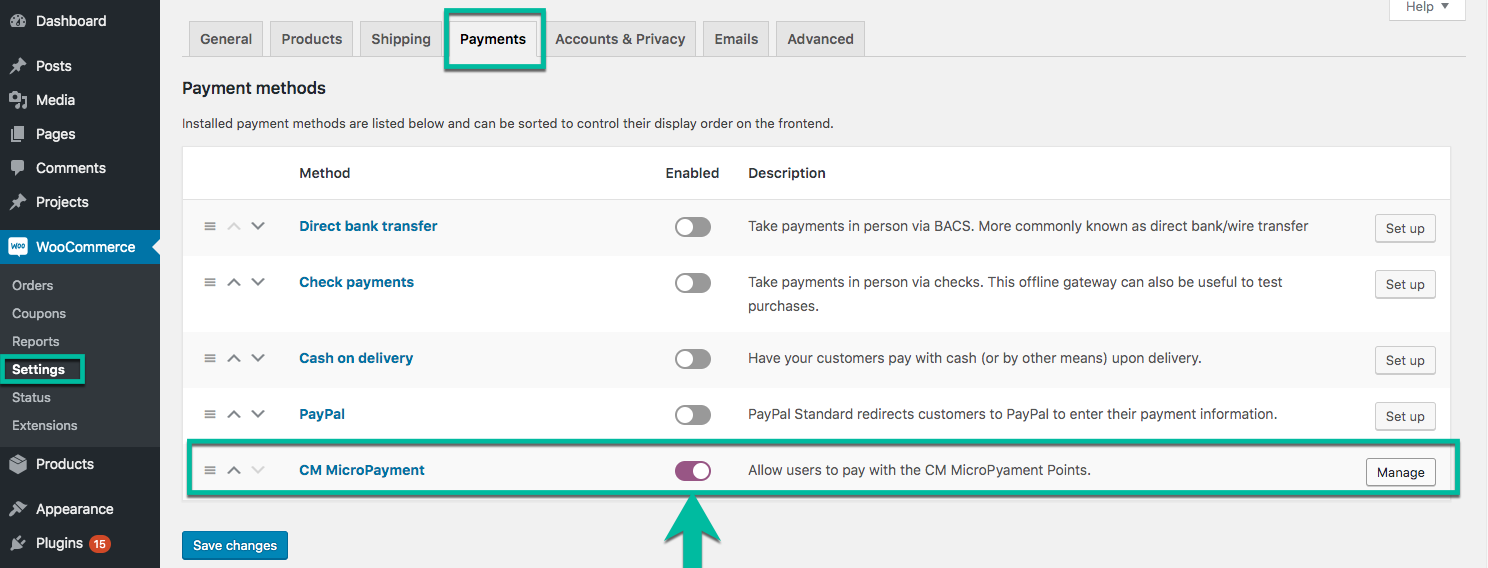
First, head to WooCommerce → Settings → Payments.
Here, make sure the CM MicroPayment method is enabled.
WooCommerce plugin integration
Then click Manage.
WooCommerce Plugin integration settings
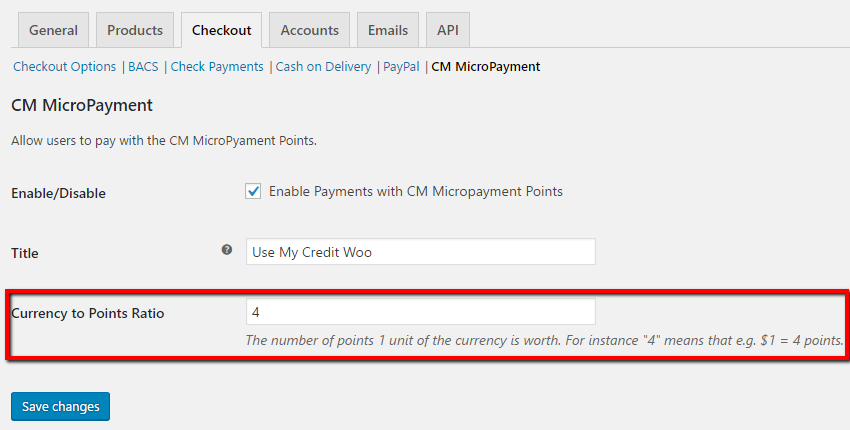
There's another toggle to enable or disable MicroPayments as a payment method and you can also to configure the title and checkout button labels.
Here you can also edit the labels for Title and Checkout Button Text that are displayed on the checkout page:
WooCommerce Plugin integration labels
More importantly, the Currency to Points Ratio defines the value of points.
Examples
The formula to determine the is value of the points is Points*Formula.
A product costs $5 and the user has 1 point. If Currency to Points Ratio is 5, the user has the exact amount of points to buy the product (5 ratio * 1 point = 5)
A product costs $5 and the user has 10 points. If Currency to Points Ratio is 0.5, the user has the exact amount of points to buy the product (0.5 ratio * 10 points = 5)
There are also 3 other useful options:
Show wallet code
Show purchase cost
Show digital wallet balance
These options were introduced in version 2.1.1. They allow you to show or hide Wallet ID/Nickname, purchase cost and wallet balance:
WooCommerce Plugin integration options
For more information about setup of payments and payment gateways in WooCommerce, please refer to the WooCommerce plugin’s help.
Part B) - MicroPayments
Head to the Generalsettings tab.
WooCommerce Plugin integration settings
WooCommerce Plugin integration settings:
Use WooCommerce for Checkout – Necessary to activate the integration.
Apply WooCommerce currency format on points - Enable it to apply WooCommerce currency format settings on points. You can manage this format from WooCommerce → Settings → General → Currency options. Note: this option was introduced in version 2.1.1.
Grant Micropayment Points per purchase - Grant virtual currency points for purchases users make in your WooCommerce shop. This can reward users for purchases with points, which can also convert later to coupon codes or purchasing directly in your store (the last two options needs to be enabled to support this).
Allow to convert Micropayment Points into discounts - This setting option allows users to use the shortcode to use the accumulated points to buy the discounts for WooCommerce products. The conversion ratio between points to real money value is based on the MicroPayments setting explained above. Discount codes can be used in the checkout before making the payment.
Replace default currency to points in orders - Converts default prices in orders to points (in the admin section). For instance, instead of "$3", it will be "3 points". Note: this option was introduced in version 2.1.3.
Replacing default currency to points in orders
Replace default currency in e-mails when purchasing with Gateway - Converts the prices of items from the default currency to points. For instance, instead of "$3", it will be "3 points".
Additional user who should get points for purchases - Choose "Admin" to grant the admin points for each WooCommerce purchase.
Final order status of purchasing micropayment points - When points are bought, the order status will be set to the value of the option. Default is Completed.
Order status after payment with micropayment points - When the order is paid, its status will be set to the value of the option. Default is Processing.
Granting Points For Purchases (Video Tutorials)
What It Means
WordPress MicroPayments allows you to grant points for purchasing all or certain Easy Digital Downloads and WooCommerce products.
EDD
WooCommerce
Use Points for Discounts
What It Means
One of the options of using the points is changing them to the Easy Digital Downloads discounts.
1) EDD
One of the options of using the points is changing them to the Easy Digital Downloads discounts.
The discounts are created by exchanging the selected (by user) amount of points to the discount having the fixed amount in the selected currency (not a percentage discount!) using the ratio set by the administrator. To enable this functionality the Easy Digital Downloads must be enabled and the feature has to be enabled in the MicroPayments Settings page.
Example
Note: The option Allow to convert MicropaymentPoints into discounts is required for the functionality to work
EDD integration settings
Example
EDD Currency to points ratio settings
The ratio used for generating the discounts is the same ratio which is used in the Easy Digital Downloads Gateway. You can find these settings in Downloads → Settings → Payment Gateways
Shortcodes
There are two shortcodes - one to create the discounts, one to list the created discounts.
[cm_micropayment_points_to_discount] - this is the shortcode for displaying the form allowing to change the points into discounts
[cm_micropayment_points_discounts] - this is the shortcode allowing to display the table of all generated discounts (Note: it won't display anything if no discounts were generated!)
Frontend
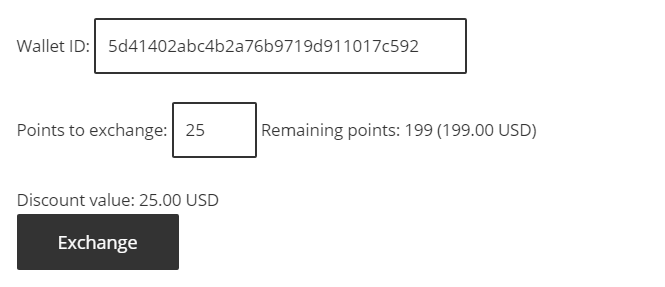
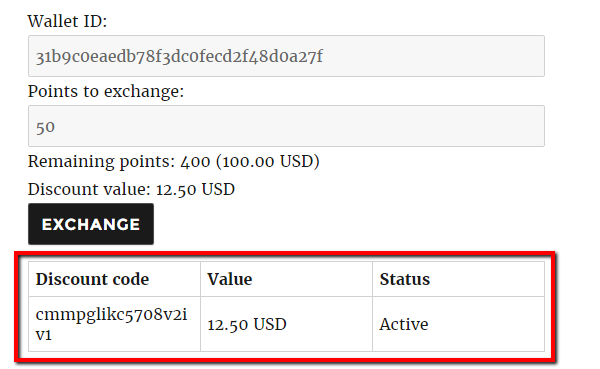
The form displayed by the [cm_micropayment_points_to_discount] shortcode contains:
Field to input the Wallet ID - if the user is logged in, and the Wallets are assigned it will be pre-filled with the user's wallet ID
Points to exchange - user needs to put the amount of points which they want to exchange for a discount
Remaining points - it displays the remaining amount of points in the Wallet together with their value (calculated based on the ratio)
Discount value - this value changes dynamically, based on the amount entered in the Points to exchange
Example
Page entitled CM Micropayment Easy Digital Downloads Discounts displaying the form coming from the [cm_micropayment_points_to_discount] shortcode.
Changing points to EDD discounts
Example
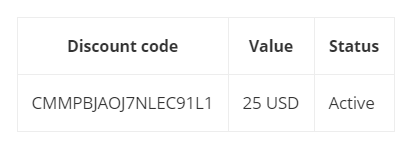
After the discount has been created the [cm_micropayment_points_discounts] will display a table with the discount code, it's value and status (marked with the red border).
EDD Discount code example
Using the Discounts
After creation you can copy the Discount code displayed in the table and paste it on the Easy Digital Downloads checkout form to lower the total value of the transaction (all of the Easy Digital Downloads rules for discounts apply).
Video Tutorial
2) WooCommerce
The discounts are created by exchanging the selected (by user) amount of points to the discount having the fixed amount in the selected currency (not a percentage discount!) using the ratio set by the administrator.
Example
The ratio used for generating the discounts is the same ratio which is used in the MicroPayments payment gateway for WooCommerce.
WooCommerce plugin integration settings - Currency to Points Ratio option
Shortcodes
There are two shortcodes - one to create the discounts, one to list the created discounts.
[cm_micropayment_points_to_woo_discount] - this is the shortcode for displaying the form allowing to change the points into discounts
[cm_micropayment_points_woo_discounts] - this is the shortcode allowing to display the table of all generated discounts (Note: it won't display anything if no discounts were generated!)
Frontend
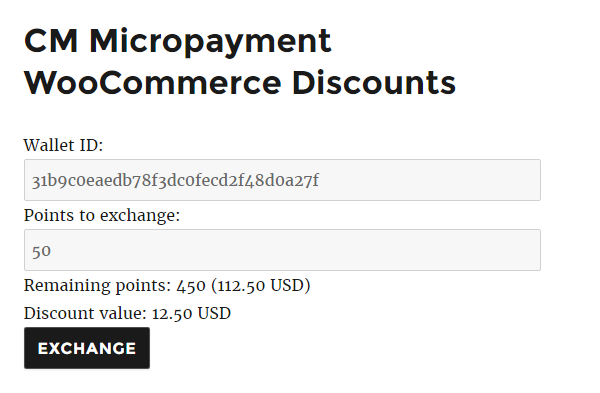
The form displayed by the [cm_micropayment_points_to_woo_discount] shortcode contains:
Field to input the Wallet ID - if the user is logged in, and the Wallets are assigned it will be pre-filled with the user's wallet ID
Points to exchange - user needs to put the amount of points which they want to exchange for a discount
Remaining points - it displays the remaining amount of points in the Wallet together with their value (calculated based on the ratio)
Discount value - this value changes dynamically, based on the amount entered in the Points to exchange
Example
Page entitled CM Micropayment WooCommerce Discounts is displaying the form coming from the [cm_micropayment_points_to_woo_discount] shortcode.
Changing points to WooCommerce discounts
Example
After the discount has been created the [cm_micropayment_points_woo_discounts] will display a table with the discount code, it's value and status (marked with the red border).
WooCommerce Discount code example
Using the Discounts
After creation, you can copy the Discount code displayed in the table and paste it on the WooCommerce checkout form to lower the total value of the transaction (all of the WooCommerce rules for discounts apply)
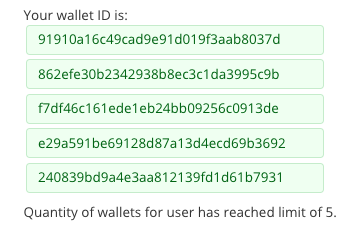
Description: Shows the button which – once clicked – creates a new wallet code to display the wallet. This action is done with an AJAX request so it doesn’t reload the page.
On success, the wallet code will be displayed. You can choose to hide the button by enabling the option "Hide button after wallet creation".
Example
After the "Create Wallet" button has been clicked, the wallet code is displayed. The user should save or remember their wallet code and use it when asked.
Creating new wallet
Show Wallet History
Shortcode: [cm_user_wallet]
Description: If user is logged in, shows latest transactions on wallet.
Example
User wallet history example
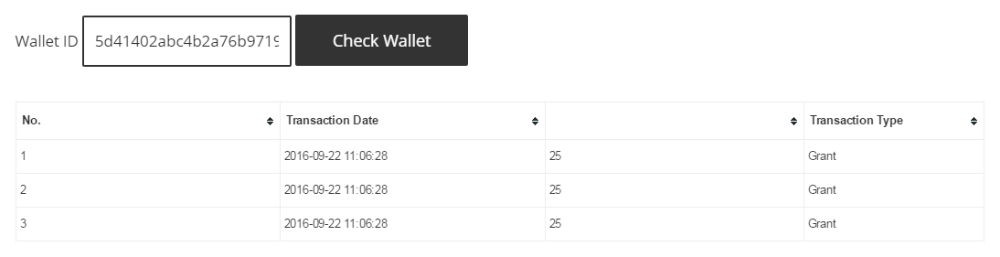
Check Wallet by Code
Shortcode: [cm_check_wallet]
Description: Shortcode shows a form, where user enters the wallet code/name, and displays wallet info.
Example
Checking the wallet history by the wallet ID
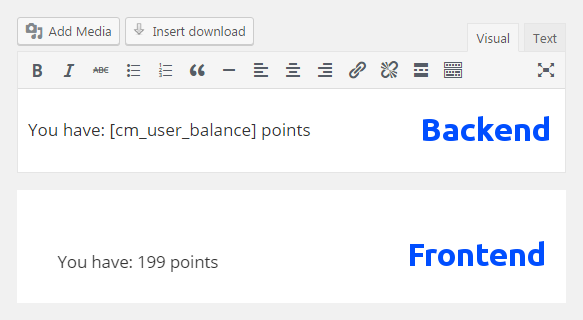
Show User Balance
Shortcode: [cm_user_balance]
Description: Show how many points logged-in user has on his wallet.
Example
Showing wallet balance to the user
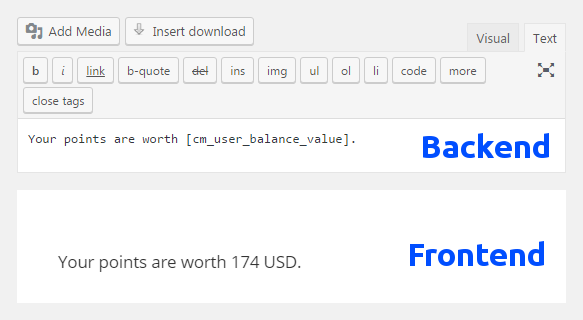
Show User Balance Value
Shortcode: [cm_user_balance_value]
Description: Show how many the points logged user has on his wallet are worth.
Example
Showing wallet balance value to the user
2) Transfer and Payment Shortcodes
Show "Purchase More Points" Link
Shortcode: [cm_micropayment_buy_more_link]
Description: Displays the link to the page allowing to buy more points (checkout).
Example
Link for purchasing points
Transfer Points Between Users
Shortcode: [transfer_wallet_points]
Description: Shows the form which allows to make a transfer of points from your own wallet to the other wallet with the known code. Of course only the amount of points lower or equal to the amount of points available on the wallet can be sent.
Description: Shows a button which allows to transfer tip to a selected user.
Attributes:
tipamount - Amount of the tip (default: 0)
account - The user_login of the WordPress user that will receive the tip (default: empty)
class - CSS class, if applicable (default: empty)
text - Plain text shown above the button (default: empty)
label - Button label (default:Pay Tip)
Example
[cmmp_tip_button tipamount="5" account="johndoe" label="Pay Tip" text="Would you like to tip John Doe with 5 points?"]
PayPal Payout Exchange form
Shortcode: [cm_micropayment_points_to_paypal]
Description: Displays the form allowing to exchange the points to money using PayPal Payout system.
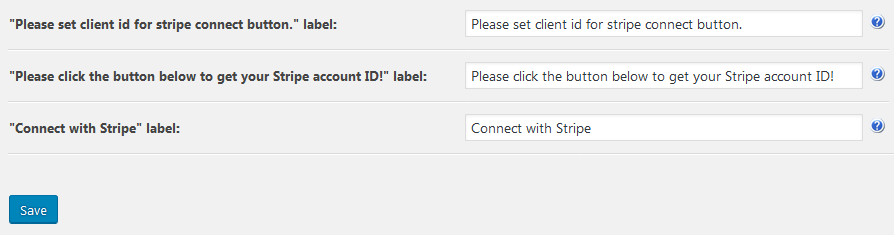
Stripe Exchange form
Shortcode: [cm_micropayment_points_to_stripe]
Description: Displays the form allowing to exchange the points to money using the Stripe system.
Attribute:
connectbutton (optional) - "1" includes link so users can connect with Stripe. "0" does not include it (default: "0") Example: [cm_micropayment_points_to_stripe connectbutton="1"]
3) Checkout Shortcodes
Checkout Page
Shortcode: [cm_micropayment_checkout]
Description: The shortcode allows to display the form allowing to buy the defined points sets using the built in PayPal Gateway. If the Easy Digital Downloads integration is enabled, the items will be added to EDD cart.
Example
Option to buy 25 points for 5 USD. After clicking on the "Send" button the payment process starts.
Purchasing 25 points
Show Wallet Balance After Checkout
Shortcode: [get_transaction_wallet_points]
Description: Shows on the success page how many points the wallet has after completing a successful checkout.
Example
Showing wallet balance after checkout
Show Wallet Name After Checkout
Shortcode: [get_transaction_wallet]
Description: Shows on success page name of charged wallet.
4) Discount Shortcodes
Show Discounts
Shortcode: [cm_micropayment_points_discounts]
Description: Displays the list of the discount codes generated with the cm_micropayment_points_to_discount.
Example
Showing existing discounts to the user
Exchange Points to Discounts
Shortcode: [cm_micropayment_points_to_discount]
Description: Allows users to exchange their points to Easy Digital Downloads discount codes.
Example
Changing points to EDD discount
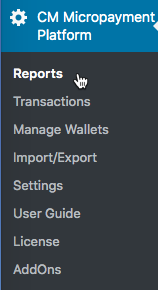
Point Usage Reports
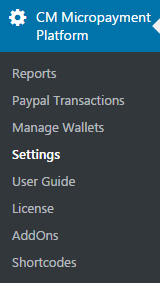
Head to Reports.
Navigation to the plugin Reports
Report Types
There are two types of reports available:
Graph Report
List Report
To switch between them you need to select the type you want from the first dropdown on the left and click Apply.
MicroPayments report types and filters
1) Graph Report
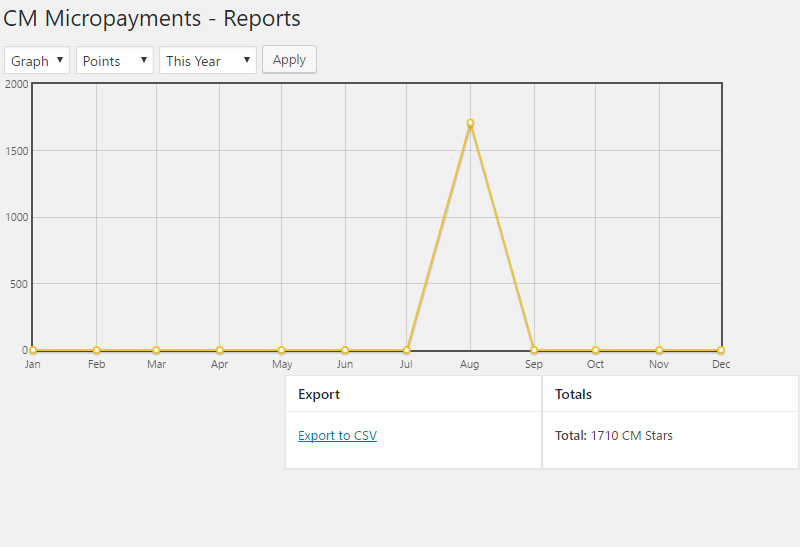
The first type of report allows you to see the graph displaying the data about the flow of the points in your payment system.
You can manipulate the data displayed on the graph in two ways:
By changing the type of data displayed:
Points - displays the amounts of points being used in transactions
Count - displays the amount of different transactions which take place
Amount - displays the value of the transactions in the real-life currency
By changing the timeframe (using the third dropdown).
Example
Graph displaying the amount of points which were used in the given period.
Example of the graph report
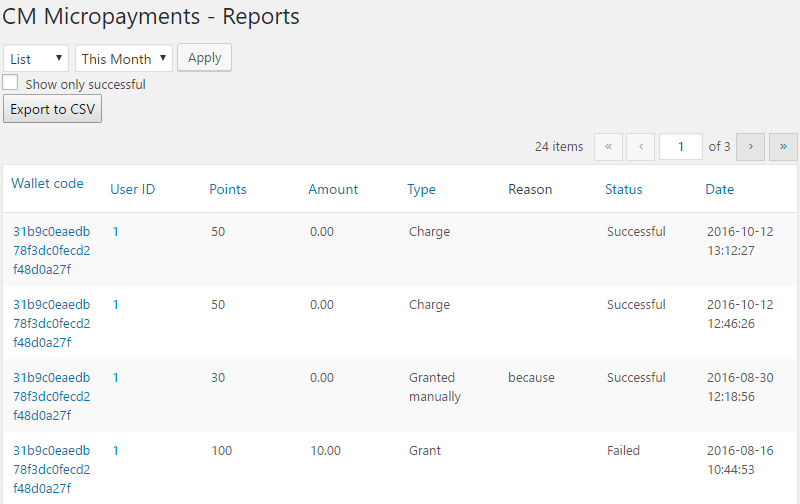
2) List Report
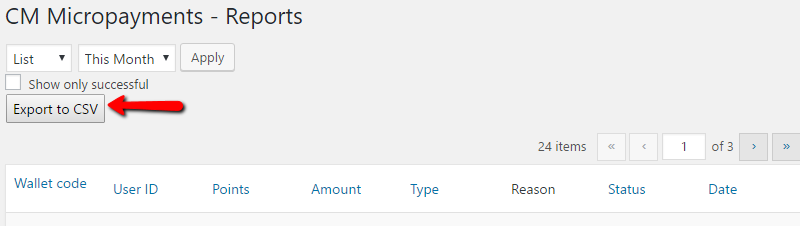
The second type of report allows you to list all of the wallet transactions and filter them by date and by status (Successful only or All).
Things you can change on this screen:
Timeframe - by using the dropdown next to Apply button, you can select the timeframe you'd like to display
Status - by selecting Show only successful you can filter out the transactions which have failed for any reason
Page - by using the numbers and arrows over and under the table you can change the pages of the data
Example
Example of the list report
List report displaying all of the transactions from the current month
You can define a fixed amount of currency that will be added or subtracted from the wallet every X amount of days
To set this visit the Periodic Grant/Charge tab.
Periodic Grant / Charge points settings
You need first to Enable this option. Then, define the amount add or subtracted and the interval.
Periodic Grant / Charge operations
Note that the interval will be calculated starting from the present day - that is, from the day when you save these settings.
Troubleshooting
What Is This
This section addresses some common issues found while using the plugin.
I'm getting the message "Until the errors are fixed (see other notices) the CM Micropayment Platform integration has been suspended"
1) Causes
This message is displayed if the plugin is missing basic configuration. It usually comes accompanied by other notices. For example:
Example of the error message
2) Fixes
Check the other notices, if available, to understand the specific cause. Here are the two more important ones:
Message: "CM Micropayment Platform : There are no Points defined. Please go to Settings -> Points and "Add New" to add the possibility to buy points."Solution: Make sure to add at least one point value from Settings → Points.
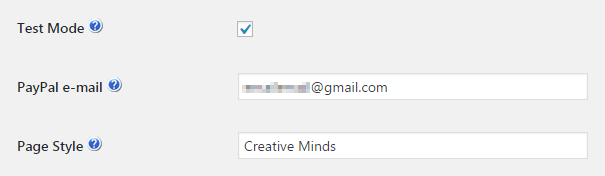
Message: "CM Micropayment Platform : Missing Paypal credentials. Please go to Settings -> PayPal and fill the credentials." Solution: If PayPal is enabled and not on Test Mode, you need to add your credentials. Also note that you need a merchant PayPal account:
Note that, in the case of Easy Digital Downloads and WooCommerce, the respective plugins must be installed and activated! Otherwise, the relevant settings will not be displayed in MicroPayments.
Make sure all pages are assigned (this should happen automatically when the plugin is installed)
MicroPayments checkout page settings
I'm getting a message that says I need to add [cm_micropayment_checkout] to my Checkout page. How to remove it?
Solution
If you're getting this notification and you're using EDD integration, all you need to do is to uncheck the following checkbox:
Using built-in PayPal gateway
"Point is lower than 0 or is not a number" message