WordPress Questions and Answers (CMA) + WordPress MicroPayments (CMMP) - Use Case - Letting Users Pay With Digital Wallet For Posting Questions
Use Case - Letting Users Pay With Digital Wallet For Posting Questions
Note: This use case requires these to be installed and activated:
- WordPress Questions and Answers - This document uses version 4.4.0
- WordPress MicroPayments - This document uses version 1.9.3
Video Use-Case
Introduction
Combing both plugins means forum users can receive or pay virtual money for posting questions and answers. It's also possible to grant badges for users with certain amount of points.
Use Case Front-End Example
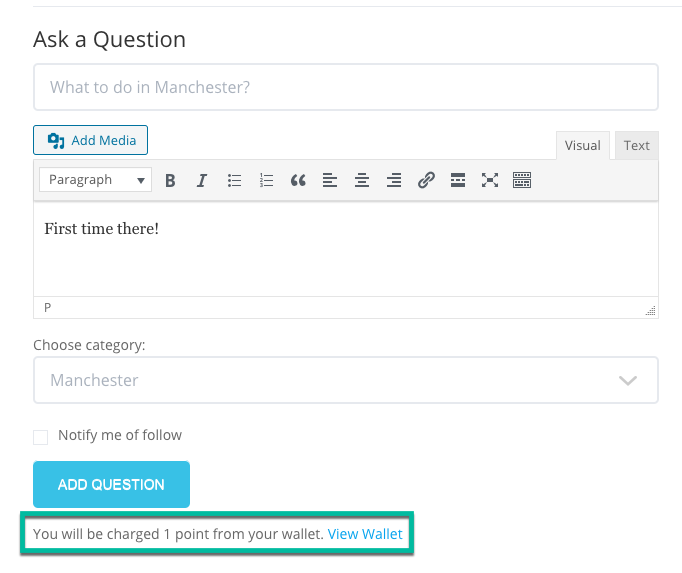
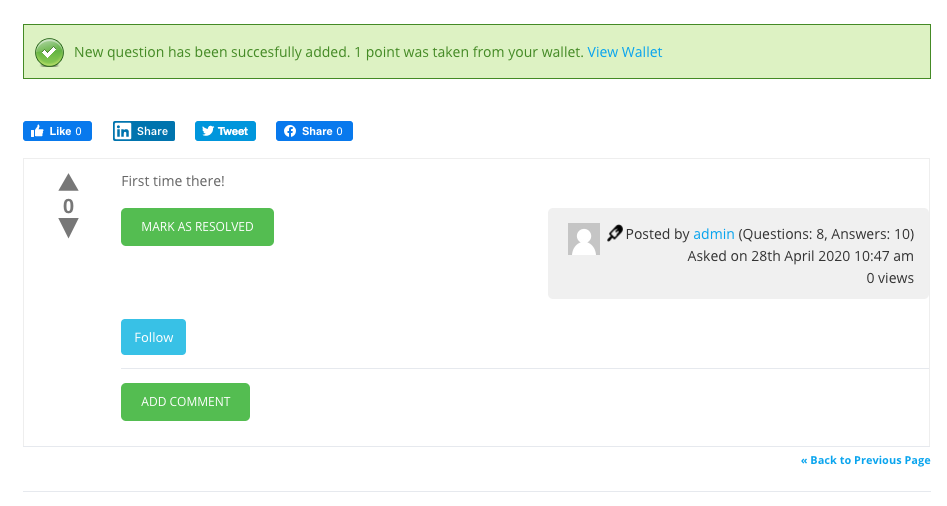
User has to pay one point to post question, as highlighted below.
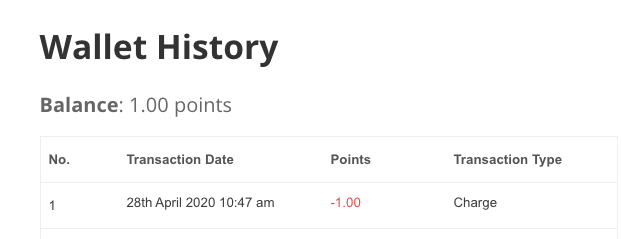
As a result, the user wallet has been charged one point.
Use Case Assumptions
In this example use case guide, we'll cover how to charge users for posting questions and grant points for answering. Users get badges by achieving a certain amount of points. You can apply the same idea to different topics.
We consider that you have already bought the plugins, but not installed them. We will cover the basics of setting up the WordPress MicroPayments plugin. Learn how to create the tourism forum with WordPress Questions and Answers.
It follows:
- Installing the plugins
- Setting up WordPress MicroPayments
- Charging for asking questions
- Granting points for answering
- Granting extra points for best answers
- Granting badges to engaged users
- Translating the forum interface
- Use case result
Installing the Plugins
The process is the same for all CM plugins.

- Download the add-on from your customer dashboard.
- Log in to WordPress and navigate to the WordPress Admin → Plugins settings.
- Click on Add New.
- Activate it and add the license.
Learn more: Getting Started - Installation And First Steps
Setting Up WordPress MicroPayments
After installing the WordPress MicroPayments plugin, every registered user is given their own wallet.
Don't forget to set up digital wallets properly to use the integration to its fullest potential.
Quick Step-by-Step
- Follow the basic video tutorials WordPress MicroPayments (CMMP) - Video Tutorials - CreativeMinds Products Documentation
- Check the general settings WordPress MicroPayments (CMMP) - General Settings - CreativeMinds Products Documentation
- Give the virtual currency a name WordPress MicroPayments (CMMP) - Getting Started - Labels (Choosing The Point Name, Translating The Text Users See)
Full documentation - WordPress MicroPayments (CMMP) - CreativeMinds Products Documentation
TIP: MicroPayments Wallet Page Shortcodes
Some shortcodes that are useful to place in the "My Wallet" page.
- Apply
[cm_user_balance]to show how many points the user has on his wallet. - Apply
[cm_user_balance_value]to show how many much money the wallet is worth. -
Apply
[cm_user_wallet]to show the latest transactions on the wallet.
Wallet transaction history example

Learn more: WordPress MicroPayments (CMMP) - Shortcodes - Overview - CreativeMinds Products Documentation
Tourism Use Case
In our case, we'll call the virtual currency "Travel Tokens".

Charging for Asking Questions
Let's now set up the cost.
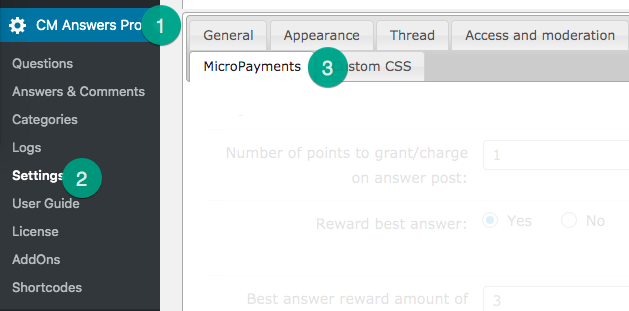
Head to Admin Dashboard → CM Answers Pro (1) → Settings (2)→ MicroPayments tab (3).
TIP: Important Tab!
All settings related to this integration are in this tab.
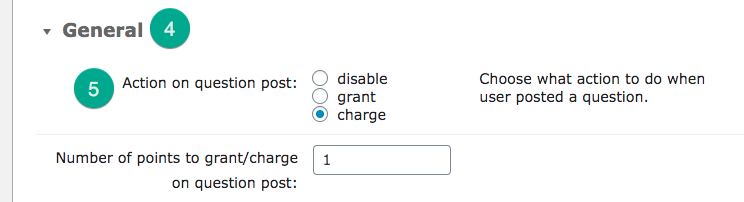
Under the General section (4), notice the Action on question post (5).
Set to charge and then write 1. Now, users will have to pay one point to post questions.
Granting Points For Answers
Just below the previous options, you will find Action on answer post (6).
We'll set to grant and set the value 1. Now, users will be granted one point for posting an answer.

Granting Extra Points For Best Answers
TIP: Best Answers
The thread author can mark questions as resolved - when that is the case, the last answer is considered the best one.
Similarly, below you can set a different amount of points for best answers.
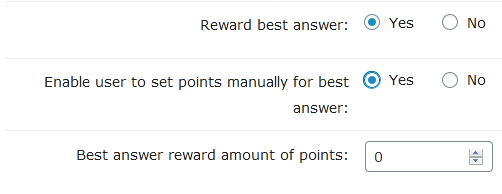
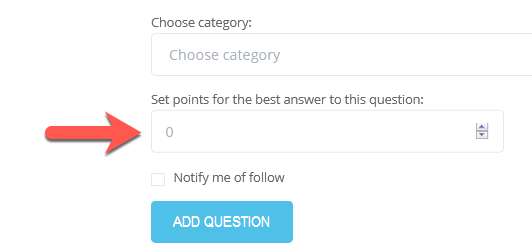
If Enable user to set points manually for best answer is on, the following field will be available while creating a question:
Granting Badges To Engaged Users
Now, let's promote engagement! The WordPress Questions and Answers let's add multiple badges to users that received many points in the forum, like this:
To do so, check the section Badges under the General tab (1).
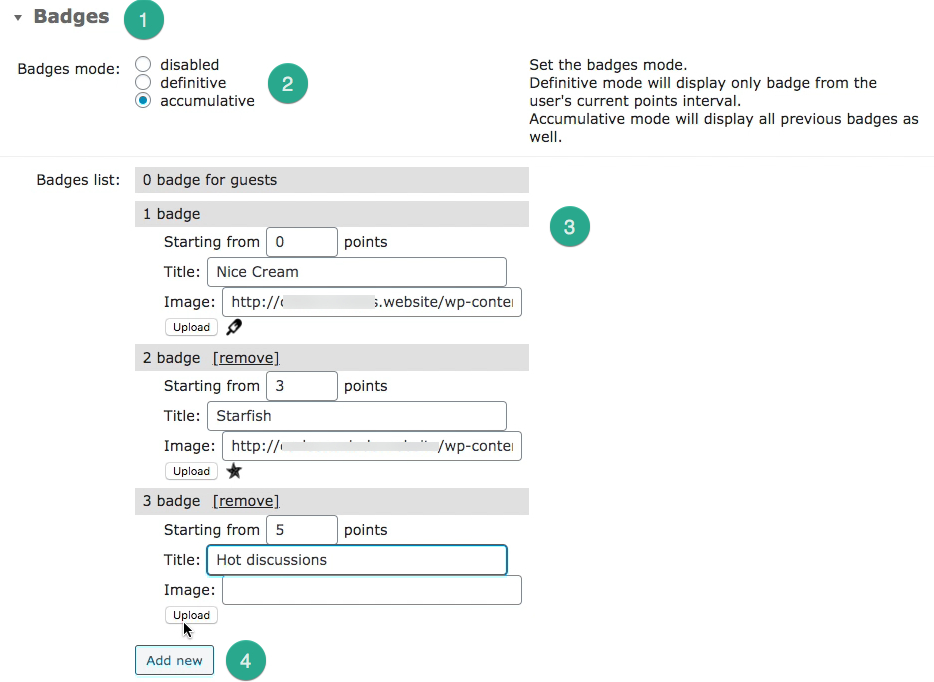
First, choose the badges mode (2).
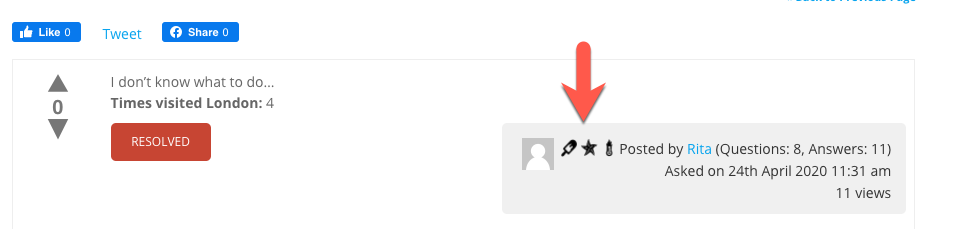
- Definitive will show only one badge. Following the screenshot, with 4 points, Rita would show only the Starfish badge.
- Accumulative will show all badges that apply. Following the screenshot, with 4 points, Rita would show both the Nice Cream and the Starfish badges.
Creating Badges (3)
- Starting from - How many points the user needs to receive it.
- Title - Will show on mouse hover.
- Image - Provide the link or add one from your machine. It will always be redimensioned (not cropped) to 20x20px.
Add as many badges (4) as you would like.
Tourism Badges Use Case
- Badges are set to Accumulative
- The user Rita has more than 5 points
TIP: Badges in PeepSo
You can also show badges in PeepSo with the WordPress Questions and Answers + MicroPayments PeepSo Integration.
Translating Interface
This integration includes some specific labels. This way, you can adapt all messages related to payments.
Head to CM Answers → Settings → Labels and edit all relevant text. Example of translation:

TIP: Points Placeholder
The labels may, naturally, include the points price of the questions and answers. These depend on your settings.
To solve this, we use the placeholders %d for prices.

Example: if you charge 2 Travel Tokens for asking questions, the following label
%2 Travel Tokens will be charged
Will appear on your site as:
2 Travel Tokens will be charged
Learn more: Settings - Labels
Use Case Result
Example
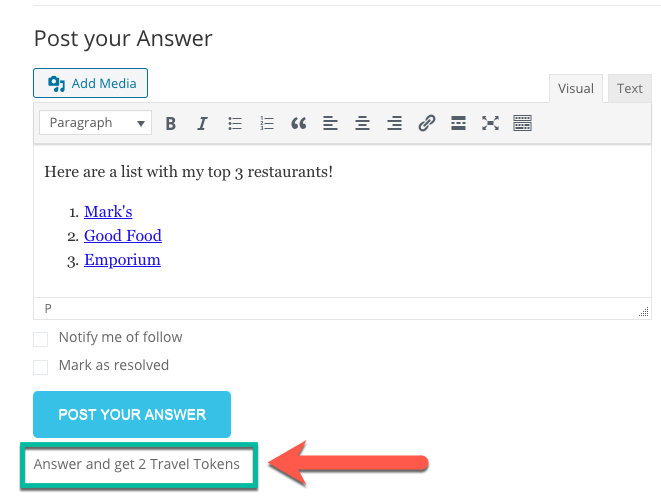
Posting a question costs one Travel Token.

On the other hand, answering a question grants Travel Tokens.
 |
More information about the WordPress Questions and Answers plugin Other WordPress products can be found at CreativeMinds WordPress Store |
 |
Let us know how we can Improve this Product Documentation Page To open a Support Ticket visit our support center |