Appointment Booking Calendar + Payments - Use Case - How to Charge Users for Booking Appointments
Use Case - How to Charge Users for Booking Appointments
Note: Since we renewed the way, how the payment works in the plugin, you need to update the plugin and the add-on as minimum to these versions:
- Appointment Booking Calendar - This document uses version 2.0.0
- Booking Payments Add-on - This document uses version 2.0.0
The payment add-on works with two payment systems, so you also need to install and activate one of these plugins:
- Easy Digital Downloads (EDD) / WooCommerce - To connect payment gateways such as PayPal or Stripe
Video Use-Case
Introduction
Appointment Booking Calendar allows you to manage and display multiple calendars with open spots for visitors to book. The Booking Payments Add-on allows you to charge users to book said spots.
Use Case Front-End

Use Case Assumptions
Want to Learn From The Start?
If you still haven't configured your first calendar, check the use case:
Appointment Booking Calendar - Use Case - How to Create a Calendar Booking System in WordPress
In this example use case guide, we'll cover how to charge users for booking slots in your calendars. We consider that you have already bought and installed the Appointment Booking Calendar plugin, but not installed the Booking Payments Add-on yet.
It follows:
- Installing The Add-on
- Installing Payment Plugin (EDD or WooCommerce)
- Setting Up Calendars Recap
- Choosing Between Payment Systems
- Setting Prices to Appointments
- Setting Up Paid Slots in Schedule
- What the Customer Sees on the Front-End
- Accepting Bookings
- Sending Email Reminders
- Translating the Plugin's Interface
- Appearance
- End Result
Installing the Add-on
The process is the same for all CM plugins and add-ons.

- Download the plugin from your customer dashboard.
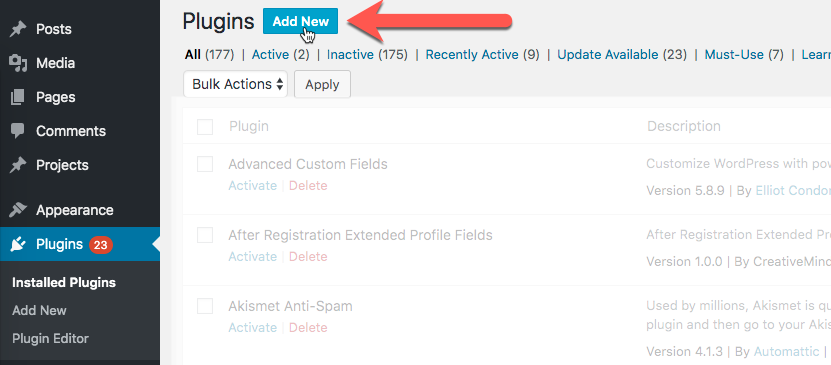
- Log in to WordPress and navigate to the WordPress Admin → Plugins settings.
- Click on Add New.
- Activate it and add the license.
Installing Payment Plugin (EDD or WooCommerce)
You must choose between either Easy Digital Downloads or WooCommerce.
EDD or WooCommerce? No Difference For The Plugin
As far as the Payment add-on is concerned, there is almost no difference between using either EDD or WooCommerce. Both are free and provide free and paid add-ons.
Head to Admin Dashboard → Plugins → Installed Plugins and click Add New.
Search for either Easy Digital Downloads or WooCommerce and install it.
Configure Payment Plugins
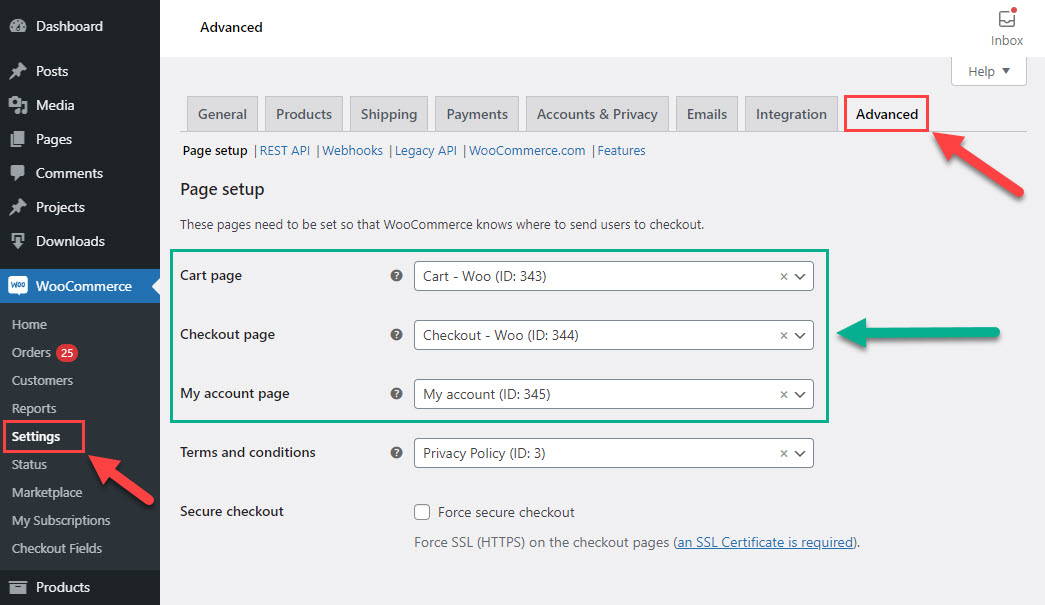
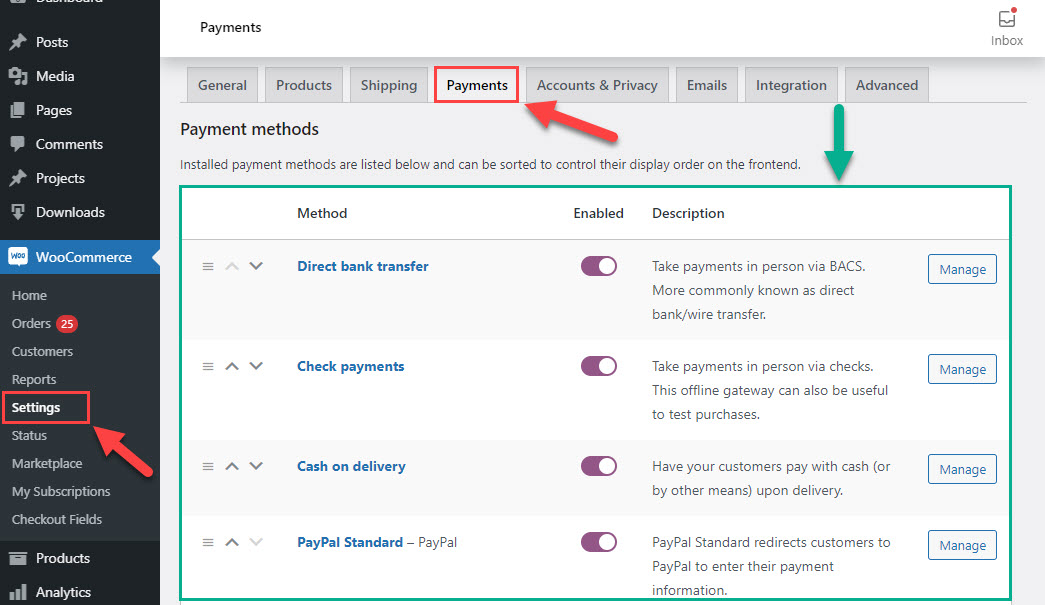
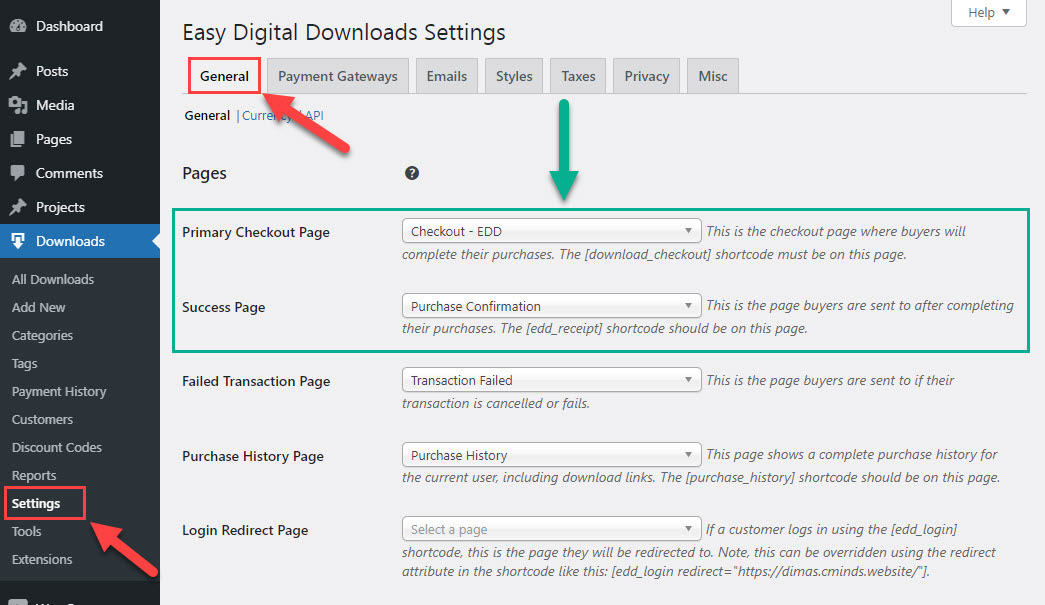
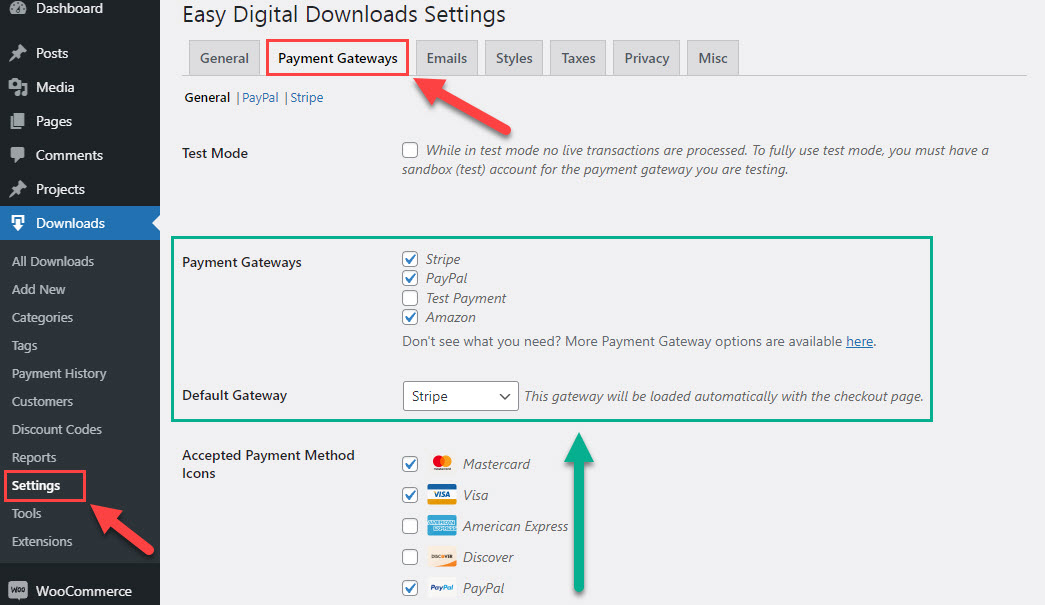
Don't forget to configure the payment plugin! This way you can connect it to payment providers such as PayPal or credit card companies. And make sure that your payment plugin has the correct Checkout and Cart pages set up. They are used by the plugin.
WooCommerce - Cart and Checkout Pages:
WooCommerce - Payment Methods:
EDD - Checkout Page:
EDD - Payment Gateways:
External Resources
Setting Up Calendars Recap
Recap
If you still have questions about
- Setting up a calendar
- Showing calendars on your site
- Improving the calendar
- Managing bookings
- Email notifications
- The discussion form
Head back to the use case Appointment Booking Calendar - Use Case - How to Create a Calendar Booking System in WordPress
Choosing Between Payment Systems
The plugin allows you to choose which payment plugin to use (EDD or WooCommerce) if they are activated. EDD and WooCommerce work similarly. WooCommerce works with "Products". In the case of EDD the products are called "Downloads".
When the base plugin Appointment Booking Calendar and the Booking Payments Add-on are activated, you need to choose one of these payment systems - either EDD or WooCommerce.
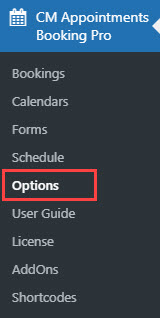
To choose between available payment systems, navigate to Admin Dashboard → CM Appointments Booking Pro → Options → Payment. In the option Select the Payments System choose the payment system that you've activated. Only one system can be enabled at a time.
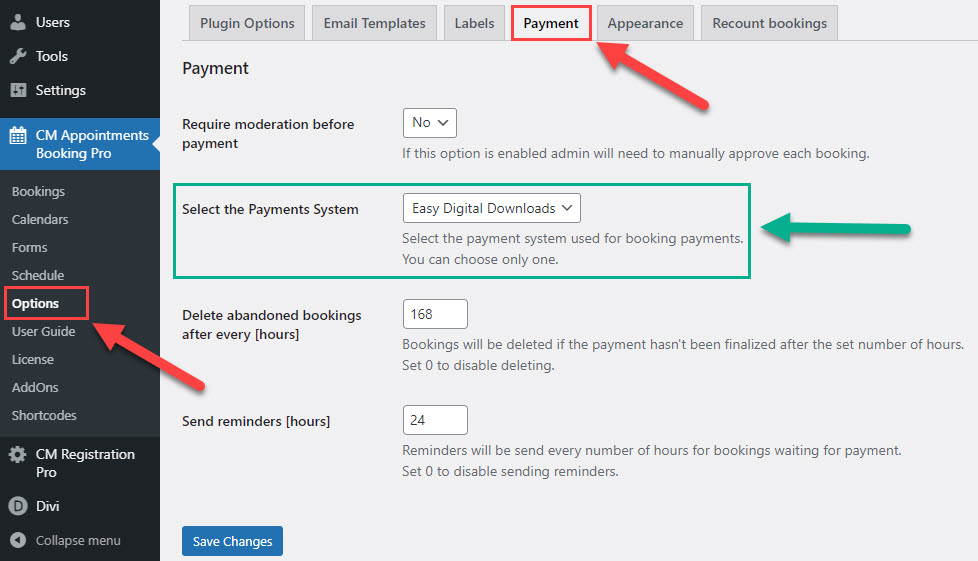
Important
There can be available two payment systems only - EDD or WooCommerce. When you activate one of them, it can be displayed that it's already chosen in the dropdown. But anyway, you need to navigate to the Payments tab and click the button Save Changes to approve the choice, otherwise the plugin will not work correctly with the chosen plugin system.
Setting Prices to Appointments
Now we can start setting prices for our booking slots. We will consider this process step by step.
1) Defining Prices for Calendars
How to Create Products?
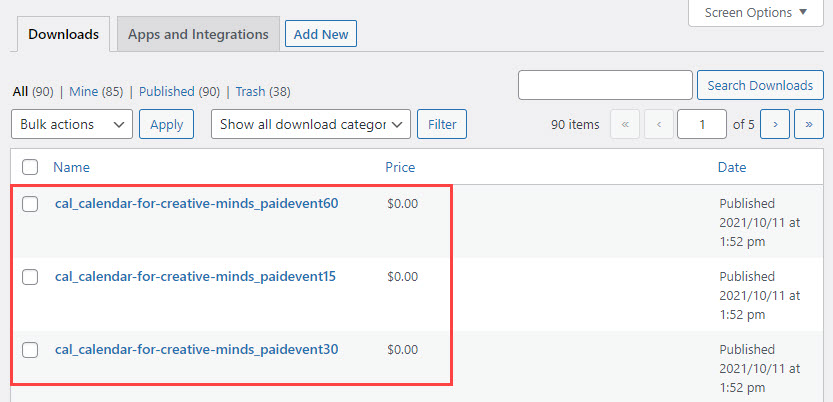
When you activate the Booking Payments Add-on and one of the payment systems, products for every calendar are created automatically for 3 basic booking durations: 15, 30 and 60 minutes. Products are created in the payment system that you've chosen to work with.
Note: Creating products is fully automatic, so you don't need to create products manually. And if some product was deleted by some reason, it will be created automatically again.
Example of created base booking slots in EDD:
Names of the Products
Each calendar has its own products, so you can define different prices for different calendars. To distinguish products for every calendar, the automatically created products have a specific format of the name. The name of each product is based on the slug of the calendar and on the duration of the booking slot. The format is:
- cal_calendar_slug_paideventXX, where "XX" is duration of the slot in minutes.
For example, if the calendar slug is "calendar-for-creative-minds", the name of the product for 30-minutes duration will be:
- cal_calendar-for-creative-minds_paidevent30
Setting Up the Prices for Basic Booking Durations
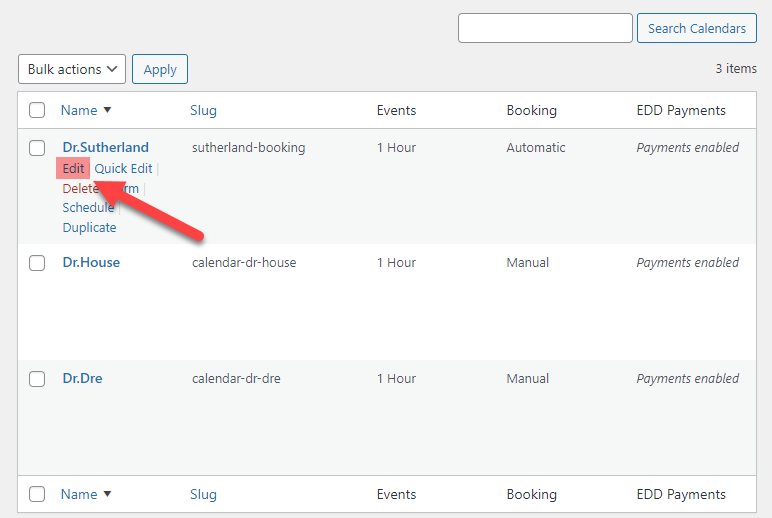
When products for basic booking durations are created, you need to define prices for them. To do this, navigate to Admin Dashboard → CM Appointments Booking Pro → Calendars. Hover on the calendar you need and click Edit.
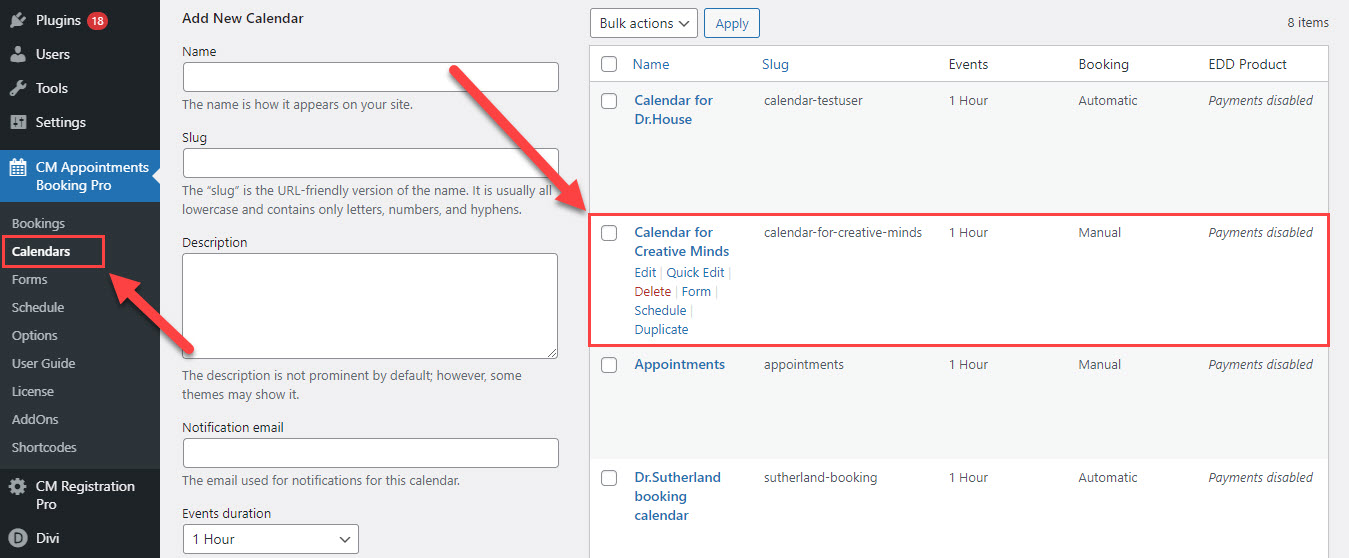
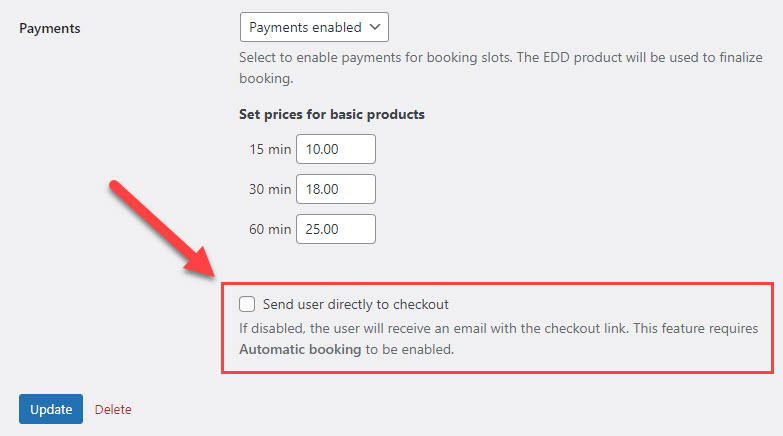
Scroll down to the section Payments and set the prices for basic booking durations for 15, 30 and 60 minutes in the relevant fields:

Then click Update to save the changes.
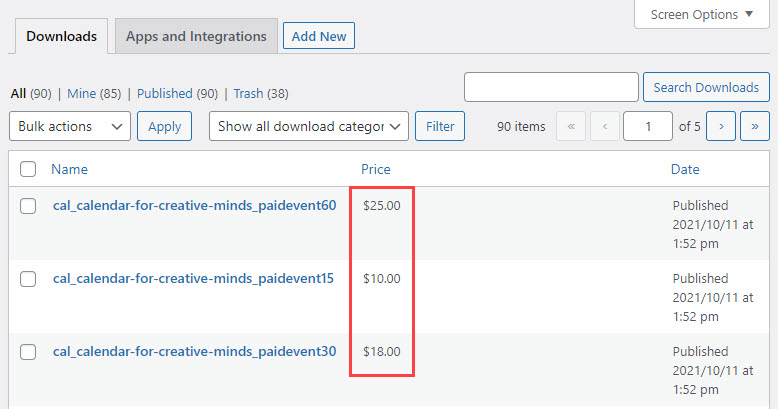
The relevant products will be automatically updated in the chosen payment system (example in EDD):
TIP: Change Prices Manually
You can also manually change the prices for basic booking durations directly in products of plugin systems.
Learn more about it:
Setting Up the Prices for Variable Booking Durations
There is a possibility to book slots with different durations, make multiple bookings choice. There is also a possibility to set up partially paid slots. It means, there is a need to create additional products and set up prices for different durations. All additional products and their prices are created and calculated automatically. Their prices depend only on the prices of 3 basic slot durations - 15, 30 and 60 minutes. The whole process of generating additional products is fully automatic, so you don't need to create or change their prices manually in payment systems.
How the price is calculated?
When the customer makes a booking with a duration that is different from the one of the basics, the price is calculated by summarizing the time and splitting it to the basic durations from higher to lower.
Example:
We have 3 products with basic booking durations:
- 15 minutes - 10$
- 30 minutes - 18$
- 60 minutes - 25$
The customer chooses a partially paid slot with the duration 4 hours, and paid part is equal 2 hours and 45 minutes (or 165 minutes).
The price will be calculated as 60 minutes + 60 minutes + 30 minutes + 15 minutes. In result it will be 25$+25$+18$+10$=78$.
During customers attempt to make a booking, there will be automatically created a new product for the duration 165 minutes with the price 78$.
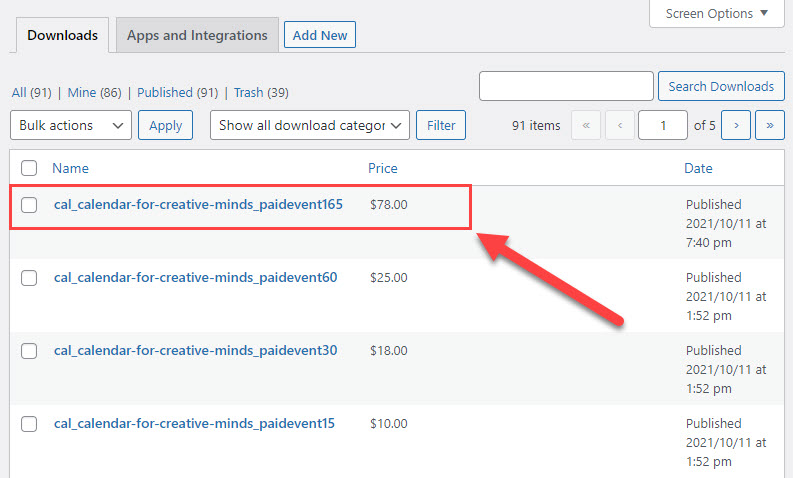
And this product can be paid by the customer to finalize the booking:
Note
If you change the price of one of the basic booking durations (15, 30 and 60 minutes), the prices of products for all other durations will be recalculated and changed automatically. Their prices will change not at once - only when some customer attempts to make a booking with the relevant duration that is different from the basic ones. So, you don't need to manually change the prices for products with booking durations that are different from the basic ones.
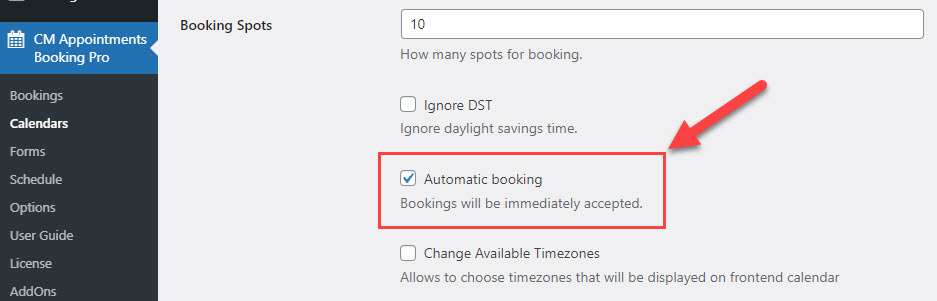
2) Choosing Between Automatic and Manual Booking
On the same page, you can enable the option Automatic Booking. If the option is on, this calendar will not require a moderation and approval for each booking.
3) Choose Between Direct Checkout or Email Notification
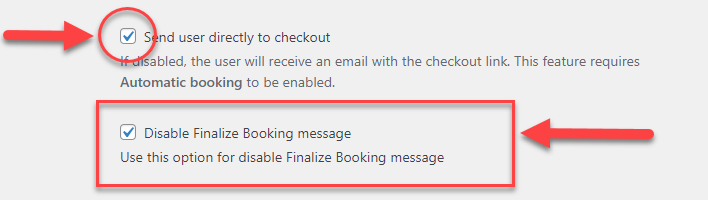
If Automatic Booking is on, you can also enable the option Send user directly to checkout. The behavior is:
- Enabled - When the user clicks the payment button, he will be directed to checkout
- Disabled - When the user clicks the payment button, he will receive an email with the checkout link
You can Disable Finalize Booking message by checking the corresponding option. This option is available and appears only when the option Send user directly to checkout is enabled.
Reminder: Creating Calendars
This completes the process of setting up appointments prices. Now, when a customer tries to book an appointment in the chosen calendar, he/she will be prompted to pay.
Setting Up Paid Slots in Schedule
Next step is setting up paid slot in a calendar schedule.
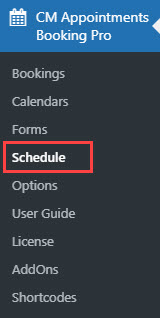
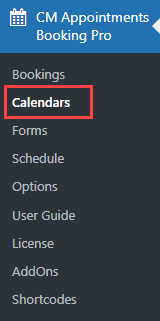
Navigate to Admin Dashboard → CM Appointments Booking Pro → Schedule.
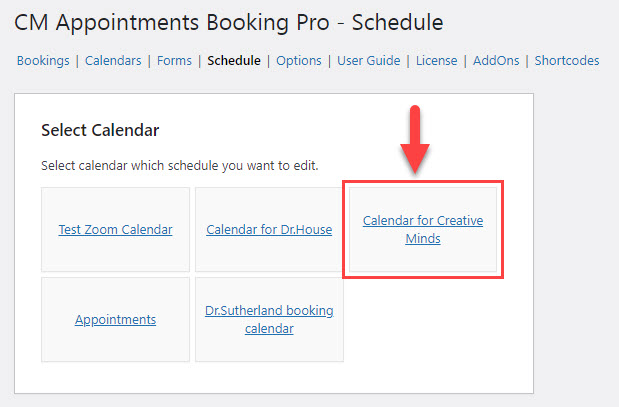
Choose the calendar, which schedule you need to configure and click on it.
Head to the Week Template tab.
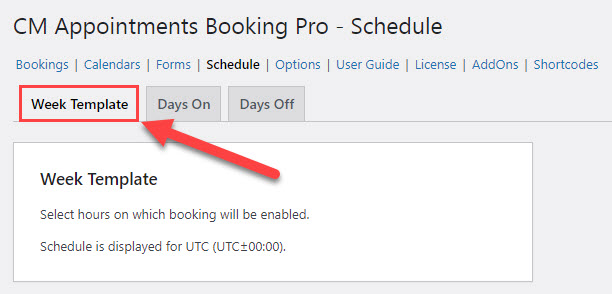
Here you can configure the availability of your schedule with free and paid slots.
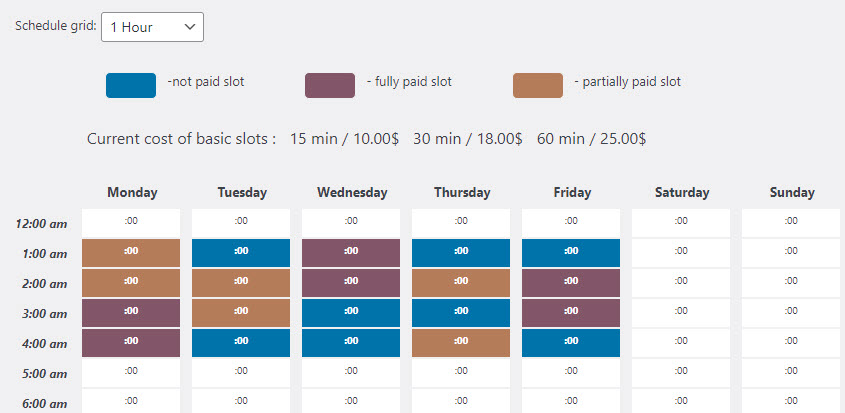
Above the schedule grid you can see a couple of tips about paid slots.
Color Markers
First tip is about slot markers. Except the slots that are not available for booking (marked as white slots), there are three conditions of the slots, each of them has its own color:
- Not paid slot - Marked with a blue color.
- Fully paid slot - Marked with a purple color.
- Partially paid slot - Marked with a brown color.
Note 1: you can change default names of these labels in the Labels tab in plugin options. Learn more about it further in this guide.
Note 2: you can change default colors of these labels separately for each calendar. Learn more about it further in this guide.

We will talk about what is Partially paid slot a little bit further in this guide.
Current Cost of Basic Slots
Second tip is about current cost of basic slots that you configure individually for each calendar you have. This is a little help for the admin, so it's not necessary to keep in mind the prices of the basic slots.

Setting Up Paid Slots
There are two ways how you can make the slots paid or free - in bulk or individually.
In Bulk
You can find two buttons under the sсhedule grid:
- Mark all slots as Paid
- Mark all slots as UnPaid
The names of these buttons are self-explanatory. Clicking on the button Mark all slots as Paid will make all available for booking slots paid, and clicking on Mark all slots as UnPaid will make them all not paid.
Individually
You can hover on any slot that is available for booking and click on it with the right button of the mouse - in the context menu that opens, you can switch the slot between paid and unpaid conditions.

What is Partially Paid Slot?
Above the schedule grid, you can see a dropdown, where you can choose the grid of your schedule.

Note: this is not the way how the slots duration will be displayed on the Front-end for customers. To change the booking slot duration on the front-end you need to change the parameter Events Duration in the Calendar Settings
The grid can be switched between 15 minutes, 30 minutes and 60 minutes slot durations. It means that any booking slot duration can be decomposed to these 3 basic durations. So, for example, the slot with 60 minutes duration can consist free and paid 15 or 30 minutes slot, and it will make this 60 minutes slot Partially Paid.
Let's consider a couple of examples to make it clearer.
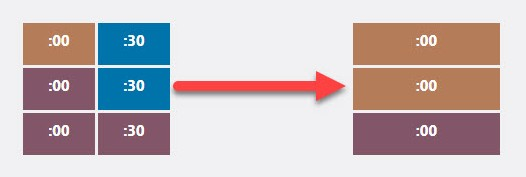
1) Let's switch our schedule to 15 minutes grid and make a few paid slots as shown on the screenshot below. And then we switch our schedule to 30 minutes grid. As you can see in the first line, one of the 30-minutes slots became partially paid, as it consists of one paid and one free 15 minutes slots. All other slots are fully paid or fully free.
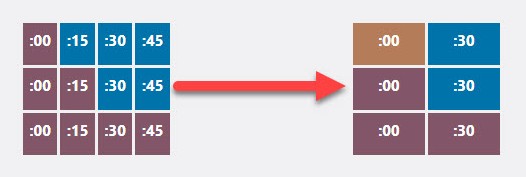
2) Now let's switch the same example from 30 to 60 minutes grid. As you can see, first and second 1 hour slots became partially paid, as they contain free and paid 15 and 30 minutes slots.
Reminder
The duration of the booking slot can be different - you can define it in the calendar settings, the booking duration can be from 15 minutes to 6 hours. How the result sum is calculated, we've already discussed earlier in this guide.
What the Customer Sees on the Front-End
The customer interface for the Booking Payments Add-on is different from the base plugin only relating to the payment information.
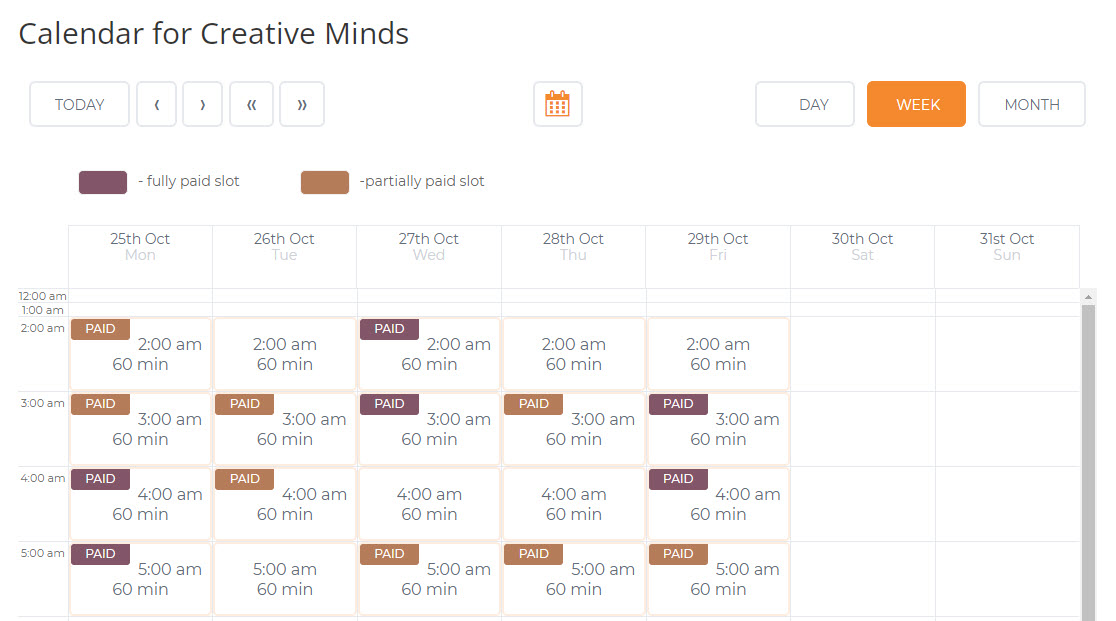
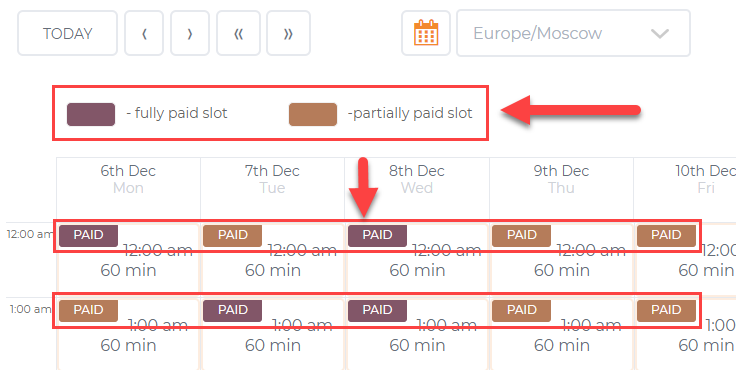
Calendar View
There are three types of the slots:
- Free slots
- Fully paid slots (marked with a purple label Paid)
- Partially paid slots (marked with a brown label Paid).
The customer can see a tip above the calendar to help distinguishing fully paid slots from partially paid slots.
Booking
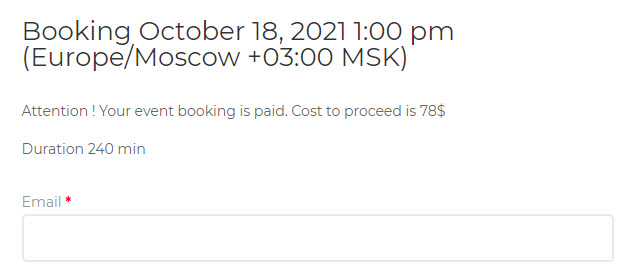
When booking a paid appointment, the customer should receive a message on the Front-End stating its cost (this text can be changed in the Labels tab; learn more here).
Example
Also, during this step, the customer will receive an email message. Its content depends on the Automatic booking option in Calendar:
- If automatic booking is enabled - A message with information on completing payment will be sent.
- If automatic booking is not enabled - A message stating the booking is waiting for approval will be sent. After it is approved, an e-mail with information on completing the payment will be sent.
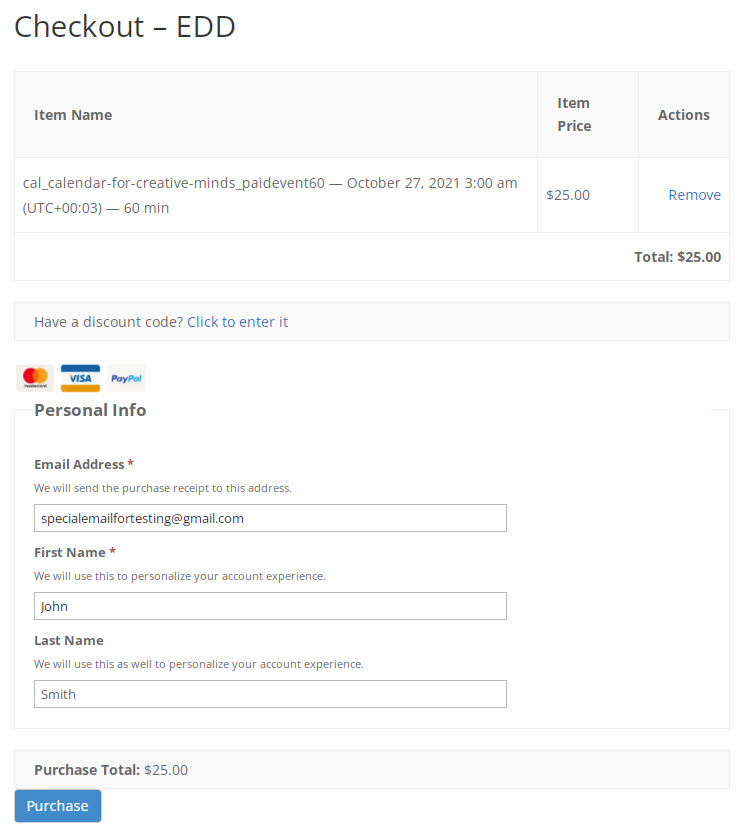
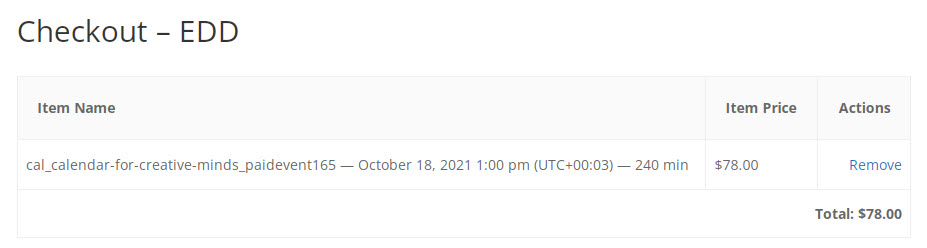
Checkout
Once the booking is approved, the customer will be able to pay for it. This can be done on the checkout page. The example below uses EDD:
Example
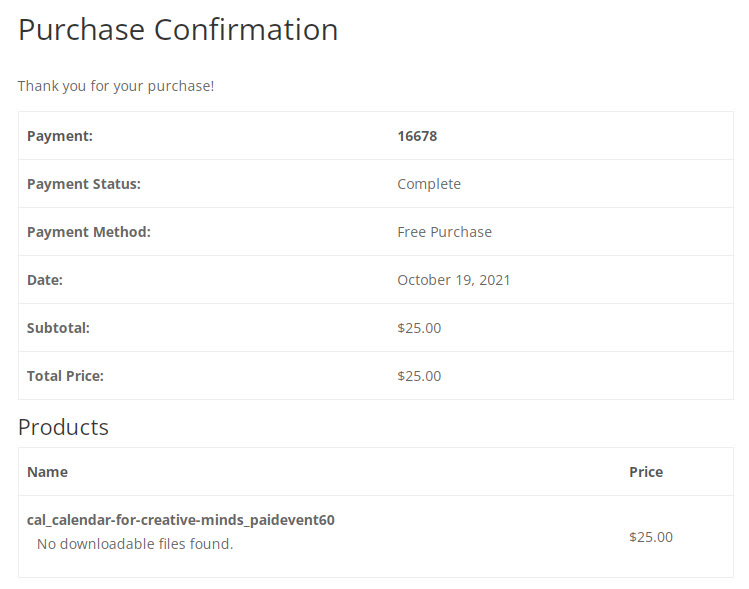
Confirmation
After the purchase is confirmed, the customer will receive the following information, along with an email.
Example
Accepting Bookings
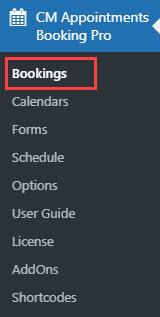
To manage all your bookings, navigate to Admin Dashboard → CM Appointments Booking Pro → Bookings.
This is, step by step, what happens during booking:
- The customer makes an appointment - To understand what the customer sees
- The appointment is approved - This step can be either automatic or manual (approval by the admin), depending on the Calendar settings.
-
Sending customer the Payment Request - It can be sent automatically in case of automatic approval. In case of manual approving bookings the admin can send it by clicking the respective button. In both cases the status of the booking will be changed from New to Waiting for Payment.

Accepting the request and sending the payment request -
The Customer pays - The status of the booking should change from Waiting for Payment to Accepted. The screenshot below shows both cases:

Statuses of bookings


Sending Email Reminders
The Booking Payments Add-on has three extra email templates which can be customized. These relate to pending payments, payment reminders and expired payments, in which case the booking will be canceled.
TIP
Learn more about Appointment Booking Calendar main templates.
To configure this, navigate to Admin Dashboard → CM Appointments Booking Pro → Options → Email Templates tab:
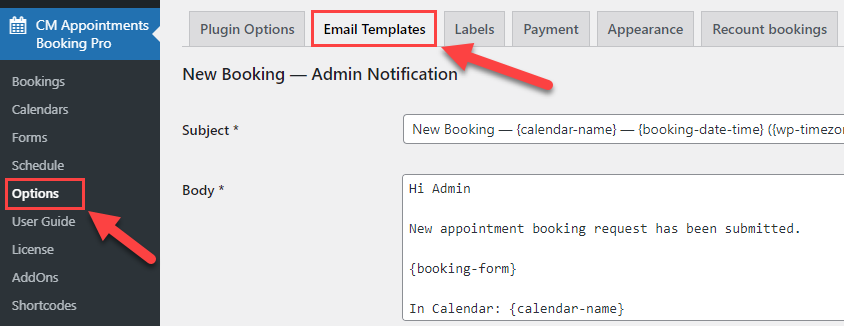
Email templates related to the Booking Payments Add-on are located at the end of the page. They refer to:
- Finalize Booking (Payment) - Instructs the user on how to make a payment.
- Finalize Booking (Payment Reminder) - This email is sent as a reminder if the customer has not paid yet.
- Booking Deleted (Payment Expired) - Notifies the user that the booking was deleted for lack of payment.
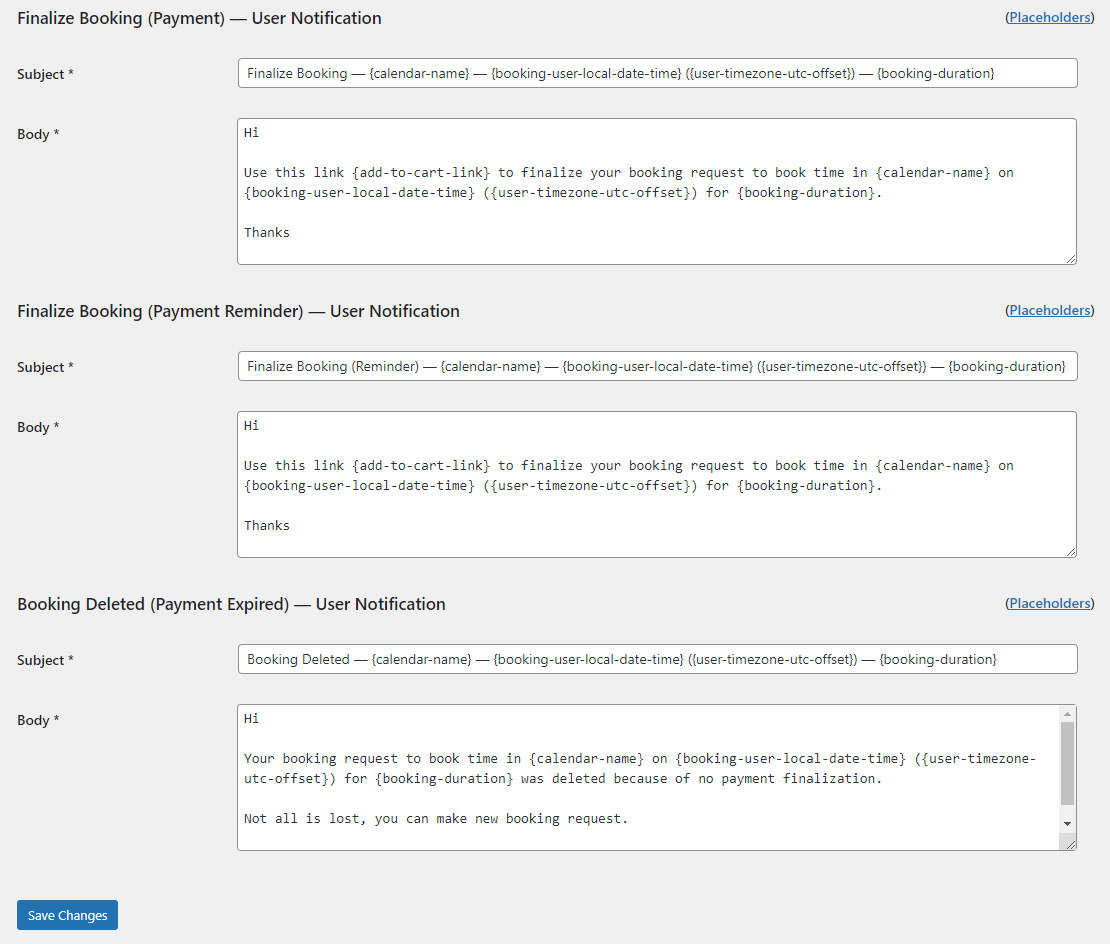
The email subject and body support placeholders, such as {calendar-name} , which returns the appropriate calendar name.
You can find the full list by clicking the Placeholders button, located above every email template, as shown:
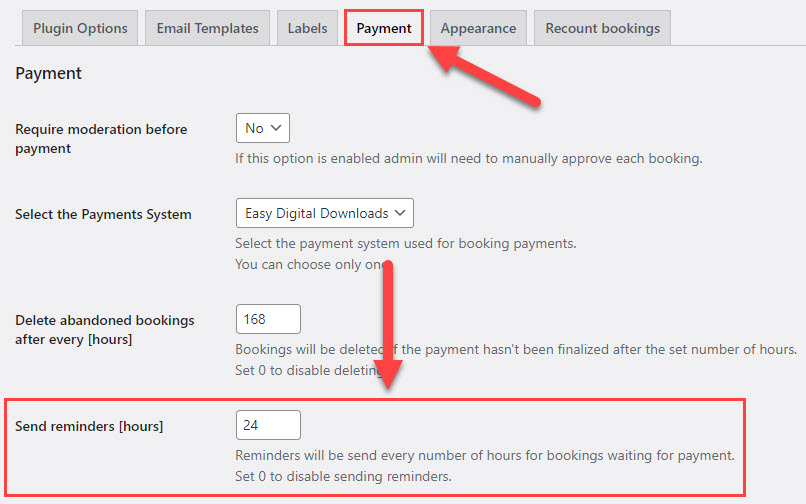
Setting When Reminders Will Be Sent
You can modify this in the Payment tab, in the option Send reminders [hours]. As an example, 24 means the user will receive the reminder every 24 hours.
Translating the Plugin's Interface
The Booking Payments Add-on adds extra labels which can be customized.
TIP
Learn more about Appointment Booking Calendar labels.
To configure this, navigate to Admin Dashboard → CM Appointments Booking Pro → Options:
Head to the Labels tab.

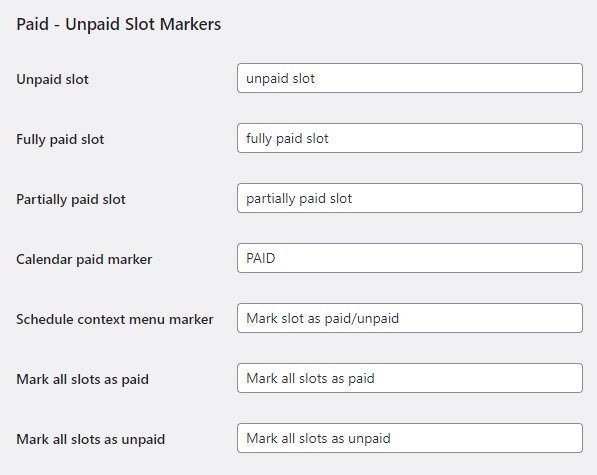
Locate the section Paid - Unpaid Slot Markers. There you can change the following labels:
- Unpaid slot (back-end only)
- Fully paid slot (back-end and front-end)
- Partially paid slot (back-end and front-end)
- Calendar paid marker (front-end only)
- Schedule context menu marker (back-end only)
- Mark all slots as paid (back-end only)
- Mark all slots as unpaid (back-end only)
Appearance
You can change colors of the fully and partially paid slots on the front-end and on the back-end:
TIP
Learn more about Appointment Booking Calendar colors.
Since the version 2.0.3 you can change colors for paid labels separately for each calendar. Navigate to Admin Dashboard → CM Appointments Booking Pro → Calendars.
Choose needed calendar, hover on it and click Edit.
Scroll down to the section Paid slots colors & display settings.
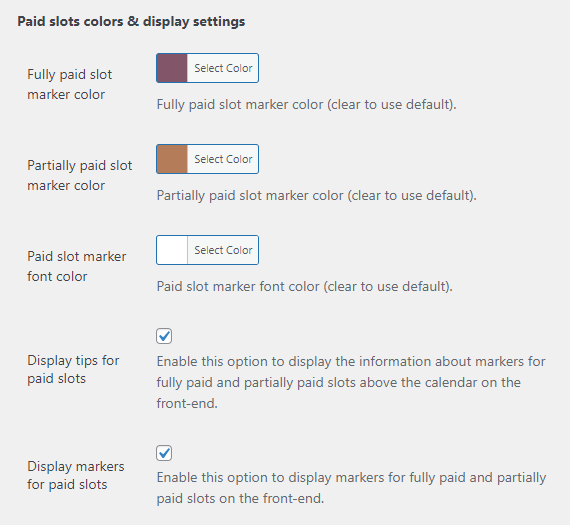
Changing the colors is applied with the 3 following options:
- Fully paid slot marker color
- Partially paid slot marker color
- Paid slot marker font color
Other two options allow you to show or hide labels and tips for paid slots on the front-end:
-
Display tips for paid slots - Enable this option to display the information about markers for fully paid and partially paid slots above the calendar on the front-end. Note: this option was introduced in version 2.0.3.

Tips for paid slots -
Display markers for paid slots - Enable this option to display markers for fully paid and partially paid slots on the front-end. Note: this option was introduced in version 2.0.3.

Markers for paid slots


After configuring the appearance, don't forget to click the button Update at the bottom of the page.
End Result
Following instructions found in the plugin and guides, you should be able to charge users for booking slots in your calendars.
Use Case Front-End
 |
More information about the Appointment Booking Calendar plugin for WordPress Other WordPress products can be found at CreativeMinds WordPress Store |
 |
Let us know how we can Improve this Product Documentation Page To open a Support Ticket visit our support center |