Appointment Booking Calendar + User Calendar - Use Case - How to Let Users Manage Booking Calendars
Use Case - How to Let Users Manage Booking Calendars
Note: This guide covers features from:
- Appointment Booking Calendar - This document uses version 1.4.4
- Booking User Calendar Add-on - This document uses version 1.0.3
Video Use-Case
Introduction
Appointment Booking Calendar allows you manage and display multiple calendars with open spots for visitors to book. The Booking User Calendar Add-on provides each of your users with a calendar.
Use Case Front-End
Use Case Assumptions
Want to Learn From The Start?
If you still haven't configured your first calendar, check the use case:
Appointment Booking Calendar - Use Case - How to Create a Calendar Booking System in WordPress
In this example use case guide, we'll cover how to grant calendars to each WordPress user. We consider that you have already bought the Appointment Booking Calendar and installed it, but not installed the Booking User Calendar Add-on.
It follows:
- Installing the add-on
- Setting up calendar - recap
- How the add-on works
- Choosing who can edit calendar pages
- User view
- Shortcodes
Installing the Add-on
The process is the same for all CM plugins and add-ons.

- Download the plugin from your customer dashboard.
- Log in to WordPress and navigate to the WordPress Admin → Plugins settings.
- Click on Add New.
- Activate it and add the license.
Setting Up Calendars Recap
Recap
If you still have questions about
- Setting up a calendar
- Showing calendars on your site
- Improving the calendar
- Managing bookings
- Email notifications
- The discussion form
Head back to the use case Appointment Booking Calendar - Use Case - How to Create a Calendar Booking System in WordPress
How The Add-on Works
Calendar Page
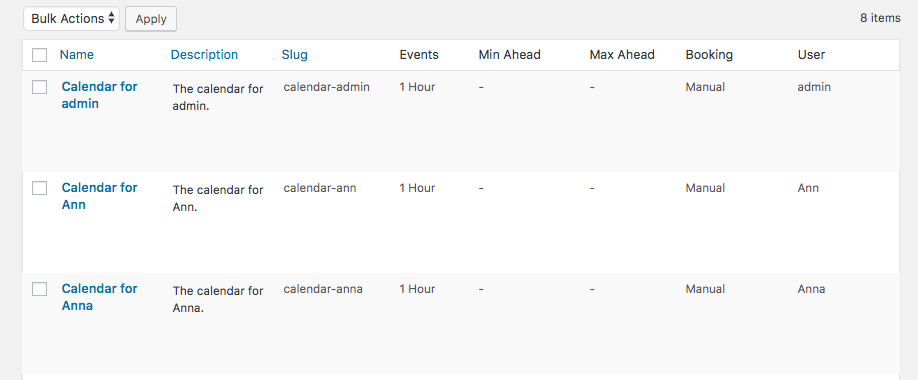
Each user receives his own calendar page, which is created automatically.
Users can edit a series of aspects of their calendars, such as availability and automatic or manual booking.
Permissions
The admin can limit who can see each calendar: everyone, only logged-in users or only specifics of specific roles.
Interface
When users edit their calendars, they can see helpful tooltips. The admin can customize these to tailor them (for instance, translating them to another language).
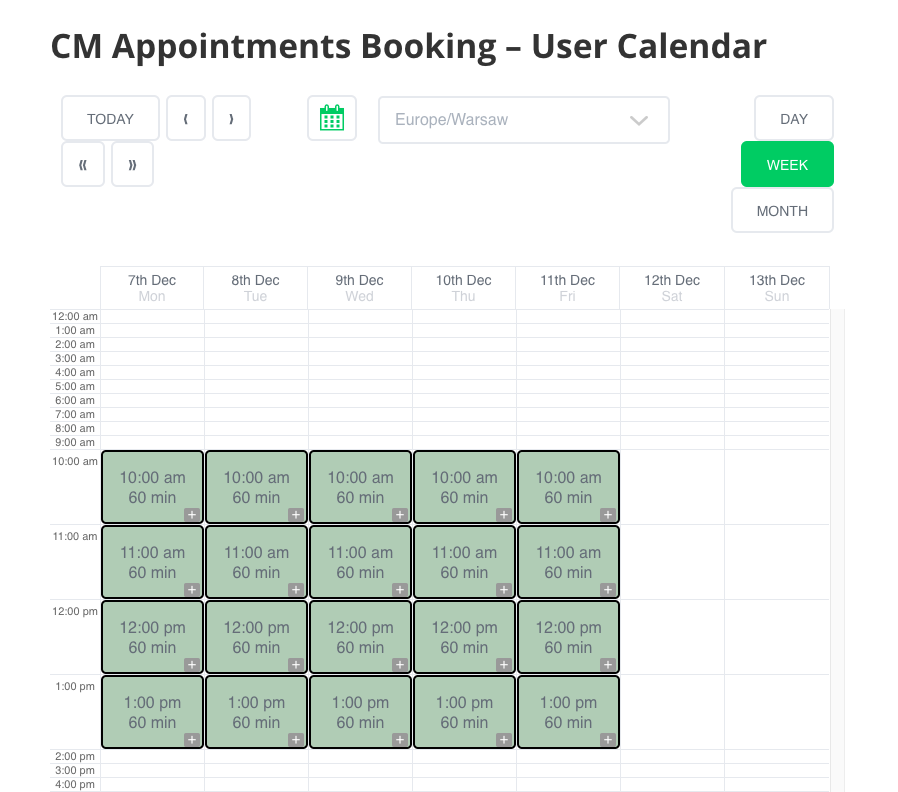
Calendar Page - What Is It
Each user receives his/her own User Calendar page, which includes only the calendar.
Example
How The Automatic Creation Works
User calendar pages are created automatically. They contain only the shortcode [cm_event_booking_calendar_user_calendar] .
The pages are created following the following structure:
"site/user-calendar/username"
So, for instance, for the site www.site.com and user john, the URL will be:
" www.site.com/user-calendar/john"
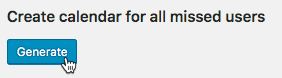
Creating Missing Calendars
If new users join your website and their calendars were not created automatically, you can generate all needed calendars at once.
To do so, head to Admin Dashboard → CM Appointments Booking Pro → Options → User Calendar tab. At the end of the page, you will find the relevant option. Simply click Generate.
TIP: Creating a New User Calendar Page
The admin and admins can create their own calendar pages too.
To do so, they only have to apply the shortcode and edit the page as they seem fit.
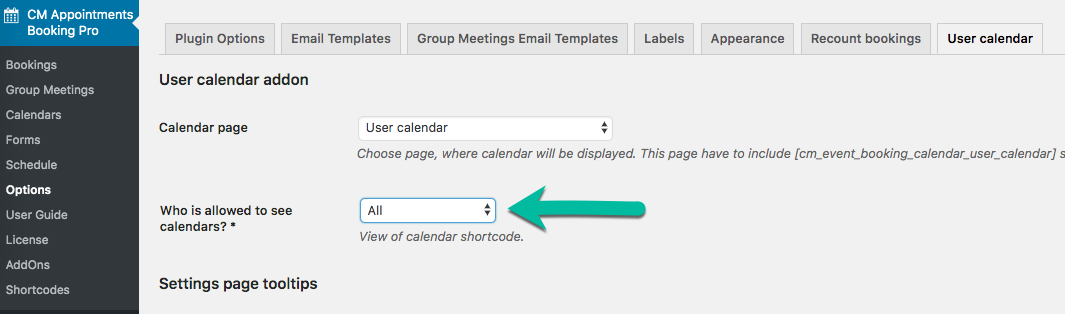
Choosing Who Can View and Edit Calendars
What is This Feature
You can restrict the access of specific or all user calendars to all users, only logged-in users, or only certain user roles.
To edit who can, by default, see calendars, head to Admin Dashboard → CM Appointments Booking Pro → Options → User calendar tab.
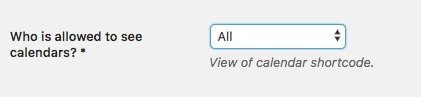
Here, edit the "Who is allowed to see calendars" option.
TIP: Individual Calendars Setting
User calendars will follow the general setting by default, but it's also possible to define the access permission for each calendar.
To do so, first head to the calendar list under Admin Dashboard → CM Appointments Booking Pro → Calendars.
Then locate the relevant one and click Edit.
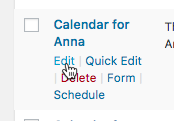
On the calendar edit page, modify the setting "Who is allowed to see calendars":
User View - Editing the Calendar
Important
These steps are directed to the end users
Users can edit their own calendar extensively. This is done from pages prepared by the admin with the shortcode [cm_event_booking_calendar_user_calendar_settings] .
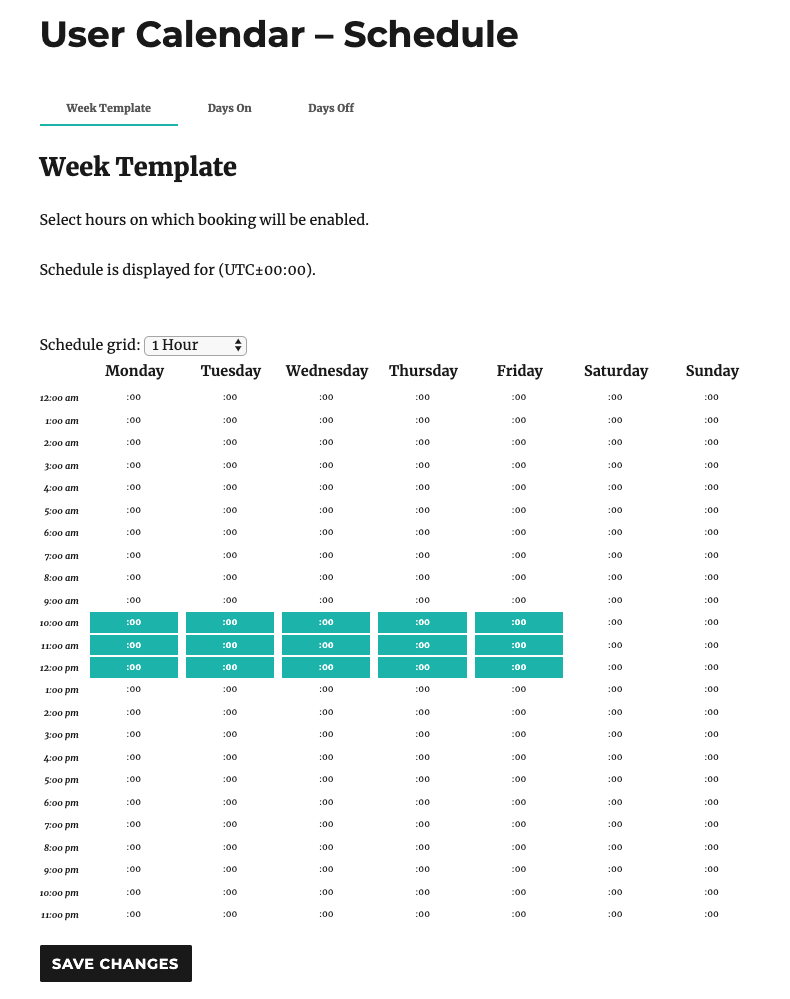
Calendar Schedule
When managing the schedule, you can choose regular available time slots, as well as exceptional days on and days off.
Example
Learn more: Appointment Booking Calendar - Calendars - Calendar Availability
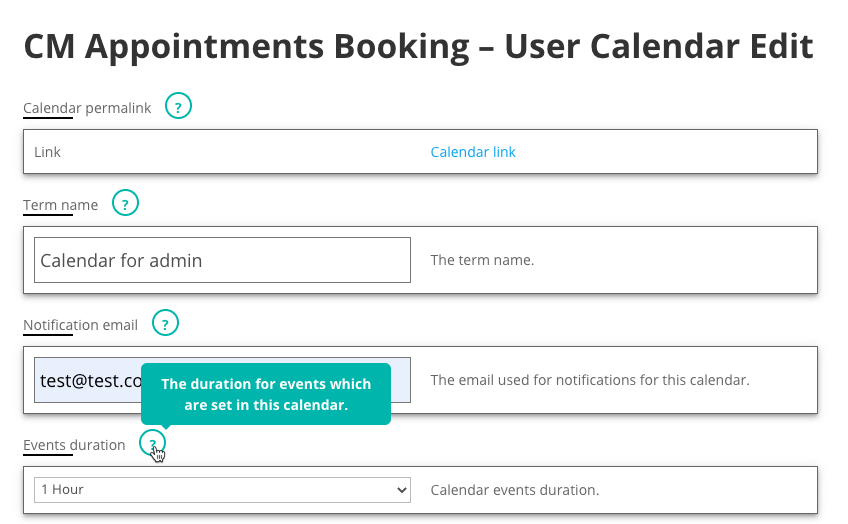
Calendar Settings
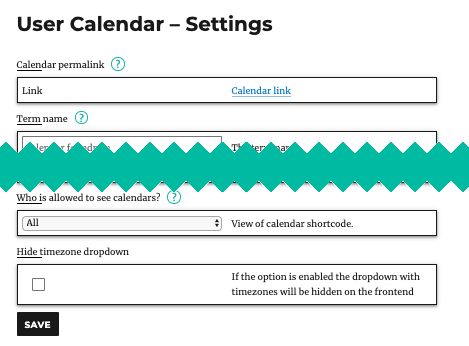
These are the configurations:
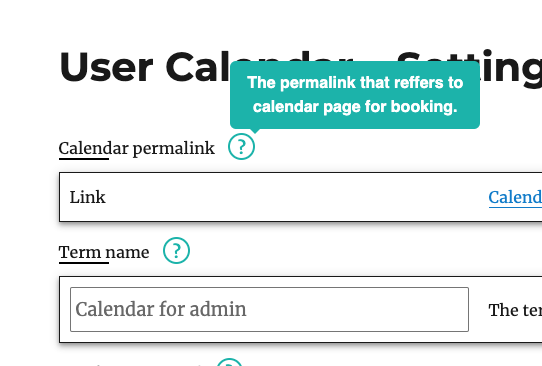
- Calendar permalink - This link is where you can find your calendar.
- Term name - Change this if you want to use another term for "Calendar".
- Notification email - Who will receive a notification about bookings.
- Events duration - How long the events last for.
- Minimum time before booking (in hours) - Bookings will only be available after the set amount of hours. For example, if it is set to 24, the user can only book one day after the current time. This affects the calendar.
- Maximum time before booking (in hours) - Bookings will only be available before the set amount of hours. For example, if it is set to 24, the user can only book within the next 24 hours. This affects the calendar (learn more).
- Example - the following calendar has the following settings:
- Minimum time before booking (in hours) - 2
-
Maximum time before booking (in hours) - 3

Example of how setting min and max time before booking works
- Example - the following calendar has the following settings:
- Ignore DST - Choose to take DST (Daylight Saving Time) in account or not.
- Success booking message - This message will be displayed when the booking process is successful.
- Booking Spots - How many spots each booking will have.
- Automatic booking - You should also decide if the calendar accepts booking automatically or requires moderation and approval for each booking.
- Who is allowed to see the calendar - Choose between:
- Everyone
- Only logged in users
- Only selected roles - choosing this will allow to choose the roles
- Hide timezone dropdown - Display or not the dropdown that allows visitors to select a different timezone.
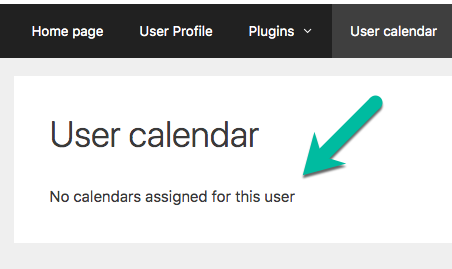
TIP: If You Don't Have a Calendar
If you see a message such as this instead of a calendar, your calendar was not generated. Contact the admin.
Back-End Editing
To learn about editing a calendar from the Back-End (for users with the relevant permissions), check the relevant guides from the main plugin:
TIP: Helping Your Users Edit Calendar
When users edit their calendar's settings, they might need help figuring out what steps to take. The plugin itself has built-in tooltips designed to help users.
Example:
To customize the content of each item, head to Admin Dashboard → CM Appointments Booking Pro → Options → User Calendar tab.
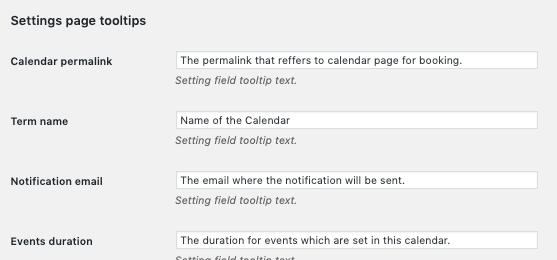
Under the Settings page tooltips options, you are able to edit each tooltip.
User View - Viewing Bookings
You can check a list of all current bookings.
This is done from a page prepared by the admin. It will show the list of all relevant bookings.
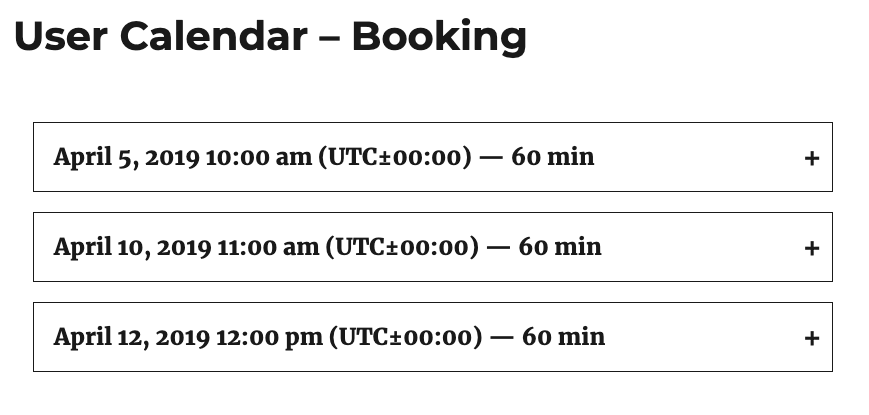
Clicking on a booking will reveal more information about it, including the data submitted by the users on the form and the discussion history.
Example

Shortcodes
TIP: What Are Shortcodes
Shortcodes add dynamic content to your site via a small piece of code. Learn more: Shortcodes - How To Use
The User Booking Calendar's shortcodes are designed to help users take control over their calendar.
Add them to relevant pages and share the links with the users.
Display the User Calendar
Shortcode: [cm_event_booking_calendar_user_calendar]
Note that a page with this shortcode is created automatically.
Edit Calendar Settings
Shortcode: [cm_event_booking_calendar_user_calendar_settings]
Edit Calendar Schedule
Shortcode: [cm_event_booking_calendar_user_calendar_schedule]
View all Current Bookings
Shortcode: [cm_event_booking_calendar_user_calendar_bookings]
Showing Calendars on Your Site
Showing the user calendar on the front-end for all other users can be done in the same way, as in the base plugin - using a shortcode:
[cm_event_booking_calendar calendar="your_calendar_slug"]
Learn more about it: Appointment Booking Calendar - Use Case - How to Create a Calendar Booking System in WordPress
End Result
Following instructions found in the plugin and guides, you should be able to let users manage calendars.
Use Case Front-End
 |
More information about the Appointment Booking Calendar plugin for WordPress Other WordPress products can be found at CreativeMinds WordPress Store |
 |
Let us know how we can Improve this Product Documentation Page To open a Support Ticket visit our support center |