The WordPress Interactive Map plugin allows you and your users to create and showcase locations in Google Maps, including images and notes for each.
The Custom Fields add-on deepens the content by supporting fields such as "Cost-benefit", "Service" and such - you can create as many as necessary.
Demo
A great deal of the footage in this tutorial comes the demo Knowledge Trail.
Access it to see live what you can achieve with the plugin.
Use Case Front-End
Location Index
Example of the locations index page
Location Page
Example of the location page
User Dashboard
Example of the user dashboard for managing locations
Use Case Assumptions
In this example use case guide, we'll cover how to create a directory of locations with custom fields. We consider that you have already bought the plugin and add-on, but not installed them.
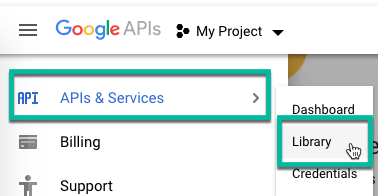
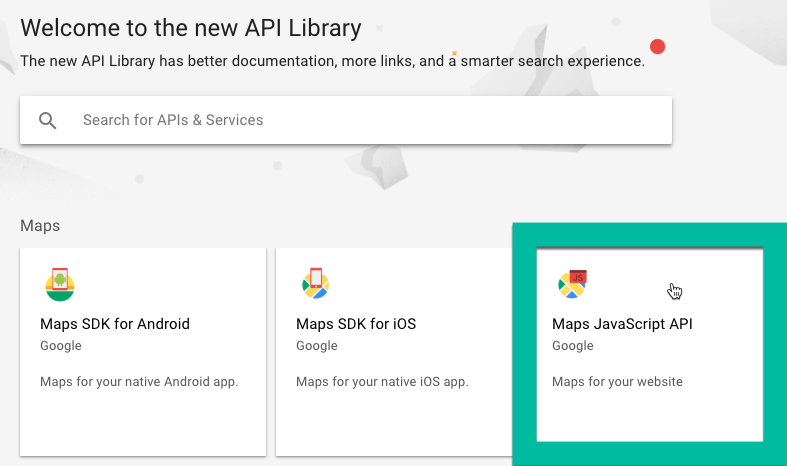
Select one of the API from the list. You may have to search for it by using the search bar.
Choosing needed API
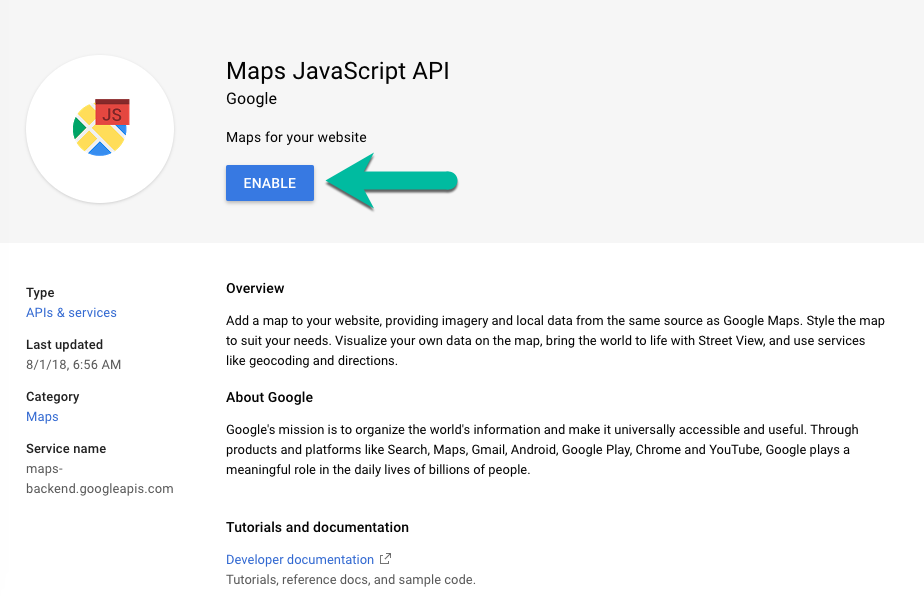
This page is important. In it, you can enable the API and find resources about it. Click Enable:
Enabling needed API
Repeat steps 6 and 7 for all the API keys you need to enable:
JavaScript API
Geolocation API (For some features; requires HTTPS)
Geocoding API
Places API
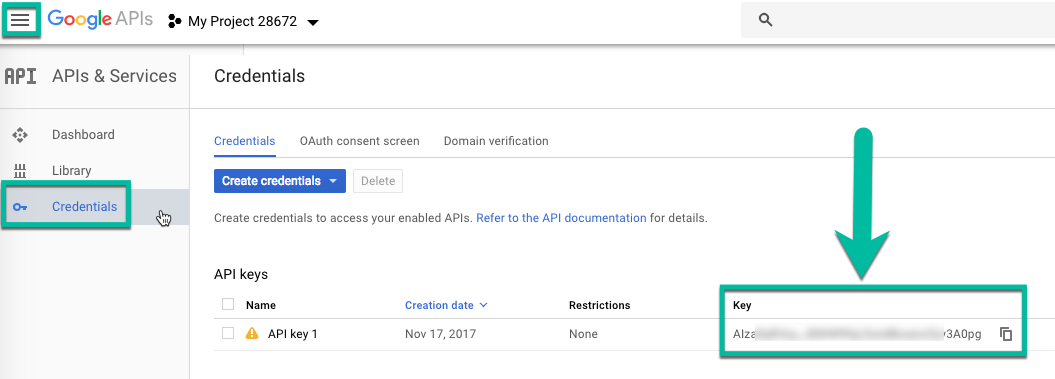
After you have enabled all the API Keys, activate the sidebar menu and click on Credentials. You will find the API key there, ready to be copied and pasted into the plugin's settings.
Where to find the generated API key
Billing
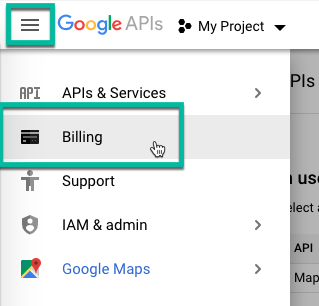
Also, if you have still not enabled billing, you can do so by activating the sidebar menu and then selecting Billing.
Billing page
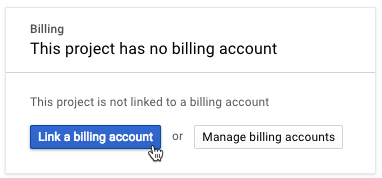
Then click Link a billing account and follow the steps.
Linking a billing account
Adding Key to Plugin
Once you have the key, adding it to the plugin is easy. Head to the Setup tab and copy it to the Google Maps App key field.
In the same setting, you can click Test Configuration to ensure the connection is working.
Adding generated Google API key to the plugin
OpenWeatherMap API key
If you want to add weather details to your maps, you will need to enter an OpenWeatherMap.org API Key the same way you did the Google Maps one.
With the initial setup ready, head to WP Admin → CM Maps Locations Pro → Locations.
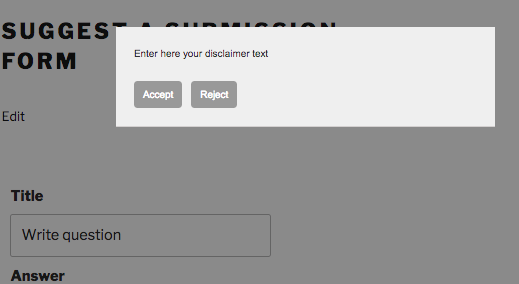
Both you and your users can use a fully-fledged Front-end form to create and edit locations.
TIP: Security
By using a Front-end form, users don't need to access the WordPress Admin dashboard.
The plugin comes with a user-friendly location editor. The admin can use both editors.
Managing locations
TIP: Editing the Form
You can change which fields appear and which are required from the Settings → Location Form tab. The changes will affect everyone who uses the form, not only the admin.
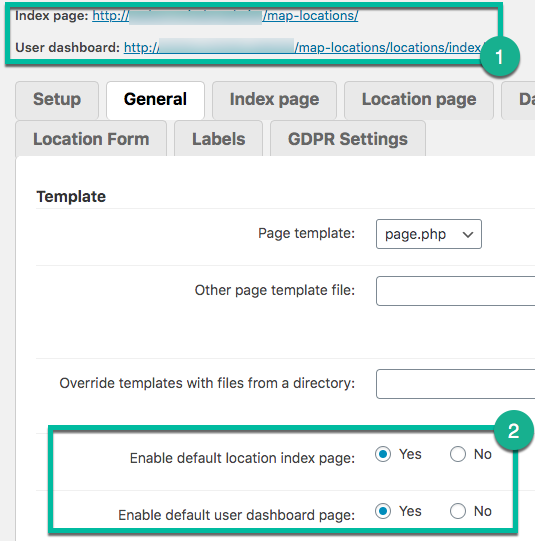
Some other settings, namely default location behavior, are in the Dashboard tab.
Labels can be translated from the Labels tab.
Custom fields are located in the Custom Fields tab.
Front-end Form
The form is feature-packed.
Highlights
Basic details - Name, description, status of the location.
Taxonomy and custom taxonomy link - Categories, tags, and any created custom taxonomy. Learn more below
Icon - Choose a default icon or upload a custom one. Set the size (small, normal, large).
Multimedia - Images and video.
Map - You can pinpoint the location directly on the map.
Coordinates - Fetched from the map. You can add them manually.
Shape colors - Visual settings.
Extra information - Data such as address and website to be shown on the location page.
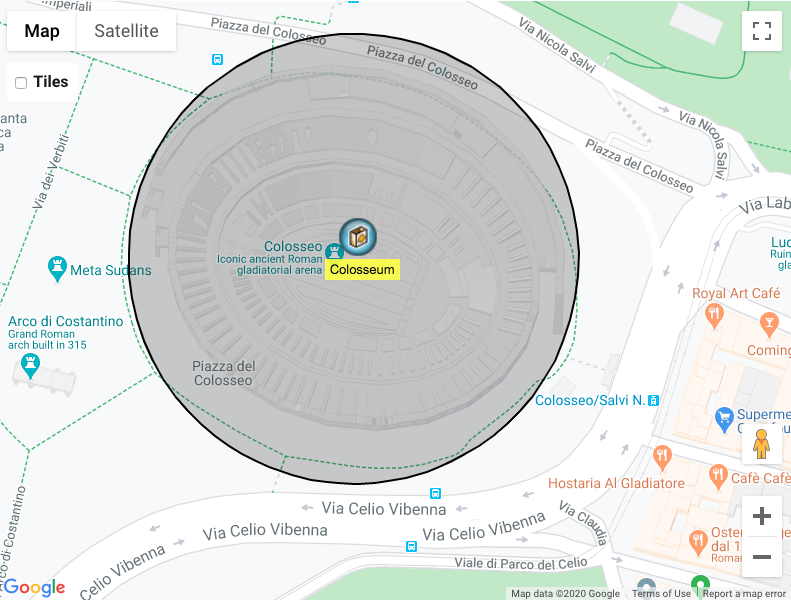
Every time a user adds a location, that location receives a page automatically. We'll review some ways to edit this page - the settings are located in both General and Location page tabs.
Configuring the location page
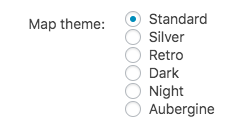
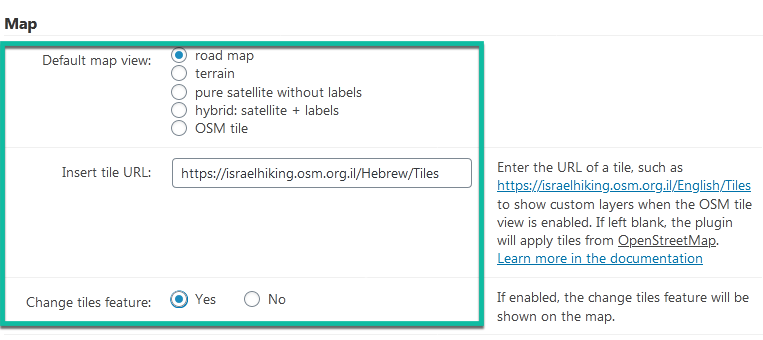
1) Theme
There are six themes to choose from.
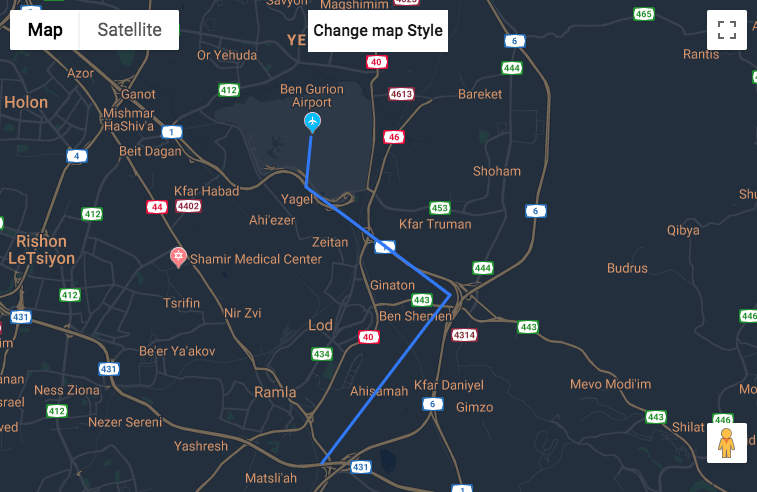
Night Theme Example
Night theme example
You can change the map theme from the General tab → Map theme option.
Where to show locations list - Choose where to display the locations list on the index page.
Bottom
Bottom condensed
Left
Right
Enable menu - If enabled, it will be shown above the map. Includes the buttons All locations, Add Locations and My Locations.
Pagination, order, search
Locations per page - Limit the locations visible on the index page below the map. If more locations are available than pagination will be displayed.
Order locations by - This has no effect on the map itself. You can order the locations list by:
Title (alphabetical order).
Created date.
Amount of views.
Ratings.
User location proximity - This option requires HTTPS to work. It uses the browser's geolocation API and will ask him/her to share the current location. After checking the location successfully, the plugin will ask to reload the page to reorder by proximity.
Sorting order - Choose sorting order for the list of locations ascending|descending showing beside the map. This has no effect on the map itself.
Map
Enable map - Display or hide the map on the index page.
Enable marker clustering - If enabled, multiple markers will be combined as a single when overlapping due to the zoom.
Example of the marker clustering
Enable info window on marker - Shows a tooltip when clicking on a clustered marker, listing each location.
Marker label type - Choose between:
show below the marker
show tooltip on mouse hover
not show at all
Clicking on the map marker will - Select between:
Open the location's page - Directs to the location page.
Redirect to custom URL - Directs to the address in the "URL" field of the location entry.
Show tooltip with information about location - Displays part of the description without directing the user to another page. This feature has extra settings.
Example of a tooltip with the location info
Number of characters from the location's description to display on the tooltip - Set number of characters from the location's description to display on the tooltip.
Default location's icon URL - Used when no icon is set.
Appearance
Text on top - You can enter text which will be displayed on the top of the index page, below the page title.
Information visible on the index page - Check which location parameters will be displayed on the index page on the location's snippet which appears below the map on the index page. Choose whether the address and postal code of the location are displayed.
Example of the location info visible on the index page
Location featured image - Choose what kind of featured image to display on the index page.
Example of the location featured image
If no icon was set to the location category a default icon will be used. The featured image is selected from 3 available options:
predefined icon taken from the location category
the first image in the location image gallery
none.
Location default image - Enter the URL of the default featured image of the location map index list. In case no featured image is defined, the location shows a default icon.
Example of the default location image
Show label below marker - Show text labels with location name below the location marker on the index page map.
Click on the location marker will - Choose between:
open the location's page.
show tooltip with information about location.
Show rating on the index page - Enable or disable the feature.
Zip code neighborhood filter
Enable ZIP code radius filter - Adds the ZIP code radius filter to the index page next to the search box.
Country code for the ZIP code searching - The ZIP filter will work only within the single country. Leave it blank to not limit the search to one country only.
Enable geolocation - Recognizes the user's ZIP code using browser's geolocation API. Notice that the geolocation API works only if you're using https.
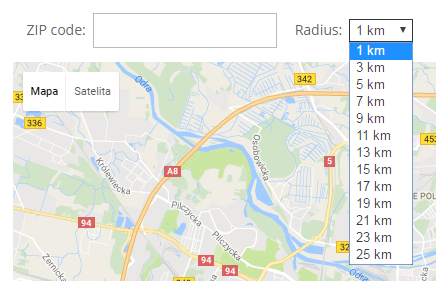
Radius values
Minimum/Maximum radius value - set minimum and maximum radius value.
Radius value step - Set radius values step.
Radius default value - Set default radius value.
Choosing the radius
Info Window
You can configure:
Template for the location's info window content - You can use HTML and placeholders.
Max width / height for the info window content.
Max width for images inside the info window.
Number of characters from the location's description to display on.
The plugin settings has a handy shortcut for the index page.
Link to the index page
User Interaction - Who Can Edit
The plugin allows your users to collaborate, adding and editing their forms. In this section we'll discuss a series of features that affect this collaboration.
Reminder: Modifying the Form
You can edit what appears on the form and which fields are obligatory from the Location Form tab.
In the same tab, you can configure notifications. These will be sent to the moderator once a suggestion is received, and to the user once the status of their location changes (for instance, it has been approved).
Naturally, these settings only apply if moderation is enabled.
Custom Fields are smart and flexible ways to categorize your locations. They can be of 8 types:
Single-line text field
Single-line number field (note: this option was introduced in version 1.2.7)
Single-line url field (note: this option was introduced in version 1.2.7)
Select (drop-down field)
Radio field
Multi-line text area
Multi-line html area (note: this option was introduced in version 1.2.7)
Single-image upload field (note: this option was introduced in version 1.3.0)
Multi-images upload field (note: this option was introduced in version 1.3.0)
Single-file upload field (note: this option was introduced in version 1.3.0)
Multi-files upload field (note: this option was introduced in version 1.3.0)
5-grade scale
Use Examples
Restaurant Review - Add the 5-grade scale fields "Cost-benefit", "Quality", "Service" and a multiple-line field "Review" to inform your readers about the venues you've visited.
Traveling Blog - Add the text field "Tourist Tips" to help fellow travelers. Then, add the fields "Accessibility" and "Best Time to Visit" for the complete service.
Journal - Add the text field "Best Memories" to locations that made a good impression on you.
Example of custom fields on the location page
If the Custom Fields add-on is enabled, you will also see the Custom Fields tab in the plugin's settings.
Custom fields settings
Click on the + Add New button below any previously created Custom Fields. A new blank row will appear.
Custom fields settings
Give the Custom Field a Text label, a Meta key, choose its Field type, and in case if you choose types Select (drop-down) field or Radio field, you also need to add options and decide if multiselect is available. The meta key is used as a unique identifier so that two fields can have the same name, but still be different.
When the needed fileds have been set, scroll down and click on the Save button.
Everyone Can Now Use Custom Fields
Note that custom fields apply to all locations - the fields you add on this page will be available when any user is editing any location.
Using custom fields
Deleting Custom Fields
To delete a custom field, simply click on the x icon near it.
To easily move locations between sites and devices, you can perform three main operations.
To check them, head to CM Maps Locations Pro → Export/Import.
Export/Import locations
This screen gives you three options:
1) Import Locations From KML or KMZ Files
TIP: What is a KML/KMZ File
KML and KMZ are the file formats used to display geographic data in an Earth browser such as Google Earth, Google Maps, and Google Maps for mobile. They are tag-based.