WordPress Interactive Map Plugin (CMML) - How To - Add Tiles/Layers To Maps
Adding Tiles/Layers to Maps
Tile Resources
To learn more about tiles and alternatives to choose from, check Tiles - OpenStreetMap Wiki
What is This Feature
With WordPress Interactive Map plugin it's possible to offer additional tiles layers on your maps. These present additional information on top of the map.
By default, the plugin connects with the free OSM (Open Street Map) service. Examples of what it can achieve:
Settings
Navigate to the Admin Dashboard → CM Map Locations Pro → Settings.
The settings are in the General tab, under the Map section.

- Default map view - Choose what is the default view. Users can change this at any time.
- Enable OSM tiles button - If enabled, the OSM tiles buttons will be displayed on the map and user will be able to switch the tiles on the front-end. Note: this option was introduced in version 3.1.4.

-
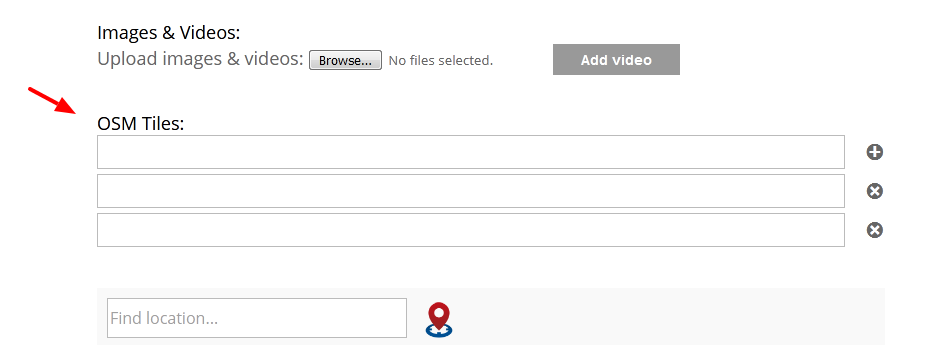
Insert tile URL - Add the URL of the tile service of your choice. Check Tiles - OpenStreetMap Wiki for more examples. Note: This option was renewed in the version 3.1.4. You can add up to 6 different OSM tiles. To do this, click the Add new button. You need to add Label and URL in the corresponding fields. You can also set of the OSM tiles as the default one. To remove any of the OSM tiles, click the button Delete.

Adding OSM tiles URL Supports Zoom Level and Dimensions
The URL can store three parameters: zoom level, tile height and tile width.
Add /:zoom:/:x:/:y: at the end of the URL and e all three patterns will be substituted with corresponding values, and map will be provided by source server.
Example
Add the tile url https://tile.openstreetmap.org/:zoom:/:x:/:y:.png. The source server will generate https://tile.openstreetmap.org/7/40/27.png.
The particular template view may look different in accordance to certain API requirements.

Allow Users To Upload Tiles
You can edit the upload to form to allow users to set different tiles for each Location. Learn More
 |
More information about the WordPress Interactive Map Plugin Other WordPress products can be found at CreativeMinds WordPress Store |
 |
Let us know how we can Improve this Product Documentation Page To open a Support Ticket visit our support center |