WordPress Interactive Map Plugin (CMML) - Free Version Tutorial
WordPress Interactive Map Plugin - Free Version Tutorial
WordPress Interactive Map Plugin
Learn more about Pro version of the WordPress Interactive Map plugin
This article covers only features present in the free version of the WordPress Interactive Map Plugin.
It shows you how to create a directory of locations on your site.
Video
Example
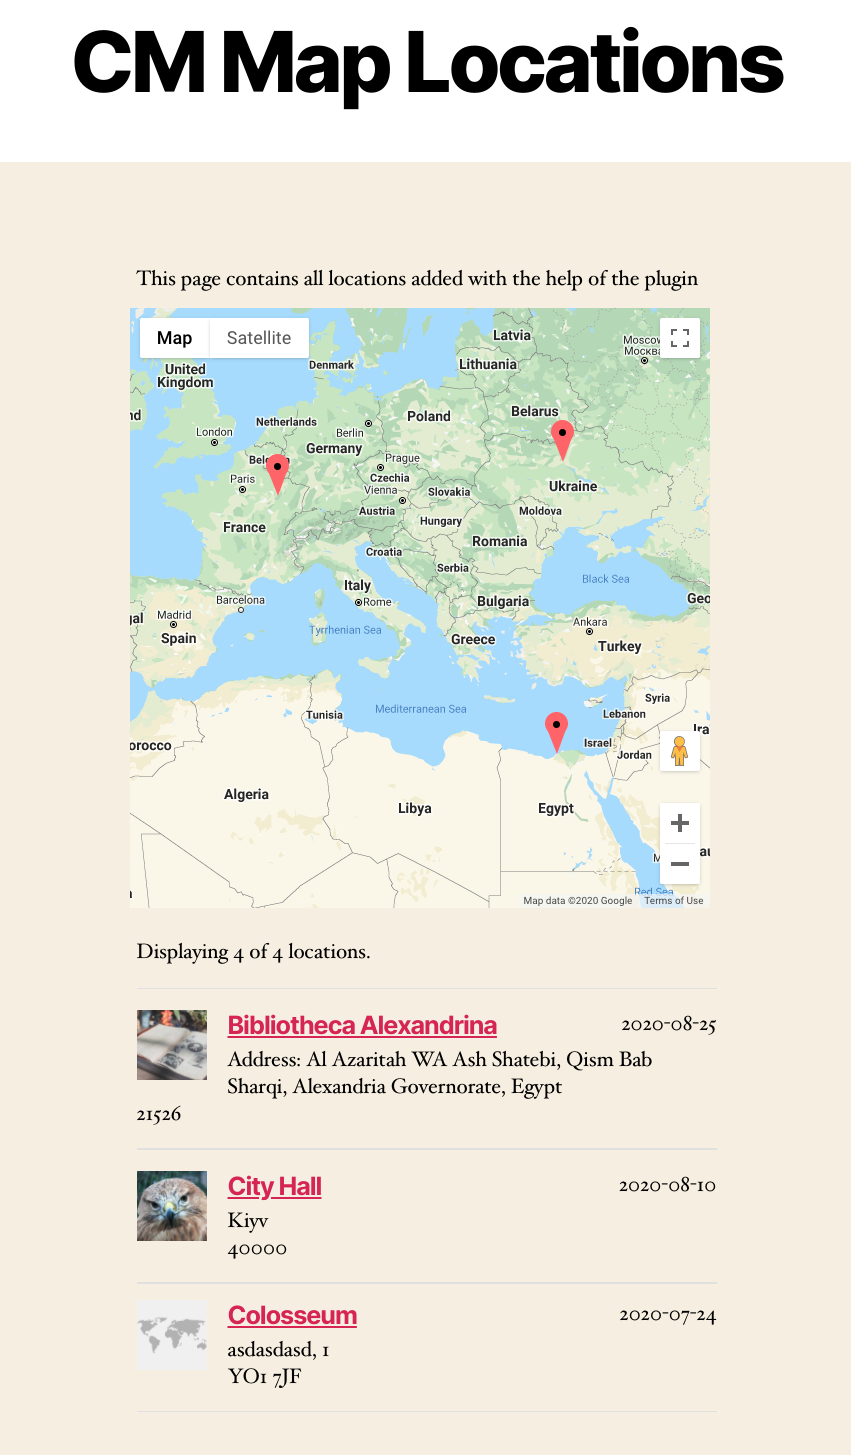
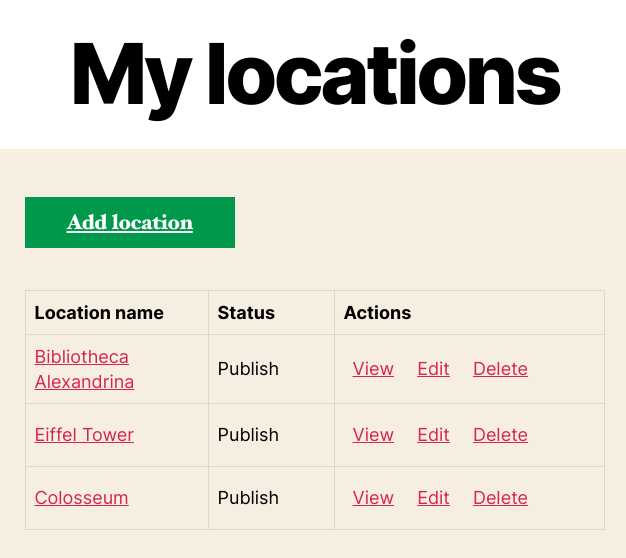
Table of Contents
- Installation guide
- Setup Wizard
- List of Features
- Using the Plugin - Overview
- Initial Setup
- Plugin Settings
- Shortcodes
Installation guide
Here are the steps needed to install the plugin:
- Download - To manually install the plugin, you must first download it from WordPress.org to your computer.
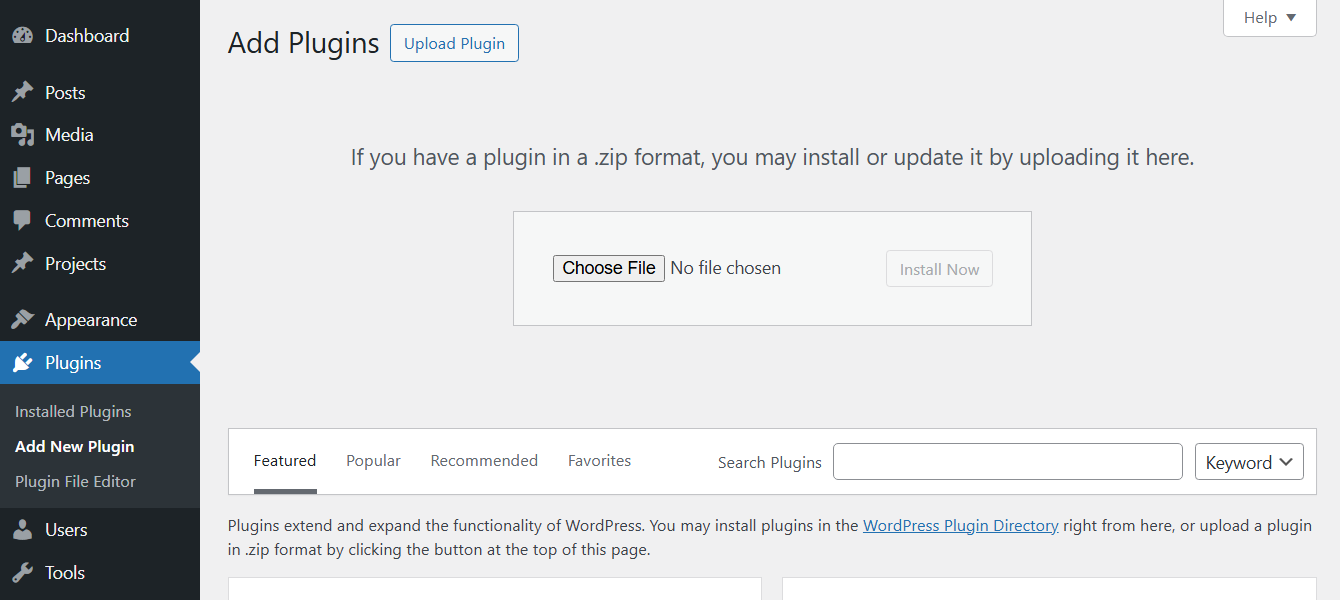
- Navigate to the Plugins tab in the WordPress Admin Panel to install the plugin.
- Activate the plugin.
Setup Wizard
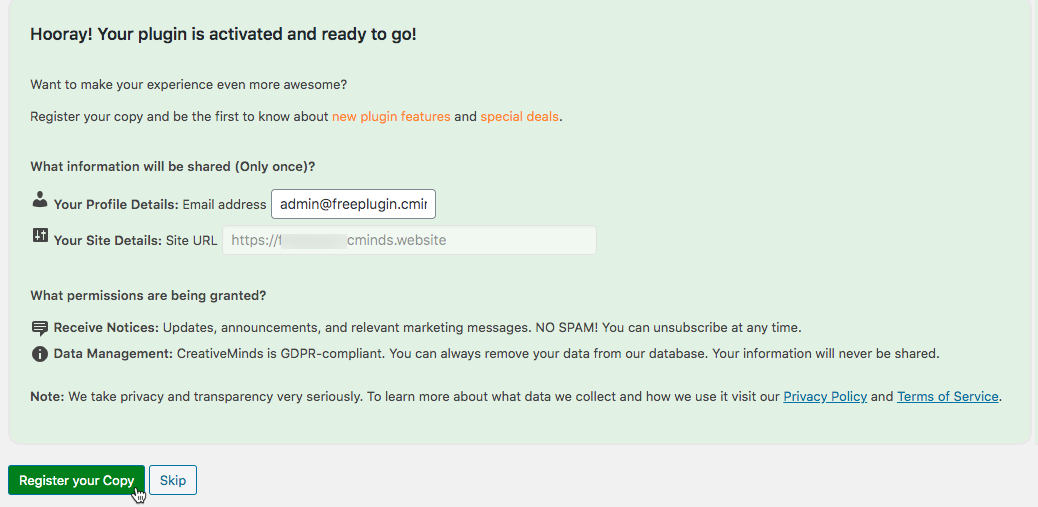
Once you install and activate the plugin, you will see a setup wizard. It will help you to configure the basic settings step by step - just follow the instructions. Optionally, you can skip it.

TIP: Register for Benefits
If you like, you can register your plugin to receive information about updates and our latest offers. You can complete your registration at any time.
If you don’t want to register right away, you can select the Skip button.
List of Features
WordPress Interactive Map Plugin
Learn more about Pro version of the WordPress Interactive Map plugin
Using the Free Plugin - Overview
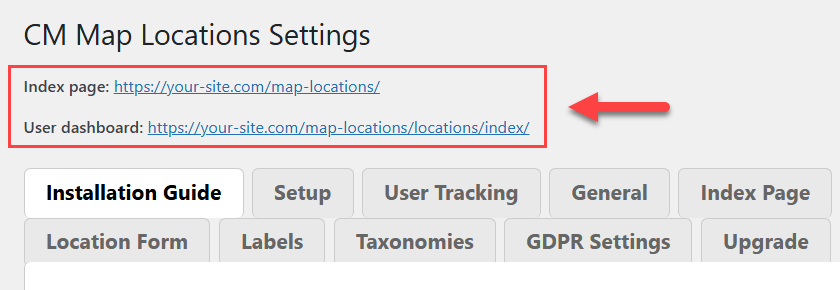
TIP: Automatic Index and User Dashboard Pages
The plugin automatically creates:
- A location index page - All new locations will be shown there.
- A user dashboard page - Users can manage their locations and add new ones from there.
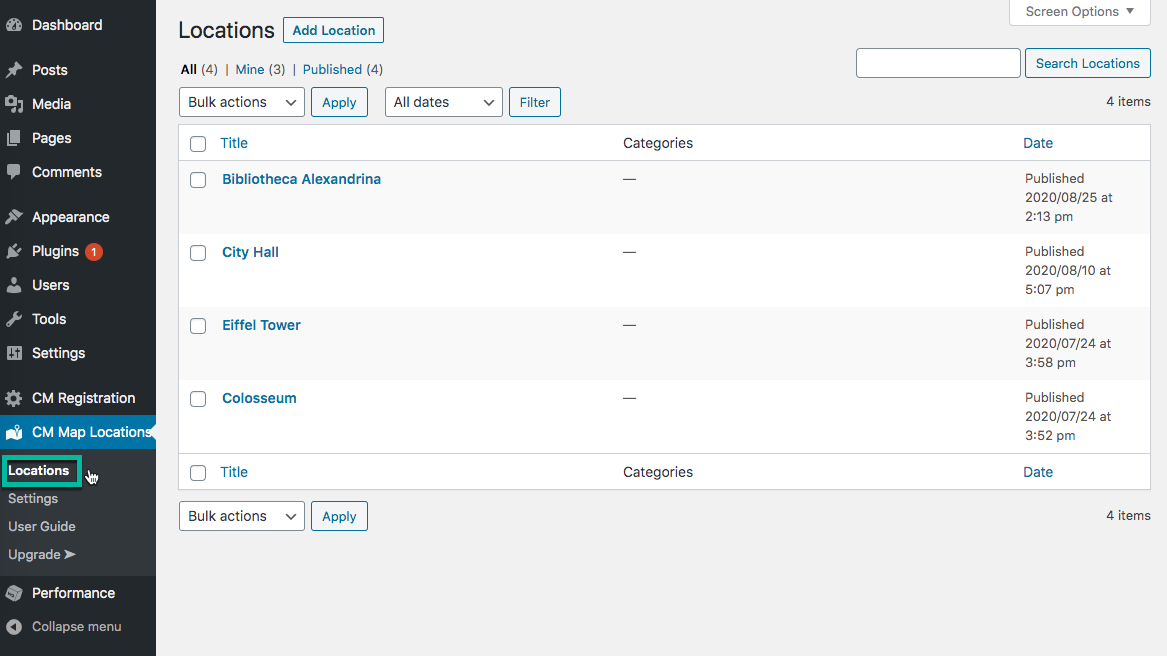
Admin - Adding and Managing Locations
You can add and manage locations from the back-end. Head to Admin Dashboard → CM Map Locations → Locations.
User Dashboard - Adding and Managing Locations
Every location is "attached" to the user that created it, including the admin!
The user dashboard page lists all locations added by the currently logged-in user. As such, the content changes depending on who accesses it. There's also a handy Add location button.
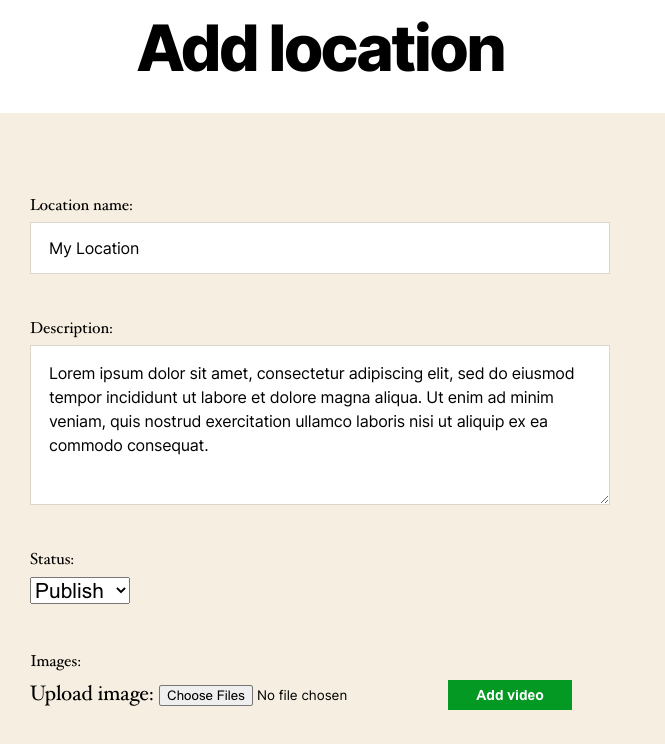
What Does It Look Like to Add a Location?
All users (including the admin) can add locations from a front-end form.
Initial Setup
A core aspect of the plugin is showing locations on a Google Map. To do so, you require creating and then add a Google Maps API key into the plugin.
Important
- Starting from July 2018, Google Maps, Routes, and Places require billing information, such as an associated credit card.
- The pricing system also changed, but in practice, the services are still free for limited use.
Google API Keys - Obtaining the Google API Key
To obtain the Google API key, follow these steps:
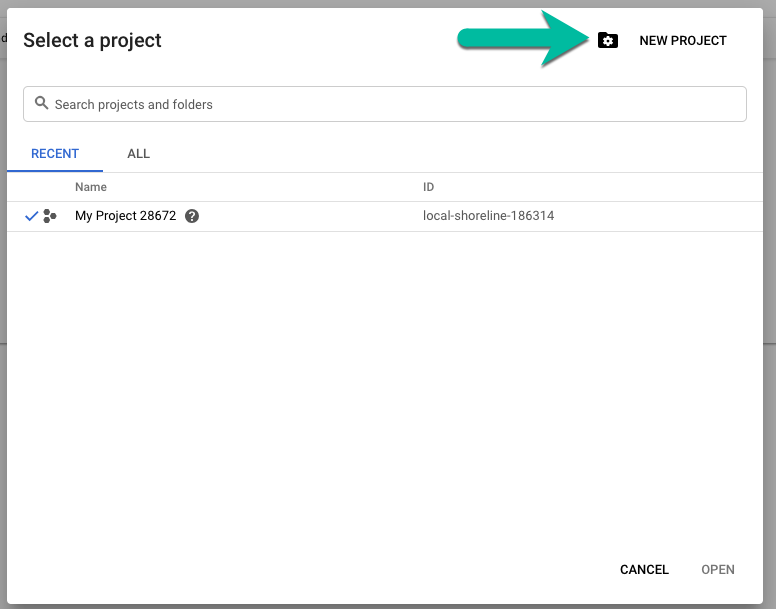
- Head to the Google Developers webpage
- Log in to your Google account
- Go to your project or create a new one

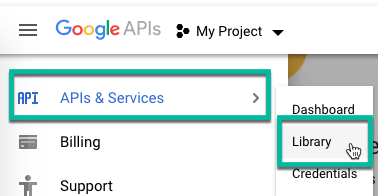
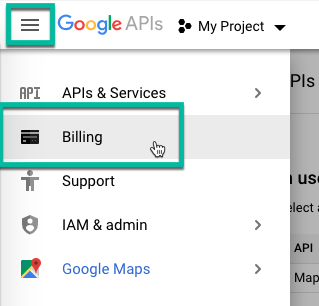
- Head to APIs & Services and then Library
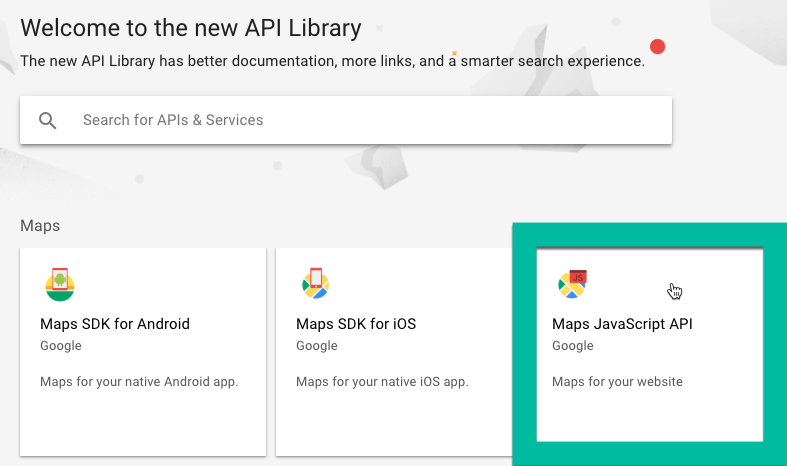
- Select one of the API from the list. You may have to search for it by using the search bar.
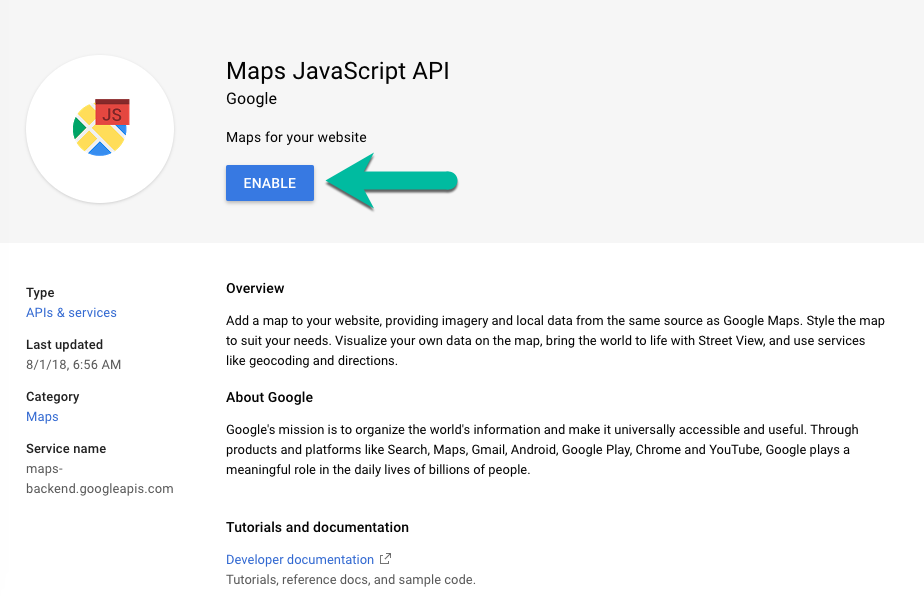
- This page is important. In it, you can enable the API and find resources about it. Click "Enable"
- Repeat steps 6 and 7 for all the API keys you need to enable:
- JavaScript API
- Geolocation API (For some features; requires HTTPS)
- Geocoding API
- Places API
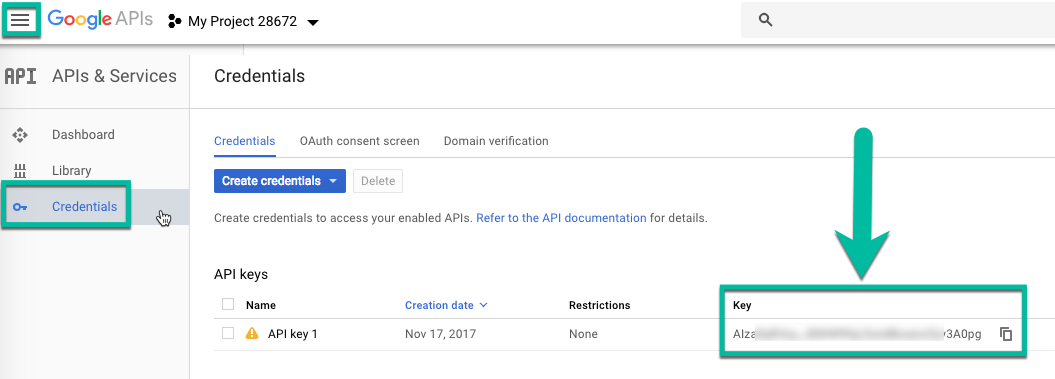
- After you have enabled all the API Keys, activate the sidebar menu and click on Credentials. You will find the API key there, ready to be copied and pasted into the plugin's settings.
Billing
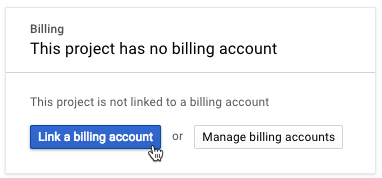
Also, if you have still not enabled billing, you can do so by activating the sidebar menu and then selecting Billing.
Then click Link a billing account and follow the steps.
Adding Key to Plugin
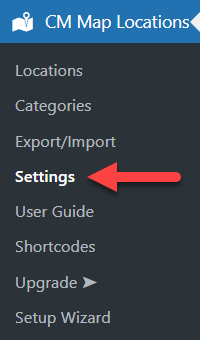
Once you have the key, adding it to the plugin is easy. Navigate to Admin Dashboard → CM Map Locations → Settings.
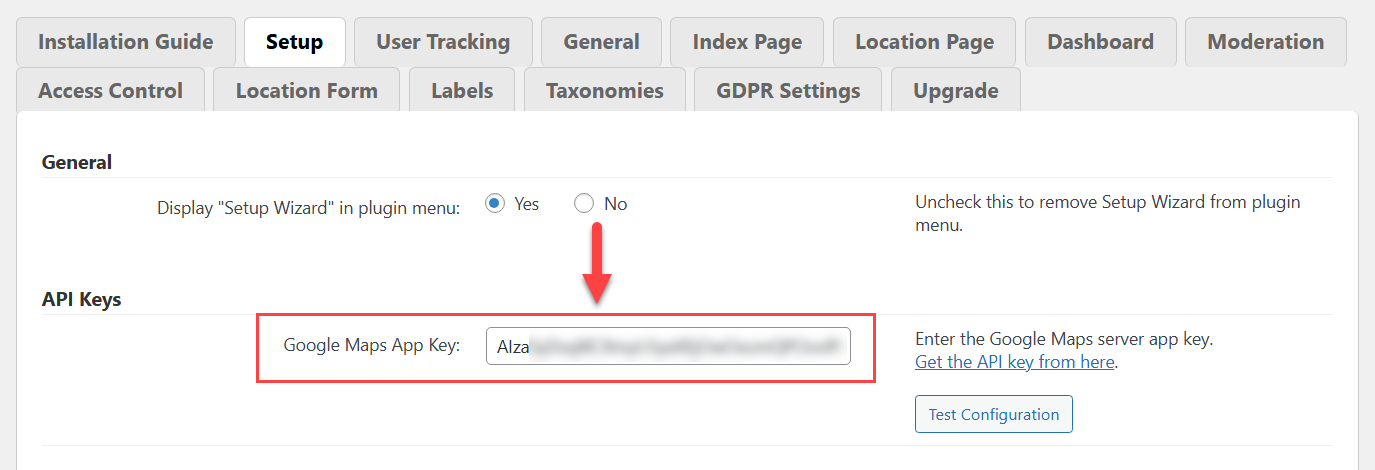
Head to the Setup tab and copy it to the API Keys field.
In the same setting, you can click Test Configuration to ensure the connection is working.
Plugin Settings
Now let's configure the plugin settings.
The settings page shows options available in the Free version of the plugin and also showcases the options that are available in the Pro version only. You can show or hide Pro options by clicking the relevant button at the top right:

Setup tab

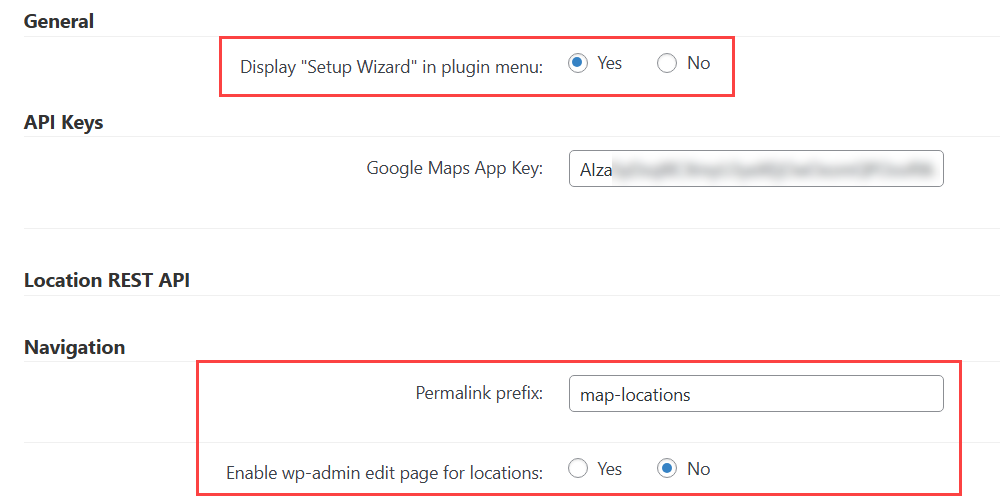
General
- Display "Setup Wizard" in plugin menu - Disable this option if you want to remove the Setup Wizard from the plugin menu.
Navigation
- Permalink prefix - The prefix of the index and locations' permalinks. For example, "map-locations" will generate permalinks such as: site.com/map-locations/paris-trip. By default, it's "map-locations".
- Enable wp-admin edit page for locations - If disabled, when you click the Edit link in the back-end, you will be redirected to the front-end location edit page.
General tab

In this tab, you can configure the overall plugin behavior and appearance.
The options are:
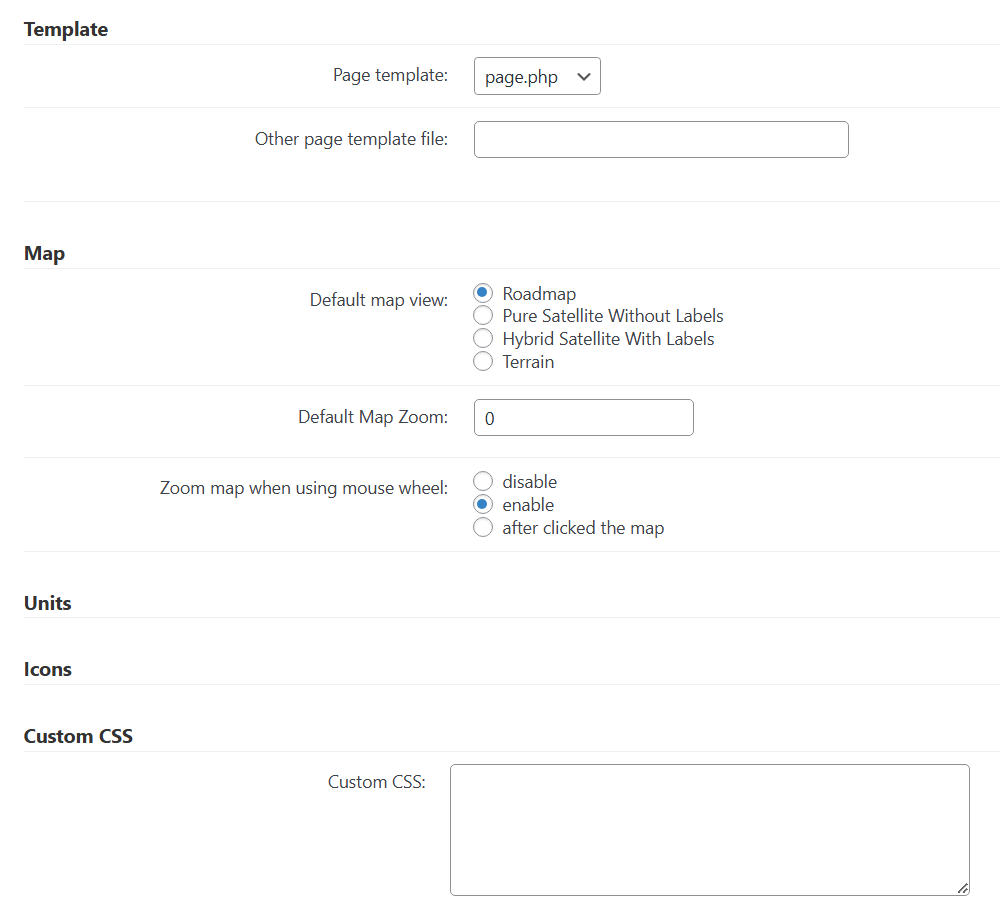
Template
- Page template - Choose the page template of the current theme or set default.
-
Other page template file - Enter the other name of the page template if your template is not on the list above. This option has priority over the selected page template. Leave blank to reset.
Advanced!
Editing templates is an advanced process that may require HTML, CSS and coding skills.
Make sure to back up all files before saving changes. This article provides examples of changes, but they are illustrative and not meant to be followed literally.
General Support - Advanced - Creating and Editing Custom Templates
Map
- Default map view - Choose between
- road map
- terrain
- pure satellite without labels
- hybrid: satellite + labels
- Default Map Zoom - Default value for map zoom. If set to 0, then zoom will be selected automatically. Default is 0.
- Zoom map when using mouse wheel - If enabled, scrolling the mouse when it's over the map will zoom out or zoom in.
Custom CSS
- Custom CSS - You can enter a custom CSS which will be embedded on every page that contains a maps plugin interface.
Quick Read
What is CSS
CSS allows you to make changes that WordPress, themes and even the plugins don't support. Be sure to test all changes before applying! Learn more: General Support - Advanced - Custom CSS
CreativeMinds Can Help
If you prefer not modifying CSS and visual elements by yourself, CreativeMinds can help to adapt CM plugins to your theme. Learn more: Plugin Installation Service for WordPress by CreativeMinds
Index Page tab
You can configure everything related to the index page in this tab.

The options are:
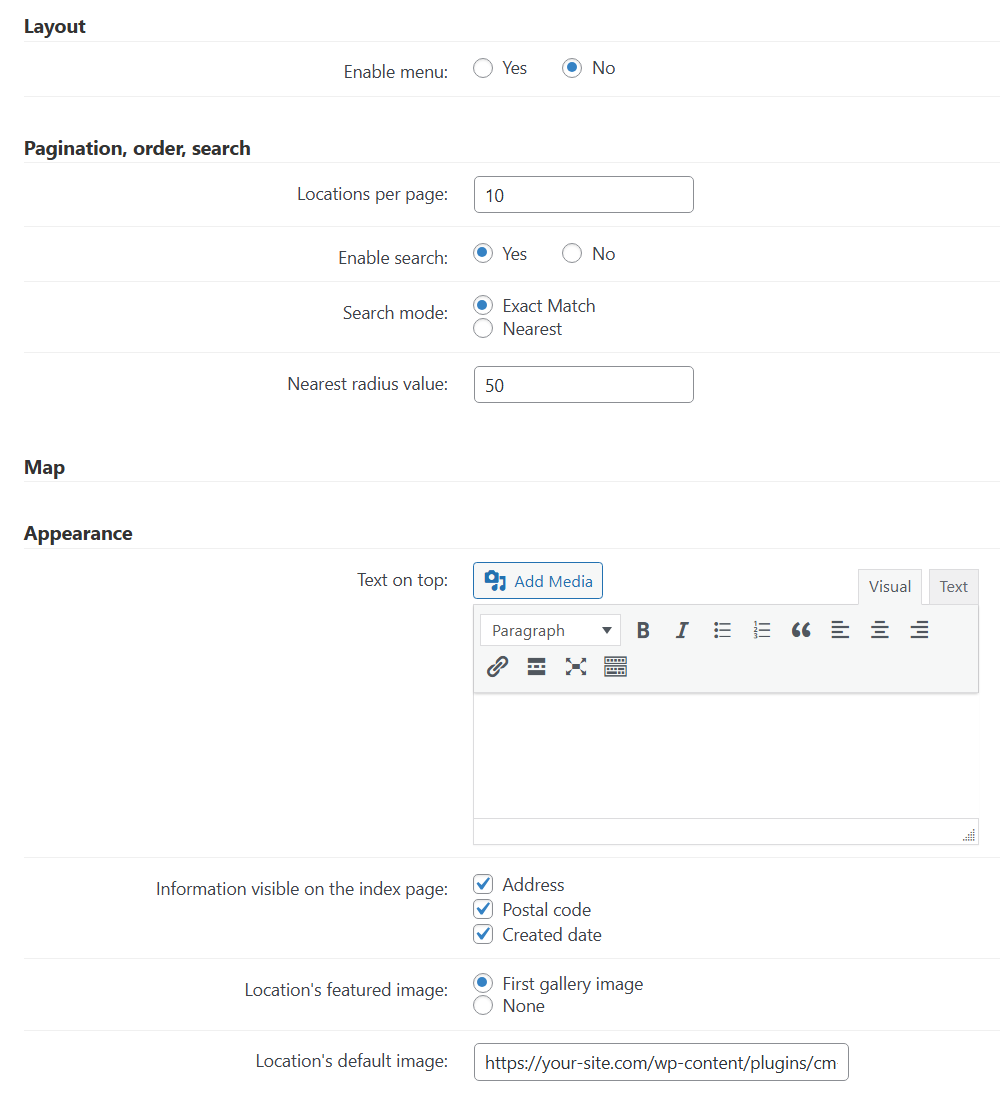
Layout
- Enable menu - If enabled, it will be shown above the map. Includes the buttons All locations, Add Locations and My Locations.
Pagination, order, search
- Locations per page - Limit the locations visible on each page. The default is 10.
- Enable search - Choose Yes to turn on the search bar on the default index page.
- Search mode - Choose search mode between:
- Exact match
- Nearest
- Nearest radius value - Define the nearest radius value in case, if you chose Nearest search mode in the previous option.
Appearance
-
Text on top - Enter what is displayed on the top of the index page, below the page title.
You can include HTML, images and video.
Highlighted Example

Example of text added to the top of the index page - Information visible on the index page - Show or hide
- Address
- Postal code
-
Created date
Highlighted Example

Example of the location info visible on the index page
- Location's featured image - Choose between:
- First gallery image
- None
- Location's default image - Useful for branding.


Location Page tab

The options are:
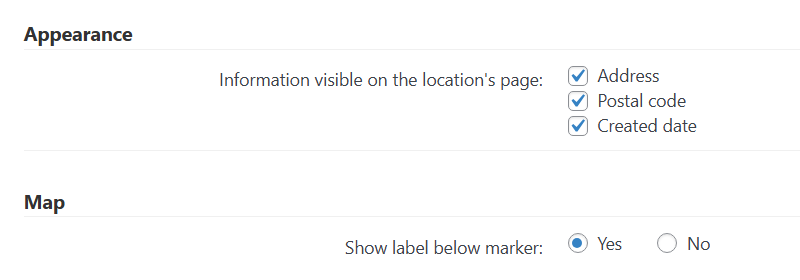
Appearance
- Information visible on the index page - Show or hide:
- Address
- Postal code
-
Created date
Highlighted Example

Example of the information visible on the index page

Map
- Show label below marker - Show text labels with location name below the location marker on the location page map.
Dashboard tab

The options are:
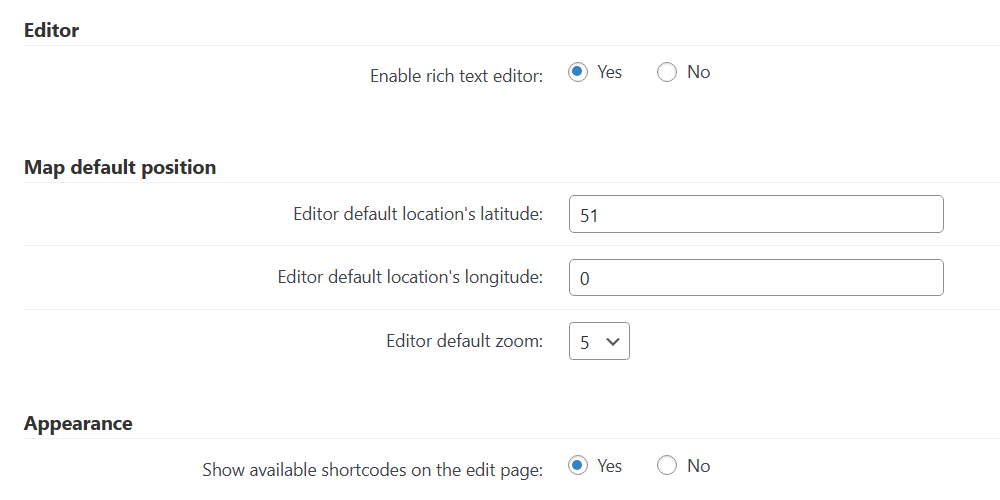
Editor
- Enable rich text editor - Allow or not users to use the WYSIWYG editor when creating the location description. If disabled, a simple textarea will be displayed.
Map default position
- Editor default location's latitude - By default, 0.
- Editor default location's longitude - By default, 0.
- Editor default zoom - Higher number means closer. By default, 5.
Appearance
- Show available shortcodes on the edit page - Show or hide.
Location Form tab

Here you can configure which fields should be displayed in the form for adding new locations. For a few fields you can choose if they should be optional or required.
The options are:
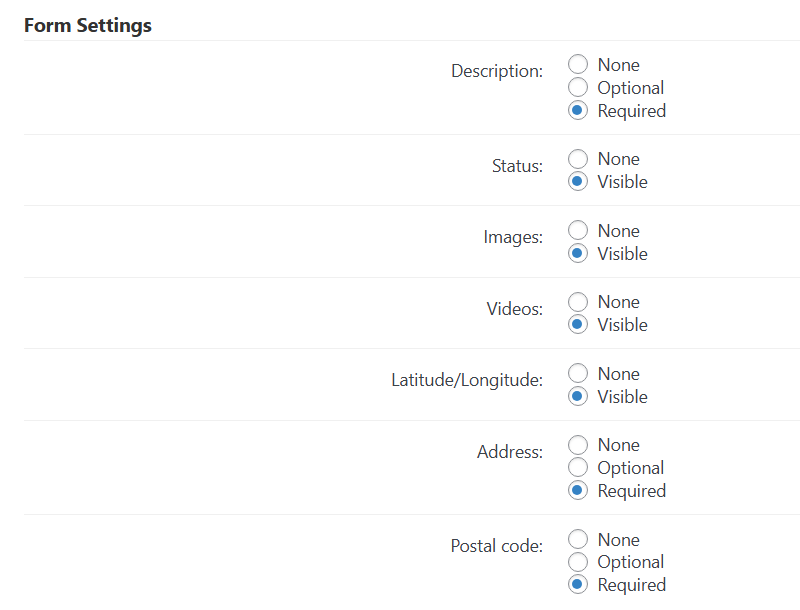
- Description - Can be optional or required.
- Status
- Images
- Videos
- Latitude/Longitude
- Address - Can be optional or required.
- Postal code - Can be optional or required.
Shortcodes
The plugin has a few shortcodes which you can use.
Snippet
- Shortcode:
[cmloc-snippet] - Use: Displays a location's snippet.
- Filtering parameters:
- id - set location ID to display specific location map.
- View paramteres:
- featured - set the map to display interactive map or image for a static image.
-
Sample: By using the shortcode
[cmloc-snippet id="487" featured="map"], we are able to add a snippet of this location to the blog post.
Displaying a location snippet
Specific Location Map
- Shortcode:
[cmloc-location-map] - Use: Shows a specific location on a map.
- Filtering parameters:
- id - location ID.
- View parameters:
- theme - Choose between:
- silver
- retro
- dark
- night
- aubergine
- mapheight - the height of the map in pixels (decimal value without px string).
- mapwidth - width of the map in pixels (decimal value without px string).
- width - width of the entire widget in pixels (decimal value without px string).
- showtitle - 0 for no, 1 for yes.
- showdate - 0 for no, 1 for yes.
- theme - Choose between:
-
Sample:
[cmloc-location-map id=1767 mapwidth=640 mapheight=480 width=700 showtitle=1 showdate=1]
Displaying a map with specific location
 |
More information about the WordPress Interactive Map Plugin Other WordPress products can be found at CreativeMinds WordPress Store |
 |
Let us know how we can Improve this Product Documentation Page To open a Support Ticket visit our support center |