Map Locations and Routes - Getting Started - Adding API Keys (Google Maps and OpenWeatherMap)
Adding Google API Keys
Back to WordPress Interactive Map Plugin Guide
Back to WordPress Travel Map Plugin Guide
Important
- Starting from July 2018, Google Maps, Routes, and Places require billing information, such as an associated credit card.
- The pricing system also changed, but in practice, the services are still free for limited use.
Both WordPress Travel Map plugin and WordPress Interactive Map plugin require either Google Maps API keys or the OpenWeather API key to work.
This guide will give you an overview of how to fetch keys for both services. Note that these steps depend on the interface and conditions of these third-party services, which are subject to change.
If you believe that this guide is out of date, please contact us.
Table of Contents
- API Keys - Which Ones are Needed
- API Keys - Finding the Plugin Settings
- Google API Key
- OpenWeatherMap
- Google Seach Engine ID
^Go back to the Table of Contents
API Keys - Which Ones are Needed
Google API Keys
If you would like to use the Google Map service, you will need to activate a series of services in the same API Key. The process to get all is the same and is explained in-depth below.
- WordPress Interactive Map plugin Free and Pro
- JavaScript API
- Geolocation API (For some features; requires HTTPS)
- Geocoding API
- Places API
- WordPress Travel Map plugin Free and Pro
- JavaScript API
- Geocoding API
- Places API
- Static API
- Elevation API
- Directions API
OpenWeatherMapKey
You only need the main key provided by the app.
^Go back to the Table of Contents
Finding the Settings
In both plugins, the needed settings can be found under the Setup tab.
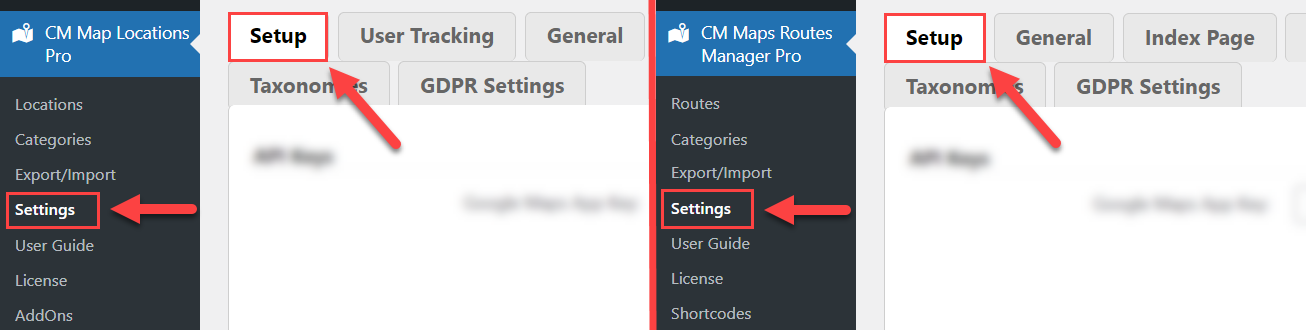
Under the API Keys section you can find the following settings:
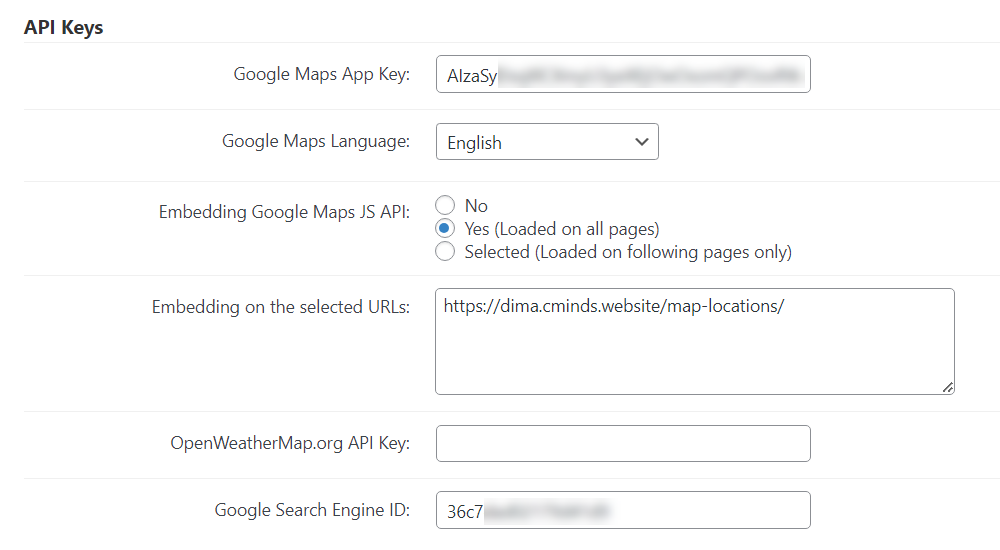
- Google Maps App Key - Add here the Google Maps API key.
- Google Maps Language - Choose the language of Google Maps on your site. Note: this option was introduced in version 4.9.1 of WordPress Travel Map plugin and in version 3.0.8 of WordPress Interactive Map plugin.
- Embedding Google Maps JS API - Here you can choose if to embed Google Maps JS API on pages of your site. Available options are:
- No
- Yes (Loaded on all pages)
-
Selected (Loaded on following pages only)
Note: this option was introduced in version 5.0.4 of WordPress Travel Map plugin and in version 3.2.8 of WordPress Interactive Map plugin.
- Embedding on the selected URLs - Define here the list of URLs where to embed Google Maps JS API in case if you chose Selected in the previous option. Add each URL to a separate line. Note: this option was introduced in version 5.0.4 of WordPress Travel Map plugin and in version 3.2.8 of WordPress Interactive Map plugin.
- OpenWeatherMap.org API Key - Add here the relevant API Key.
- Google Search Engine ID - Enter the Google Search Engine ID. This is required for the Load Google Images feature. Note: this option was introduced in version 5.1.2 of WordPress Travel Map plugin and in version 3.3.5 of WordPress Interactive Map plugin.
^Go back to the Table of Contents
Google API Keys - Obtaining the Google API Key
To obtain the Google API key, follow these steps:
- Head to the Google Developers webpage.
- Log in to your Google account.
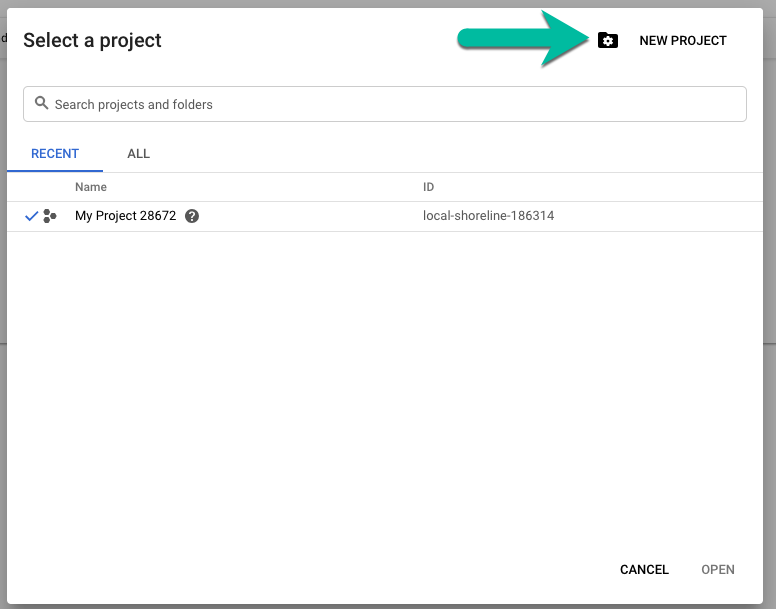
- Go to your project or create a new one.

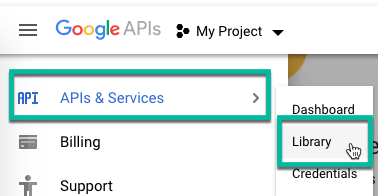
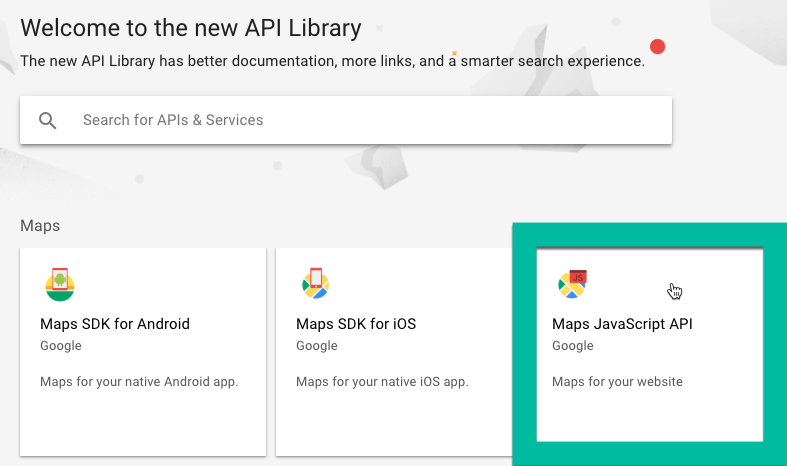
- Head to APIs & Services and then Library:
- Select one of the API from the list. You may have to search for it by using the search bar.
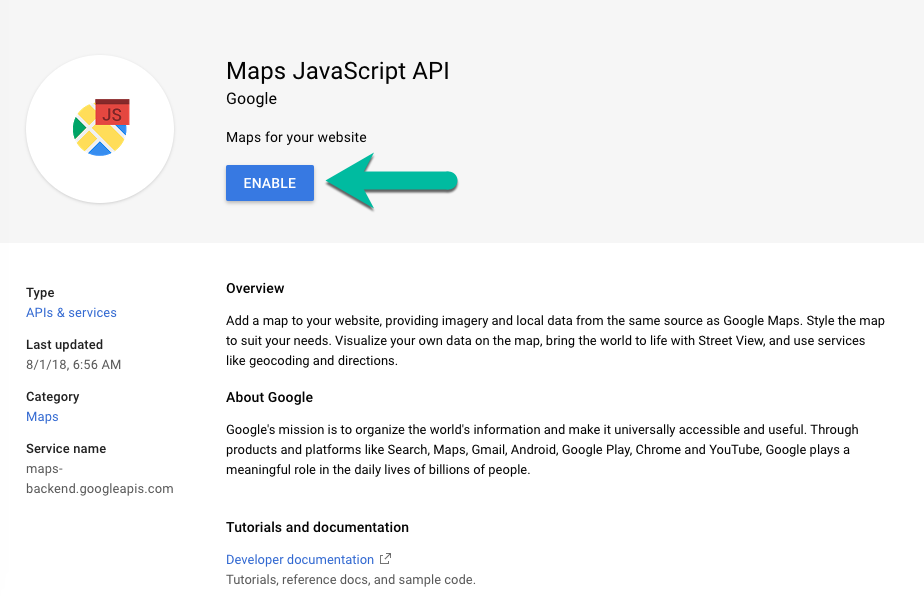
- This page is important. In it, you can enable the API and find resources about it. Click Enable:
- Repeat steps 5 and 6 for all the API keys you need to enable. Review which keys are necessary.
-
After you have enabled all the API Keys, activate the sidebar menu and click on Credentials. You will find the API key there, ready to be copied and pasted into the plugin's settings.
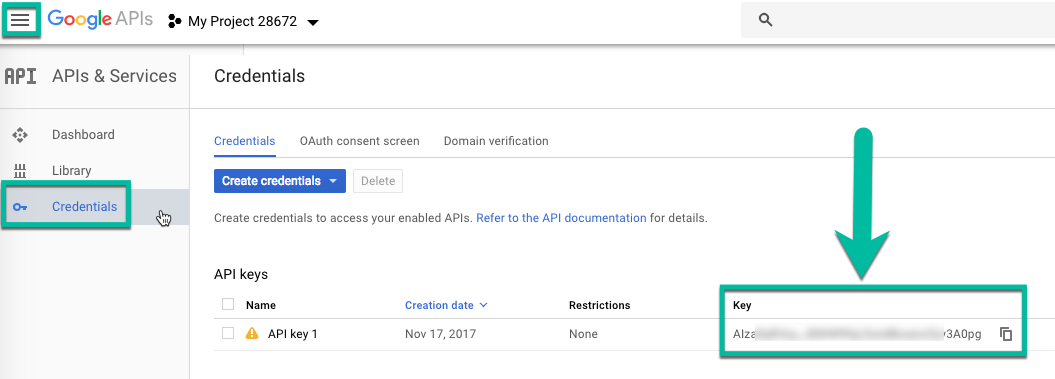
Where to find the generated API key

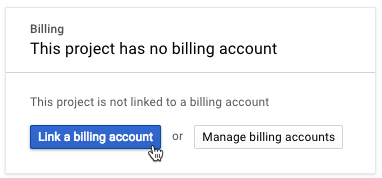
Billing
Also, if you have still not enabled billing, you can do so by activating the sidebar menu and then selecting Billing.
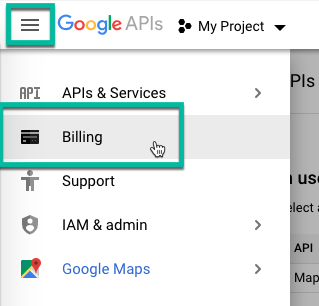
Then click Link a billing account and follow the steps.
ZIP Search Feature - Google API - Disabling Restrictions
The ZIP Search feature requires the "Application restrictions" to be disabled for all Google APIs.
Step-by-step
-
Access the Google Maps section of the Google APIs. You can access it directly through the link https://console.developers.google.com/google/maps-apis/api-list

List of enabled APIs - Make sure you selected the right project
- Click Details to edit the setting of that API (you will do this for every API)
-
Click Credentials and then the pencil icon.

Editing API -
Under Application restrictions, make sure "None" is selected.

Disabling API restrictions - Repeat steps 4 and 5 for all API services


^Go back to the Table of Contents
OpenWeatherMap API key
If you want to add weather details to your maps, you will need to enter an OpenWeatherMap.org API Key the same way you did the Google Maps one. To obtain the API key create an account and login to http://home.openweathermap.org/.
Step-by-step
This guide will walk you through the process while creating a new account.
-
Click Create an Account.

Creating new account -
Enter your information

Entering needed information -
Choose a purpose for which you will use the maps

Defining the usage purpose -
Click API keys and you will have access to the key. According to OpenWeatherMap, it can take a couple of hours for the key to be active.

Copying the generated API key


^Go back to the Table of Contents
Google Search Engine ID
To obtain the Google Search Engine ID, follow these steps:
Navigate to https://programmablesearchengine.google.com/
Click Get started and login using you Google account.

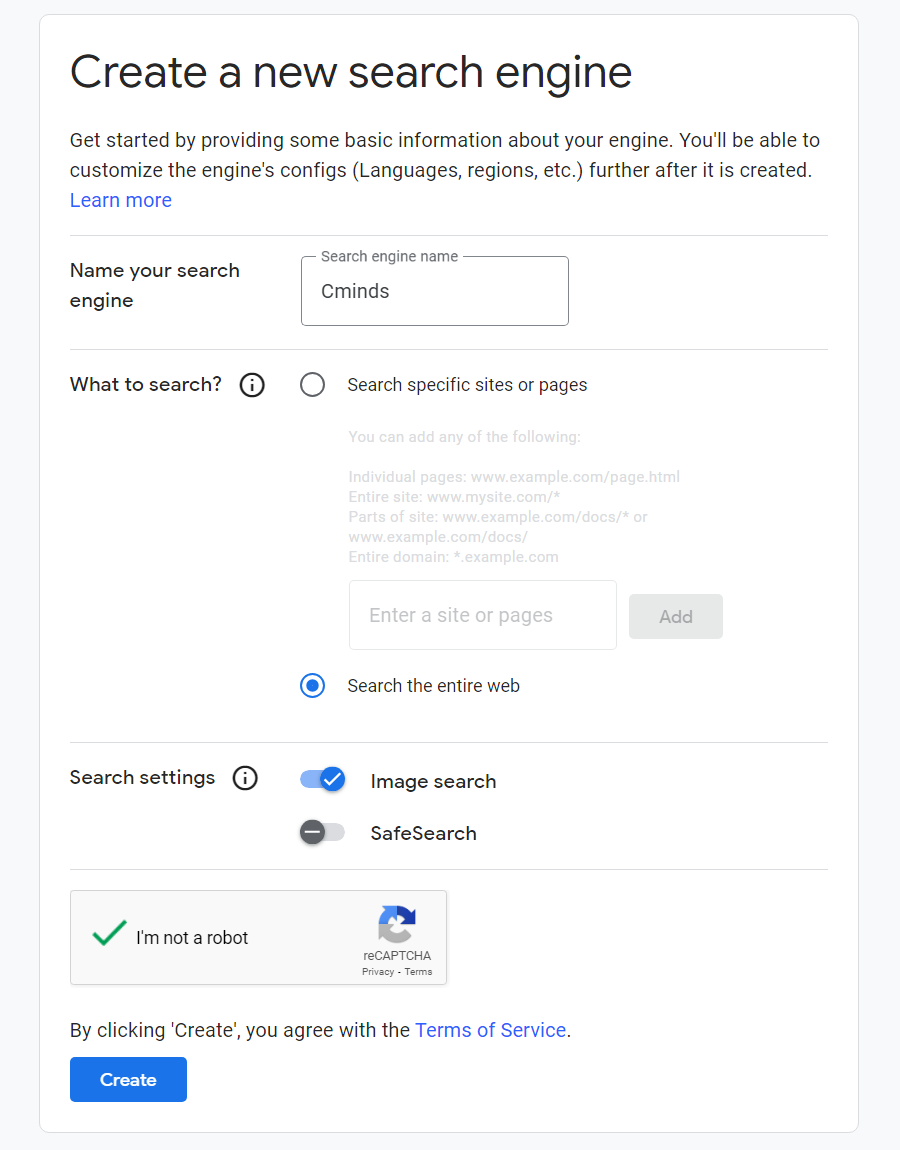
There will be a form where you need to fill the following:
- Fill the field Name your search engine.
- Choose to Search the entire web.
- Choose the option Image search.
- Complete reCaptcha and click Create.
When the search engine is created, click the button Customize.
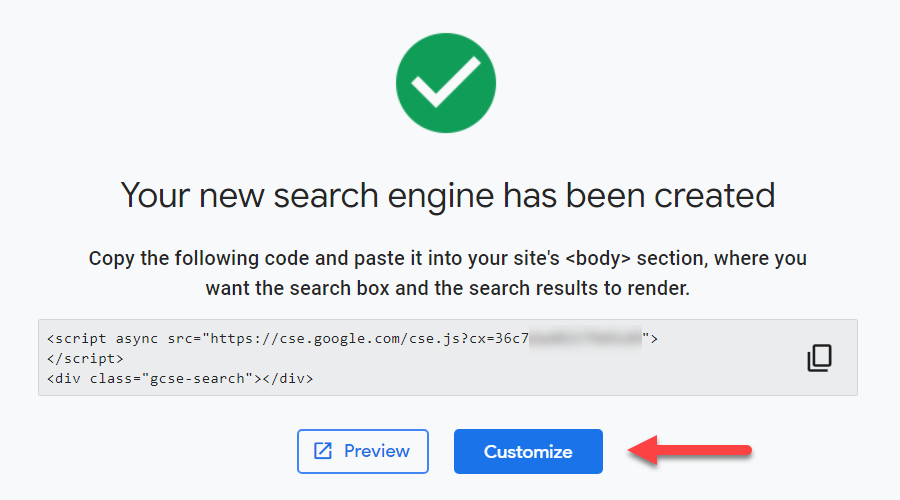
There you can find the Search engine ID which you can copy and then paste in the plugin settings.

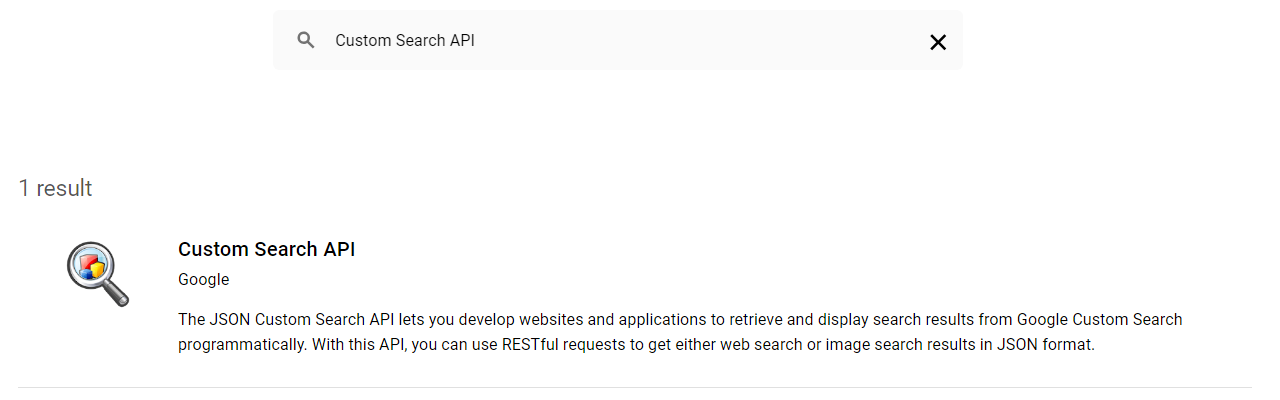
Enabling Custom Search API Library
Next that is needed for Search Engine ID, you need to get back to your API Library in your Google Console Dashboard, then find and enable Custom Search API.
 |
More information about the WordPress Interactive Map Plugin Other WordPress products can be found at CreativeMinds WordPress Store |
 |
Let us know how we can Improve this Product Documentation Page To open a Support Ticket visit our support center |