WordPress Ad Server (CMAC) - Use Case - How to Create Popup Ads On Server and Show On Client Sites
Use Case - How to Create Popup Ads On Server and Show On Client Sites
Note: This guide requires:
- WordPress Ad Server - This document uses version 2.1.5.
- Ad Changer Client - This document uses version 1.9.7.
Introduction
WordPress Ad Server is a WordPress ads plugin, designed to simplify the use and management of advertising campaigns on multiple WordPress websites.
It’s especially useful for companies that have several advertisement platforms on WordPress and therefore requires a banner server that manages and rotates banners from numerous advertising campaigns.
Use Case Front-End
Displaying randomly popup ads on the client site:
Use Case Assumptions
In this example use case guide we will consider how to manage Popup ad campaigns with one WordPress Ad Server.
The WordPress Ad Server is an advertising plugin that consists of two separate kinds of plugins: WordPress Ad Server and Ad Changer Client - never install both of them together on the same site.
We assume that you've already bought the plugins, but not installed them yet.
It follows:
Installing the Plugin
The process is the same for all CM plugins and add-ons.

- Download the plugin from your customer dashboard.
- Log in to WordPress and navigate to the WordPress Admin → Plugins settings.
- Click on Add New.
- Activate it and add the license.
Learn more: Getting Started - Plugin Overview
Setting up
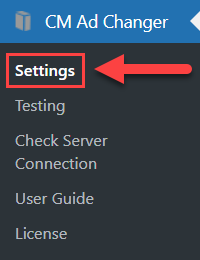
When the WordPress Ad Server is installed, first we need to configure it. Navigate to Admin Dashboard → Ad Changer → Settings.

There you can find a few tabs with settings. Let's consider them step-by-step.
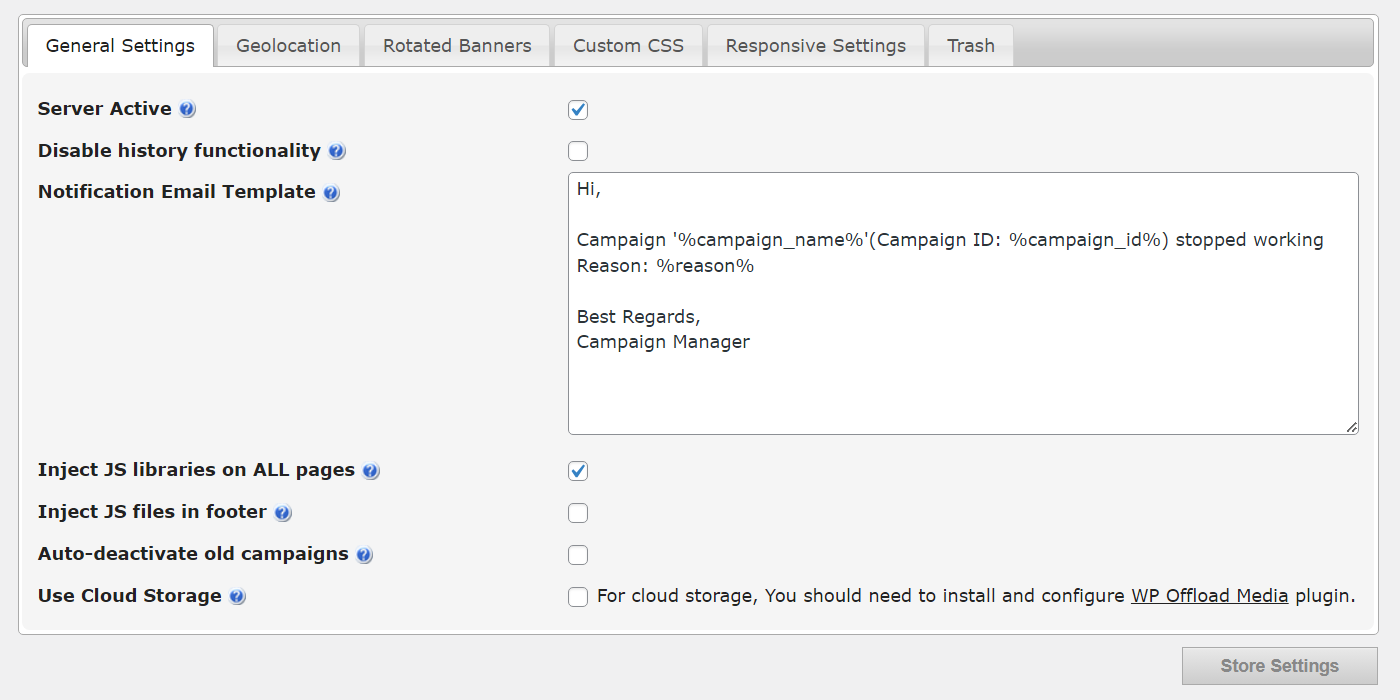
General Settings
First tab is General Settings. The options are:
- Server Active - Defines whether the Ad Changer Server is active to accept banner requests.
- Disable history functionality - Turn off data collection on clicks, impressions, etc. This may help improve speed and performance.
- Notification Email Template - Customize the text of email notification that will be sent if the ad campaign stops working on some reason.
- Inject JS libraries on ALL pages / in footer - Use in cases when the shortcodes are inserted within customized themes or other plugins. This is needed when banners are not showing up as expected on your pages, or when you are adding custom CSS styles to override settings and to better accommodate placement of the banner.
- Auto-deactivate old campaigns - Campaigns with selected activity dates, will be automatically deactivated when the last date passes.
- Use Cloud Storage - If the option is enabled, then images that you upload to ad campaigns will be stored on the cloud server. Important: This option demands another plugin for work - you need to install and configure WP Offload Media.
Geolocation
Second tab is Geolocation.
Server Geolocation Settings are implemented with an API developed by http://ipinfodb.com/, which can be used to show the geographical location of users accessing your ads in reports and statistics. Note: it doesn't let you define campaigns by geolocation.

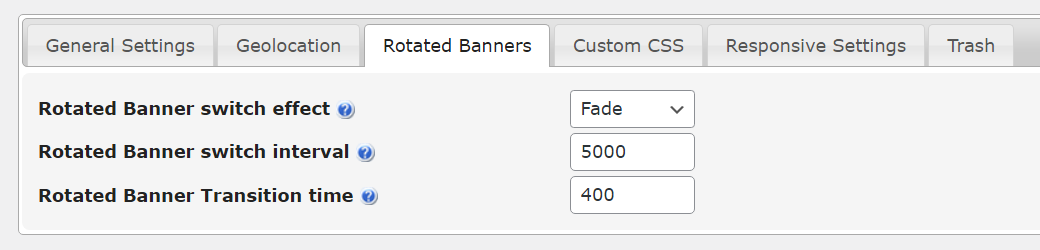
Rotated Banners
Third tab is Rotated Banners. The options are:
- Rotated Banner switch effect - Select switch effect between Fade or Slide.
- Rotated Banner switch interval - Set the time when one banner changes another one (in milliseconds).
- Rotated Banner Transition time - Set the time that transition takes (in milliseconds).
This setting is client-based, therefore it can be changed on the client side while running the same campaign.
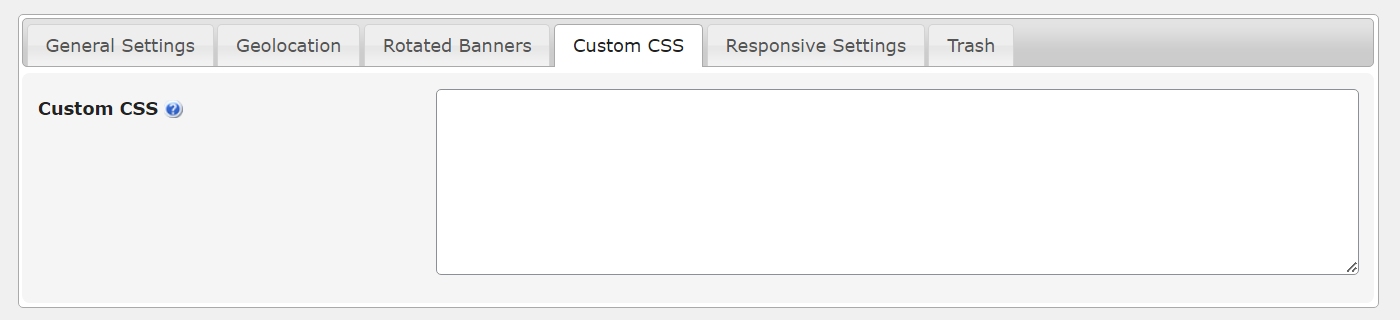
Custom CSS
Fourth tab is Custom CSS.
Server Custom CSS settings relate to the layout of banners on your website. This setting overrides the style.css parameters in your WordPress theme.
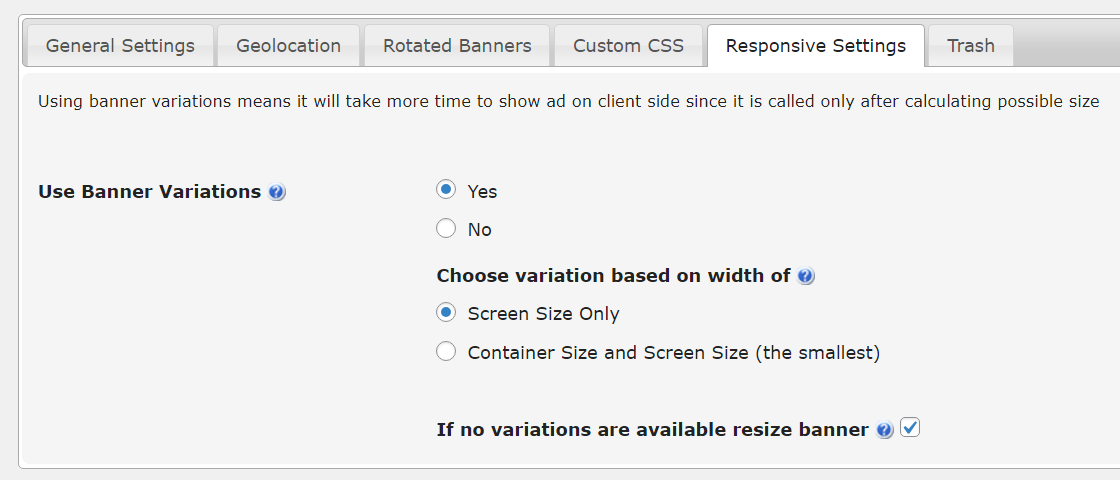
Responsive Settings
Fifth tab is Responsive Settings.
Responsive banners resize according to the screen size of the device being used. With responsive banners, your ads are always appropriately resized according to device requirements.
The options are:
- Use Banner Variations - When this option is active, the banner variation means that only banners with appropriate dimensions will be displayed. This allows client sites to ask the server for the correct banner size, and display it according to current browser settings. Browser settings are detected before the server shows the banner, this sometimes means that there is a slight delay in loading the banner before it is served to the client.
- Choose variation based on width of - Whether or not specific banners are chosen is primarily determined by the device screen width, or by the width of the page or div element which contains the banner shortcode or widget.
- If no variations are available resize banner - Allow the plugin to Resize Banners in cases when the appropriate variation for a particular device is not available. This option allows responsive banners to accommodate for a foreseen circumstance when all the banner variations are larger than expected, or for when no other defined banner variation exists.
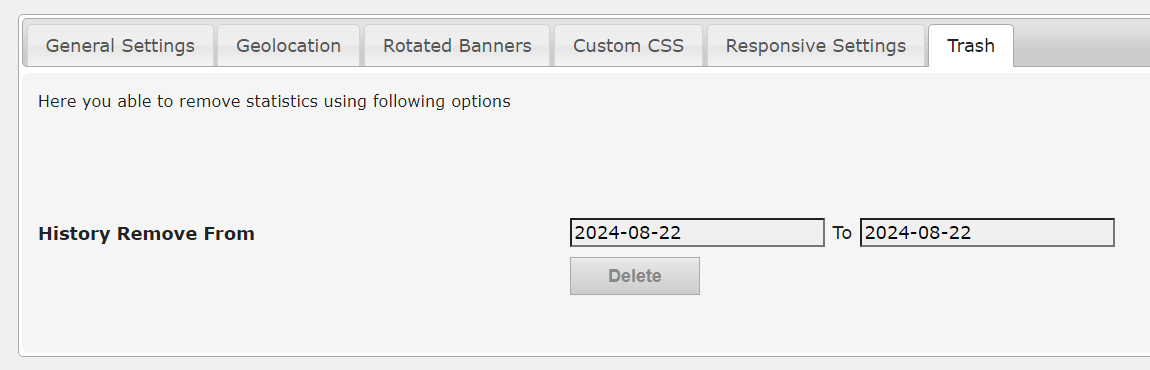
Trash
Last tab is Trash. Here the admin can remove statistics between two set dates.
When everything is configured, don't forget to click the button Store Settings.

Creating a Campaign
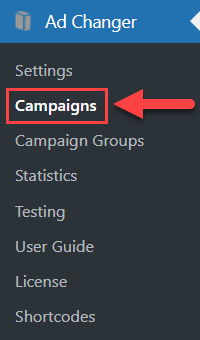
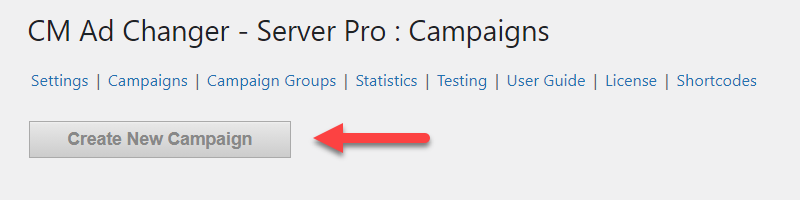
Now it's time to create our first ad campaign. Navigate to Admin Dashboard → Ad Changer → Campaigns.
Click the button Create New Campaign at the top right of the page.
There you can see the form with three tabs that will help you to create a campaign. Let's consider them all one by one.
Campaign Settings
First tab is Campaign Settings.

The options are:
-
Campaign Name - Write here a name for the ad campaign. It will not be displayed on the front-end, this is for internal use only.

Adding campaign name Once the campaign is created, a new option Campaign ID will appear under the Campaign name. Here you can find the number - this is ID you need to use in the shortcode for placing the campaign in posts/pages.

Campaign ID -
Campaign Group - You can add the campaign to the group. Learn more about creating Campaign Groups.

Choosing campaign group -
Campaign Weight - Determine the campaign importance and priority in relation to all other campaigns to determine how often it should appear. This is important when used within a group of campaigns. Learn more about weight: WordPress Ad Server (CMAC) - Campaigns - How Weight Works (Chance of Display)

Setting up the campaign weight -
Campaign Notes - You can write here a note. It will not be displayed on the Front-end, it's for internal use only.

Adding campaign notes -
Target URL - Target URL for all banners in the campaign. Target URL specified in banner will override this. Note: clicks are counted only if it is set.

Adding target URL -
Open target URL in new window - If enabled, the target URL will open in a new window after clicking on it.

Opening target URL in new window -
Campaign Status - Disable this option if you want to stop the campaign.

Choosing campaign status -
Campaign Manager Email - Write here the manager's email of the campaign. The notifications will be sent on that address.

Adding campaign manager email -
Send Notifications - Enable it to send email notifications to campaign manager when the campaign stops.

Enabling notifications -
Max Impressions - Set the number how many times the campaign should be shown before it stops. Set to 0 to make it unlimited.

Limiting impressions -
Max Clicks - Set the number how many times the campaign can be clicked before it stops. Set to 0 to make it unlimited.

Limiting clicks -
Approved Domains - Add a list of domains from which banners can be requested and served. Leaving this list empty will allow all Ad Changer clients to request the banners randomly without defined preferences.

Adding approved domains -
Advertisers - Name of the advertiser. You can choose it from the dropdown list of advertisers that you already added, or create the new one.

Choosing advertiser -
Custom JS - This field is designed to add custom JS codes into the page where the campaign ads are being displayed. The JavaScript code executes immediately, so it hooks into the banner click, shows modal, show alert, call AJAX, etc.

Adding custom JS


Campaign Banners
Second tab is Campaign Banners.

The options are:
- Campaign Type - Pick the type of advertisements in the current campaign from the list of currently supported types. Learn more about these campaign types:
- Image Banners
- HTML Ads
- AdSense Campaign
- Video Campaign
- Floating Banner - In this case we choose this option to display popup ad.
-

Choosing campaign type
- Display Method - Choose the method of displaying the banners:
- Selected Banner - Will only serve selected banner
-
Random Banner - Will serve random banner based on banner weight

Choosing display method
-
Width - Set this up to limit the width of the div containing the HTML ads. You may specify both number and the unit e.g. 100px 50% 30em (no unit defaults to "px").

Setting up the width -
Height - Set this up to limit the height of the div containing the HTML ads. You may specify both number and the unit e.g. 100px 50% 30em (no unit defaults to "px").

Setting up the height -
Background Color - Background of floating banner HTML content.

Setting up the background color -
Delay To Show - Define how long to wait from the moment page loads until the ad is displayed.

Setting up the delay to show -
Banner Shape - Define round or sharp edges for your ad.

Setting up the banner shape - Show Effect - Choose the animation effect in which the pop-up banner should appear on the screen.
- Pop In
- Rotate In
- Tada
- Shake
- Swing
- Flash
-
Bounce

Setting up the show effect
-
Interval - Define whether to display the ad every time a page loads or only on the first-page load.

Setting up the interval -
Banner Underlay Type - Shadow color of the underlying background under the banner.

Setting up the banner underlay type -
AdDesigner - Design your ads in real-time via the ad changer server. Learn more about AdDesigner.

Button to open AdDesigner -
Campaign HTML Ads - Design a pop-up banner in using an HTML editor. Let's consider it more detailed below.

Button for creating a banner


Campaign HTML Ads
Clicking on Add HTML Banner will show the form where you can edit the ad content. Let's add here an image.
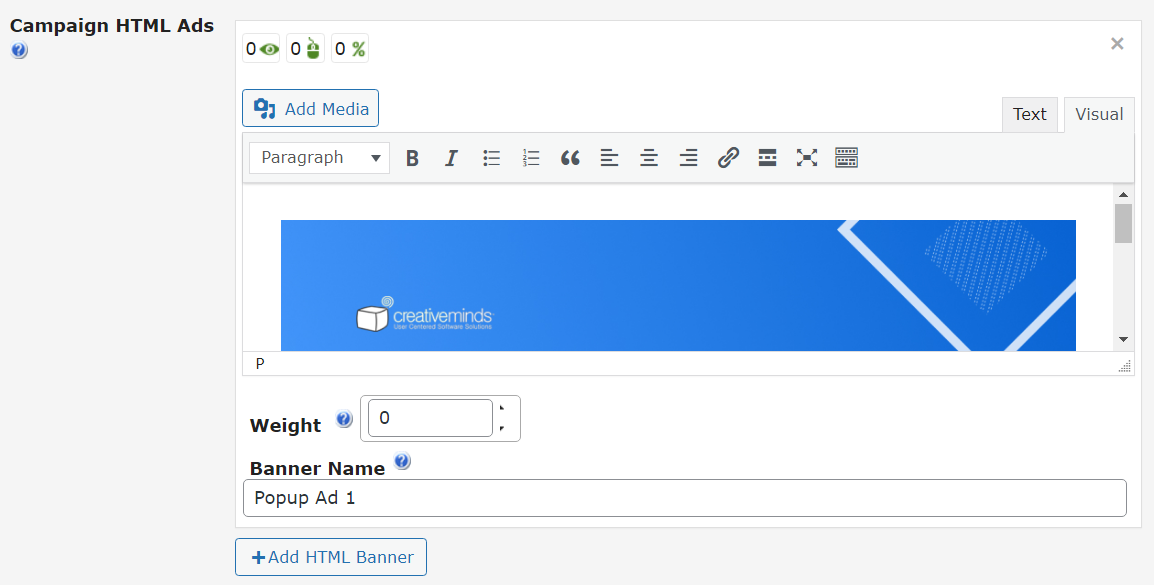
It has 2 more options:
- Weight - If you use a few banners that are supposed to be shown randomly when loading the page, the weight value allows you to define which banner be displayed more often. The value can be from 0 to 100.
- Banner Name - You can add here the banner name which will help to distinguish it when viewing the statistics.
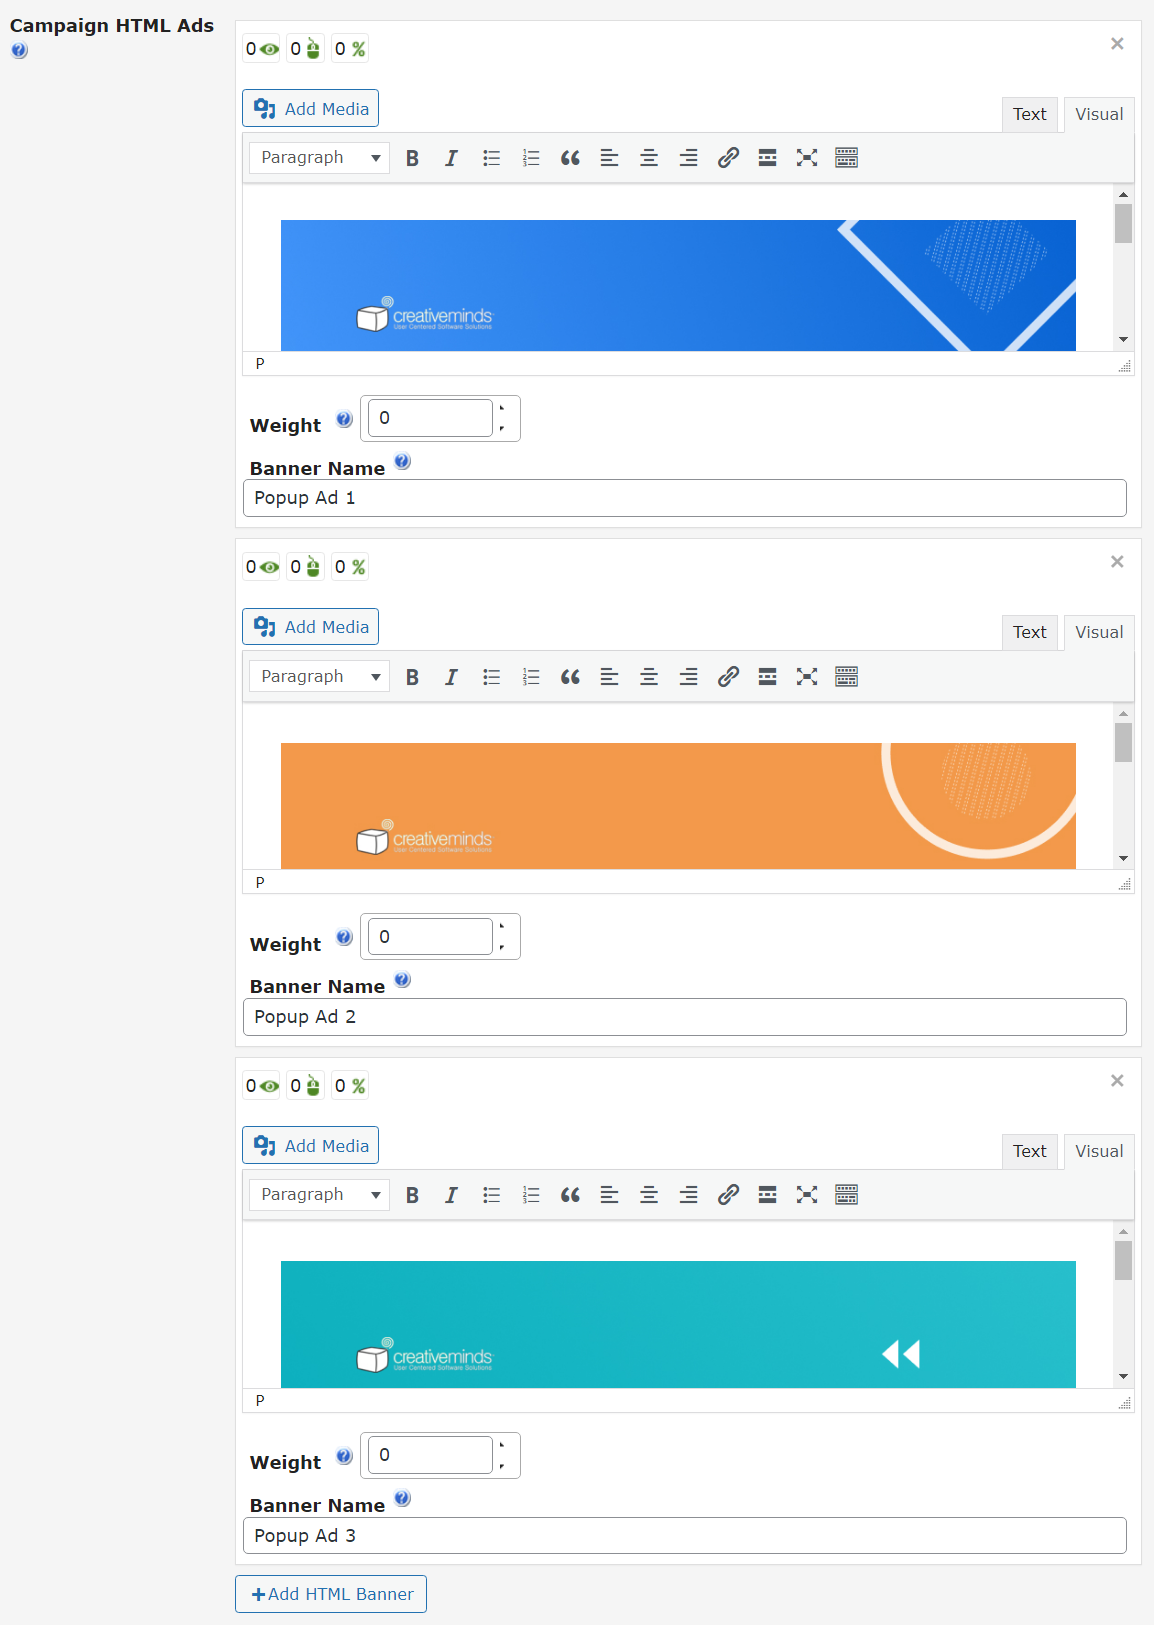
The same way we can add multiple ad banners:
Campaign Activity Settings
Third tab is Campaign Activity Settings.

The options are:
-
Activity Dates - Define here the activity dates and time for the campaign. You can add lots of periods - depends on how many of them you need. To add a new period just click on the blue "+" icon.

Setting up activity dates -
Activity Days - Choose the activity days of the week for the campaign by checking the boxes.

Setting up activity days


At the end, when everything is configured, click the Add button to save the campaign.

Setting Up a Campaign for Client
When the creating of the campaign is done, we need to place it in the post or page.
First install the Ad Changer Client plugin to another website (remember: don't install the WordPress Ad Server and Ad Changer Client on the same website). We need to configure it for the beginning. Navigate to Admin Dashboard → CM Ad Changer → Settings.
The settings here look very similar to the server side plugins settings. The tabs Custom CSS, Rotated Banners and Responsive Settings work the same and override the settings defined by the server side. A little difference is in General Settings tab:
- Client Active - Defines whether the Ad Changer Client is active. If it's disabled, no banners will be displayed by Ad Changer Client.
- Disable sending history data - Turn off data sending on clicks, impressions, etc. This may help improve speed and performance.
- Ad Server domain - This specifies the URL address of the server plugin installation (i.e. where the WordPress Ad Server is installed).
- Server cache update timeout - Time in minutes between another call to the site where the WordPress Ad Sever is installed for fresh data. Default value is 30.
- Flush cache now - Check it to get fresh date from the server now.
-
Inject JavaScript libraries on ALL pages / in footer – Use in cases when the shortcodes are inserted within customized themes or other plugins. This is needed when banners are not showing up as expected on your pages or also when adding custom CSS styles to override settings and to better accommodate placement of the banner.

General client plugin settings

After configuring the settings click the button Store Settings to save the changes.
Now we can place the ad campaign to the post or page, or anywhere else on the website. The following steps are the same for the site, where the WordPress Ad Server is installed, and for the site where Ad Changer Client is installed.
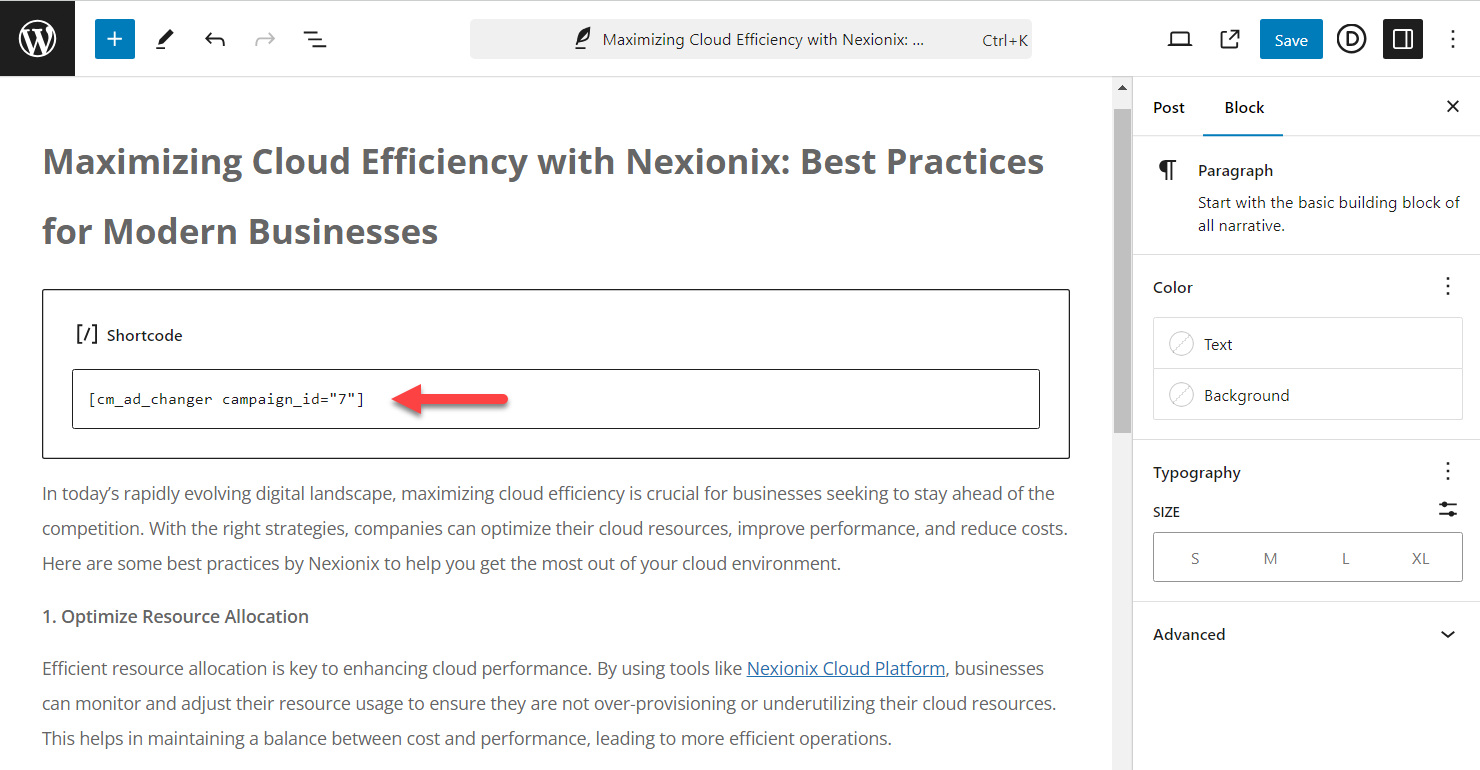
Every created campaign has it's ID. To place the campaign anywhere we need to use the shortcode [cm_ad_changer] with the parameter campaign_id="X", where X is campaign's ID. In our case the shortcode will look like this [cm_ad_changer campaign_id="7"]
You can insert it using the tools of usual post/page editor or using the tools of your theme.
Now we can check the result on the front-end.
End Result
Following instructions found in the plugin and guides, you should be able to manage Popup ad campaigns with one WordPress Ad Server.
Use Case Front-End
Displaying randomly popup ads on the client site:
 |
More information about the WordPress Ad Server plugin Other WordPress products can be found at CreativeMinds WordPress Store |
 |
Let us know how we can Improve this Product Documentation Page To open a Support Ticket visit our support center |