WordPress Ad Server (CMAC) - Client - Using Shortcodes
Using Shortcodes
TIP: What Are Shortcodes
Shortcodes add dynamic content to your site via a small piece of code.
Learn more: Shortcodes - How To Use | Finding ID of Post/Page/Other Content
In order to display WordPress ad campaigns from the server site, WordPress Ad Server makes use of shortcodes, which can be modified and inserted on any page, post and widget area.
To add one or more WordPress Ad campaigns to a post or page, you’ll need to use a shortcode. To add different parameters to your shortcode, use the following additions, which are also listed in the plugin settings panel.
Navigate to the Admin Dashboard → Ad-Changer → Settings.

Click on the Show/Hide to show shortcode attributes.
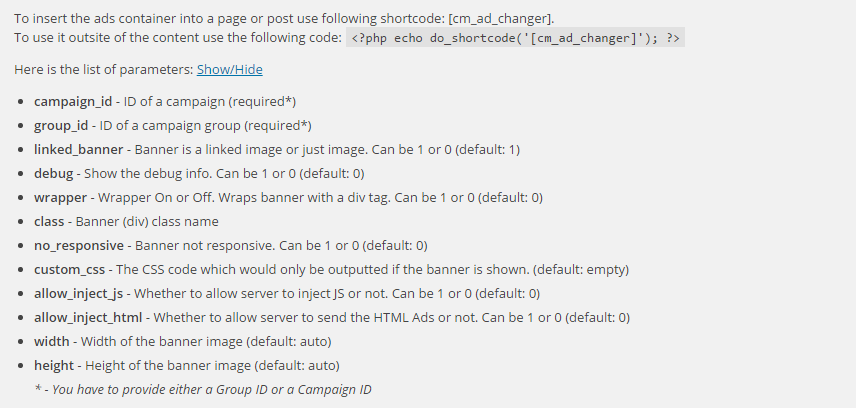
- Shortcode: [cm_ad_changer]
- Shortcode attributes:
- campaign_id - ID of a campaign (required).
- group_id - ID of a campaign group (required) Note: if both group_id and campaign_id are added, only group_id will be used.
- linked_banner - Banner is a linked image or just an image. Can be 1 or 0 (default: 1).
- debug - Show the debug info. Can be 1 or 0 (default: 0).
- wrapper - Wrapper On or Off. Wraps banner with a div tag. Can be 1 or 0 (default: 0).
- class - Banner (div) class name.
- no_responsive - Banner not responsive. Can be 1 or 0 (default: 0).
- custom_css - The CSS code which would only be outputted if the banner is shown. (default: empty).
- allow_inject_js - Whether to allow the server to inject JS or not. Can be 1 or 0 (default: 0).
- allow_inject_html - Whether to allow the server to send the HTML Ads or not. Can be 1 or 0 (default: 0).
- width - Width of the banner image (default: auto).
- height - Height of the banner image (default: auto).
View this example to see how the wrapper works.
 |
More information about the WordPress Ad Server plugin Other WordPress products can be found at CreativeMinds WordPress Store |
 |
Let us know how we can Improve this Product Documentation Page To open a Support Ticket visit our support center |