WordPress Ad Server (CMAC) - Campaigns - Setting up a Campaign
Setting up a Campaign
To add a campaign in the WordPress Ad Server plugin settings, navigate to Admin Panel → Ad Changer → Campaigns.
Click on Create new Campaign.

Here's what you will see:
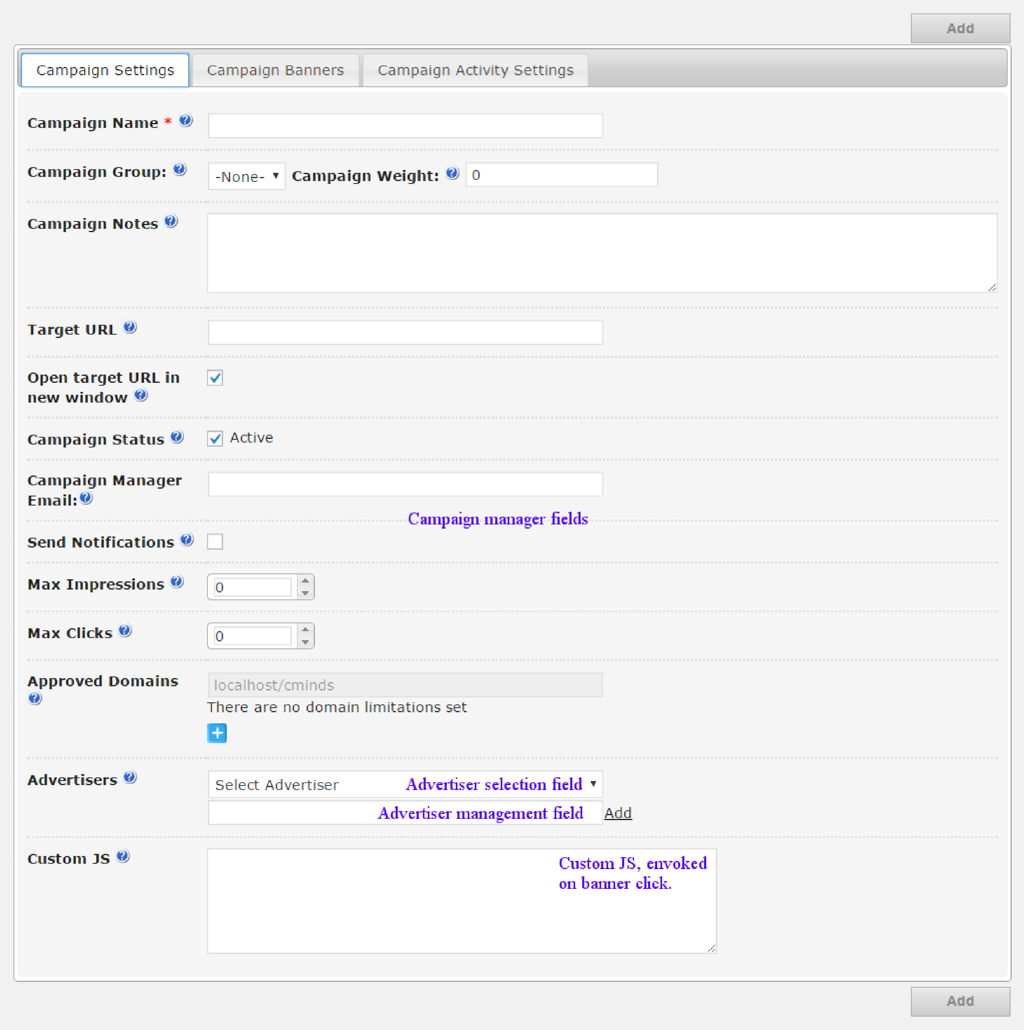
Campaign Settings consist of descriptive settings (Title and Notes) and functional settings. First, enter the campaign name. The other fields, unless specified, will instead use default values.
Here are some of the options explained:
-
Campaign Weight – Determine the campaign importance and priority in relation to all other campaigns to determine how often it should appear. This is important when used within a group of campaigns.
Learn more about weight: WordPress Ad Server (CMAC) - Campaigns - How Weight Works (Chance of Display)
- Approved domains – Add a list of domains from which banners can be requested and served. Leaving this list empty will allow all Ad Changer clients to request the banners randomly without defined preferences.
- Custom JavaScript – This field is designed to add custom JS codes into the page where the campaign ads are being displayed. The JavaScript code executes immediately, so it hooks into the banner click, shows modal, show alert, call AJAX, etc.
Managing Campaign Banners
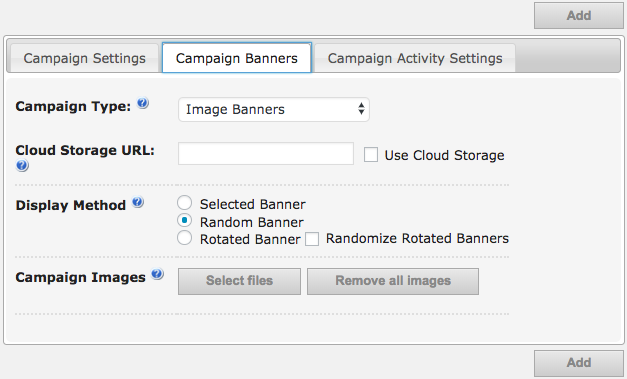
- Campaign type – Pick the type of advertisements in the current campaign from the list of currently supported types:
- Image Banners
- Flyin Bottom Page Banner
- Floating Banner
- Video Campaign
- AdSense Campaign
- HTML Ads
-
Cloud Storage – Select if you wish to use cloud hosting for storing all your banner images. Insert the URL received from your cloud storage provider. Once this option is chosen, you can manually upload and link the files to your website from the cloud. This can improve your server performance and reduce the load.
Note that, if cloud storage is enabled, banners count on the campaign list will show "N/A". This happens because the plugin cannot access and count banners from outside the storage server. Check the documentation on the campaign list.
- Campaign Images – Upload images and define their name, title, alt, target url, and weight attributes. Click on add variations to insert different sizes for the displaying the banner on mobile devices, or have them resized automatically by selecting the option in the general server settings.
AdSense Support
In the WordPress Ad Server version 1.2.5, we’ve introduced Google AdSense support. Now, instead of displaying banners, you can provide your AdSense publisher ID and the ID of your AdSense advertisement to be displayed.
Currently, only the 300×250 ads are supported, but we plan to further develop AdSense support in future releases.
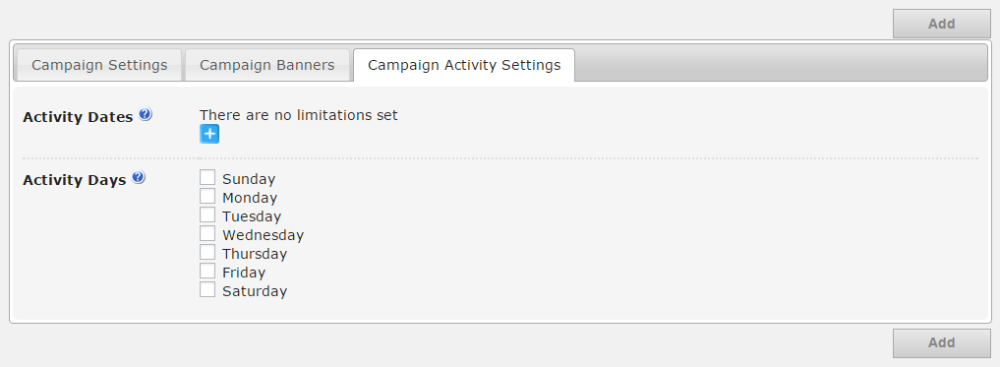
Ad Campaign Activity Settings
Activity settings are where you define when exactly your WordPress ad campaign will be displayed. You can determine the campaign’s start and finish dates, as well as select what hours of the day and on what days of the week it would be available.
 |
More information about the WordPress Ad Server plugin Other WordPress products can be found at CreativeMinds WordPress Store |
 |
Let us know how we can Improve this Product Documentation Page To open a Support Ticket visit our support center |