WordPress Member Directory Plugin (CMED) + Community + Payments - Use Case - Charging Users For Suggesting Experts in Directory
Use Case - Charging Users For Suggesting Experts in Directory
Note: This guide covers features from
- Pro version of WordPress Member Directory plugin - This document uses version 1.5.7
- Community Add-on - To allow users to suggest experts
- Payment Add-on - To charge users for suggesting experts
- Easy Digital Downloads (EDD) / WooCommerce - To connect payment gateways such as PayPal or Stripe
Optional:
- WooCommerce Subscriptions - To allow automatic renewals. Only works with WooCommerce
The WordPress Member Directory plugin allows you to create a listing of experts, or members.
By combining the Payments add-on and Community add-on, you can charge users for creating and managing said profiles.
Video
Use Case Front-End
Quick Read: How It Works
- Users must be logged-in to pay for creating an expert profile.
- Easy Digital Downloads and WooCommerce provide the platform needed to collect payments for listings.
- You can choose for how long users will have access to the creation and editing feature. When this period ends, you can send automatic email reminders. In order to charge them automatically, you require WooCommerce and WooCommerce Subscriptions.
- Once a non-logged in user submits a new expert, their email is saved and a password is sent once the listing is approved. This process does not create a WP user associated with the listing. However, it still allows user to update their expert listing information without having any access to the WP dashboard or having any other privileges related to WP users.
Use Case Assumptions
In this example use case guide, we'll cover how to charge users for suggesting and claiming experts in your Expert Directory.
We consider that you have already bought the addon, but not installed it.
Learn The Basics
This documentation follows:
- Preparation
- Setting up payments
- Selecting Payment Plugin (WooCommerce / EDD)
- Requiring users to pay for adding experts
- Requiring users to pay for claim listings
- Requiring users to pay for renewing listings
- Notifying users
- User View - Suggesting and Paying
- Admin View - Tracking payments
- Extra
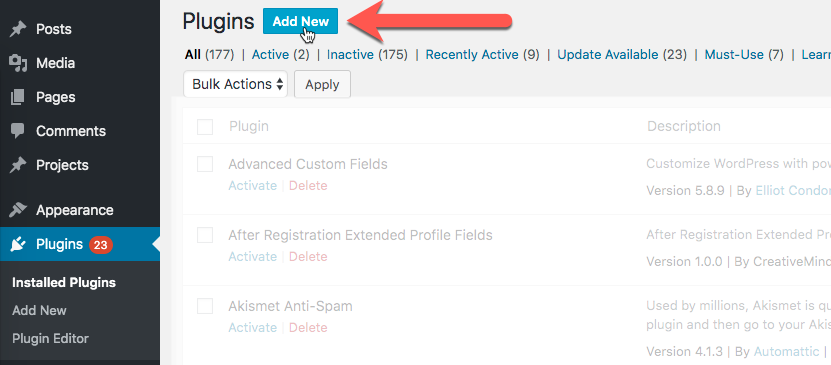
Installing the Addon
The process is the same for all CM plugins and addons.

- Download the plugin from your customer dashboard.
- Log in to WordPress and navigate to the WordPress Admin → Plugins settings.
- Click on Add New.
- Activate it and add the license.
Installing Payment Plugin (EDD or WooCommerce)
You must choose between either Easy Digital Downloads or WooCommerce.
EDD or WooCommerce? No Difference For The Plugin
As far as Answers Payment is concerned, there is almost no difference between using either EDD or WooCommerce.
Both are free and provide free and paid add-ons. The only difference is that you can offer automatic renewals by using WooCommerce and its paid WooCommerce Subscriptions add-on
Head to Admin Dashboard → Plugins → Installed Plugins and click Add New.
Search for either Easy Digital Downloads or WooCommerce and install it.
Configure Payment Plugins
Don't forget to configure the payment plugin! This way you can connect it to payment providers such as PayPal or credit card companies.
Important
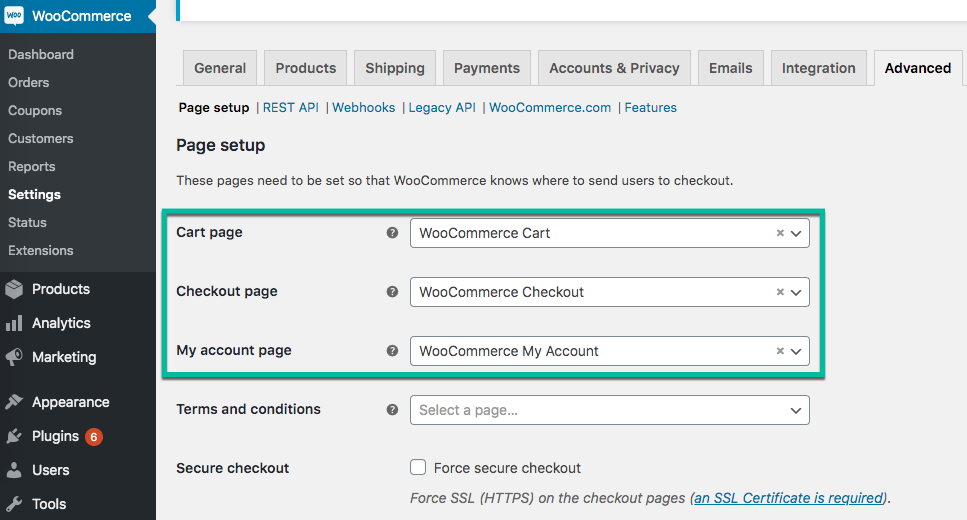
Be sure that your payment plugin has the correct Checkout and Cart pages set up. They are used by the plugin.
External Resources
Setting up a Directory
First, set up the directory if you haven't done so. Since this article focuses on the payment use case, it mostly list the relevant documentation for this first step.
Learn The Basics
WordPress Member Directory Plugin (CMED) - Use Case - Creating an Expert Directory From Scratch
Checking Settings
Navigate to Admin Dashboard → CM Expert Directory → Settings. Then click on the General tab.

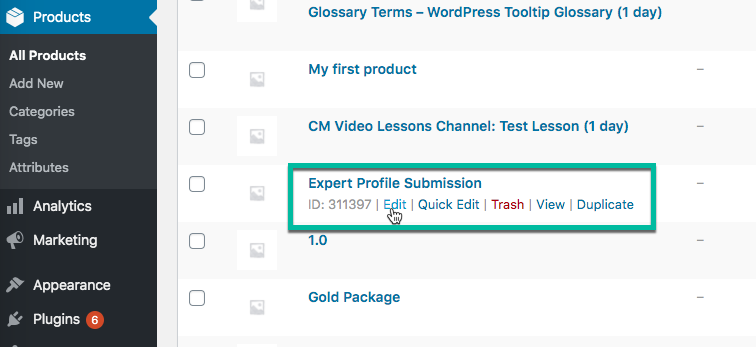
Adding First Expert
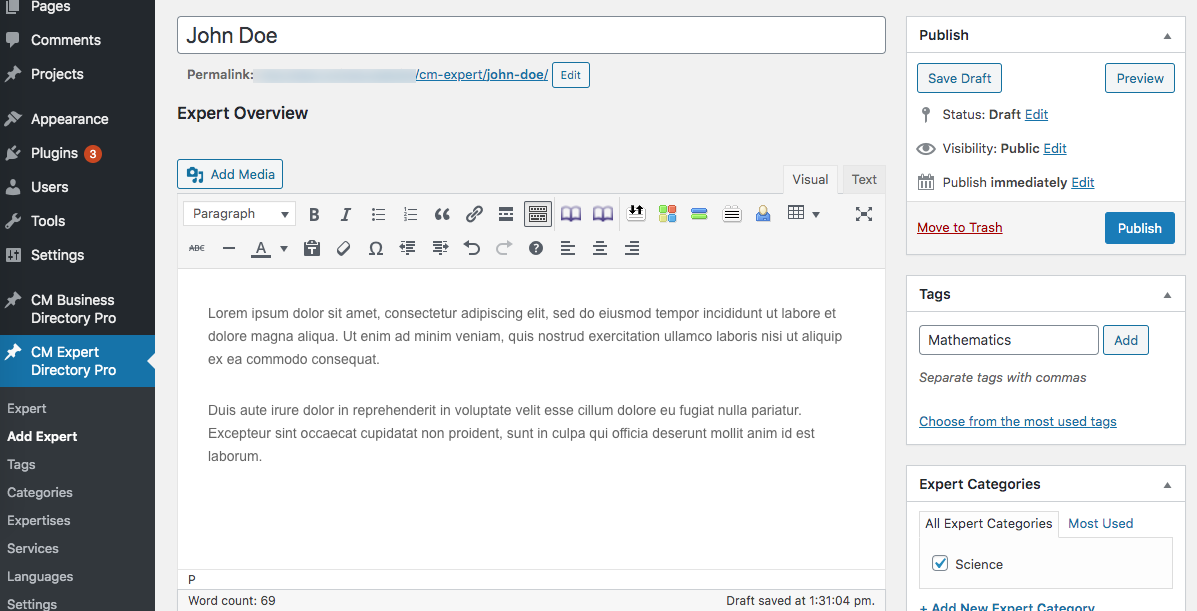
Head to CM Expert Directory Pro → Add Expert.
Learn more: WordPress Member Directory Plugin (CMED) - Getting Started - Add Expert
Useful Guides
- General - Set general options for plugin.
- Advertisement - Choose if you want to display advertisements and if so, place ads content in the fields.
- API Settings - Twitter and Google settings.
- Expert Page - Settings for Expert Page. More about Additional Taxonomy, Additional Links/Fields and Star Rating
- Directory Index Page - General settings for Directory Index page and also Filters
- Directory Appearance - Settings for 3 different views: Directory, Tiles and List view.
- Custom CSS - Option to apply your own custom css styles.
- Labels - Customize plugin labels to your needs.
- See Shortcodes list to know what you can change to adjust plugin to your needs.
Letting Users Suggest Experts
Now, allow users to suggest experts. We'll also skim through this part to focus on payments.
Learn The Basics
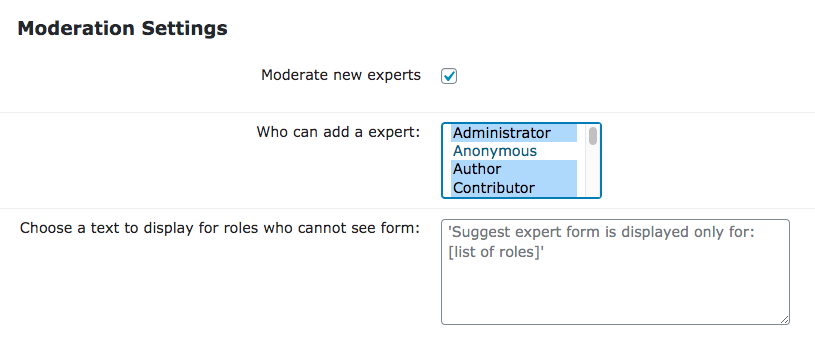
Navigate to the Admin Dashboard → CM Expert Directory → Settings.
Under moderation settings, choose the roles who can add experts.
Setting Up Payments
Now that the directory is set up and users can suggest experts, it's time to configure payments.
1) Selecting Payment Plugin (WooCommerce / EDD)
Let's start by telling the plugin which payment platform we are using (EDD or WooCommerce). Navigate to CM Expert Directory Pro → Settings → Payments tab → Payment System Selection section.
Only one system can be enabled at a time. In the example below, it's WooCommerce.
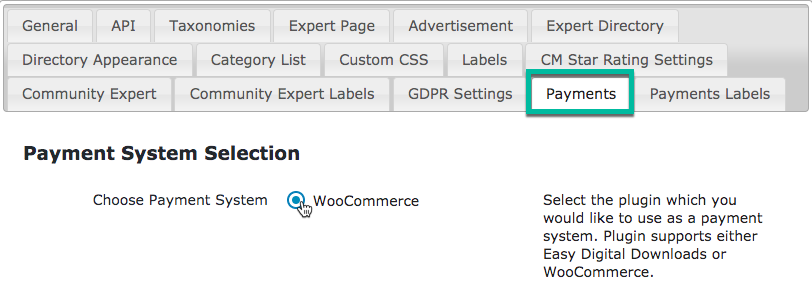
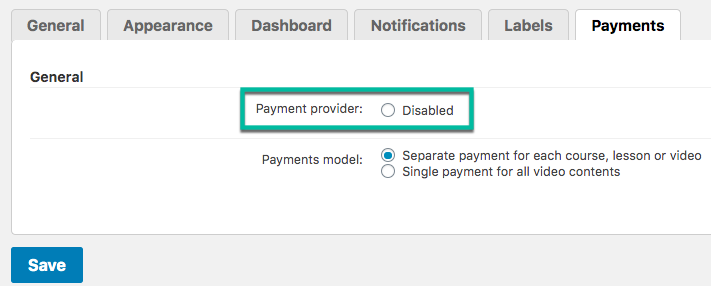
TIP: Section is Empty?
Note that in the same screen we can choose the Payment provider: EDD or WooCommerce. If only "disabled" is shown, it means these payment plugins are not activated.
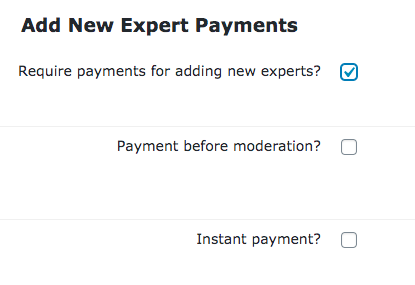
2) Requiring Users to Pay for Adding Experts
Now onto the most important settings of the use case.
Head to the Add New Expert Payments section and check "Require payments for adding new experts". We'll talk about the two other options in a moment.
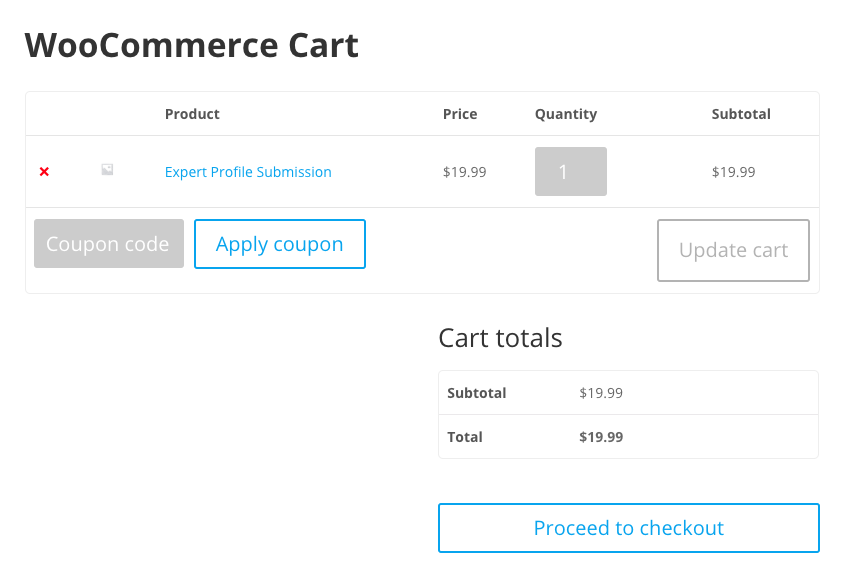
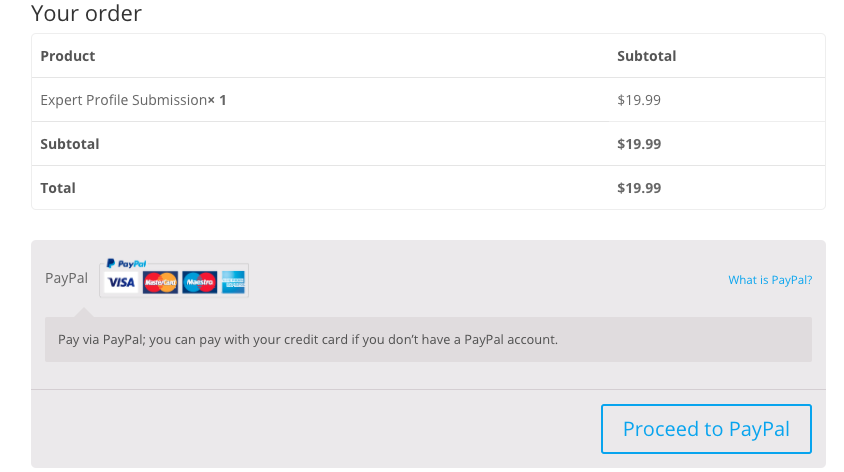
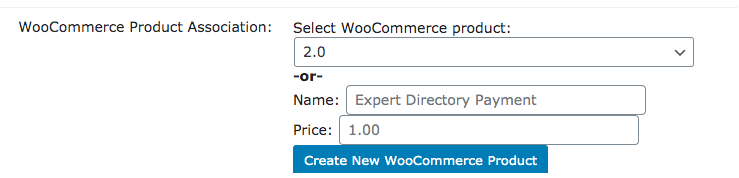
Then, create a new WooCommerce/EDD product or assign the purchase with an existing product.
3) Requiring Users to Pay for Claiming Experts
You can also charge users for claiming experts. Turn on the option in the Claim Expert Payments section.
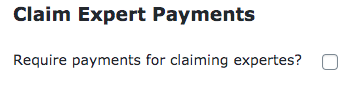
And then set the product, like in the other payment settings.
User Perspective
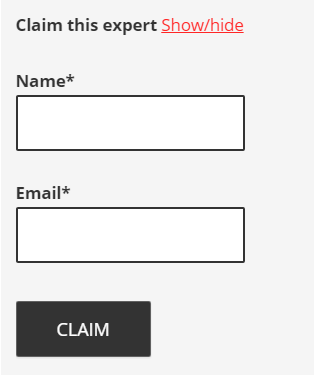
Users can claim existing expert listings by going to the listing page and clicking show by Claim this Expert.
They only need to add their name and valid email address to receive an email notification with instructions on how to pay for the listing.
Example
The rest of the process is the same as Suggesting an Expert:
- User gets an e-mail.
- Pays.
- Gets another e-mail with an activation link.
Learn more: CM Expert Directory Community (CMEDC) - How To - Let Users/Visitors Claim Experts
TIP: This Defines How Much Users Will Pay to Submit Expert
Technically speaking, users will buy a WooCommerce/EDD product that will grant them access.
4) Requiring Users to Pay for Renewing Experts
Automatic Reminder vs Automatic Renewal
There's an important distinction.
- This Add-on- When the subscription expires, it is not automatically renewed. Instead, the user receives a configurable notification.
- This Add-on + WooCommerce Subscriptions - When the subscription expires, it is automatically renewed and the user is billed. Learn more below.
If this feature is enabled, users must pay in order for their listing to remain visible to the public in the directory. This is also controlled by a (separate) product in EDD / WooCommerce to allow the payment.
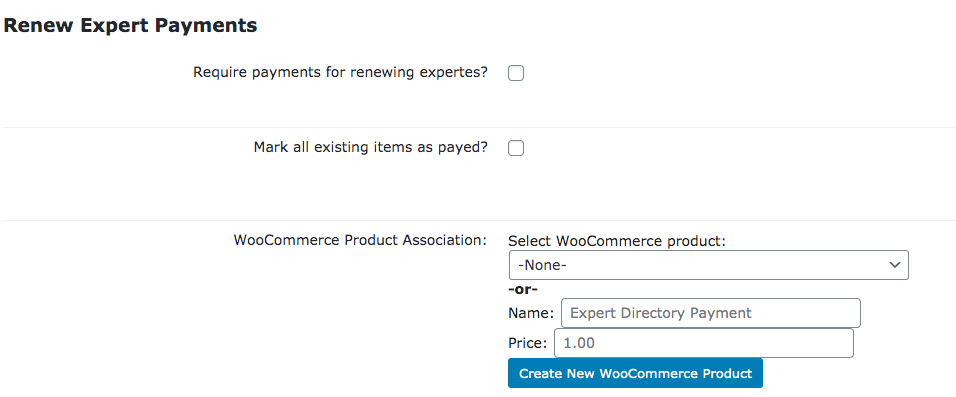
One huge difference are the time renewal and notification settings.
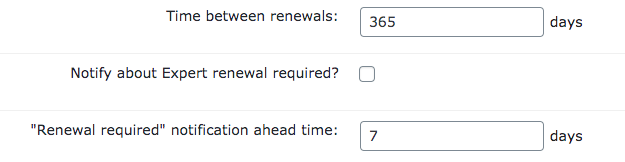
You can choose after how many days the listing will expire, requiring the user to make a new payment. Also, you can enable a notification to remind the user about the upcoming expiration.
Automatic Renewals With WooCommerce Subscription
If you have WooCommerce Subscription set up, you can enable automatic renewals. To do so, edit the WooCommerce product attached to the expert submission payment.
In the settings, change Product Type from "Simple product" to "Simple subscription". Then choose the price and period of expiration.

Frontend
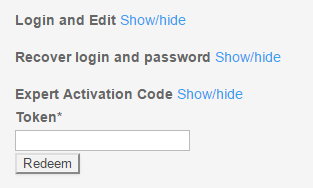
After making the payment, the user receives a link to re-activate the listing or a unique activation code to paste on the expert activation page.
5) Notifying Users
In each of the options above (payment for adding, renewing and claiming), there are also options to customize the email sent to experts. They follow the same pattern, with some changes:
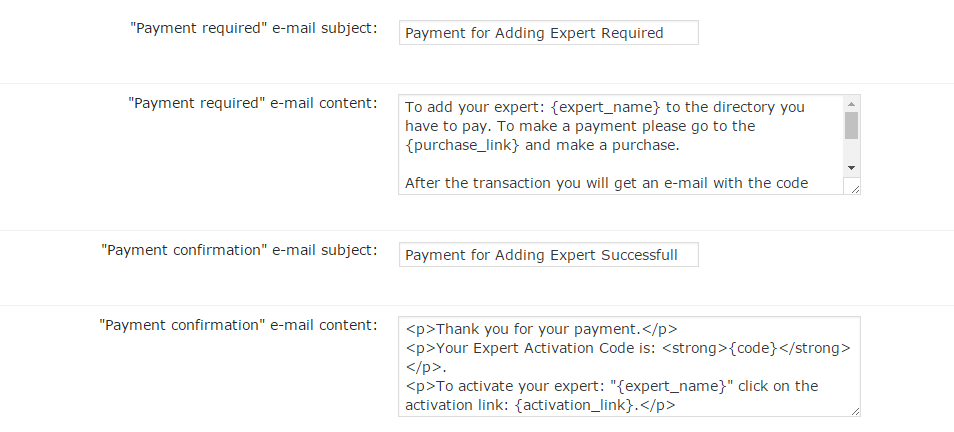
- "Payment required" e-mail - Check the box to enable the notification.
- "Payment required" e-mail subject - Topic of the e-mail being sent after the user adds the expert and it passes the moderation.
- "Payment required" e-mail content - Content of the e-mail being sent after the user adds the expert and it passes the moderation. You can use the following placeholders: {expert_name} {purchase_link} {activation_page}
- "Payment confirmation" e-mail subject - Topic of the e-mail being sent after the user purchases the product required to add a new expert.
- "Payment confirmation" e-mail content - Content of the e-mail being sent after the user purchases the product required to add a new expert. You can use the following placeholders: {expert_name} {code} {activation_link}
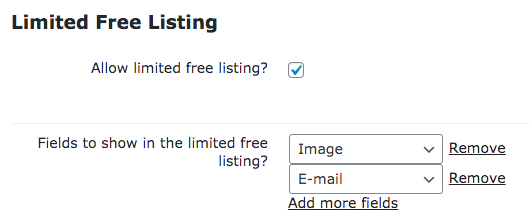
TIP 1: Limited Free Listings
In the Limited Free Listing section, you can enable exactly that - and then choose which fields will be available in these limited profiles.
TIP 2: Want Different Expert Levels?
You can achieve levels such as Basic, Pro and VIP with the Member Directory Levels Add-On for WordPress.
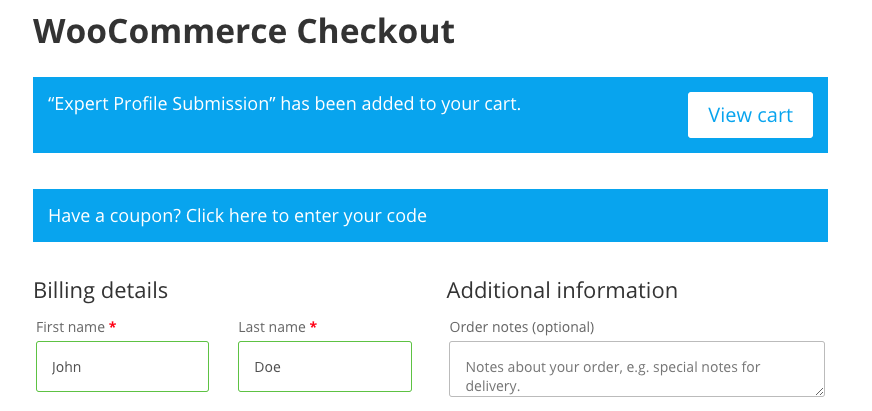
User View - Suggesting and Paying
With Payments, the user submission process is the same as in Community.
How To Edit Form
We explain in details how to configure the submission form in the documentation WordPress Member Directory Plugin + Community (CMEDC) - Use Case - Creating Directory Where Users Suggest Experts.
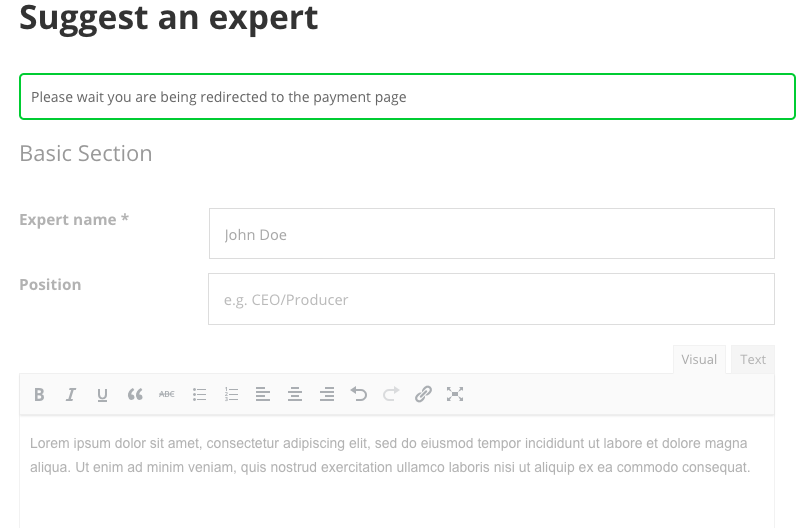
But now, when users complete the expert submission form, they will see a different message than usual. The message will mention payment.
Example
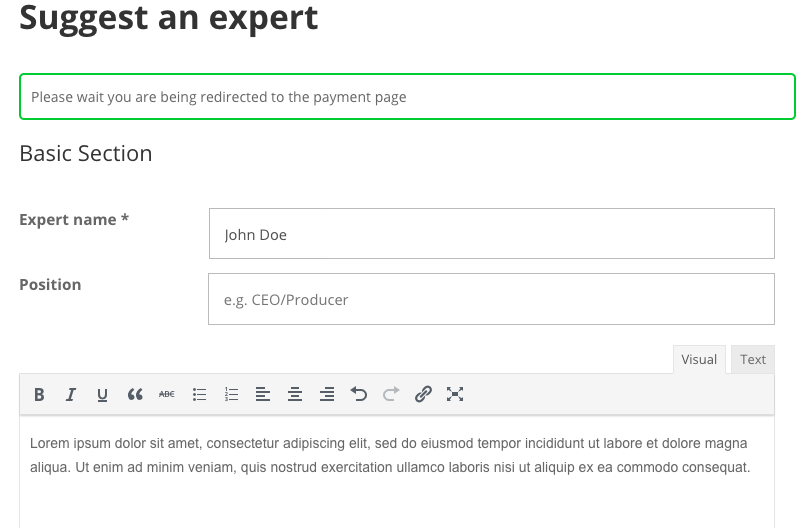
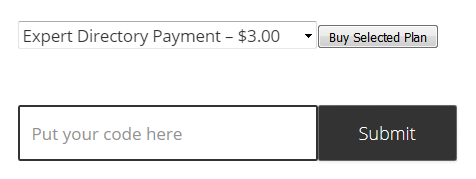
What Happens On Submission?
You can control what will happen from the settings, section Add New Expert Payments.
- Payment before moderation - If enabled, users will be able to pay even before the admin moderates the submission.
- Instant payment - If enabled, the user will be redirected to checkout immediately after filling the form. Requires Payment before moderation to be enabled.
Checkout Page Example
TIP: Translate Interface
The add-on has over some labels that can be translated. These can be found in Settings → Payments Labels.
It's an opportunity to change the interface to your site's language and/or style
Admin View - Tracking Payments
The add-on offers a simple way to track every payment made.
Definition
Expert tokens are fully automated, virtual items created by the Add-On to keep track of all of the actions requiring payments.
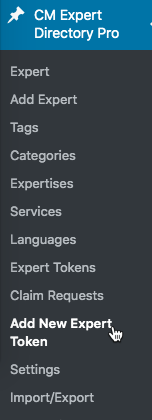
Accessing Token Dashboard
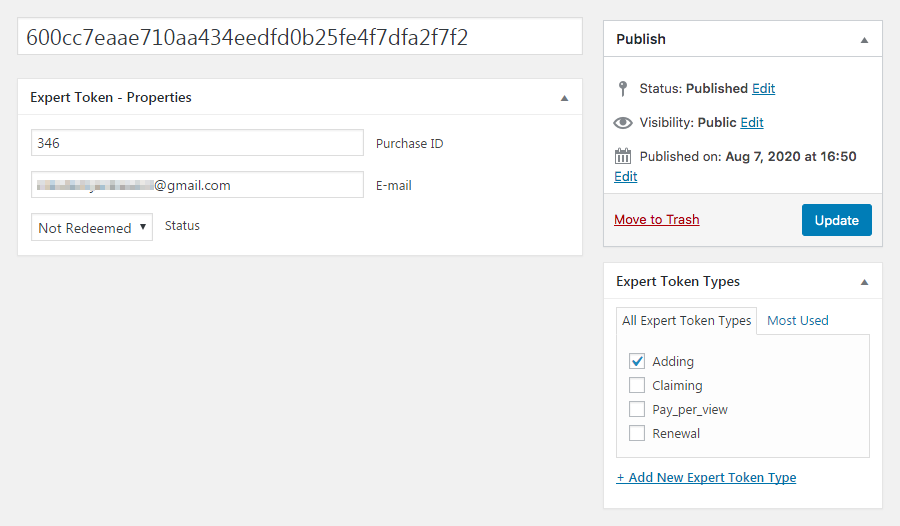
Navigate to the Admin Dashboard → CM Expert Directory → Expert Tokens.
This screen will show a table with all recorded payments, along with their attached information.
Example
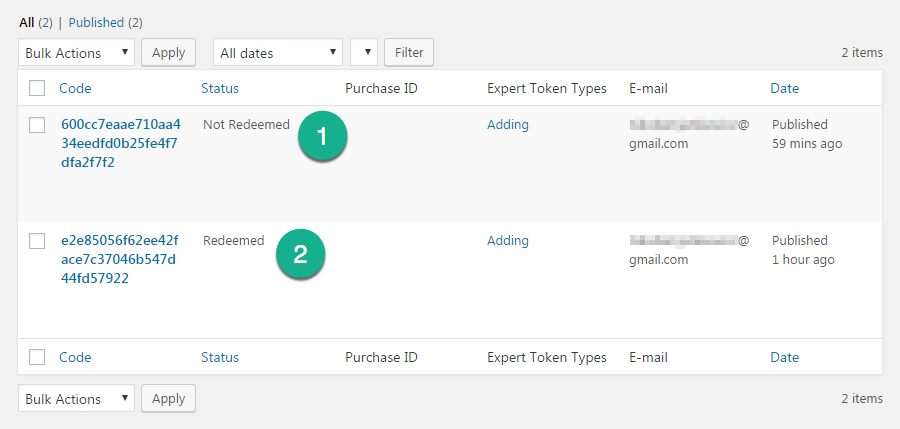
- Token before clicking on activation link from e-mail.
- Token after clicking on activation link from e-mail.
Editing a Token
Clicking on the code directs you to the token edit page, where you can change its status manually. Also here values like Purchase ID, email and types can be changed.
TIP: Activating and Deactivating, Changing Permissions
You can also activate or deactivate each token or edit its token type. Meaning the user will gain or lose permission to:
- Adding - Add experts
- Claiming - Claim Experts
- Pay_per_view - Access experts
Extra - Pay-Per-View: Charging Users For Accessing Profile
When Pay-per-view is enabled, users will be asked to buy a plan when trying to access an expert profile. Select the plan and click Buy Selected Plan.
Example
Settings
To enable this feature, head to the Payments tab → Pay-per-view section.
First, click on "Turn on the Pay-per-view".
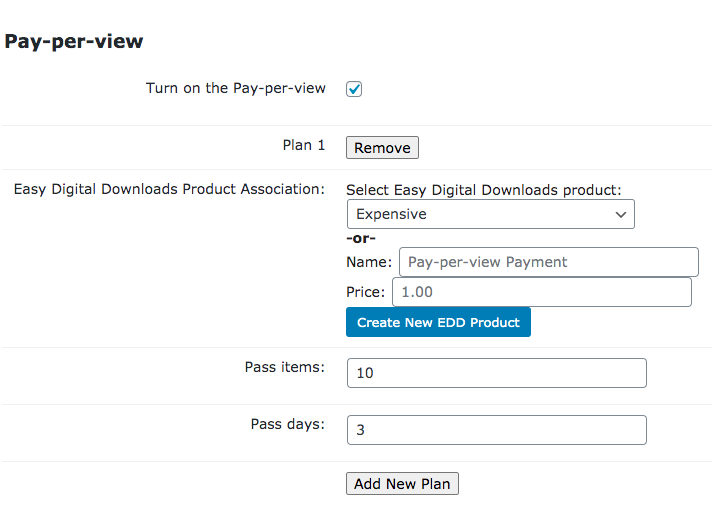
Then configure:
- Easy Digital Downloads / WooCommerce Product Association - Select an existing EDD / WooCommerce Product which will be required to use the "Pay-per-view" functionality. Or choose the name and price and click "Create New EDD / WooCommerce Product" to automatically create and assign a new Product.
- Pass items - Number of possible items to be displayed after purchasing a single "pass".
- Pass days - Number of days the purchased "pass" is valid after it's activated.
Learn more: CM Expert Directory Payments (CMED Add-On) - How To - Charge Users To See Experts (Pay Per View)
Recap
With all steps completed, your directory will require payments before user submissions are online.
Use Case Front-End
 |
Get more information about the CM Expert Directory Payments WordPress Add-on Find other WordPress products at the CreativeMinds WordPress Store |
 |
Let us know how we can Improve this Product Documentation Page Visit our support center to open a Support Ticket |