WordPress Invitation Code - Creating Codes - Single Code
Creating a Single Code
Creating Codes
Overview | Single Code | Multiple Codes | From CSV File
To create codes using WordPress Invitation Code plugin, head to Admin Dashboard → Invitation Code Content Access → Invitation codes.
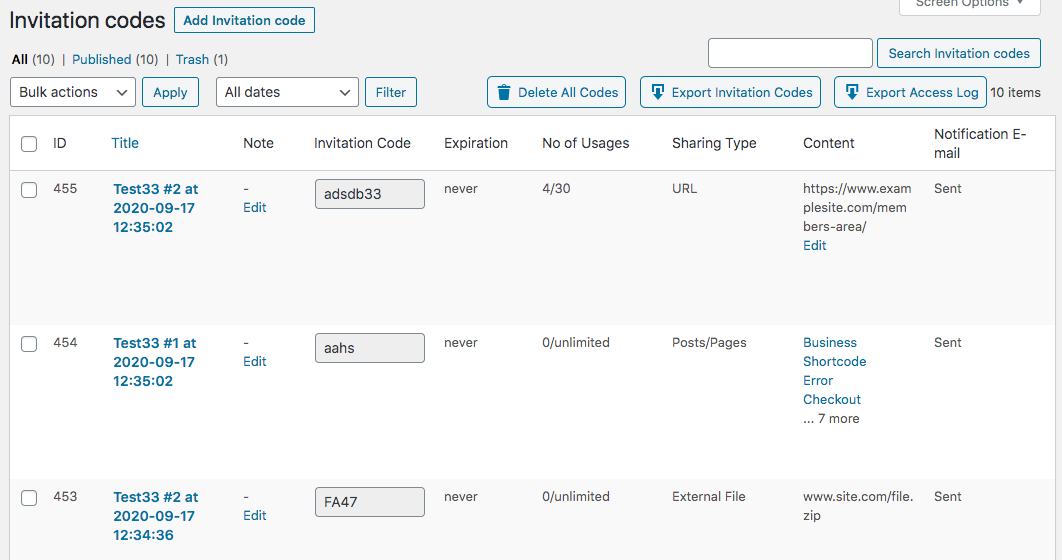
In this screen you can manage your current codes and add new ones.
Click Add Invitation Code to generate a single code.
TIP: Updating Codes
Every code can be fully edited after it's been created. That means editing expiration date, sharing type, and even the code itself!
While this can be useful, be mindful not to invalidate your codes.
Add Invitation Code (Single)
This method generates a single invitation code.
Invitation Code
- Code - Write down the code (or generate a random one).
- Note - Add a note (can only be seen by the admin).
- Hint/question - Write a hint or question where the correct answer is the code. Users will be granted access after they input the correct answer.
Email validation and 2FA verification
Note: this section was introduced in version 1.7.2 and appears only when the 2FA verification feature is enabled in general plugin settings. Learn more about this feature in the following use case guide: WordPress Invitation Code - Use Case - How To Require 2FA Verification When Using Invitation Codes

- Exclude validation email - Enable this option if you want to disable email validation. It means that the user can use any email, not the one that is assigned to the code. But if next option is disabled, the user still will have to go through the 2FA verification process. So, in result it helps to confirm that the user uses his real email address and not just a random one.
- Exclude 2FA email verification - This option can be enabled only if the previous one is enabled. If this option is enabled, the user will still have to enter the email address, but will not have to go through the process of 2FA verification process.
What is Restricted
Choose between a code type.
- URL/Pages - Set the allowed URLs/Pages (use * to indicate any subdirectory. For instance, example.com/*) from your site.
- Blacklist or whitelist - This option allows to define the restriction way for listed URLs:
- Blacklist - Choose this option, if you want to lock listed URLs by the created invitation code.
-
Whitelist - Choose this option, if you want to keep listed URL unlocked. All other posts and pages on your site will be locked by the created invitation code.
Note: this option was introduced in version 1.5.5.

Define the restriction way for listed URLs
- Blacklist or whitelist - This option allows to define the restriction way for listed URLs:
- Posts- Choose specific posts from your site.
-
Content Inside Post/Page - Hide part of a page or post.
To use it, apply the relevant content inside the shortcode
[cmicca_access_code].Learn more: How To - Hide Partial Content on Page/Post
-
File Upload - Upload or choose a file from the media library to be locked.
You have to apply the shortcode on the Display Content Access Form.
Learn more: WordPress Invitation Code - How To - Display Content Access Form (Shortcode).
- File Link - Link to an external file.

How and When Code Expires
- Number of uses - Set a usage limit (empty or 0 means unlimited).
- IP limit - Set the number of unique IP-addresses that can use the same invitation code. Everyone who used the code - their IP's will be saved for this code, and they can continue use it until it expired. But all other people will not be able to use the same code. Leave empty to keep it unlimited. Note: this feature is available since the version 1.3.10.
- Valid from - Leave empty to activate the code right away (respects the website time zone).
- Expires on - Leave empty to never expire (respects the website time zone).
- Once activated, expires after some time - Expires the account a certain amount of time after the first time the user logs in. The timer runs while the user is offline.
-
You can choose How much time the code can be used for:
If Hours: 1 is one hour, 0.5 is half an hour (30 minutes) etc. The default value is 1.
If Days: 1 is one day. You can enter only integer numbers, if you enter a non-integer number, then it will be rounded down. The default value is 1. Note: the option with the Days was introduced in the version 1.3.12.

Setting up the expiration time for the code
-
-
User can only access blocked content for some time - Expires the account after the user spends a certain amount of time on your site. The timer only runs while the user is online and accessing the content.
Enter the amount of hours. 1 equals one hour, 0.5 equals half an hour (30 minutes) and so on. Default value is 1.

Notify User (Code Creation and Recovery)
- First name / Last name - Used for recovering the code.
-
Two-factor Authentication - Used for SMS Authentication.
Only works in combination with the Secure Login plugin: WordPress Invitation Code - How To - Require SMS Authentication (Secure Login Integration).
- Email - Enter an email address which will be notified about this code. Note that if you change this field and save the changes, another email will be sent
- You can customize the email template via the settings. Learn more: How To - Customize Email Template.
- Also used for recovering the code.
Security and Privacy
- Disclaimer text - Apply an unique Terms of Service text. If you leave the field empty, the default ToS will be applied (learn more: Settings - General (Configuring Access, Privacy).
-
Two-factor Authentication - Enable to use SMS Authentication.
Only works in combination with the Secure Login plugin: WordPress Invitation Code - How To - Require SMS Authentication (Secure Login Integration).
Payment
-
If the payment option is enabled, you can set the price for the code.
Learn more: WordPress Invitation Code - How To - Charge Users for Access Code - CreativeMinds Products Documentation
Code as template
- Use the code as template - If enabled, you can use this code as a template for generating subsequent codes with external tools. This function is available since 1.3.7 version of the plugin.
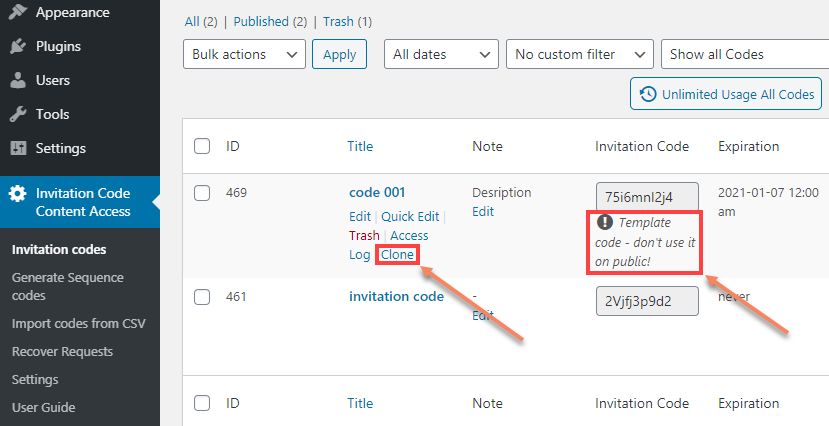
TIP: Using the code template
To create the invitation code using a template, you need to navigate to your list with codes in Invitation codes. Find the needed template-code (it is marked with a special note), hover over it and click on the Clone button. Most fields will be already filled with the information, and you can work with it the same as while creating or editing regular invitation codes.
Learn more, what for you can use the code as template:
QR Code
Since the version 1.7.11 it is possible to allow users to access restricted content by scanning a QR code. Once you create the invitation code, the QR code is generated automatically:
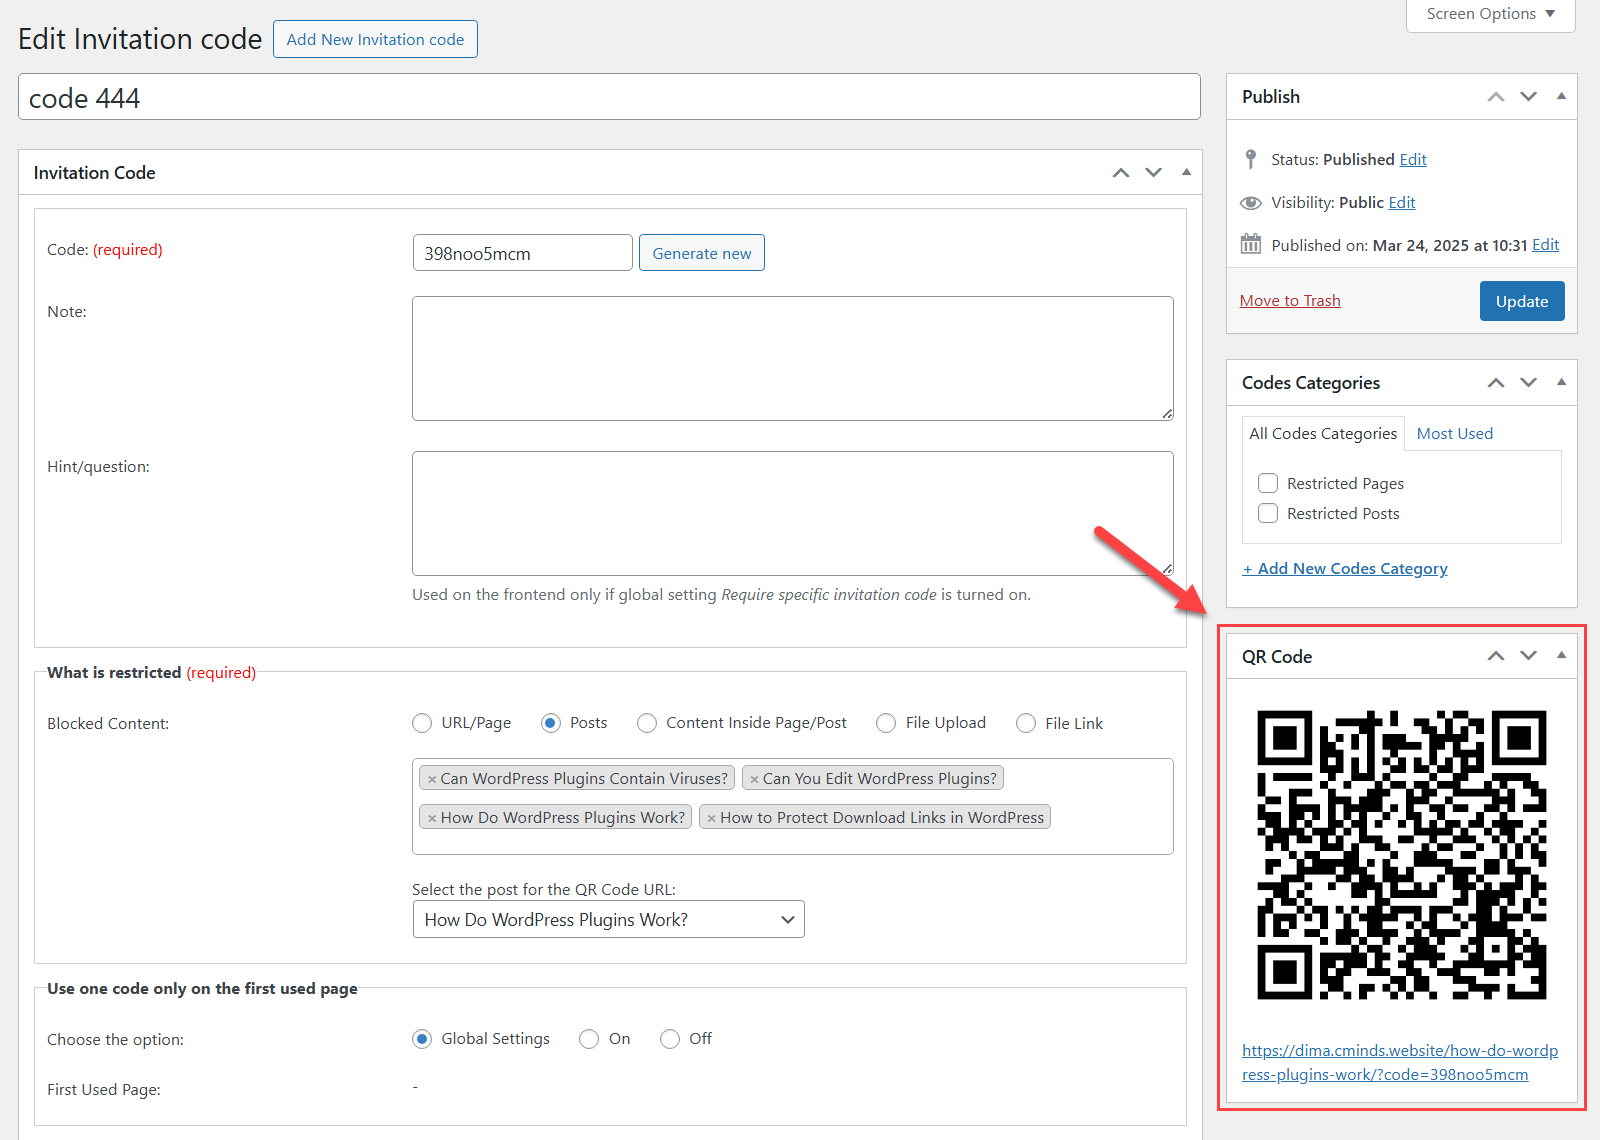
This feature requires enabling relevant option in the plugin settings. Learn more about how to configure the QR code functionality in this use case guide:
 |
More information about the WordPress Invitation Code Plugin Other WordPress products can be found at CreativeMinds WordPress Store |
 |
Let us know how we can Improve this Product Documentation Page To open a Support Ticket visit our support center |