WordPress Invitation Code - How To - Charge Users for Access Code
Charging Users for Access Code
TIP: What Are Shortcodes
Shortcodes add dynamic content to your site via a small piece of code.
Learn more: Shortcodes - How To Use | Finding ID of Post/Page/Other Content
How It Works
- Payment requires WooCommerce. EDD is not compatible.
- Add a price to an individual code
- Add a payment box anywhere on your site so users can pay (done via shortcode)
- After payment, users receive the code by email
What Is This Feature
You can charge users for purchasing an access code. Meaning they will have to pay to be granted access to any content you locked.
This feature was added in version 1.2.9 of WordPress Invitation Code plugin.
Set Up
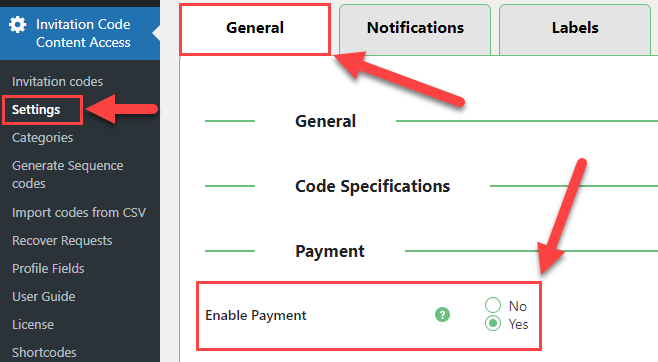
Step 1) Enable Payments
Head to Admin Dashboard → Invitation Code Content Access → Settings → General tab. Under the Payment section, set Enable Payment to Yes.
Step 2) Add Price to Code
When creating or editing a code, pay attention to the "Price" field. That's where you set the price (in WooCommerce's set currency).
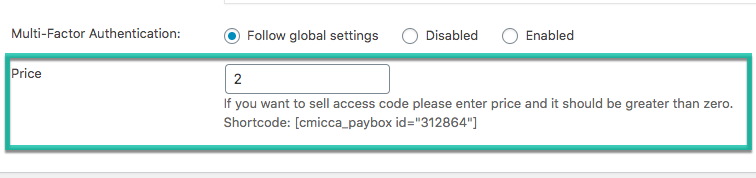
Important
Price Has To Be Higher Than 0!
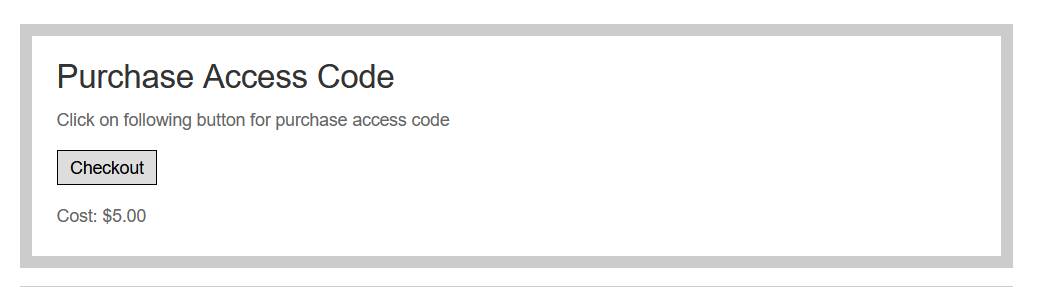
Step 3) Add Payment Option on Site
Once you publish this code, a helpful reminder will appear.

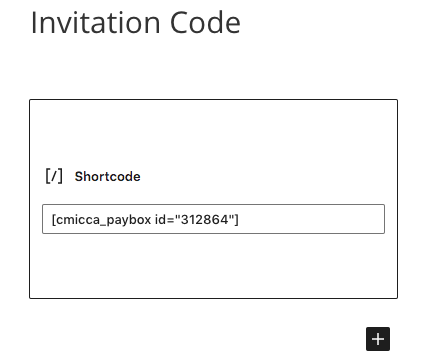
You use this shortcode to show the payment on the Front-end. The shortcode is [cmicca_paybox id=""], including the code id.
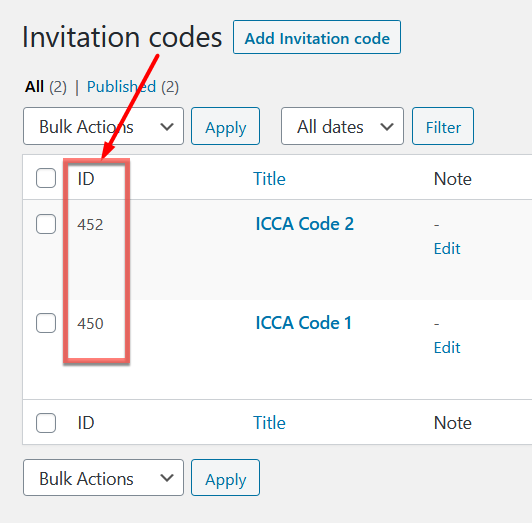
TIP: Finding Code ID
Alternative Set Up
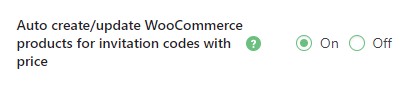
Starting from version 1.3.7 of WordPress Invitation Code plugin you can disable the automatic creation/updating WooCommerce products for invitation codes. So, a manually created product can be associated with a particular code.
Head to Settings → General tab. Under the Payment section, set "No" in the following feature.
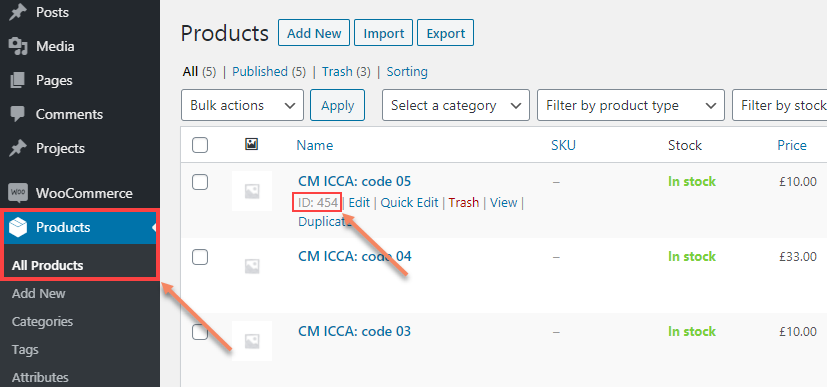
To set the price for the invitation code first you need to manually create the WooCommerce product.
When the WooCommerce product is created you need to get its ID.
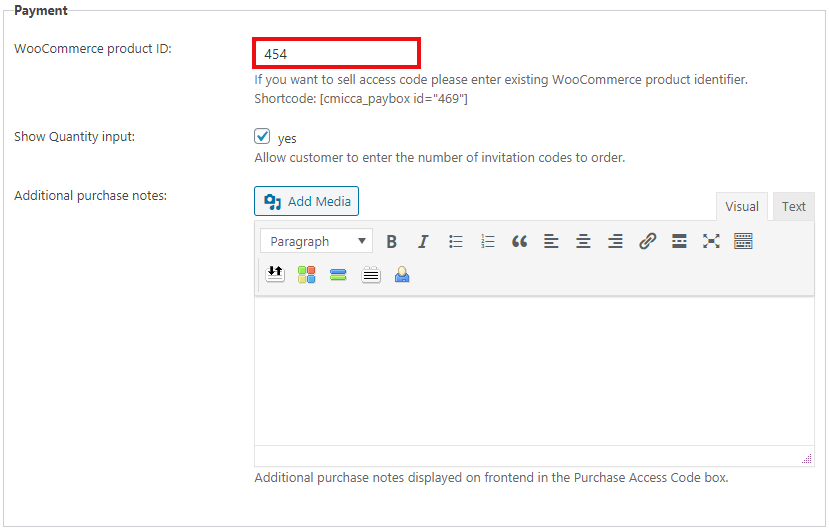
Then, while creating or editing the invitation code, you put this ID in the WooCommerce product ID field:
You can also:
- allow the customers to enter the number of invitation codes to order by enabling Show Quantity input feature.
- Write some extra information in Additional purchase notes that customers will see in front-end.
Extra Steps (Only Once)
Step 4) Configuring Message Sent With Code After Payment
Let's ensure users receive the code after payment. Head to the Notifications tab.

The relevant message is Payment Confirmation Notifications. Edit the subject and then the email content.
The content accepts these placeholders:
- [FNAME] - First name.
- [LNAME] - Last name.
- [ICODE] - Becomes the actual code.
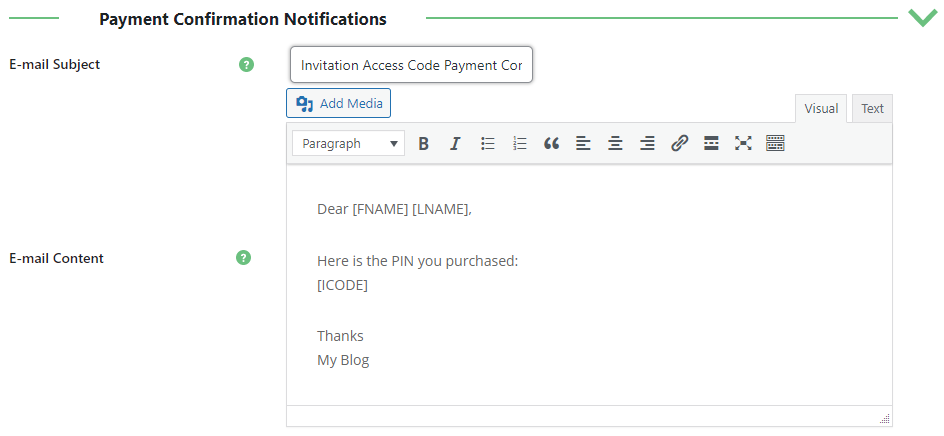
Important - Never Remove [ICODE]
If the message doesn't [ICODE], the user won't receive the code after payment!
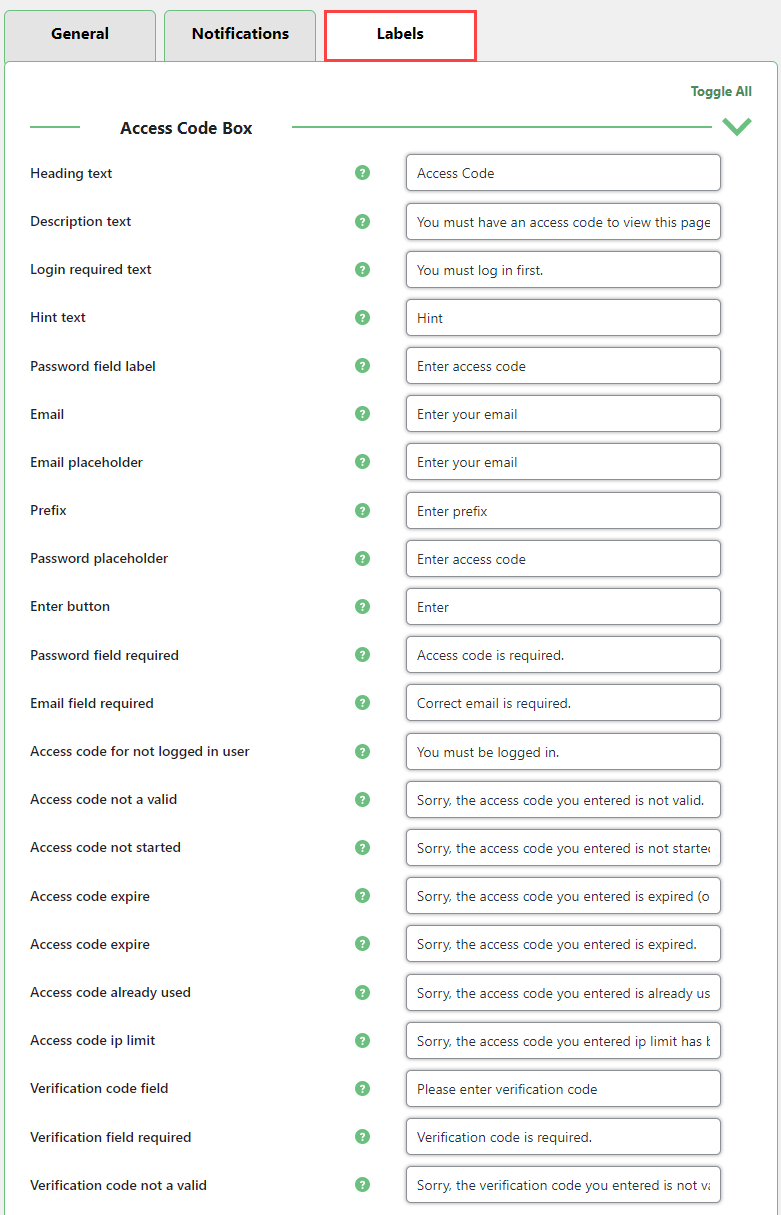
Step 5) Labels (Translating The Interface)
You can change the relevant text to anything you like. Head to the Labels tab to see all options.
What is "$%.2f"?
Since every code has its own price, the label must be able to fetch the value. Writing "$%.2f" does exactly this. If we consider a code costs $12.341, "$%.2f" will return "$12.34".
The code can be customized.
Case 1) I have experience with coding
Refer to PHP's sprintf function manual or also test it live on PHP Sandbox.
Case 2) I don't have experience with coding
We can break it down to make it simpler to edit it:

The examples below use the $12.341 price.
- $ - Is not actually a code: it will be shown as written, so it can be replaced. That allows you to change the currency easily: "%.2f ¥" will return "12.34 ¥", for instance.
- % - This is a variable and will be replaced with the actual price.
- .2f - This section defines how many digits will be shown after the point. So, using "$%.1f" would return "$12.3", because 12.34 is rounded as 12.3.
- Examples:
- "US$ %.2f" returns "US$ 12.34".
- "%,.3fPLN" returns "12,341PLN".
 |
More information about the WordPress Invitation Code Plugin Other WordPress products can be found at CreativeMinds WordPress Store |
 |
Let us know how we can Improve this Product Documentation Page To open a Support Ticket visit our support center |