WordPress Invitation Code - Creating Codes - From CSV File
Creating Code From a CSV File
Creating Codes
Overview | Single Code | Multiple Codes | From CSV File
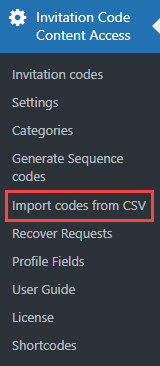
To import invitation codes from a CSV file with the WordPress Invitation Code plugin, head to Admin Dashboard → Invitation Code Content Access → Import codes from CSV.
Add Invitation Code (From CSV File)
TIP: Download File Example
Speed up the import process by using a sample file. Download CSV example file
Start by choosing the file:

This method generates multiple invitation codes at once based on a CSV file.
You can set:
- Sequence name - Write down the session name (for internal use only and will not affect the codes)
- What to do with duplicate codes - This option allows to decide what to do, if the CSV file contains codes which already exist in the list of invitations codes on your site. You can:
- Skip - The repeated codes from the CSV file will be ignored and not imported.
- Add Anyway - The repeated codes from the CSV file will be added no matter if they already exist or not.
-
Replace Existing Codes - The existing codes that match the ones from the CSV file will be removed and new codes will be imported.
Note: this option was introduced in version 1.6.4.
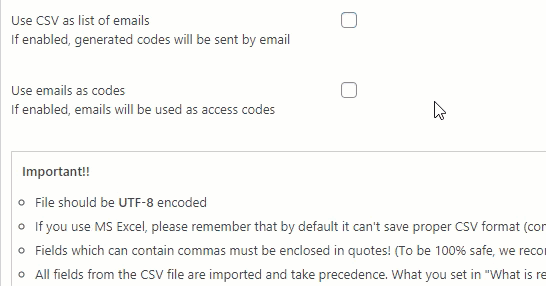
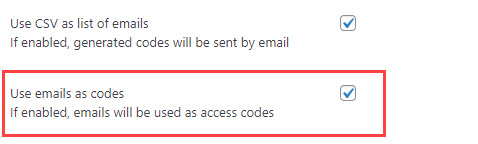
- Use CSV as list of emails - To send generated codes to the list of emails. Note: this option was introduced in version 1.4.0.
- Use emails as codes - To use email addresses instead of the codes. Note: this option was introduced in version 1.4.3.
- Note - Add a note (can only be seen by the admin)
- No of usages - Set a usage limit (empty means unlimited)
- Blocked Content - Choose between a code type. Learn more.
- Valid from - Leave empty to activate the code right away (respects the website time zone)
- Expires on - Leave empty to never expire (respects the website time zone)
- IP limit - Set the number of unique IP-addresses that can use the same invitation code. Everyone who used the code - their IP's will be saved for this code, and they can continue use it until it expired. But all other people will not be able to use the same code. Leave empty to keep it unlimited. Note: this feature is available since the version 1.4.4.
- Once activated, expires after some time - Expires the account a certain amount of time after the first time the user logs in.
- Enter the amount of hours. 1 is one hour, 0.5 is half an hour (30 minutes) etc. The default value is 1
- User can only access blocked content for some time - Expires the account after the user spends a certain amount of time on your site.
- Blocked content access time limit - Enter the amount of hours. 1 is one hour, 0.5 is half an hour (30 minutes) etc. The default value is 1. Time passes only if user is accessing content.
- Codes Category - Choose a category that imported codes will belong to. Note: This option was introduced in version 1.4.3. Learn more about it: WordPress Invitation Code - Code Categories.
- Disclaimer text - Apply an unique Terms of Service text. If you leave the field empty, the default ToS will be applied (learn more: Settings - General (Configuring Access, Privacy).
- Delay in seconds before sending emails - Set the interval between sending email notifications. To disable intervals between sending, set the value "0". This option can be useful to avoid issues related to spam filters, in case if you need to send too many email notifications with invitation codes at once. Note: This options was intrdocued in version 1.6.3.
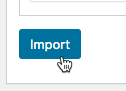
Finally, click the Import button.
Use CSV as List of Emails
Note: this feature was introduced in version 1.4.0.
While importing CSV file you can choose to use it as a list of emails by checking the box Use CSV as list of emails. So when you upload CSV file by this way, all generated codes will be automatically sent to the emails with a link to restricted page.
Email Template
To customize the template of email that will be sent to users, navigate to Admin Dashboard → Invitation Code Content Access → Settings → Notifications tab, and find there Template for "Use CSV as list of email" option.
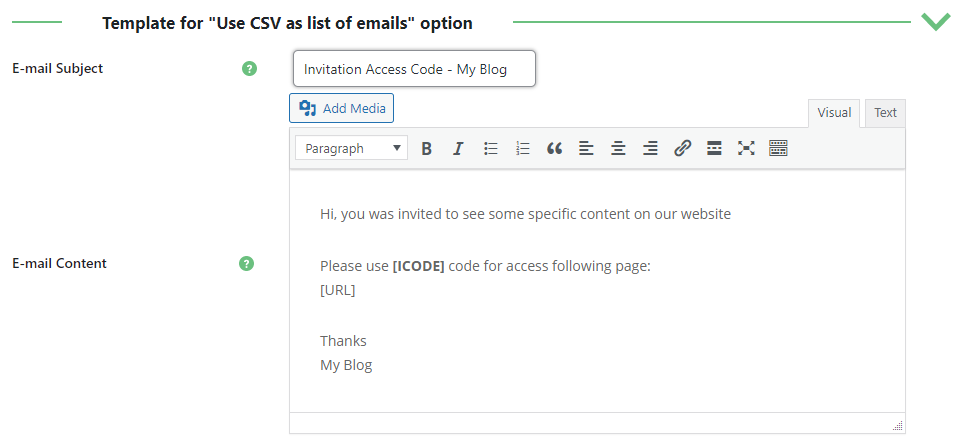
You can customize Email Subject and Email Content. For customizing the content of the notification email you can use the following shortcodes:
[ICODE]- The code itself.[URL]- Link to the restricted page.[EDATE]- Expiration date of the invitation code.[EMAIL]- User's email.[NOTE]- Note (internal note).
Once you enable the option Use CSV as list of emails a few additional options will appear:
- Randomize codes - Enable this option to randomize codes, otherwise they will be sequential.
- Add Prefix to code - Enable this option if you want to add prefix to the generated codes.
- Prefix - Write here a prefix that will be used for the generated codes.
You can also use the option Use emails as codes - if enabled, then emails will become codes, even if the Codes column is filled by other codes in the CSV file. It means, users will be able to use their email addresses as invitation codes to get access to restricted content. Note: this option was introduced in version 1.4.3.
What is a CSV File
A .csv (comma separated values) file is a format that can be opened by most spreadsheet software.
Sample Table

CSV File Specifications
The CSV file must follow some specifications:
- Has to be UTF-8 encoded
- Can include the columns
- code - can't be empty
- note
- expiration_date - Use the / separator for mm/dd/yyyy, and - or . for dd-mm-yyyy format.
- Examples:
- Proper 12/30/2020 | Incorrect 30/12/2020
- Proper 30.12.2020 | Incorrect 12.30.2020
- Proper 30-12-2020 | Incorrect 12-30-2020
- Examples:
- expiration_time
- number_of_usages
- allow_url
- sharing_type - can be
- "content" - For URLs
- "scontent" - For short content
- "file" - For files
- "efile" - For external files
- sharing_file
- disclaimer_text
- notification_email
Note on sharing_type, allow_url and sharing_file fields
The sharing_type fields determines what the code will restrict. That way, depending on it, other fields will be more relevant.
Examples:
- if sharing_type = "content" => allow_url = "http://some-url.com" (Restricted URL)
- if sharing_type = "scontent" => no need for URL
- if sharing_type = "file" => sharing_file = "9137" (file ID)
- if sharing_type = "efile" => sharing_file = "http://url-to-external-file.com"
Learn more: WordPress Invitation Code - Creating, Managing and Deleting Codes
Fields with commas
If a field contains commas, it has to be enclosed by quotes. This ensures the fields don't get mixed. For instance:
- Incorrect - Admin note, viewable only to the admin
- Proper - "Admin note, viewable only to the admin"
Overriding Values
In the plugin screen, you can:
- Select an internal name for the sequence (only shown to the admin)
- Add a note (can only be seen by the admin)
- Set the expiration date
- Set a usage limit
- Set the allowed URLs
These values will be applied only to fields that are empty in the CSV file. If a row has any assigned value to it, the value in the CSV file will be applied.
 |
More information about the WordPress Invitation Code Plugin Other WordPress products can be found at CreativeMinds WordPress Store |
 |
Let us know how we can Improve this Product Documentation Page To open a Support Ticket visit our support center |