WordPress Invitation Code - How To - Create a Gift Code and Attach it to Different WooCommerce Products
Introduction
It's possible to create a gift invitation code and attach it to different WooCommerce products, the same as you would connect one WooCommerce product to a few different gift invitation codes.
This feature was introduced in version 1.3.11 of WordPress Invitation Code plugin.
This feature works when you create codes for selling directly from the WooCommerce shop. We consider that you already know how to create invitation codes and how to sell them directly from the WooCommerce shop. If not, learn more about it:
- WordPress Invitation Code - Creating Codes - Single Code
- WordPress Invitation Code - How To - Sell the Access Codes Directly From the WooCommerce Shop
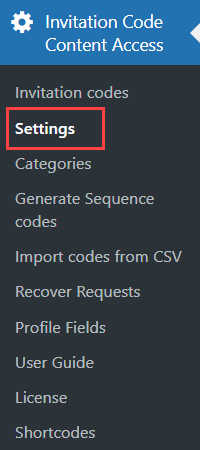
Settings
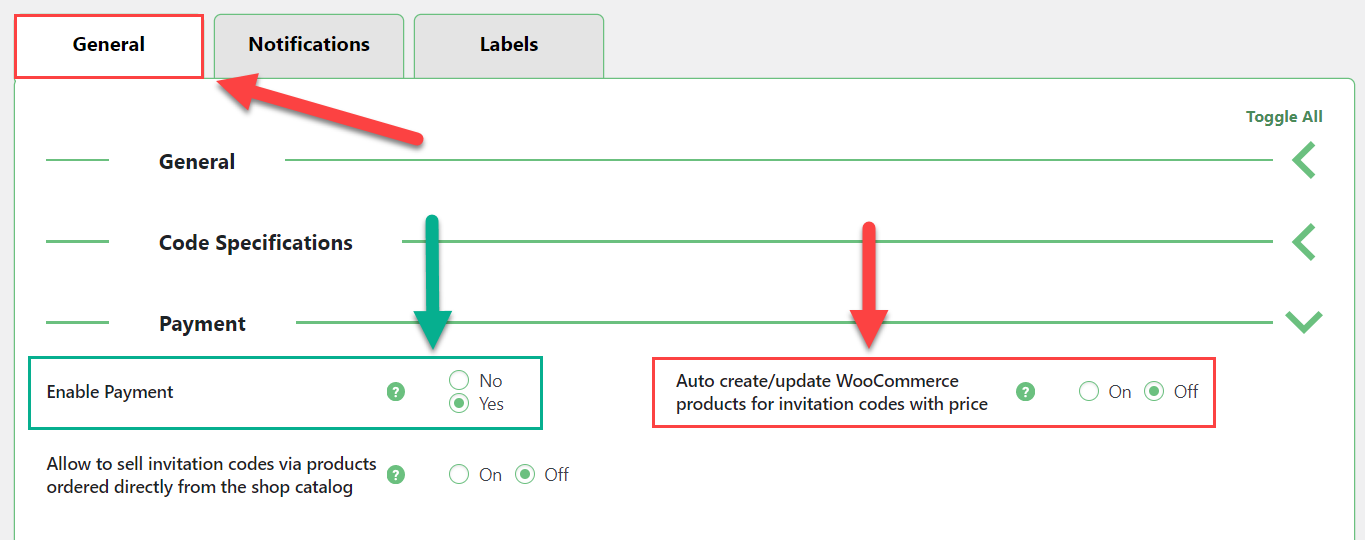
First, we need to configure the plugin settings. To do this, navigate to Admin Dashboard → Invitation Code Content Access → Settings.
Under the General tab, in the section Payment, turn on the option Enable Payment. The option Auto create/update WooCommerce products for invitation codes with price must be disabled. Don't forget to save the changes.
Part 1 – Connect a Few WooCommerce products to One Gift Code
Let's go straight to the creating of a new invitation code and consider crucial options. While creating the code you can see these options:
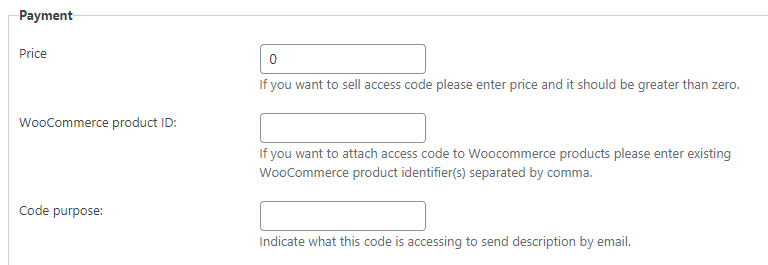
- Price - Here you don't need to set the price. Leave it blank or set 0.
- WooCommerce product ID - Here you can attach a few different WooCommerce products to one code, using WooCommerce product's ID. They must be separated by comma.
Example
We have a few WooCommerce products, and we want to connect them all to one code. Let's copy their ID's first:
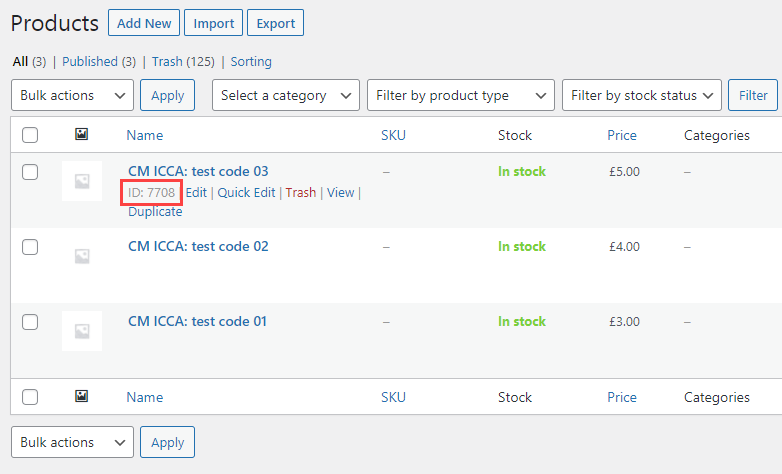
Then we paste these IDs to the relevant field separating them with comma:

- Code purpose - This is the option for a "gift code". The code will be sent to the buyer in the email with purchase information. So here you need to write the page, post, file or anything else that you restrict, so the buyer knows what the code gives access to - and this code will be marked as "gift code".

This code must be a template, so enable the option Use code as template:

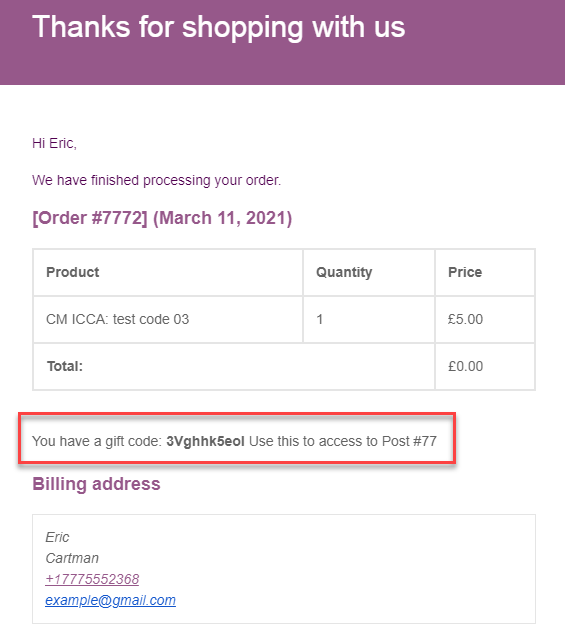
Result
Here is an example of the email that the user receives when they buy any of the chosen WooCommerce products:
Part 2 – Connect a Few Gift Codes to One WooCommerce Product
You can also connect more than one gift invitation code to one WooCommerce product - so when the user buys one product, they receive a few gift invitation codes. Here's how to do it.
Let's create another single invitation code and navigate to the same options as earlier. Let's set in the WooCommerce product ID field the same WooCommerce product, that we already set in Part 1 of this guide. So the WooCommerce product with ID "7708" will be connected to two gift invitation codes:
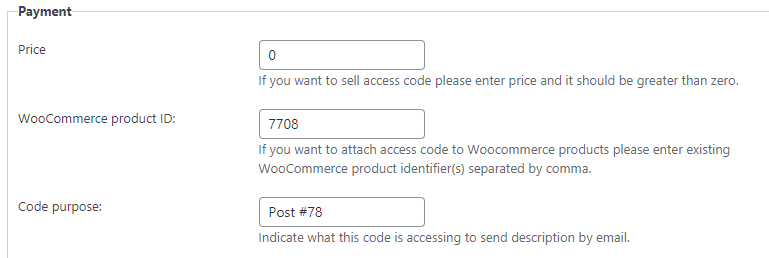
And don't forget to enable the Code as template option:
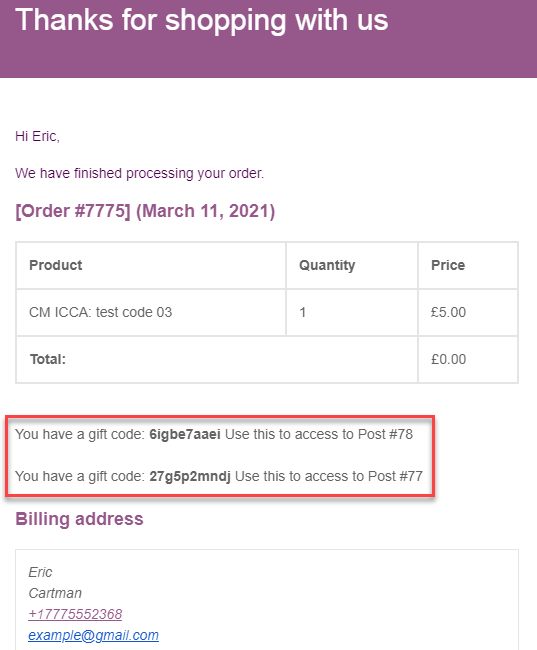
Result
When the user buys this WooCommerce product they receive an email with purchase information and all gift invitation codes connected to this WooCommerce product:
 |
More information about the WordPress Invitation Code Plugin Other WordPress products can be found at CreativeMinds WordPress Store |
 |
Let us know how we can Improve this Product Documentation Page To open a Support Ticket visit our support center |