WordPress Invitation Code - Use Case - How to Let Users Access Locked Content Using QR Codes Based On Invitation Codes
Use Case - How to Let Users Access Locked Content Using QR Codes Based On Invitation Codes
Note: This guide requires:
- WordPress Invitation Code plugin - This document uses version 1.7.11.
Introduction
This WordPress Invitation Code plugin allows you to create and sell a series of personalized temporary access codes. Each code grants limited access to a selected page only. When creating codes, you assign them to a post, a page, a URL or a file. It will automatically be locked and, when accessing it, visitors will be prompted to input the code.
Use Case Front-end
Use Case Assumptions
In this example use case guide we will consider how to let users use QR codes that are created based on invitation codes to make the process of accessing the content much easier and smoother.
We consider that you have already bought the WordPress Invitation Code plugin, but not installed it yet.
It follows:
- Installing the plugin
- What this feature is about
- Enabling QR codes functionality
- Setting up email notifications templates
- Managing invitation codes
- Creating invitation codes with QR codes
- Unique QR codes for each post/page
- End result
Installing the Plugin
The process is the same for all CM plugins and add-ons.
- Download the plugin from your customer dashboard.
- Log in to WordPress and navigate to the WordPress Admin → Plugins settings.
- Click on Add New.
- Activate it and add the license.
Learn more: Getting Started - Plugin Overview
What This Feature Is About
By default, in order to access locked content, users must enter an invitation code into the access box, when visiting needed page:
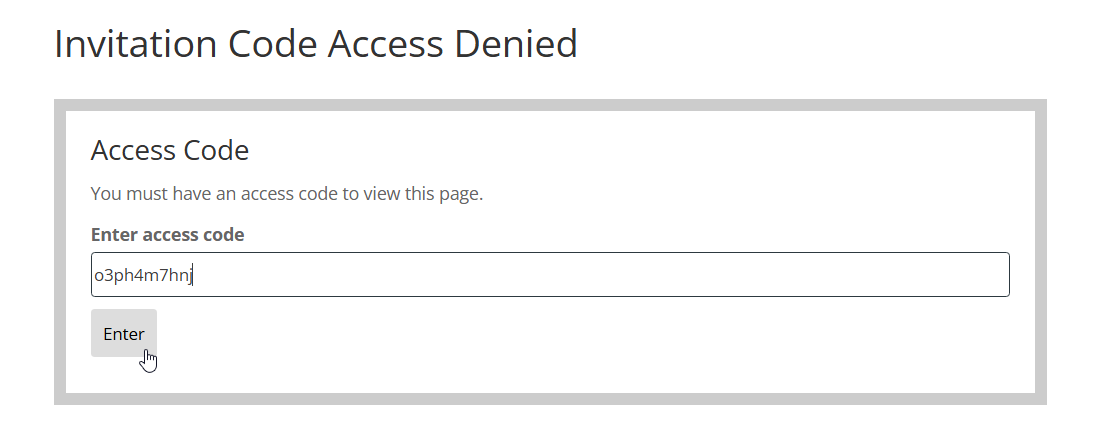
As an alternative, to make the process of accessing locked content, it is possible to use access link. It means that you can give a user not just an invitation code, but a URL link which includes a code, so the user doesn't have to enter the invitation code manually, he just needs to visit the link to access the content. Here's an example of such kind of link:
https://your-site.com/post1/?code=o3ph4m7hnj
Learn more about it: WordPress Invitation Code + WordPress Restricted Site Access (SAR) - Use Case - How to Restrict Content Based On User Roles While Allowing Access via Invitation Codes
One more alternative for accessing content is QR codes. QR codes are created based on the access links which include invitation codes. This way, you can send user a QR code which he can scan using his smartphone, and he will access the restricted content.

Enabling QR Codes Functionality
First we need to enable the QR Codes functionality in general plugin settings. To do this, navigate to Admin Dashboard → Invitation Code Content Access → Settings → General tab.
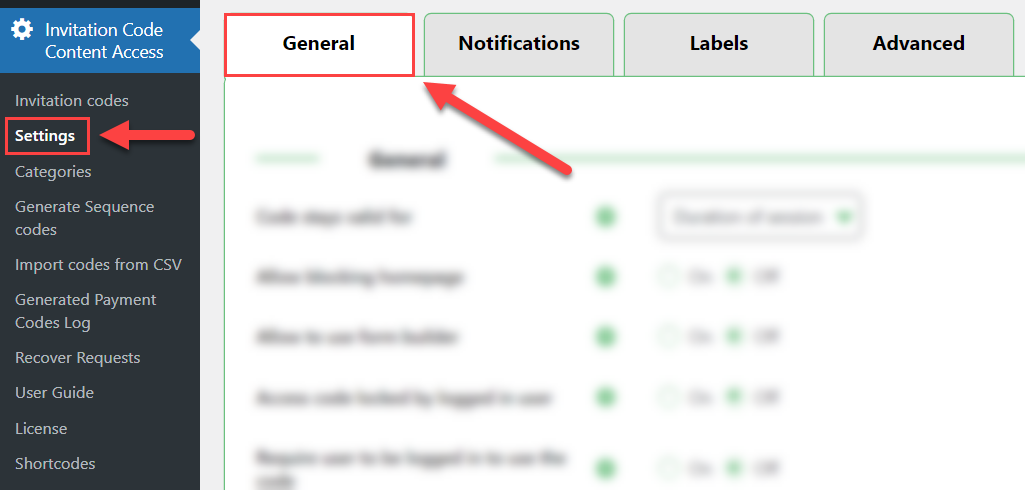
Scroll down and find the section Access via Link & QR. There you need to configure the following options:

- Allow apply code via URL - Enable this option to use URLs with invitation codes as parameters which allow users accessing restricted pages by direct access link. This way, users don't need to manually enter invitation codes for accessing content. Enabling this option is required for using QR codes.
- Activation Code GET Parameter - Optionally, specify the name of the GET parameter to be used in URLs for passing activation codes. Do not use special characters or spaces. Example of the URL that includes the invitation code for accessing content: https://your-site.com/example-post/?code=12345
- Enable QR code generation for invitation code URLs - Turn on this option to activate the QR codes feature. Now when you create invitation codes, QR codes will be automatically generated for them.
- Generate QR Codes for all invitation codes - Clicking this button will generate QR codes for all invitation codes that don't have them.
Now click the button Save Changes at the bottom of the page.

TIP
Learn more about other plugin settings in this user guide:
Setting Up Email Notifications Templates
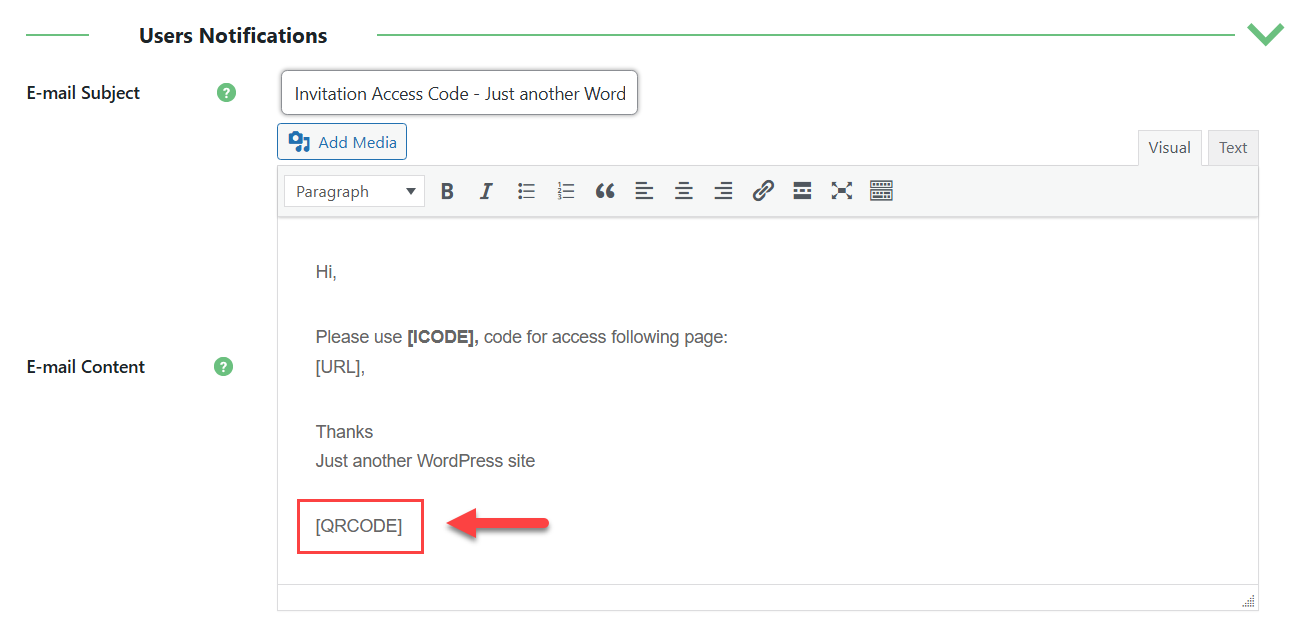
The plugin allows to notify automatically send an email to user notifying that he can access specific content using invitation code. You can also include QR code into the email. To configure email templates, navigate to the Notifications tab.

Scroll down and file the email template User Notifications. It supports a set of shotcodes for adding dynamic content. To attach a QR code to an email, use the shortcode [QRCODE] - you can insert it in any place of the template, as the QR code will be added to the email as an image attachment.
Don't forget to save the changes after configuring email templates.
Email example:

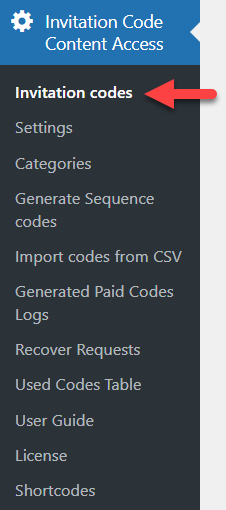
Managing Invitation Codes
To manage invitation codes, navigate to Admin Dashboard → Invitation Code Content Access → Invitation codes:
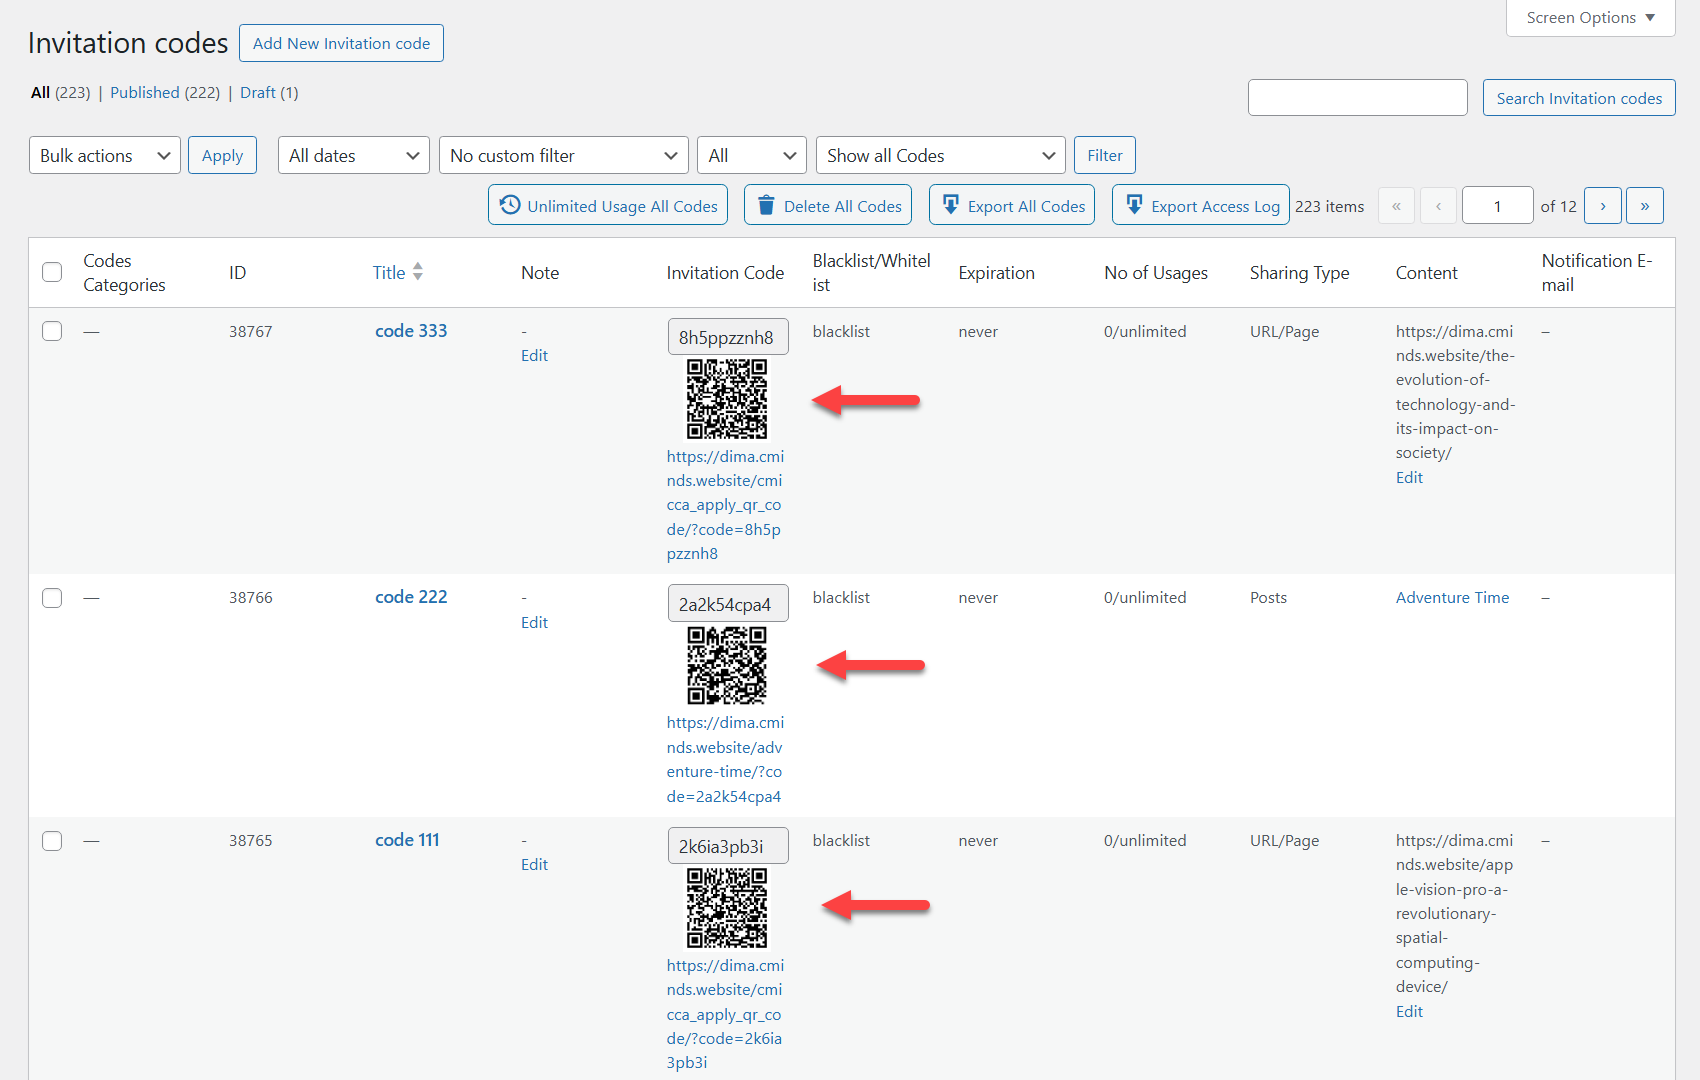
Here you can manage all existing invitation codes - review basic information, edit, delete, create new codes. If the QR feature is enabled, QR codes will be displayed for relevant invitation codes in the relevant table:
Creating Invitation Codes With QR Codes
To create new invitation code, click a relevant button at the top of the page:
There you will see a form for creating an invitation code.
In this use case guide we will focus only on a few fields of this form. You can check more details about all of them in this user guide: WordPress Invitation Code - Creating Codes - Single Code
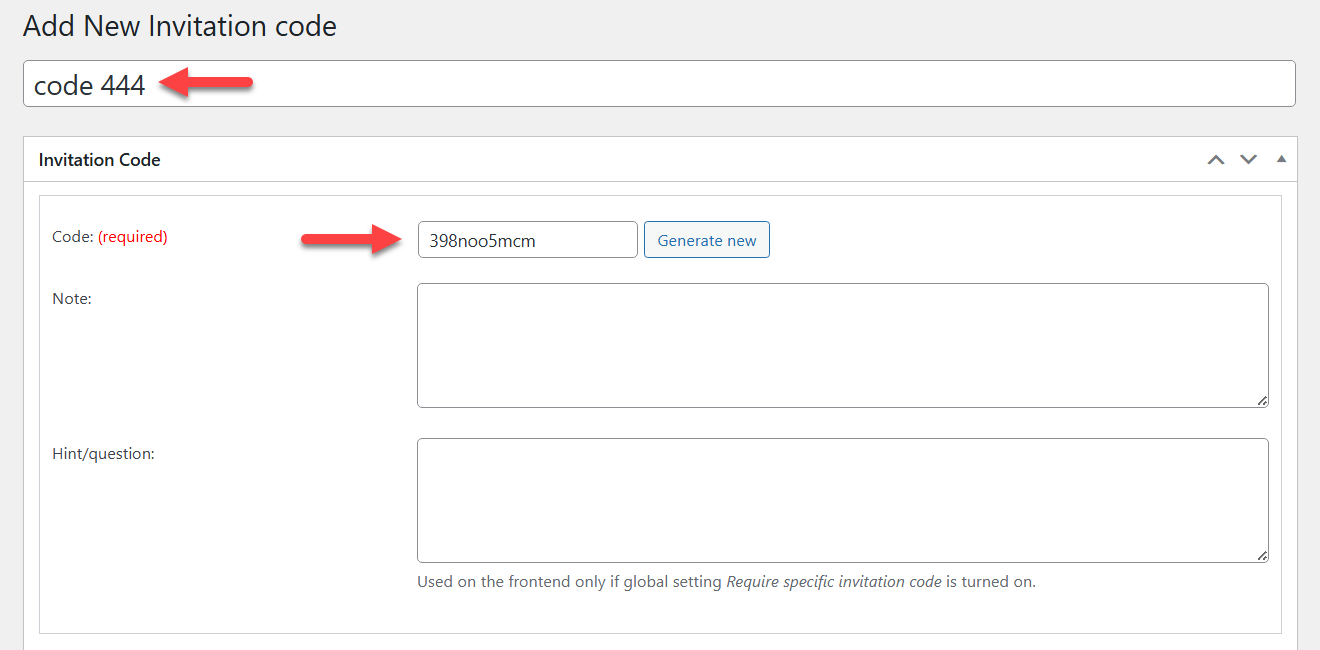
Title and Code
First, add a title for the code (it is for internal usage only) and specify the invitation code itself. You can either enter you own invitation code or generate a random one by clicking corresponding button:
Choosing Restricted Content
Next important thing you need to specify is which content to restrict - QR Code can be created for the following types of restricted content:
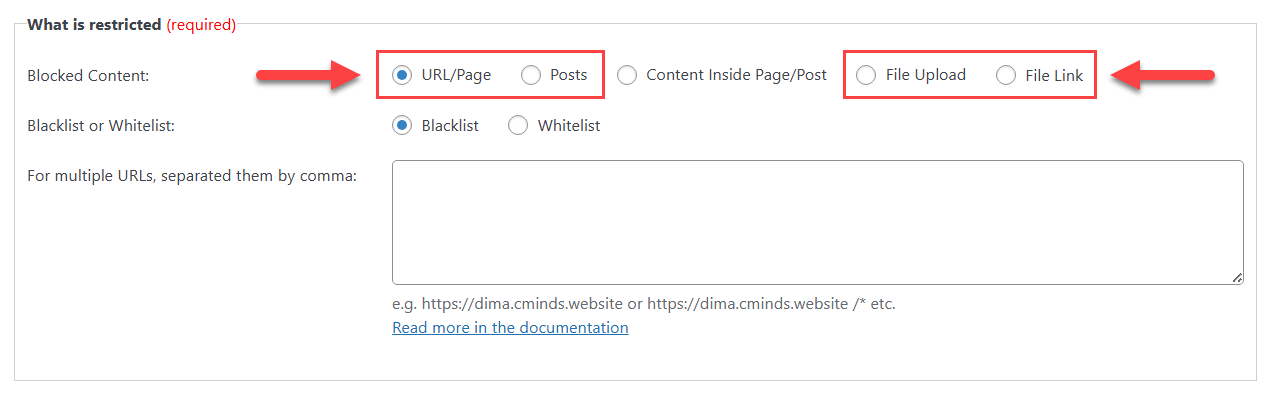
- URL/Page
- Posts
- File Upload
- File Link
For blocked content types URL/Page and Posts it is possible to specify multiple pages. Let's consider more detailed how QR codes work in this case.
URL/Page
There are 2 ways how you can specify multiple URLs:
1) Specify a set of URLs using the asterisk symbol (*). For example, you have some category which contains a few categories:
- https://your-site.com/news/post1/
- https://your-site.com/news/post2/
- https://your-site.com/news/post3/
- etc.
To restrict all these posts, it's enough to specify the following URL:
- https://your-site.com/news/*
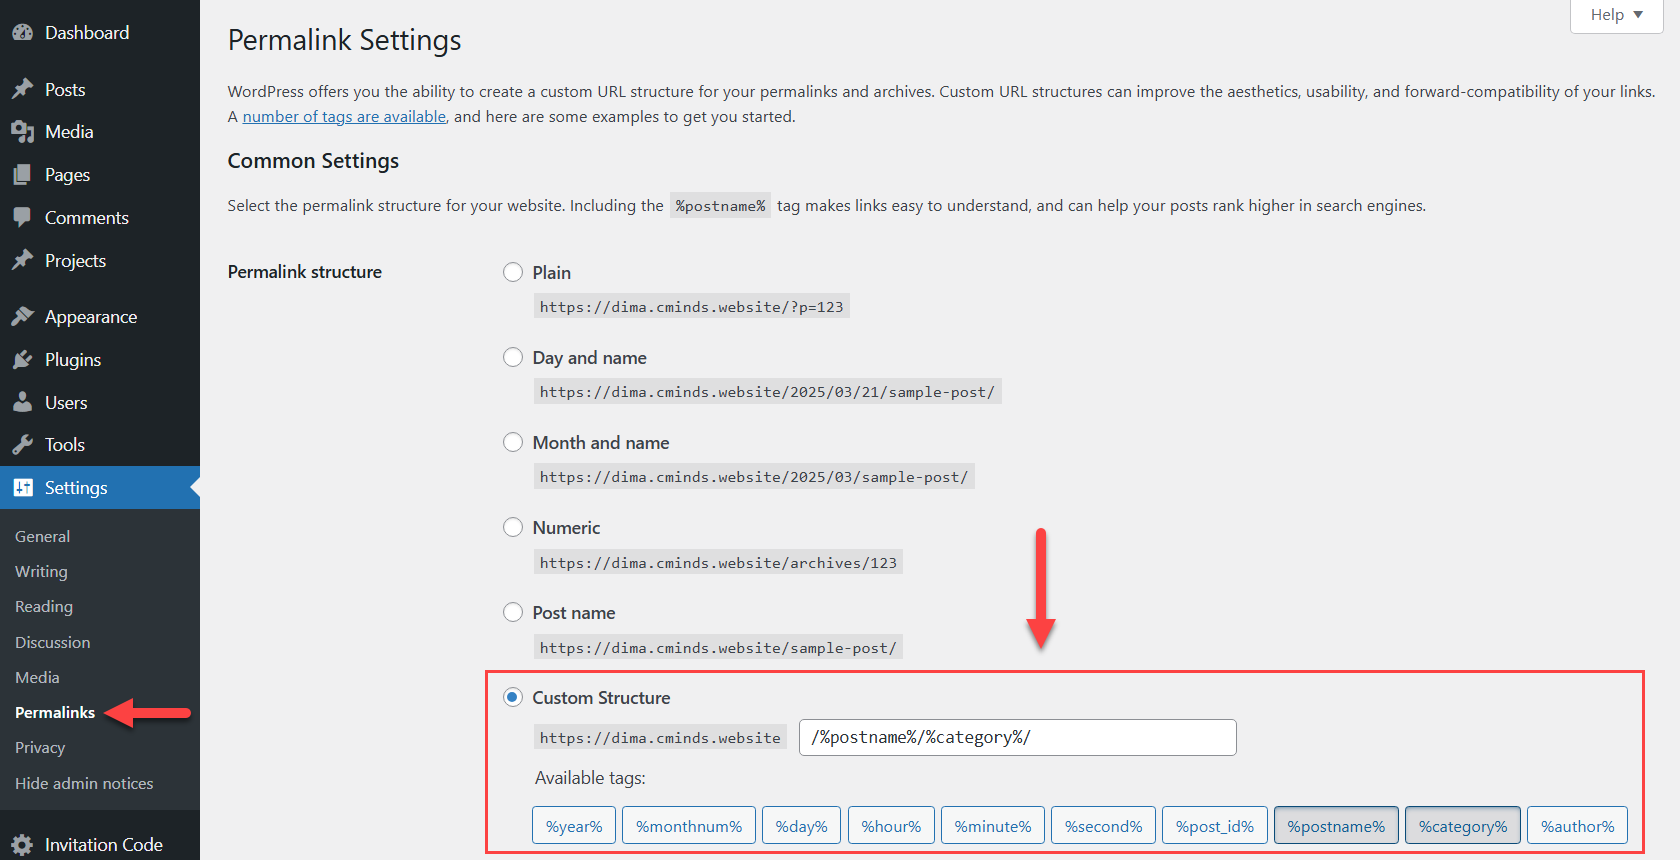
TIP
For such kind of cases you might need to specify custom structure of permalinks on your site:
2) Add a few URLs separating them by comma. Example:
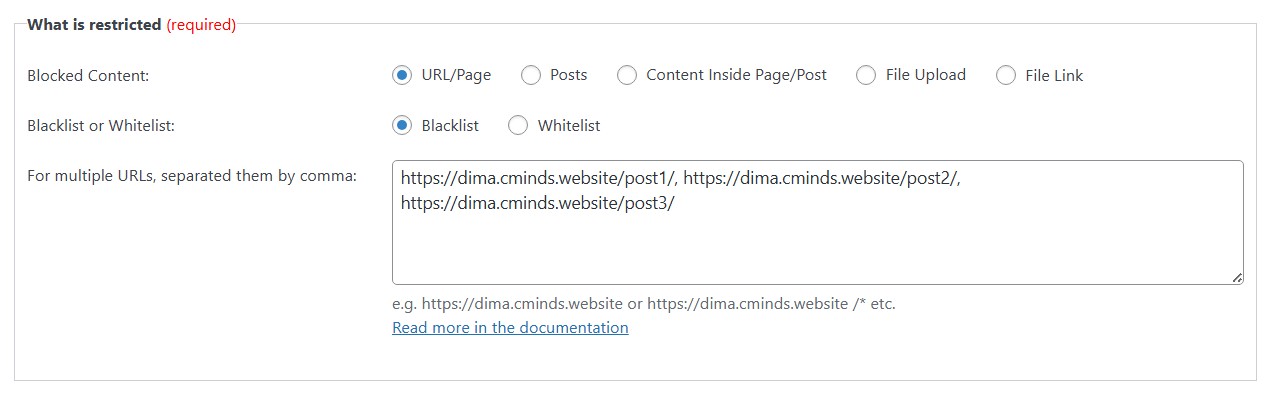
When there's specified more than 1 URL, scanning QR code will unlock all this content, but the user will be redirected to the specific page. In first case it will be the page that was created earlier, and in the second case it will be the URL that is written first in the list.
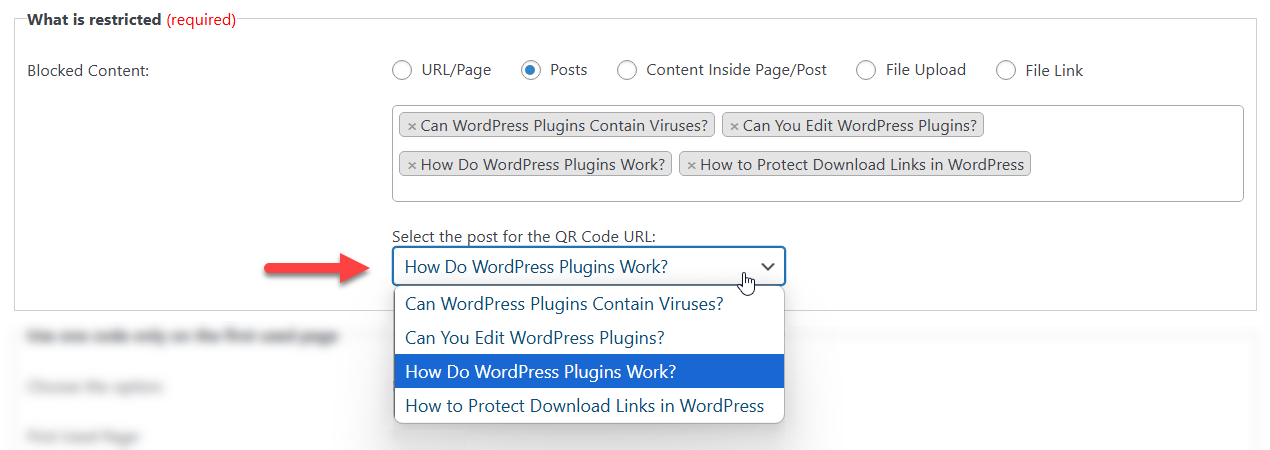
Posts
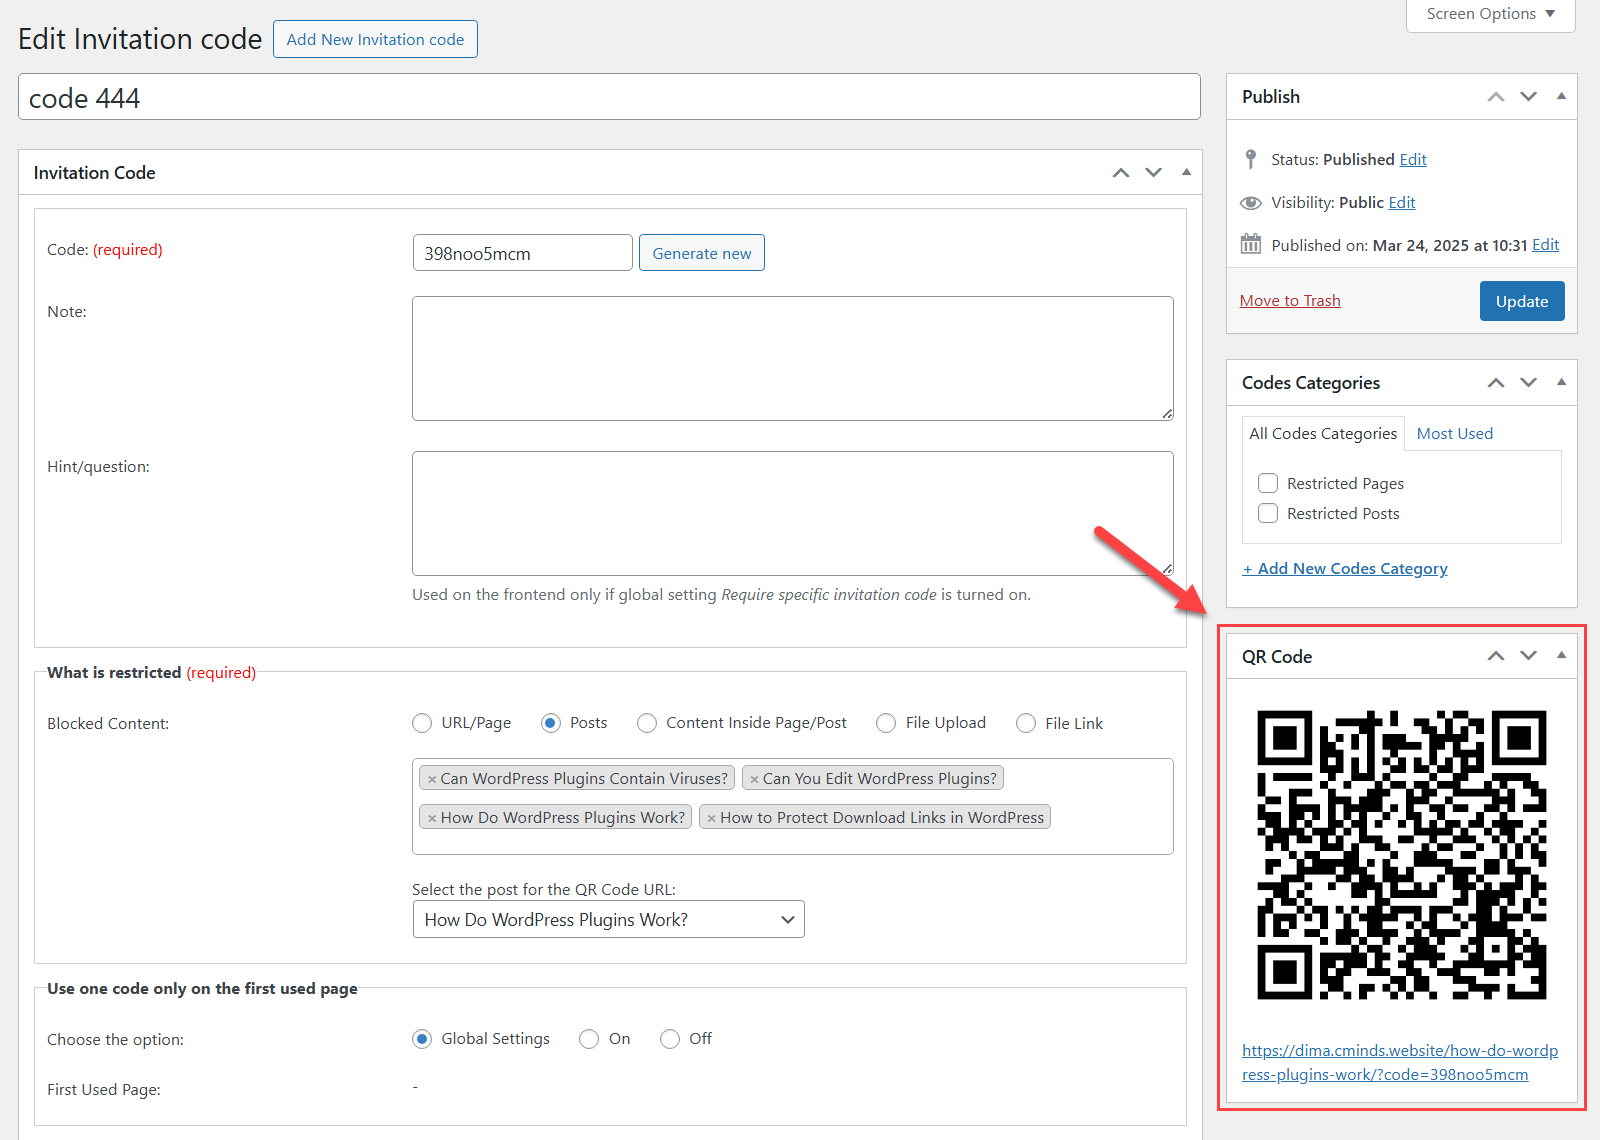
In case when you select multiple posts, you can choose the specific post where the user will be redirected after scanning the QR code:
Notifying users
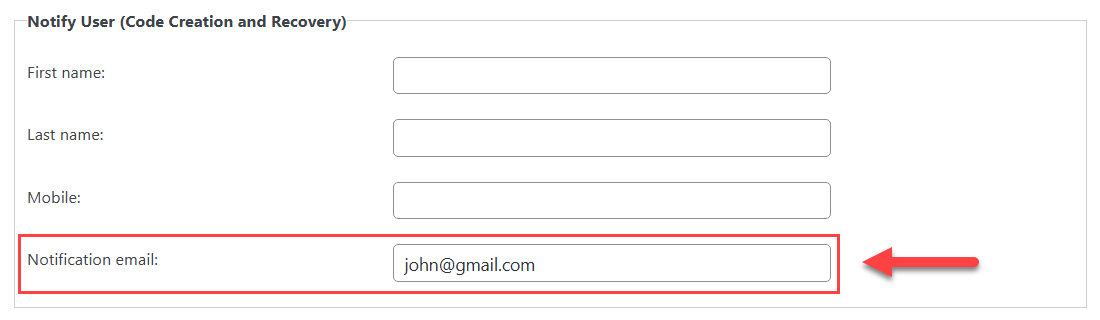
Another optional setting which can be useful is automatic notifying users. For that, scroll down and find the section Notify User and add needed email to the field Notification email. Once the code is created, the email notification with the code and QR code will be sent to the specified address.
To create the code, click the button Publish:
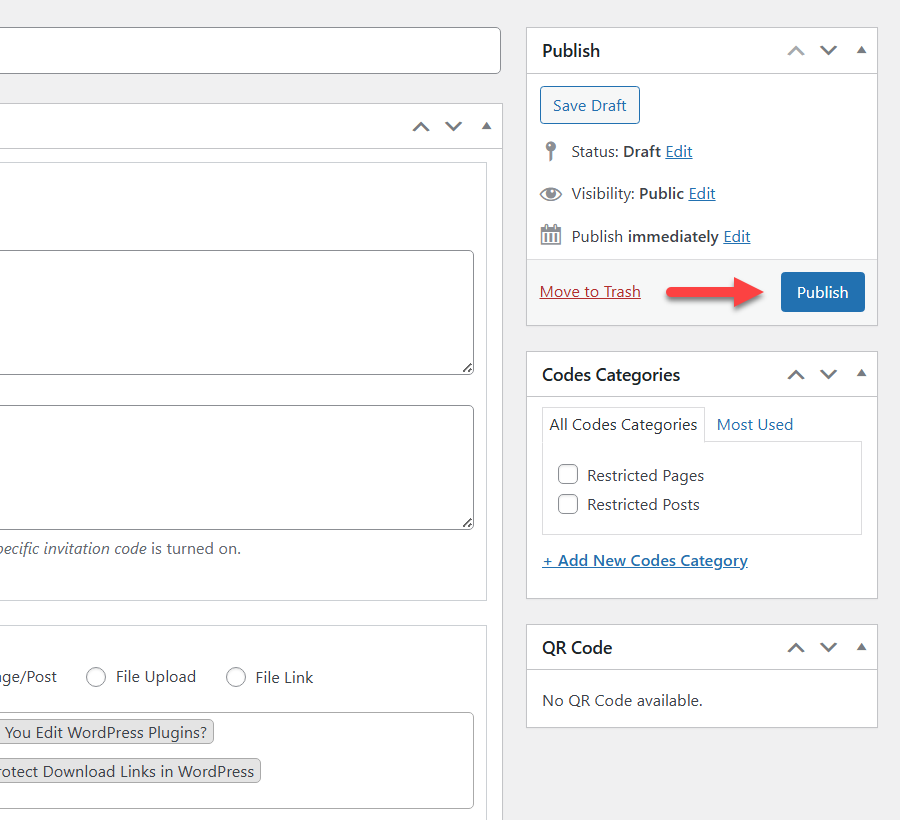
Once it's done, you will see a QR code for this invitation code under the relevant metabox:
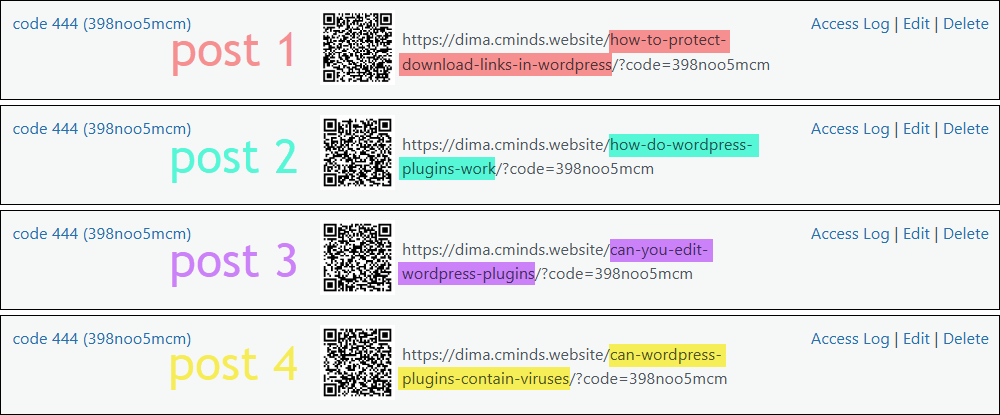
Unique QR Codes for Each Post/Page
When you create invitation code for multiple posts or pages, a unique QR code still can be generated for each specific post/page. So the admin can copy and send a QR code that leads to the specific post/page.
To find it, you need to start editing the page or post:
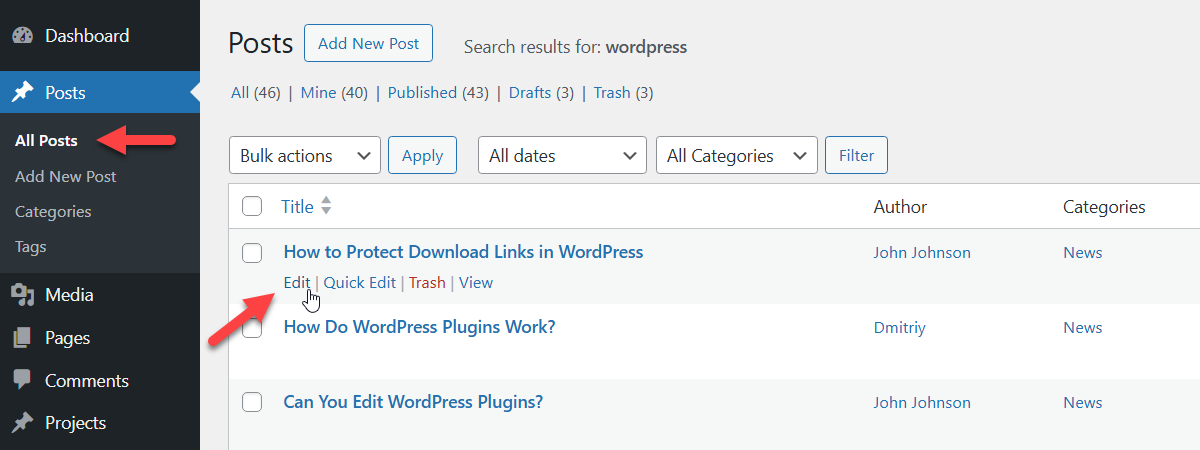
Then scroll down and find the metabox Invitation Codes Management. There you can see a list of all invitation codes that match this post/page, and the relevant access link and QR code. And QR code is unique for that page and scanning it leads to the relevant page.
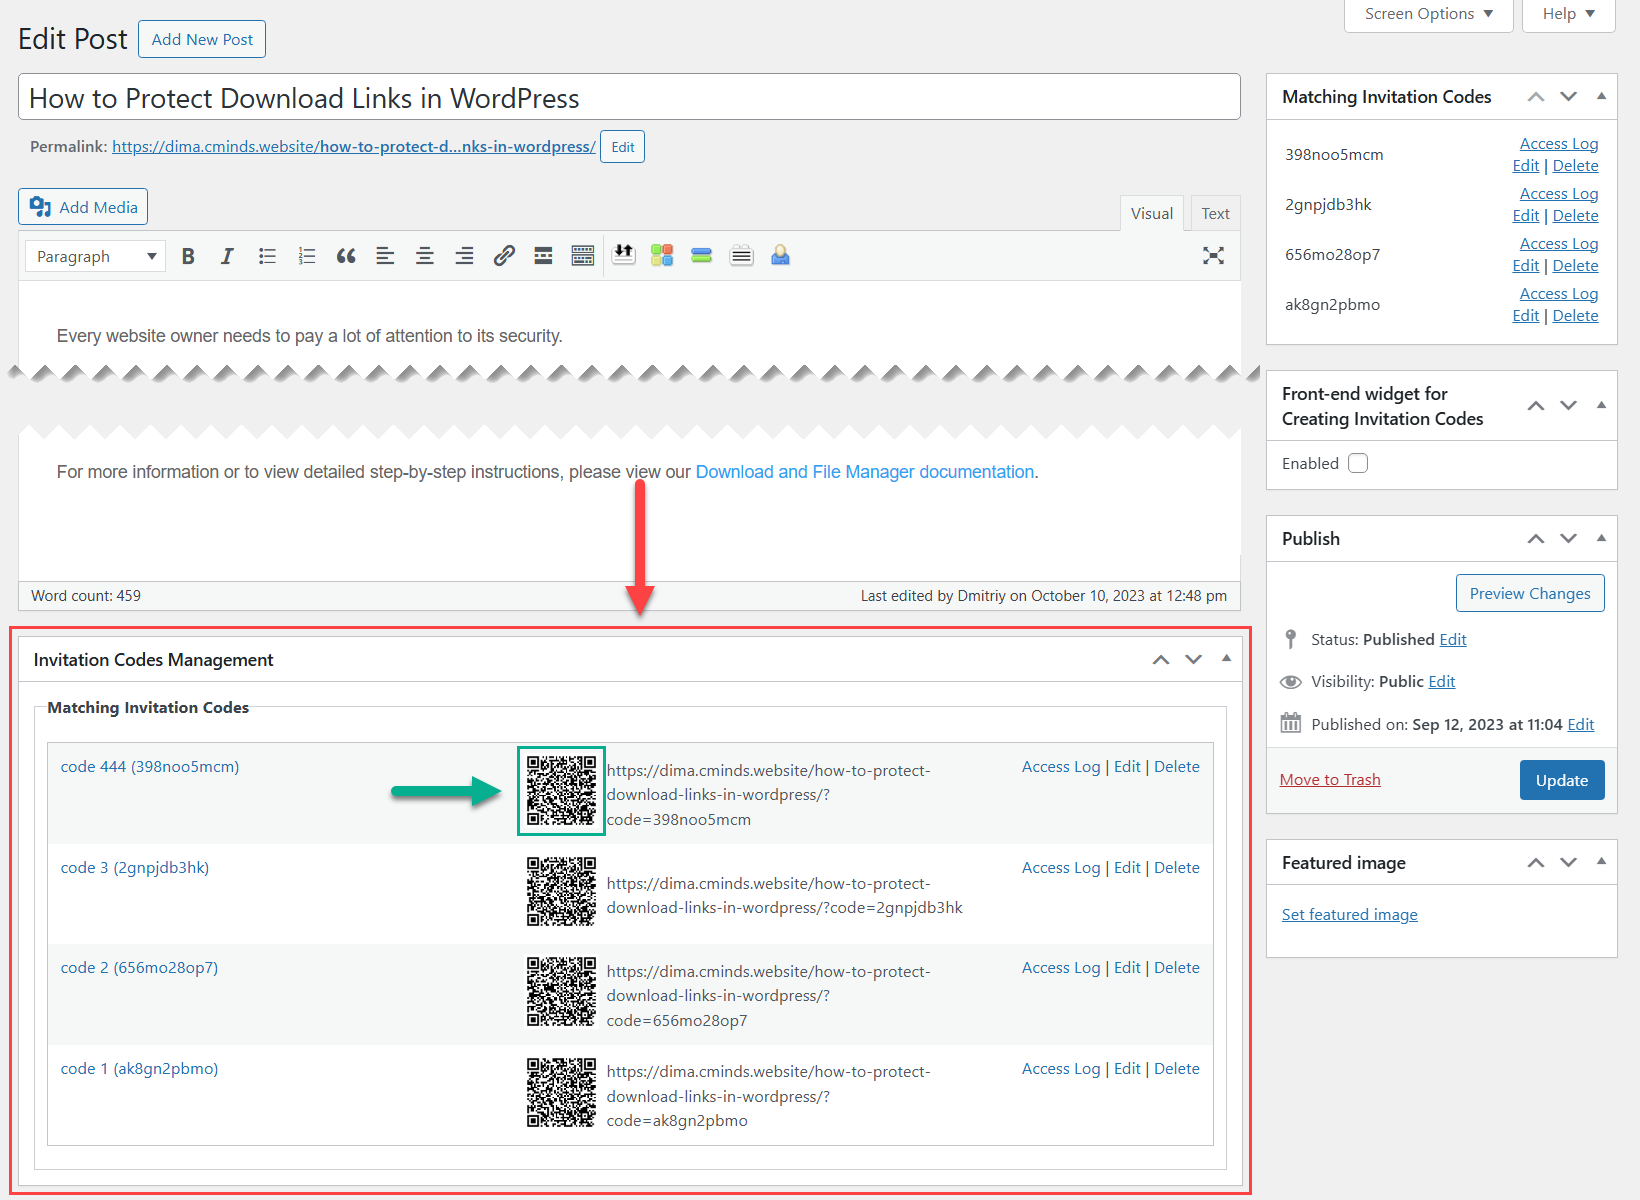
Even if the same invitation code restricts multiple posts, each post still has a unique QR code:
End Result
Following instructions found in the plugin and guides, you should be able to create QR codes that let users access restricted content.
Use Case Front-end
 |
More information about the WordPress Invitation Code Plugin Other WordPress products can be found at CreativeMinds WordPress Store |
 |
Let us know how we can Improve this Product Documentation Page To open a Support Ticket visit our support center |