Appointment Booking Calendar - Setup Step 1 - Create a Calendar
Setup Step 1 - Create a Calendar
Appointment Booking Calendar Initial Steps
Step 1- Create a Calendar | Step 2 - Add Calendar to Website | Step 3 - Modify the Form
The first step in setting up the Appointment Booking Calendar plugin is to create your first Calendar.
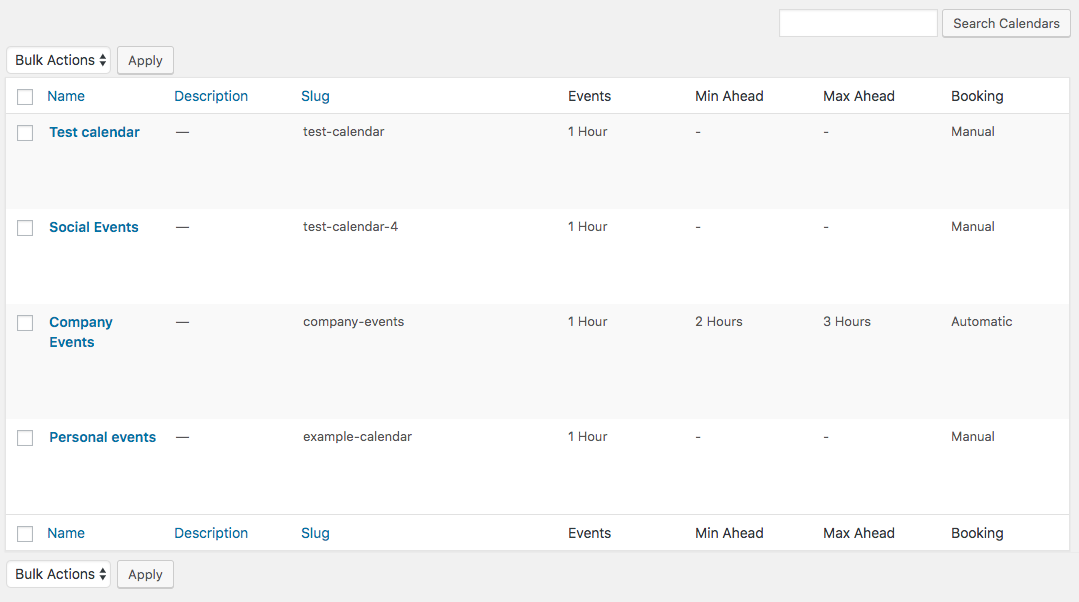
Navigate to CM Appointments Booking Pro → Calendars. The list of previously created calendars appears on the right. On the left is the Add New Calendar form.

Calendar Settings 1) - Basic Fields
Fill out all of the required fields for the Calendar:
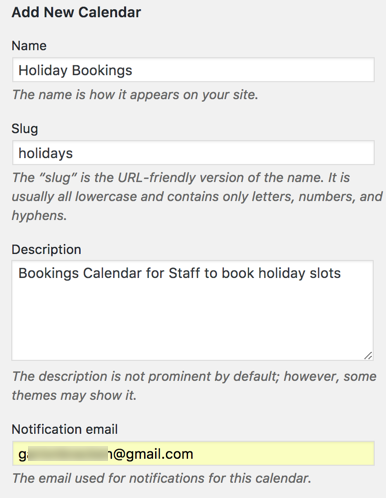
- Name: The name of the Calendar for the Front-end of the site
- Slug: The URL friendly name for the Calendar (used for shortcode)
- Description: The backend description of the calendar (use caution as some themes will display it on the front-end)
- Notification email: The email for the manager of the Booking calendar who will receive notifications of Bookings made
Calendar Settings 2) - Calendar Fields
Then set the following settings before clicking the blue Add New Calendar button:
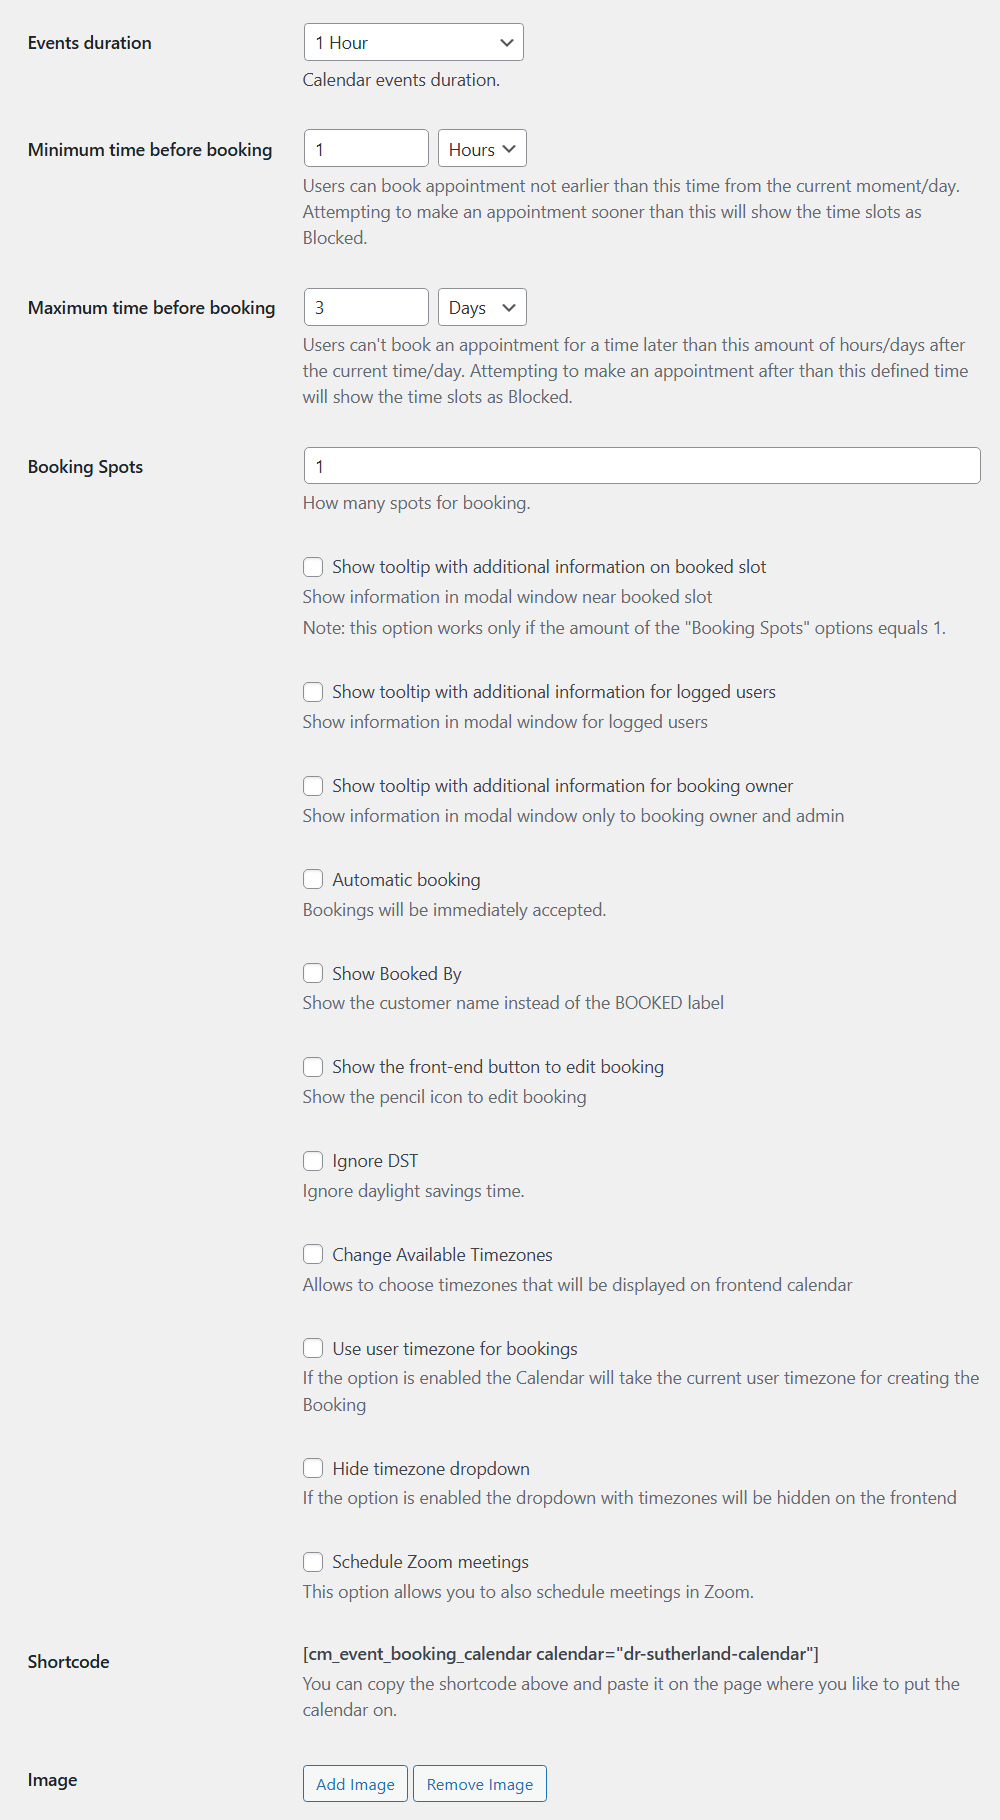
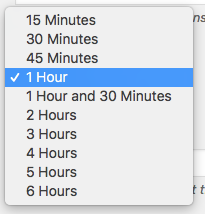
- Events duration: Choose the duration of booked events (e.g. 15 minutes consultation, 45 minutes session, 1h doctor visit, 3 hour walking tour etc.)
- Booking time availability
-
Minimum time before booking - Bookings will only be available after the set amount of hours or days. For example, if it is set to 24 hours, the user can only book one day after the current time. This affects the calendar. Note: the option for choosing days was introduced in version 2.5.0.
Maximum time before booking - Bookings will only be available before the set amount of hours or days. For example, if it is set to 24 hours, the user can only book within the next 24 hours. This affects the calendar (learn more). Note: the option for choosing days was introduced in version 2.5.0.
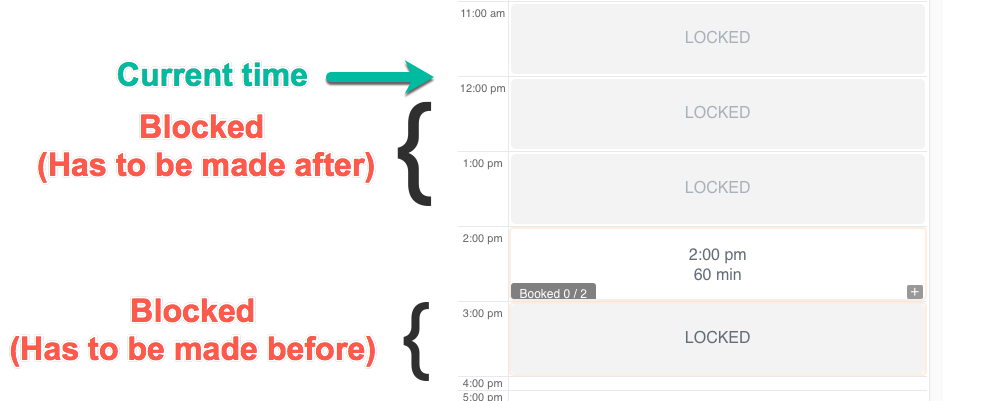
Example - The calendar below has the following settings:
- Minimum time before booking (in hours) - 2
- Maximum time before booking (in hours) - 3
-
- Booking Spots - How many spots each event has. You can choose to hide this information from your users in the General Settings.
- Show tooltip with additional information on booked slot - Enable this option if you want to display short info about booked slots on the front-end. Learn more about it in this guide: Appointment Booking Calendar - How To - Display Short Info About Booked Slots On the Front-End. Note: this option was introduced in version 2.3.3.
- Show tooltip with additional information for logged users - Enable this options to display short info about booked slots on the front-end for logged users only. Learn more about it in this guide: Appointment Booking Calendar - How To - Display Short Info About Booked Slots On the Front-End. Note: this option was introduced in version 2.3.4.
- Show tooltip with additional information for booking owner - Enable this option if you want only the admin and the customer who booked the slot to see the additional information. Learn more about it in this guide: Appointment Booking Calendar - How To - Display Short Info About Booked Slots On the Front-End. Note: this option was introduced in version 2.5.4.
- Automatic booking - Checking this box will set each booking as accepted automatically meaning Bookings manager's approval is not required for new bookings.
- Show Booked By - Enable this option to show the customer name instead of the label "BOOKED". The name will be displayed only to the admin and the customer who booked the slot (in case if he is registered on the site). Other users will see the label "Booked". Learn more about it in this guide: Appointment Booking Calendar - How To - Display Short Info About Booked Slots On the Front-End. Note: this option was introduced in version 2.5.4.

- Show the front-end button to edit booking - Enable this option to let the customer edit the slot he booked form directly from the calendar. When the user is registered and logged-in, he will see a pencil icon on slots which he booked. Clicking on it will redirect the user to the discussion/cancellation form (the same which he can access using the link from the email). Learn more about it in this guide: Appointment Booking Calendar - How To - Display Short Info About Booked Slots On the Front-End. Note: this option was introduced in version 2.5.4.

-
Ignore DST - Check this option to ignore daylight saving time.

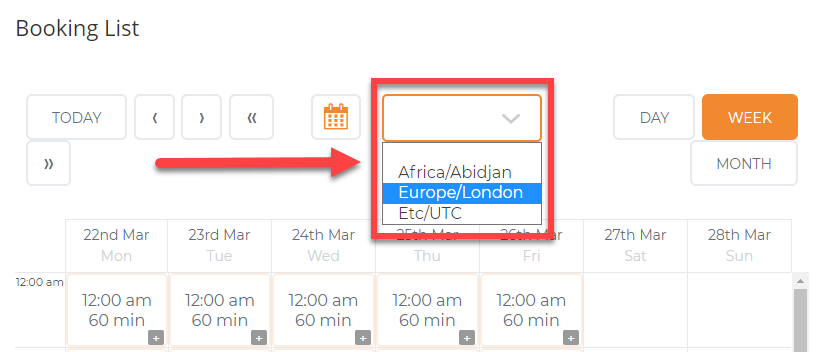
Enabling the option 'Ignore DST' - Change Available Timezones - Allows to add different timezones that the user will be able to choose on the frontend calendar. Note: This option was introduced in version 1.4.8.


Example:
- Use user timezone for bookings - If enabled, Calendar will use the current user's timezone for creating a Booking (Feature added in version 1.5.0).
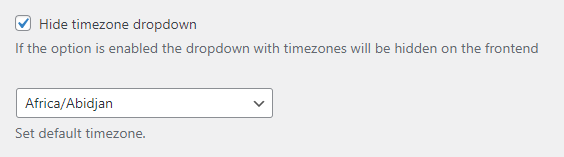
- Hide timezone dropdown - Check to hide the timezone selector (Feature added in version 1.3.4).
- Set default timezone - Choose a default timezone (Feature added in version 1.3.4).

- Schedule Zoom meetings - This option allows you to schedule meetings in Zoom. When you enable it, a few new options are available. Learn more: Appointment Booking Calendar - Integration - Scheduling Zoom Meetings
- Shortcode - Here you can copy the calendar shortcode to paste it then anywhere on your site.
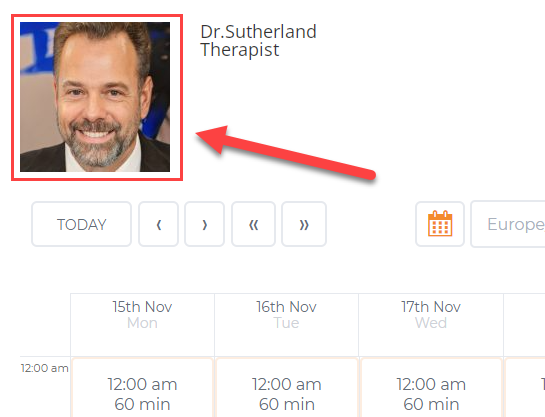
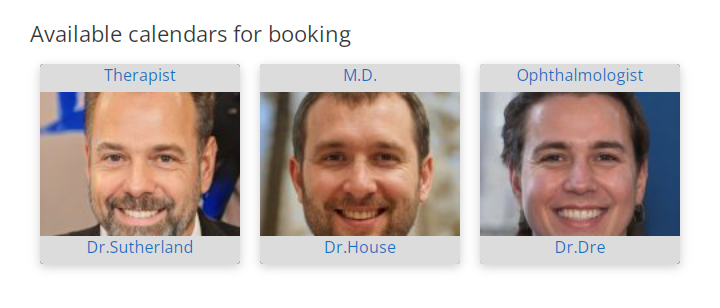
- Image - You can add an image to the calendar or remove it using relevant buttons. Note: this option was introduced in version 2.2.5. That image will be displayed on the front-end:
- On the calendar page (can be disabled in plugin settings).
- On the page with the Tiles View of all calendars.
You can now click the Add New Calendar button.
Learn more: Appointment Booking Calendar - Creating Calendars
TIP: Managing Calendars
When the Calendar has been successfully created it will appear at the top of the list of Calendars on the right.
With a successfully created calendar the next step is to create a new form for customers to enter their details after selecting time slots on the calendar.
 |
More information about the Appointment Booking Calendar plugin for WordPress Other WordPress products can be found at CreativeMinds WordPress Store |
 |
Let us know how we can Improve this Product Documentation Page To open a Support Ticket visit our support center |