WordPress Video Lessons Manager Plugin (CMVLM) - Admin - Managing Lessons
Managing Lessons
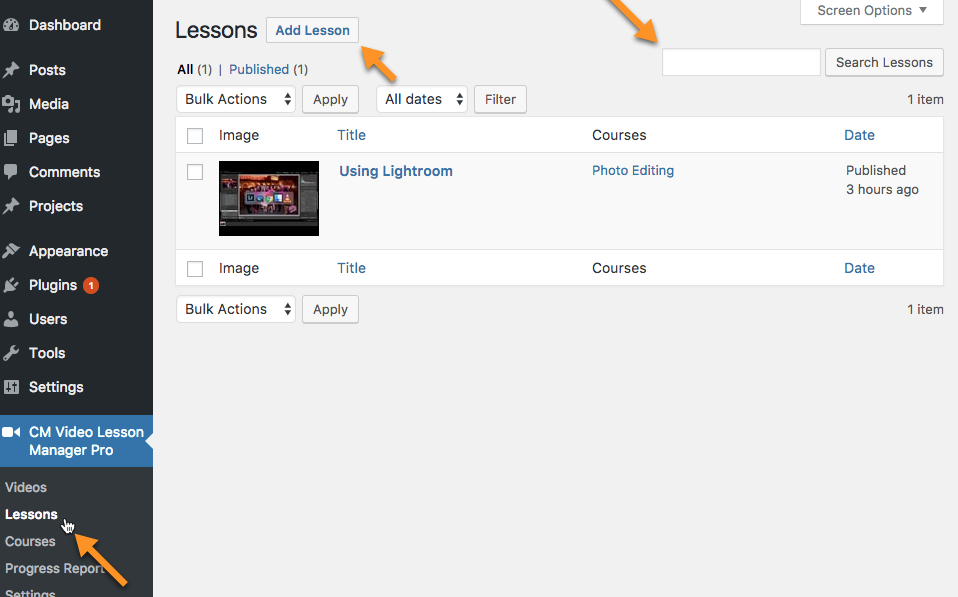
To manage video lessons, navigate to CM Video Lesson Manager Pro → Lessons from the WordPress dashboard. This will open the Lessons page and the list of existing lessons will be displayed.
The video Thumbnail, Title, Courses and Date are displayed. Lessons can be filtered or searched or had bulk actions applied
Creating a New Lesson
On the Video Lesson page click Add Lesson at the top. Doing so will redirect to the Add New Lesson page. This page is essentially the same as the Edit Lesson page which is explained later.
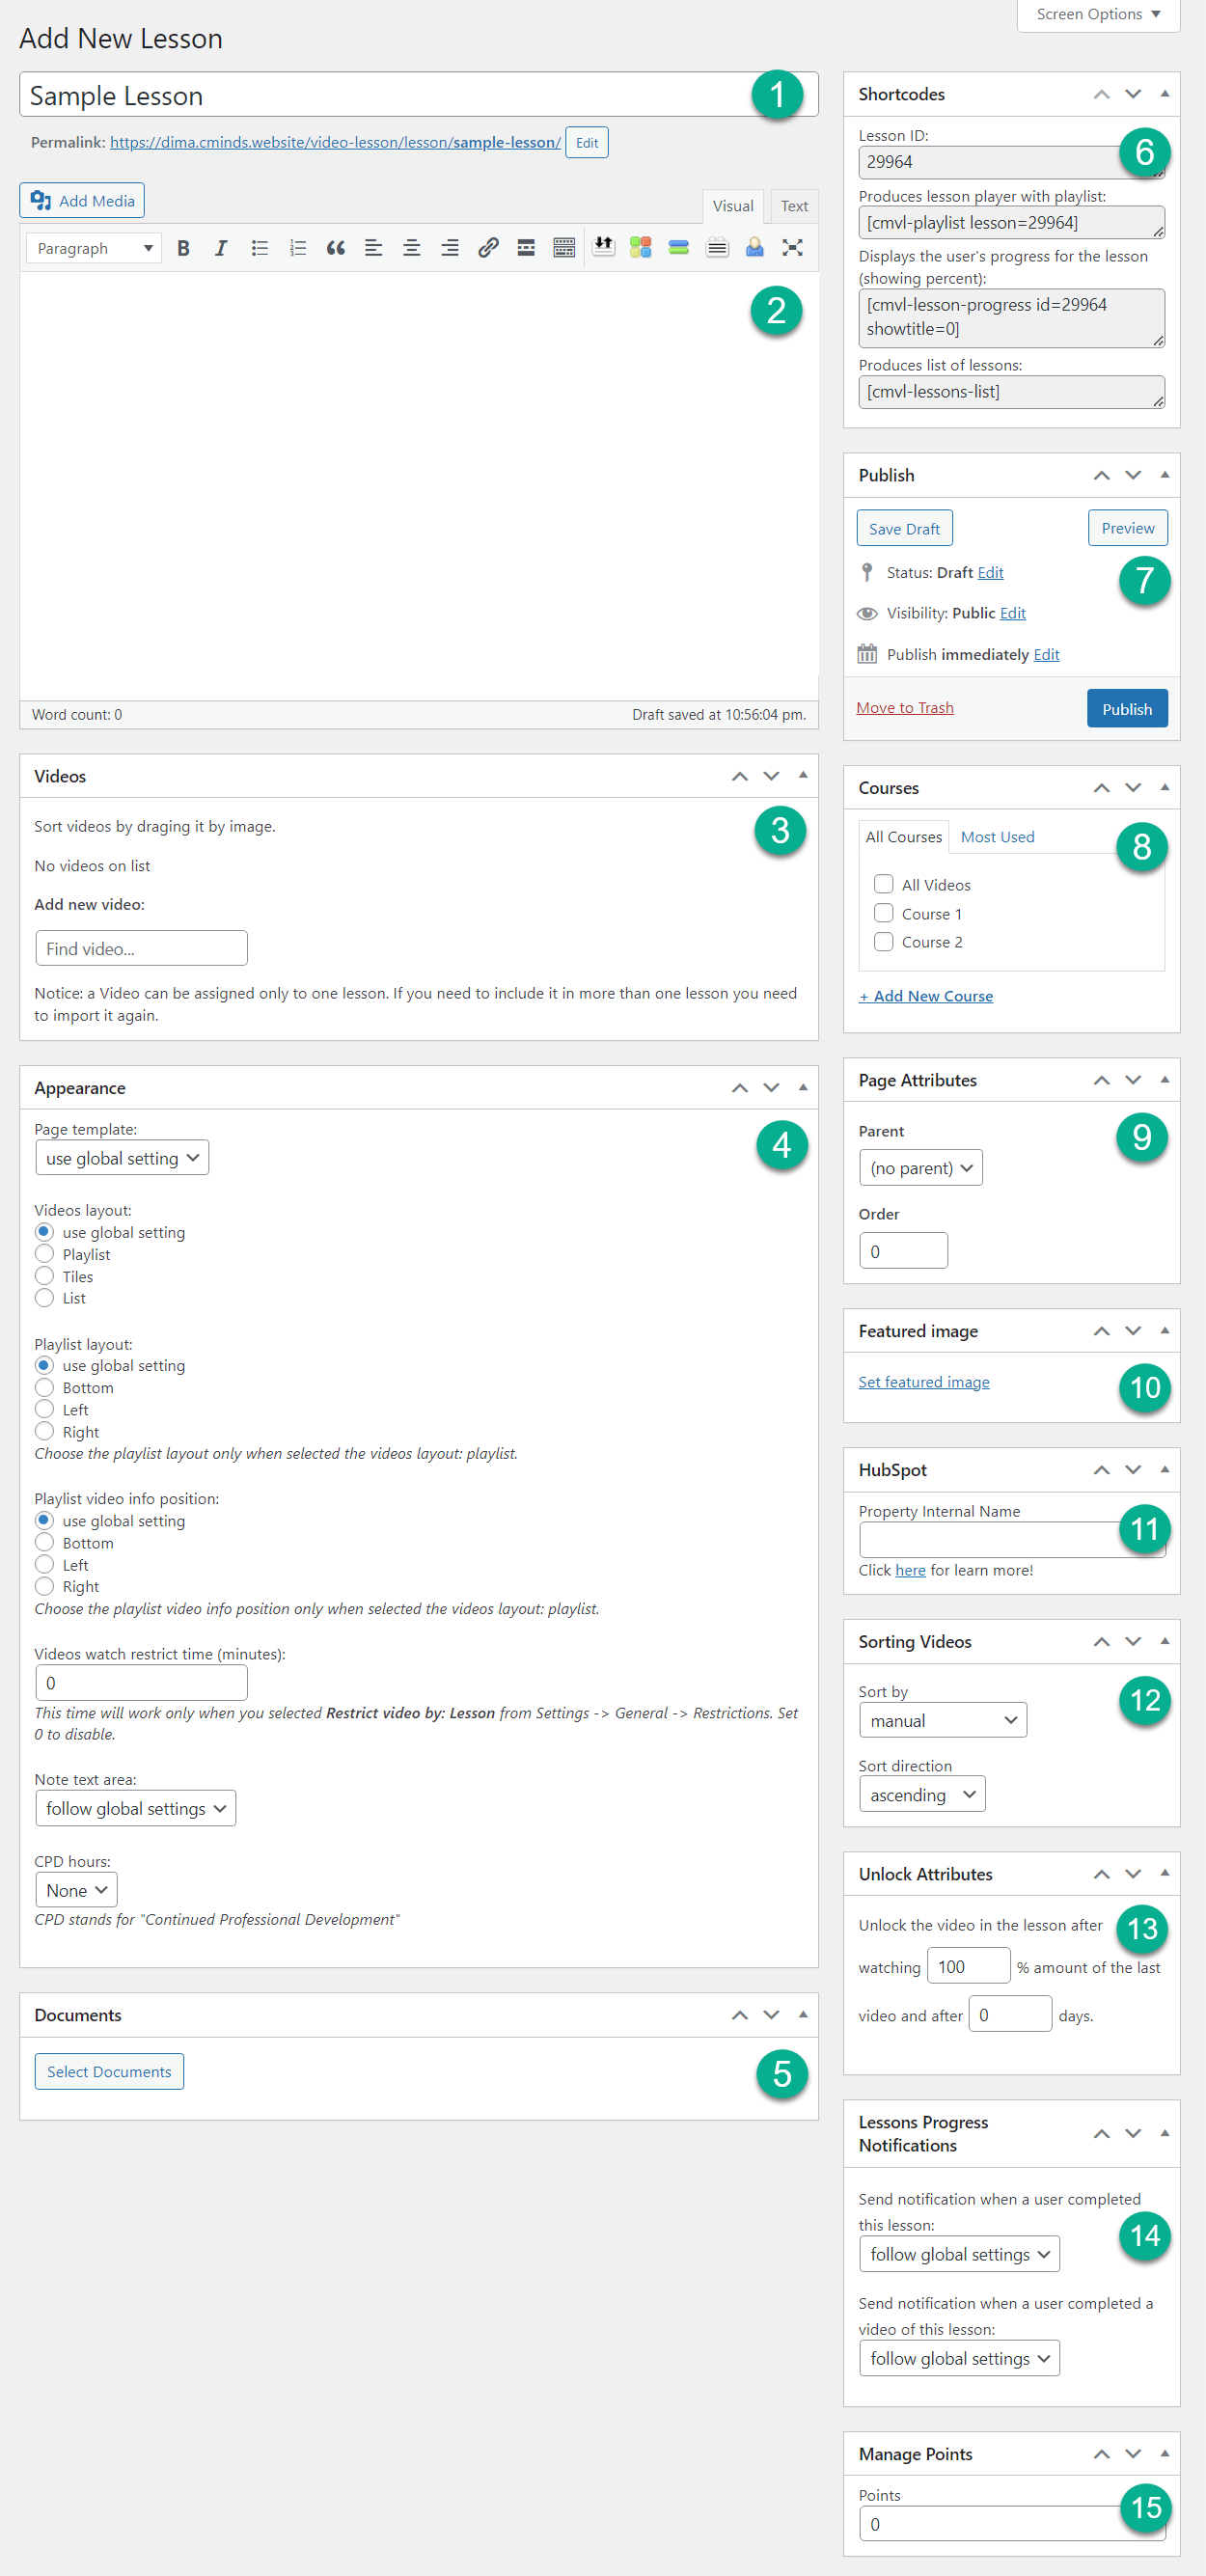
The Meta information that can be altered in this page are as follows.
- Lesson Title - The title that is assigned to the lesson must be entered manually.
- Lesson Description - This text area can be used for describing the Video content. There are various tools for formatting the text or alternatively the description can be written in HTML. Shortcodes are accepted.
-
Videos - Assigned videos can be added and removed for the lesson. All videos shown here also exist in the videos dashboard. Ordering videos can be done by dragging and dropping or by selecting any of the existing ordering options available.
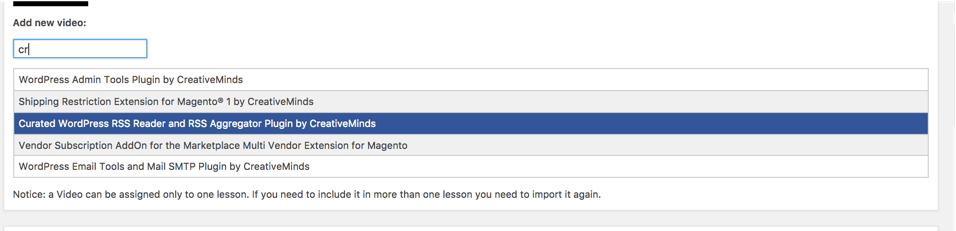
Adding more videos to the lesson can be done by typing the video name, and clicking on it from the list of videos appearing below the search box.
- Appearance - Various settings can be altered here. Customers can also override the Note text area option for an individual lesson.
- Documents - Files attached to the Lesson
- Shortcodes - Allows entering shortcodes, for example, Lesson ID or Produces lesson player with playlist.
- Publish - The current draft status and Public visibility of the Lesson.
- Courses - The lesson can be assigned to a course. To do this, check the box to the left of the selected course. Alternatively a new course can be created and the lesson assigned to it by clicking + Add New course.
-
Page Attributes - This sets the order in which the lessons will appear in the Lessons page. The lowest number appears first. If the admin don't set the order then default lessons will show as per title.

The order number of the lesson - Featured Image - Allows adding a featured image to the entire lesson.
- Hubspot - This metabox is a part of the integration with HubSpot. Here you can add Property Internal Name. Learn more. Note: this option was introduced in version 3.8.1.
-
Sorting Videos - Determines how the videos are sorted in the lesson. To change the order of the video, just click and hold the left button of the mouse on the needed video, then drag and drop in the needed place.

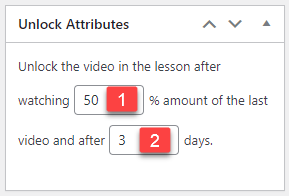
Changing the order of videos in the lesson - Unlock Attributes:
- Define how much time in percentage the user should watch the video to unlock next video. The minimum percent that you can set is "5". To disable the percentage restriction set it to "0". Note: This option was introduced in version 3.5.8.
-
Define when the video will be unlocked. Set the amount of days that should pass after unlocking current video to unlock the next one. Set this value to "0" to disable days limitation. Note: This option was introduced in version 3.6.1.
Unlock attributes for videos Note: if both options are enabled, they will work together. It means, to unlock the next video, both conditions must be met: the user should watch the required minimum time of a video and there should pass enough amount of days.
This option will work only if the option Enable video sequence is enabled, learn more about it in this guide: How To Restrict How Much Time Users Have To Watch Videos
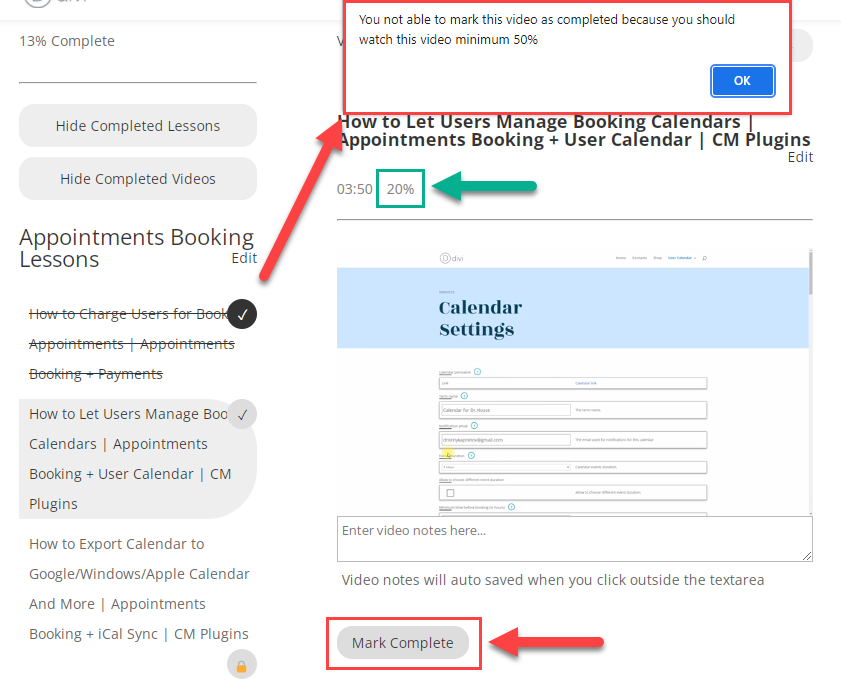
Pop-Up Message
Since the version 3.6.1 of WordPress Video Lessons Manager plugin, if the user hasn't watched enough percentage of a current video, he won't be able to complete this video manually to unlock the next one. A pop-up message will appear instead. You can edit this message in the Labels tab.
- Lessons Progress Notifications - Here you can override global plugin settings for the specific lesson. You can define if to send lesson progress notifications in two cases:
- Send notification when a user completed this lesson.
-
Send notification when a user completed a video of this lesson.
Learn more about notifications in this guide: Settings - Notifications
- Manage Points - Define the amount of points that the user will be rewarded for watching this lesson. Learn more: WordPress Video Lessons Manager Plugin (CMVLM) - Use Case - How to Show User Achievements for Watching Lessons and Courses. Note: this option was introduced in version 3.9.0.
Adding more videos to the lesson can be done by typing the video name, and clicking on it from the list of videos appearing below the search box.
Editing an Existing Lesson
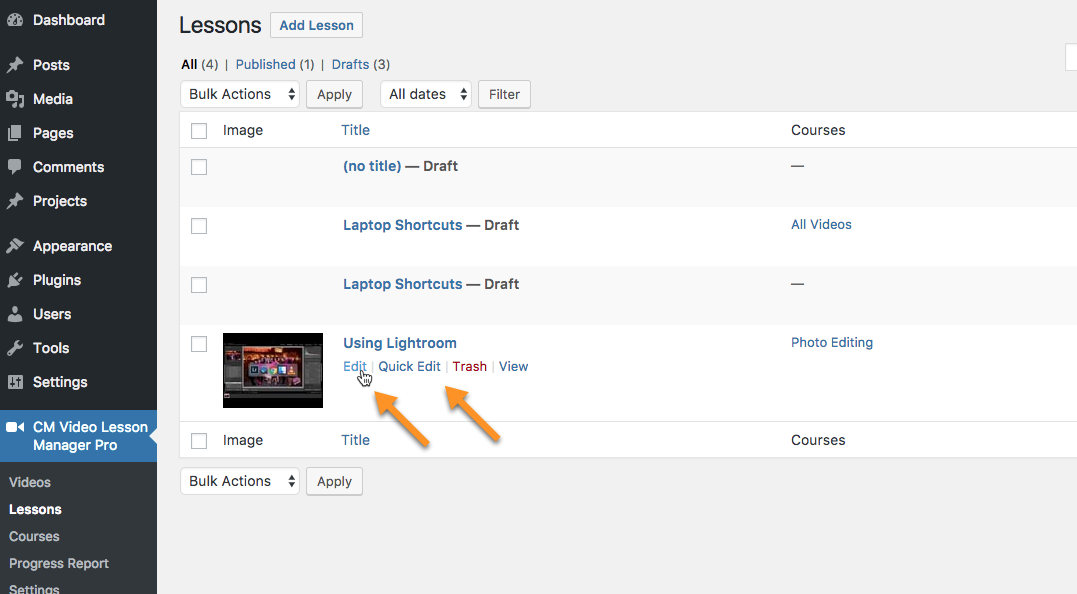
Existing lessons can easily be modified. To do this, navigate to CM Video Lesson Manager Pro → Lessons. Hover over the lesson to be modified to display the options for the lesson.
Then either choose "Edit" to enter the full Edit page which works and looks exactly the same as the "Add Lesson" page aside from having the existing information already entered. Alternatively choose "Quick Edit" to open the Quick Edit options which are slightly more convenient albeit more limited.
Deleting Lessons
Existing lessons can be deleted in bulk or individually.
To move multiple lessons to trash at once, click the check boxes to the left of the chosen lessons. Then Select Move to Trash from the drop down menu in "Bulk Actions". Lastly click on Apply.

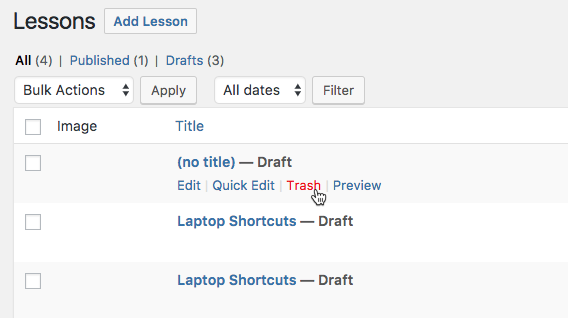
To delete lessons individually, hover over the row of the lesson to be deleted to show the options. Click on Trash. The lesson will then be moved to trash.
Restoring Deleted Lessons
Both the Bulk action and individual method of deleting lessons will delete the lesson without any warnings or alerts.
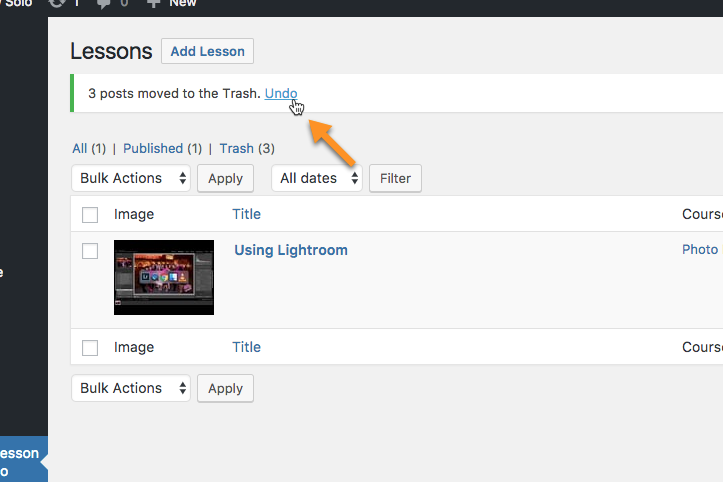
To restore a lesson or lessons immediately after deleting, click Undo in the message that appears at the top of the Lessons page after deleting. The trashed items will then be restored to the Lessons list.
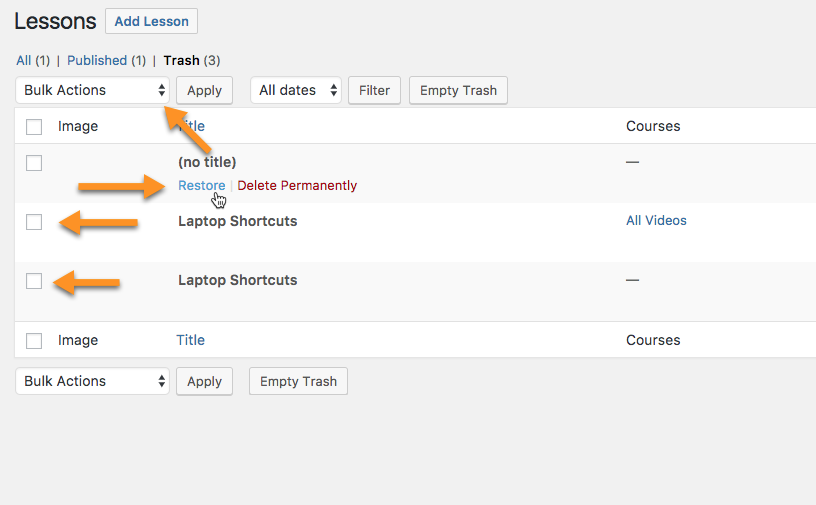
Trashed lessons can be recovered later as well. To do this, click on Trash on the Lessons page to view all the trashed lessons.
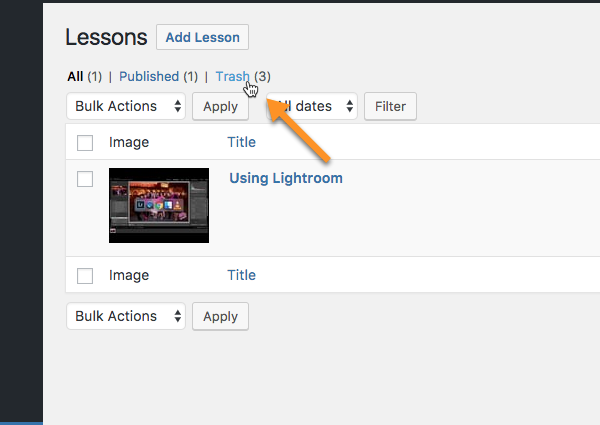
On this page hovering over the Deleted Lessons displays the Restore and Delete Permanently options. Clicking on Restore will restore lessons individually. Alternatively select the check boxes to the left of multiple chosen lesson's rows, then select Restore from the drop down menu, and then Apply.
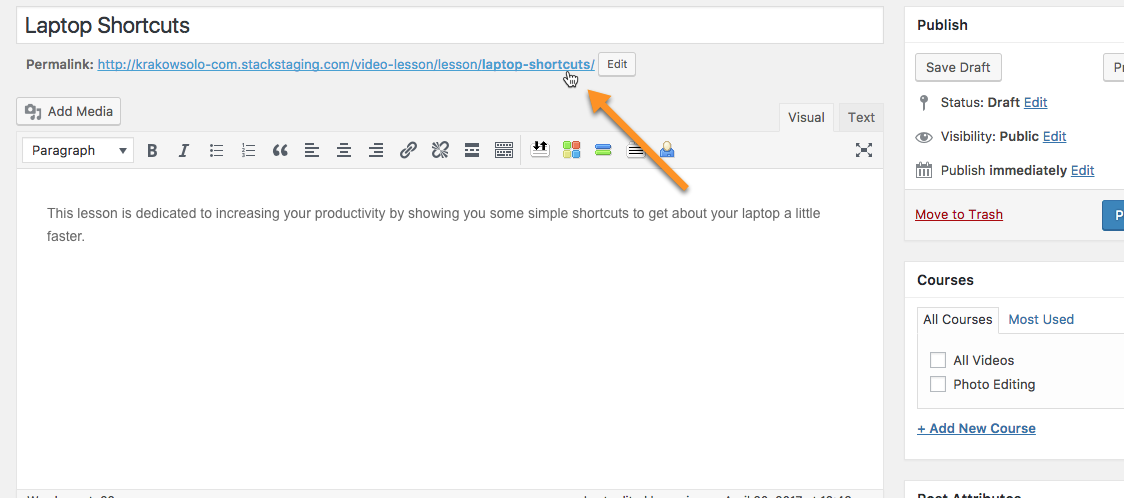
Permalink
Each video lesson has it's own permalink (web address) can be to show the video lesson content.
 |
More information about the WordPress Video Lessons Manager Plugin Other WordPress products can be found at CreativeMinds WordPress Store |
 |
Let us know how we can Improve this Product Documentation Page To open a Support Ticket visit our support center |