WordPress Glossary Plugin (CMTG) - Terms - Using Categories - Dividing Glossary Into Sections
Glossary Categories
Tooltip Tags and Categories
What Tags - Where They Appear | Categories - Dividing Glossary Into Sections
How Index - Showing Only Relevant Tags & Categories | Term Pages - Showing Tags & Categories
The WordPress Glossary plugin Pro+ and eCommerce editions support the use of term categories, which can provide a solution for the following use cases:
- Divide the glossary into sections - Explained in this guide.
- Use several glossaries on the same site (in combination with using shortcodes) - Learn more in the specific guide.
How to create and display your term categories?
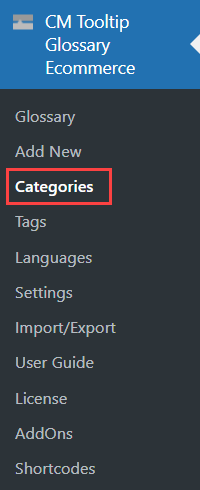
The first step in creating the term categories is by going to the Admin Dashboard → CM Tooltip Glossary → Categories as shown below:
Next, using the WordPress built in category management system, create your term categories and assign different terms to each of them:

Note!
Despite the very similar look, these are not the same categories as the WordPress built-in Post Categories!
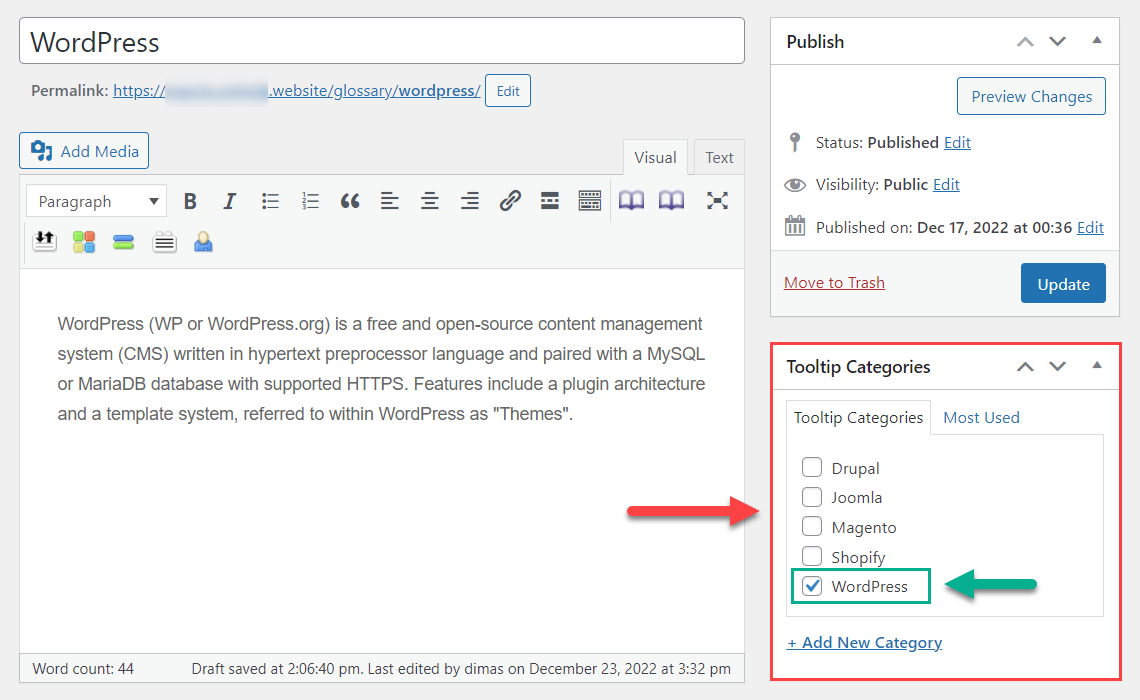
Once categories have been added, it is possible to assign each of your glossary terms to the category/categories it belongs to, as shown in the screenshot below:
How will my term categories be made visible?
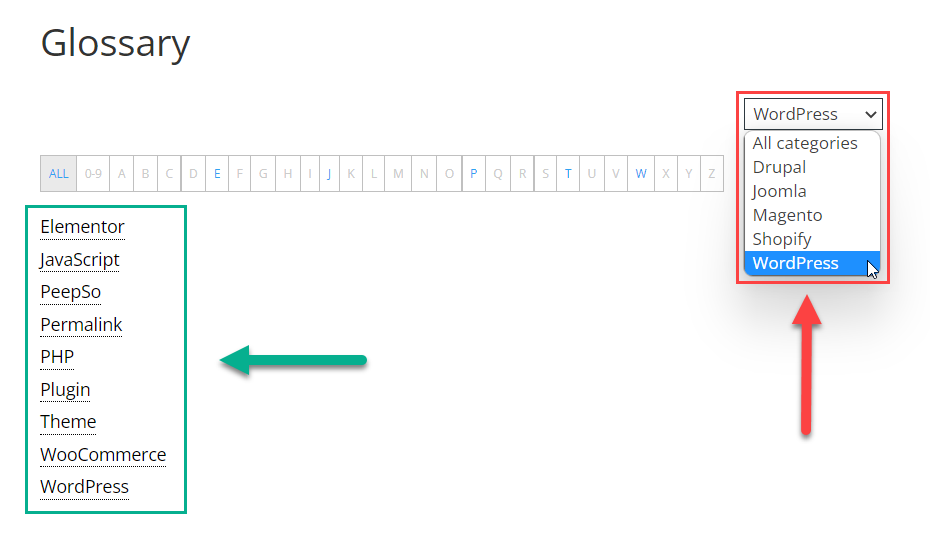
A Categories dropbox will appear in the Glossary Index Page, allowing users to choose between the different term categories, as shown below:
Category Settings
There are a few settings while creating/editing a category, which allow you to override global plugin settings:

- Taxonomy Index Link - Enter here a link which will be used as a backlink for terms of that category. Learn more detailed about how this field works in this guide: WordPress Glossary Plugin (CMTG) - How To - Include Glossary Category In the Term Permalink
- Disable tooltips - Check it, if you want to disable displaying tooltips for terms of a certain category. Note: available in Pro+ and eCommerce versions only.
- Tooltip background color - Choose custom background color for a tooltip. Note: this option was introduced in version 4.2.0.
- Tooltip width - Set the custom tooltip width for the terms belonging to this category. Note: this option was introduced in version 4.3.3.
- Tooltip height - Set the custom tooltip height for the terms belonging to this category. Note: this option was introduced in version 4.3.3.
- Tooltip text color - Choose custom text color inside of a tooltip. Note: this option was introduced in version 4.2.0.
- Tooltip text font-size - Define the custom size of the text inside of a tooltip. Note: this option was introduced in version 4.2.0.
- Tooltip reset custom styles to default - Check it, if you want to reset custom styles to default (according to global plugin settings). Changes will be applied after updating the category. Note: this option was introduced in version 4.2.0.
-
Whitelist/Blacklist Glossary Categories - If you decide to use this field, and select Whitelist for this category - then only the terms from categories which are in this list and are defined in the Glossary will be highlighted in the content if found. If you choose Blacklist instead, terms from selected categories will not be highlighted on the posts/pages belonging to this category.
Front-end Example
- Default tooltip style defined in plugin settings.
- Custom tooltip style defined in a category.

Displaying category terms with custom tooltip style

 |
More information about the WordPress Glossary Plugin Other WordPress products can be found at CreativeMinds WordPress Store |
 |
Let us know how we can Improve this Product Documentation Page To open a Support Ticket visit our support center |