WordPress Glossary Plugin (CMTG) - Getting Started - Glossary Index
Glossary Index
The Glossary Index Page is automatically created upon the WordPress Glossary plugin installation. It's a normal page with the shortcode [glossary] , which outputs a div containing a set of filters and the list of all your terms in an alphabetical order.
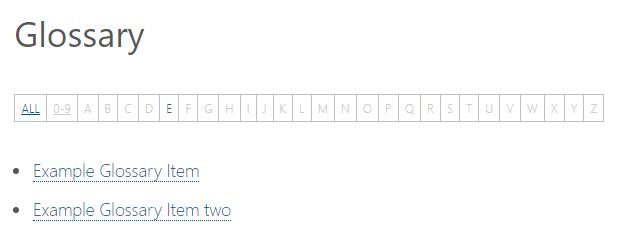
As you add more terms, the Glossary Index Page will be automatically updated to present all of your glossary items.
TIP: Shortcut
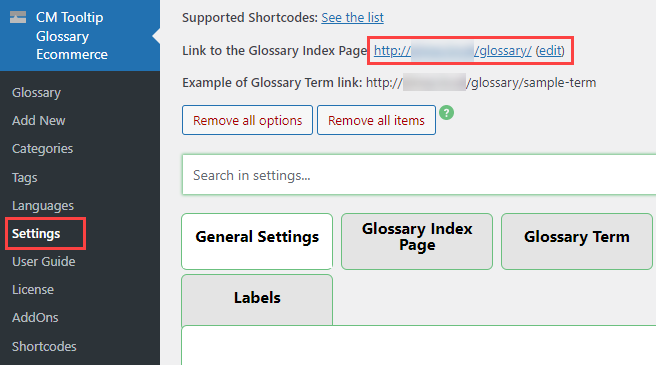
You can easily find and edit the glossary page by going to Admin Dashboard → CM Tooltip Glossary → Settings.
Warning: The free version of the Glossary plugin has a limit to show only 500 terms in the Index Page (performance reasons). In all Pro editions, this limitation has been lifted.
Setting Up Your Main Glossary Index Page
When your first set up your preferences in the plugin settings, you can manually select an existing page from your site, which will be dedicated to the glossary index, or easily generate a new one.
Below: The setting to choose the main Glossary Index Page ID is the first setting of the General Settings tab of the plugin:
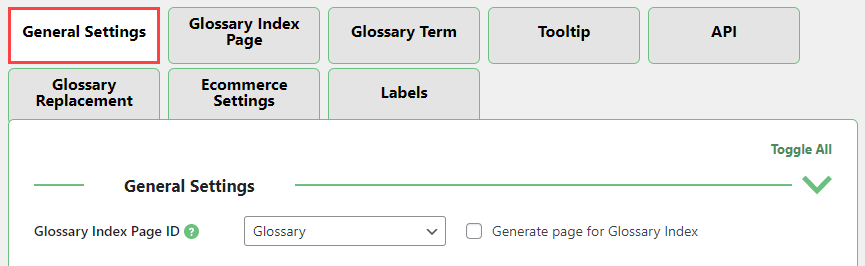
This option allows you to do three things:
- Select one of the existing pages from the dropdown menu.
- Select 'None' from the dropdown menu (no Glossary Index Page).
- Please note that having an index page is optional. If you choose not to have a glossary terms index page on your site, terms will still be highlighted as a mouse-over tooltip in the relevant posts and pages.
- Generate a page and automatically set it as the Glossary Index page (after checking the checkbox and Saving Changes).
Defining the index page’s permalink and name
Glossary Terms Permalink is the part of the URL for glossary terms, but usually it's also the url of the Glossary Index Page.
Below: The setting for the Glossary Terms Permalink is located on the General Settings tab.

Below: An example of how the default permalink of the page containing the Glossary Index can look like:

You can learn more about setting it up on the Glossary Terms Permalink User Guide page.
More than one Glossary Index Page
Even though you can only setup one "main" Glossary Index page, it is possible to have more than one glossary index, by using glossary categories.
The best way to add more Glossaries, is to split the terms between the multiple categories, example:
- Medicine - with slug "medicine"
- Architecture - with slug "architecture"
Then for each of these categories, you should create a separate page/post containing the shortcode with category parameter:
[glossary cat="medicine"]- to display the Medicine terms[glossary cat="architecture"]- to display the Architecture terms
Warning: Please note that you need to use the category slug not the name!
Settings
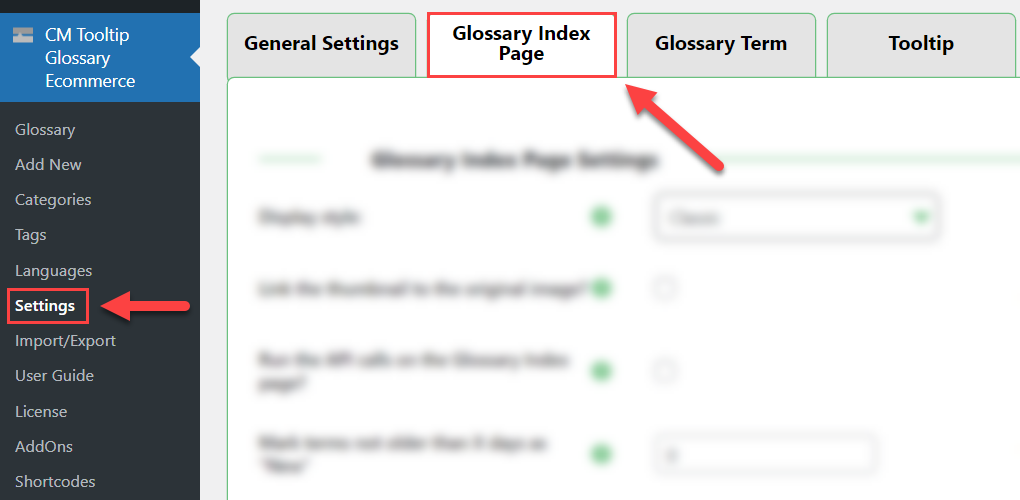
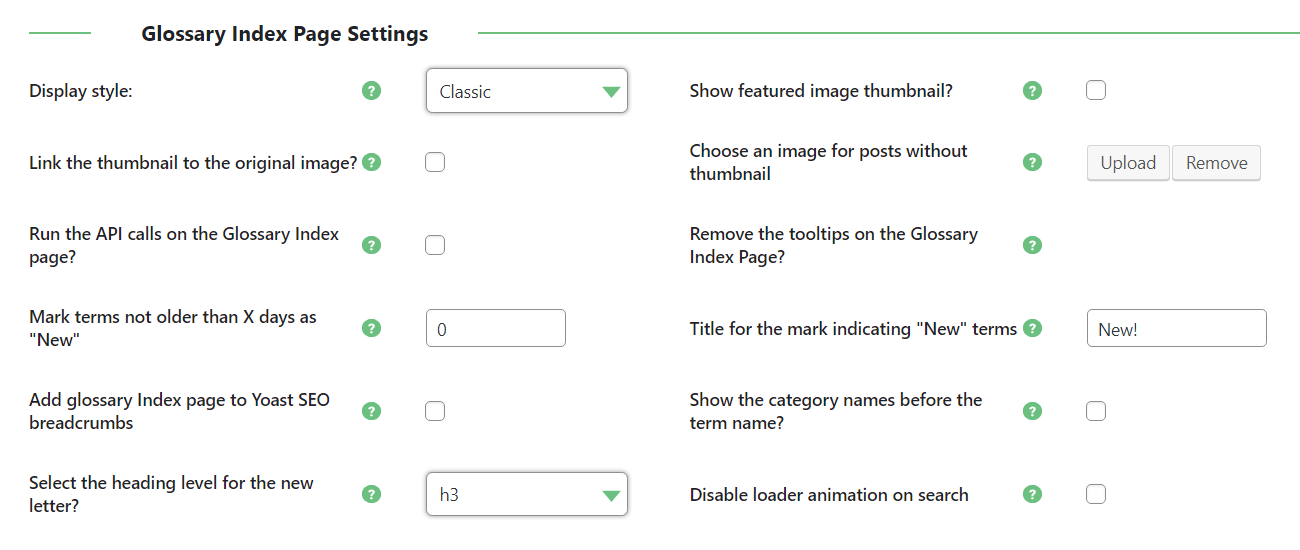
The remaining majority of the settings for the Glossary Index Page are located on the Glossary Index Page tab.
The options are:
Glossary Index Style Templates
The Pro editions have several available style templates for the index page. While the Pro edition has 3 available templates, the Pro+ and Ecommerce have more options.
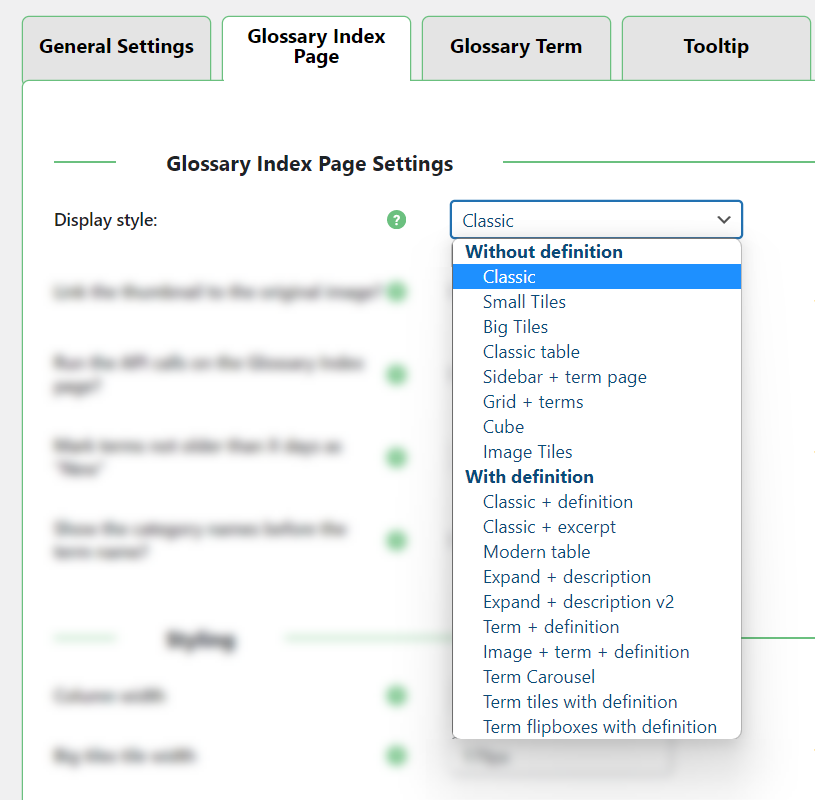
Depending on which version of the plugin you are using, you can show the terms with or without their definition.
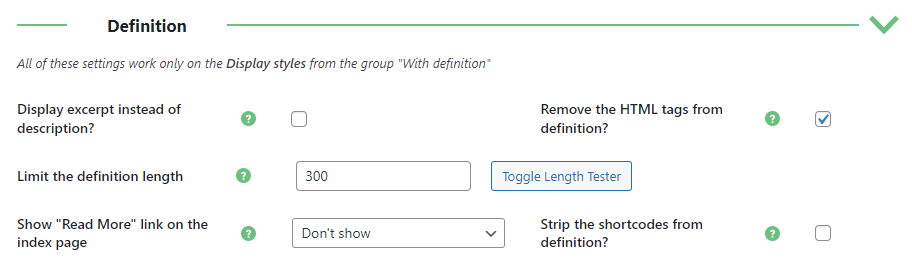
In the Definition settings area, you can select whether to show the definition or the excerpt. You can also limit the length of the text, and remove HTML and shortcodes from the content. Note: This section is available in Pro+ and Ecommerce versions only.
Setting up a Glossary Index Page with the Image Tiles View
To set up the index view to display featured images, follow the instructions in the video below:
Removing the Tooltip from the Glossary Index
If you want to remove the tooltip from the Glossary Index Page, this is not controllable from the plugin settings.
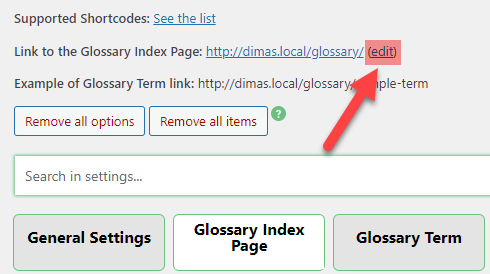
Instead, you need to edit the page where the glossary index appears.
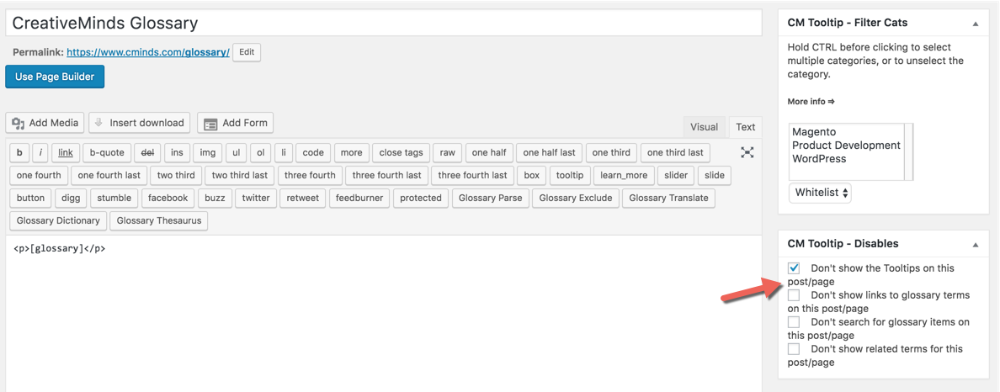
Below: One of the easiest ways of getting to the Glossary Index edit page is by clicking the (edit) link marked with the arrow.
While editing the page, choose in the glossary metabox "Don't show the tooltip on this page":
Additional settings
The plugins Glossary Index Page also includes options for social sharing and for showing a search form. Learn more WordPress Glossary Plugin (CMTG) - Extras - Social Share Buttons
Under the headline Alphabetic index, you can choose to hide letters from the index if there are no matching terms. You can also customize your alphabet and show or hide numbers. Learn more: WordPress Glossary Plugin (CMTG) - Index - The Alphabetic Index
Pagination
To learn more about the pagination of the Glossary Index Page, please visit the Index Pagination page.
 |
More information about the WordPress Glossary Plugin Other WordPress products can be found at CreativeMinds WordPress Store |
 |
Let us know how we can Improve this Product Documentation Page To open a Support Ticket visit our support center |