WordPress Pay Per Post Plugin (CMPPP) - Use Case - How to Visualize Post Availability with Badges and Access Rules
Use Case - How to Visualize Post Availability with Badges and Access Rules
Requirements
This use case requires these plugins to be installed and activated:
- WordPress Pay Per Post Plugin + EDD Direct Payments Add-on (You receive both products upon purchase) - To block content. This document uses version 2.7.0.
The plugin also requires installing and using one of the following payment plugins:
Introduction
The WordPress Pay Per Post plugin allows you to charge users for accessing content on your site. The admin can set up prices for different periods of access time.
Use Case Front-End
Here's a front-end example of all kind of post statuses:

Use Case Assumptions
In this example use case guide, we'll cover how to display badges next to posts to indicate their availability status (free, paid, purchased, unavailable, or temporarily free). We will also show how to combine badges with access rules such as purchase limits and delay restrictions.
We also consider you have already bought the plugin, but not installed it yet.
It follows:
- Installing the plugin
- Quick recap
- Enabling and configuring badges
- How to make posts unavailable after a set number of purchases
- How to make new posts free for a limited time
- End result
Installing the Plugin
The process is the same for all CM plugins and add-ons.

- Download the plugin from your customer dashboard.
- Log in to WordPress and navigate to the WordPress Admin → Plugins settings.
- Click on Add New.
- Activate it and add the license.
Quick Recap
In this use case guide we will focus mostly on enabling and customizing a timer widget.
To learn more about the plugin basic and how to configure it, please check the following use case guide:
Enabling and Configuring Badges
Let's start with the settings of badges. There're 5 post statuses which the plugin supports:
- Free post
- Paid post
- Post which is already purchased by the user
- Post which is not available for purchasing anymore (learn more below)
- Post which is free for a certain period of time (learn more below)
For each post status, you can define a custom icon and text that will be displayed on hover.
To configure it, navigate to Admin Dashboard → CM Pay Per Posts Pro → Settings → Badges & Widget tab.
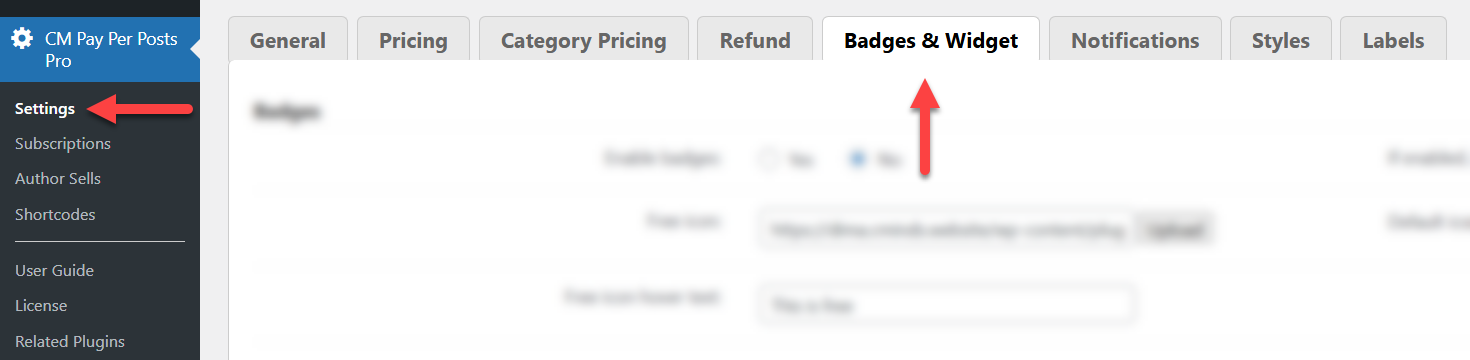
Find the section Badges. The options are:

- Enable badges - Choose Yes to turn on status badges feature.
- Free icon - Define the icon for posts which are free to view.
- Free icon hover text - Define the text for posts which are free to view.
- Paid icon - Define the icon for posts which are paid.
- Paid icon hover text - Define the text for posts which are paid.
- Purchased icon - Define the icon for posts which are already purchased by the user.
- Purchased icon hover text - Define the text for posts which are already purchased by the user.
- Not available icon - Define the icon for posts which are not available for purchasing anymore.
- Not available icon hover text - Define the text for posts which are not available for purchasing anymore.
- Free now, but will be paid soon icon - Define the icon for posts which are free for a certain period of time.
- Free now, but will be paid soon icon hover text - Define the text for posts which are free for a certain period of time.
After configuring the settings, click the button Save at the bottom of the page.

Front-end Example
Here's a front-end example of all kind of post statuses:
- Free post
- Temporarily free post
- Paid post
- Post which is already purchased by the logged-in user
- Post which has reached limit of user purchases

Now let's learn more about posts which are not available anymore and about temporarily free posts.
How to Make Posts Unavailable After a Set Number of Purchases
The admin can restrict the number of users that can purchase each post. For example, if we set a users limit to 10, and 10 users have already purchased some post, other users will not be able to purchase access to this post anymore. Users who already purchased access can repurchase the post after their access expires
To configure this feature, navigate to the General tab of the plugin settings.

Find the section Post Availability. The options are:

- Allow to set limit the post availability for users - Choose Yes to enable the limitation.
- Max user number limit - Set the maximum number of users that can purchase each post.
- Allow to set message with limit - If this option is enabled, users will see a message for posts where the limit has been reached.
The labels for this feature can be edited in the plugin settings under the Labels tab.

Relevant labels can be found under the Post Availability section.

How to Make New Posts Free for a Limited Time
The plugin allows to enable restriction for posts or group of posts, but make newly created post free for the specific period of time.
For example, if you set a delay restriction of 3 days, the post or page will be accessible for free during the first 3 days after it is published. Once this period ends, users will need to pay to view the content.
The delay restriction can be set to:
- individual post
- group of posts
- category of posts
Delay Restriction for an Individual Post
To enable it for an individual post, head to Admin Dashboard → Posts → All Posts, hover on the needed post and click Edit.

Find the metabox CM Pay Per Posts Pro: [Payment System Name] Pricing. Configure the following settings:
- Enable the option Allow buying as individual.
- Define the access period and price.
- Enable the checkbox for the Delay restriction option and set up the number of days for how long it will be free since the publication date.
Then save the changes in the post.
Delay Restriction for a Group of Posts
To enable the feature for a pricing group, navigate to Admin Dashboard → CM Pay Per Posts Pro → Settings → Pricing tab.

Choose the pricing group where you want to enable the feature, enable the option Delay restriction, then set the number of Days since publication date.
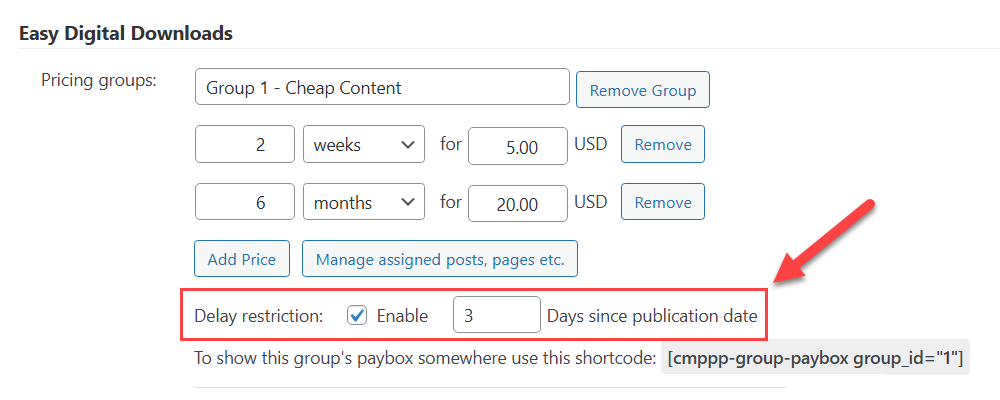
Don't forget to save the changes.
Delay Restriction for a Category of Posts
To configure it for category of posts, navigate to the Category Pricing tab.

To define a delay restriction for a category, configure the following:

- Enable categories pricing - Turn on this option.
- Payment model - Choose the payment system you want to use. The list will show the plugins which are installed and activated on your site. In our use case we will choose Easy Digital Downloads.
- Specific post categories - Select a category to set a specific pricing for it.
- Set price and period for selected categories - Choose the period type, define the duration and price.
- Delay restriction - Check the option Enable, then set the number of Days since publication date.
- Start - Click this button to apply chosen settings to a category.
End Result
Following instructions found in the plugins and guide, you should be able to display badges next to posts to indicate their availability status.
Use Case Front-End
Here's a front-end example of all kind of post statuses:
 |
More information about the WordPress Pay Per Post Plugin Other WordPress products can be found at CreativeMinds WordPress Store |
 |
Let us know how we can Improve this Product Documentation Page To open a Support Ticket visit our support center |