WordPress Pay Per Post Plugin (CMPPP) - Settings - Subscriptions Settings (General Tab)
Subscription Settings
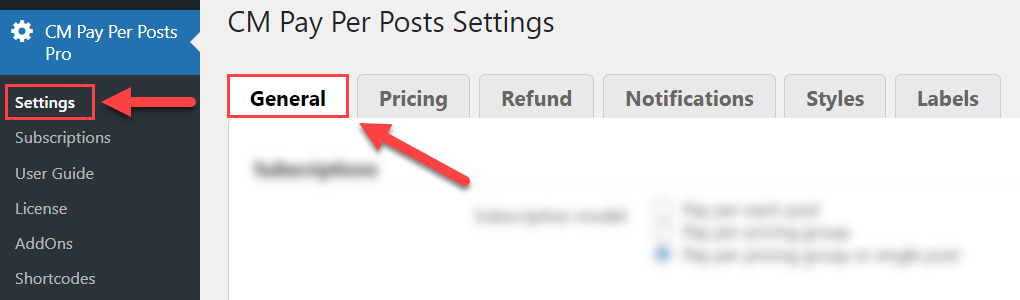
You can find the Subscriptions settings on Admin Dashboard → CM Pay Per Posts Pro → Settings page under the General tab of the WordPress Pay Per Post plugin.
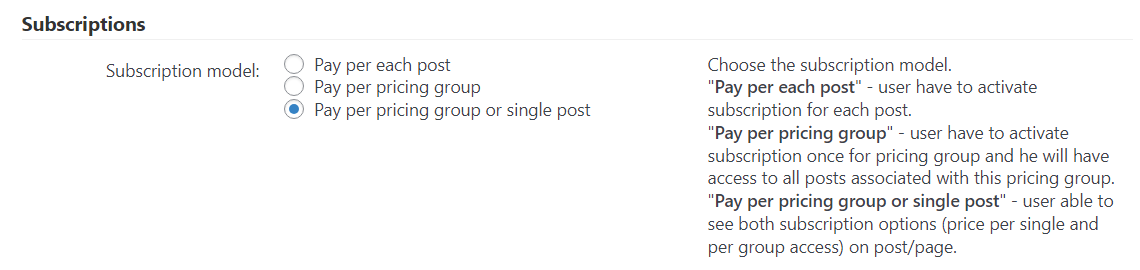
Subscription Model
Choose the subscription model.
-
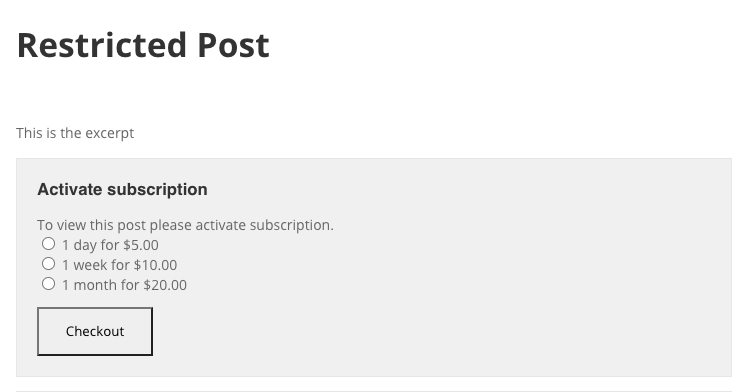
"Pay per each post" - users have to activate subscription for each post.

Setting up an individual price for a post -
"Pay per pricing group" - users have to activate subscription once for pricing group and he will have access to all posts associated with this pricing group.

Assigning post to pricing groups -
"Pay per pricing group or single post" - users can see both subscription options mentioned above on every post or page. (Feature added in version 2.0.7).

Setting up both pricing options for a post


What Should Be Hidden in the Frontend
This is perhaps the most important setting in this screen. There are four option, and some of them have additional settings:
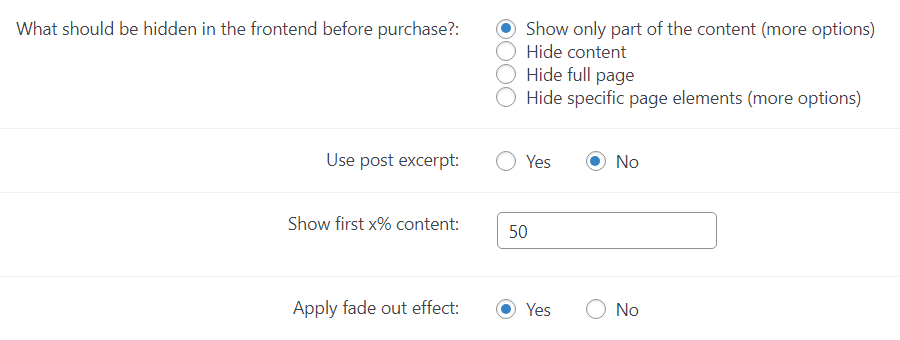
- Show only part of the content (more options) - Specify how much of the content is hidden.
- Hide only content - Hides the complete content.
- Hide full page - Hides the full page, including content, header, and footer.
- Hide specific page elements (more options) - Specify which elements of the page are hidden.
1) Show only part of the content additional options
a) Use post excerpt
- If enabled, post excerpt will be displayed (if available) until the user pays for the access.
- If disabled, the post content fragment will be displayed.
Excerpt Example
With the following excerpt
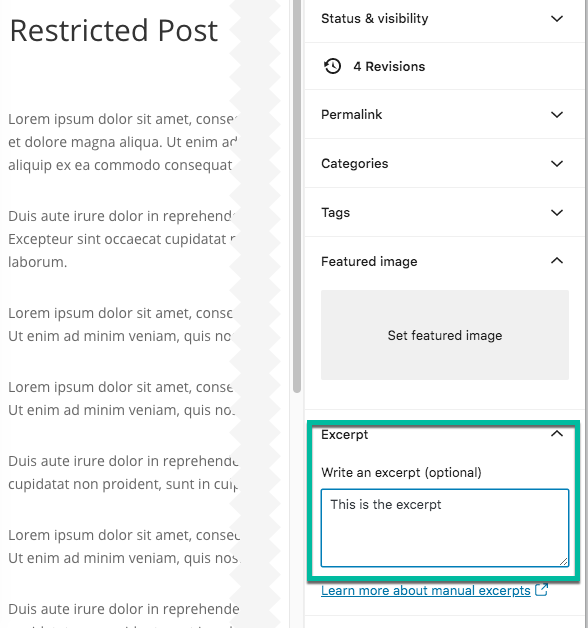
The excerpt is shown before the pay box
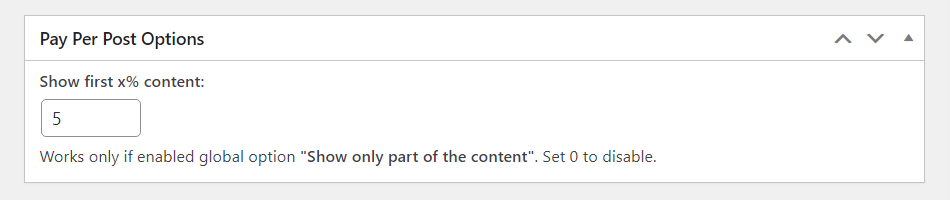
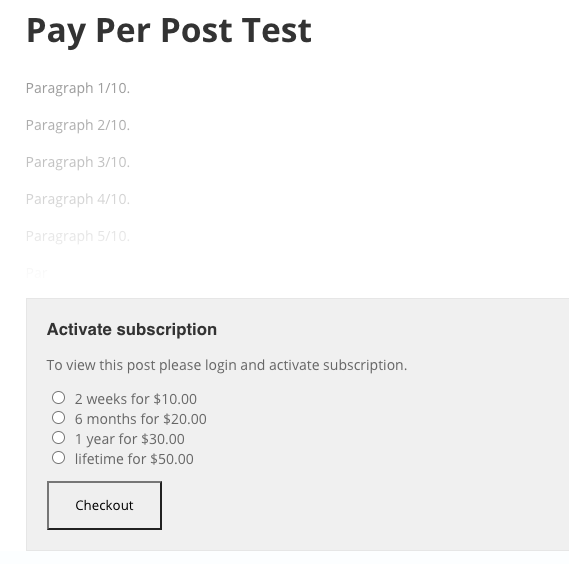
b) Show first x% content
Show a percentage of the post content. Only works if the option Use post excerpt is disabled.
Since the version 2.6.8 it is possible to override the global option for setting up the % for each page. It can be done on the post editing page under the metabox Pay Per Post Options. If the value is set to "0", then the global value will be used.
c) Apply fade out effect
Gradually hides the content, respecting the percentage value.
Example
50% content and fade out effect.
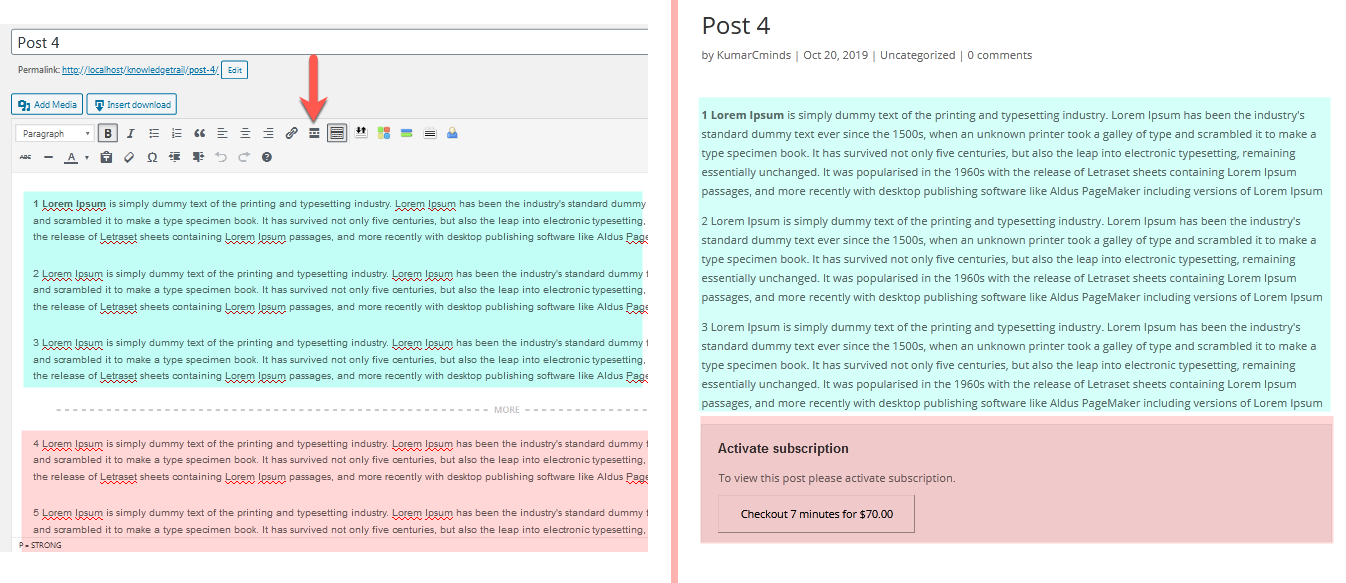
2) Hide Full Post in Frontend
If enabled, will hide the full post (starting from the Read More tag) until the user pays for the access.
Backend vs. Frontend Example
3) Hide Full Page
Hides all elements of the page.
Example
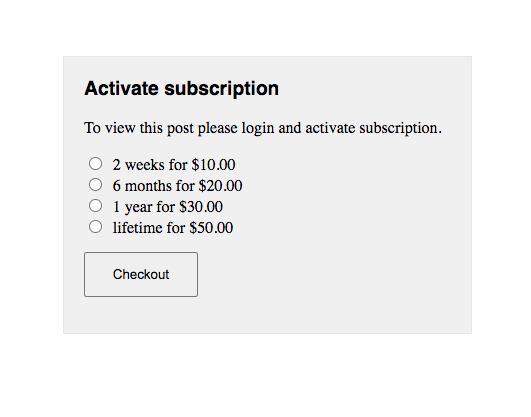
4) Hide Specific Page Elements
ID of Block (only one) to be replaced with payboxes
ID of Blocks to be hidden
Set the element ID which will be hidden. To add multiple, separate them by commas. E.g "main, content, footer".
The element cannot be inside the post/page content.
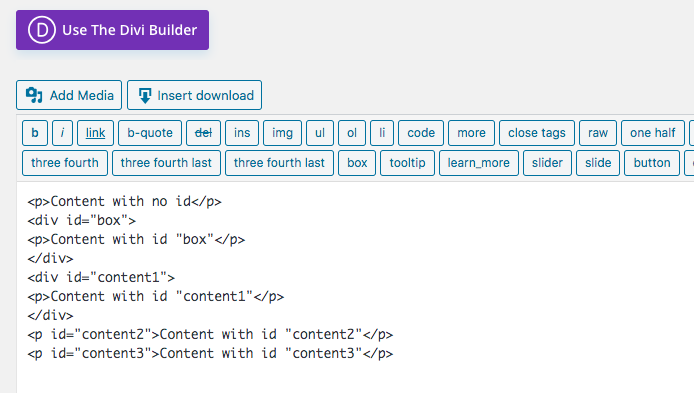
Note: Doesn't Include Post/Page Content
This feature does not apply to content inside the page/post. As such, in the following example the IDs box and content1 would not be hidden.
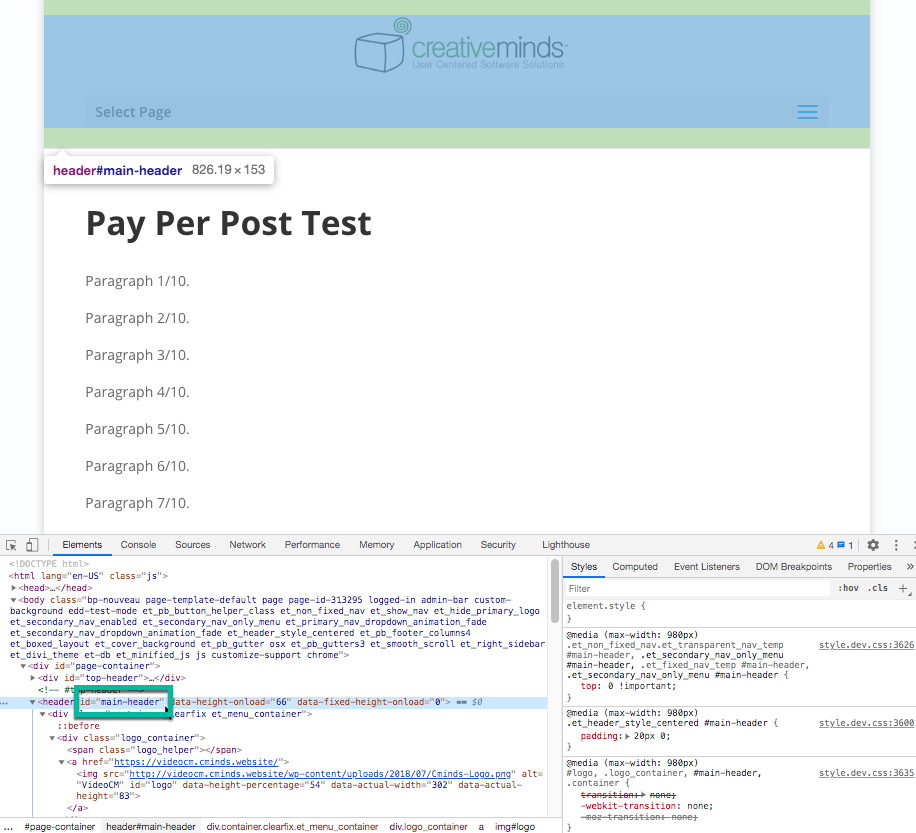
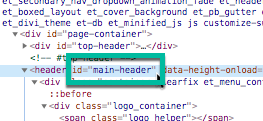
TIP: Finding ID
To find the ID of an element, use the inspect tool of your browser. Locate the element inside the elements list (called DOM tree), and copy its ID. Note that not all elements necessarily have IDs.
Full View
Detail
Additional Options (Always Apply)
The settings below apply despite the options selected above.
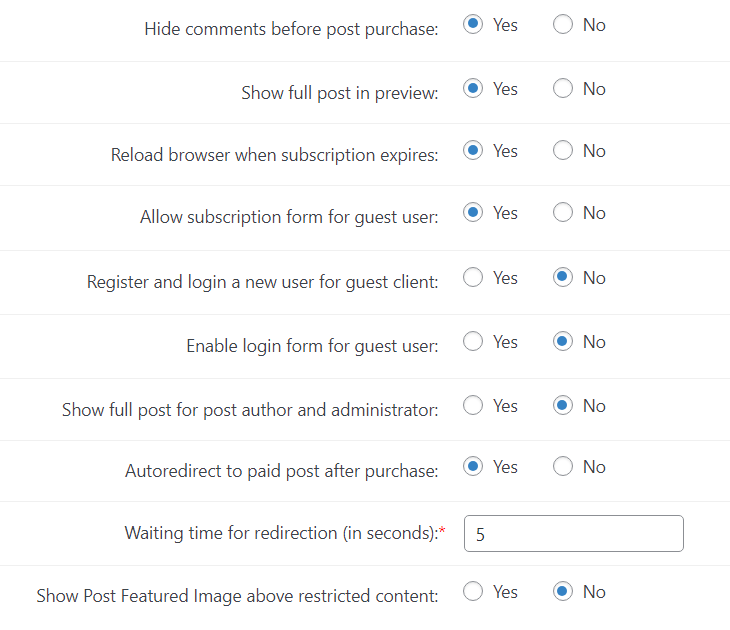
- Hide comments before post purchase - If enabled, comments will be displayed only if user have active subscription for a specific post. If disabled, comments will be always visible.
- Show full post in preview - If enabled, when showing the post preview (eg. for Draft posts) the post content won't be truncated - Wordpress will display full content which will be visible after user purchase a subscription.
- Reload browser when subscription expires - If enabled, script will check in the background if the subscription is still active and reload the browser when it expires or user has been logged-out to disallow further reading post.
- Allow subscription form for guest user - If enabled, guest users will be able to purchase subscriptions of groups and categories even without being logged-in. This option shows the subscription form, including the price, to guests. Note that the guest access is based on a cookie and so guest users will lose access if this cookie is deleted.
Front-End Example

-
Register and login a new user for guest client - If enabled, guests will be registered and logged in automatically after they purchase the access to restricted content. This option works only if the previous option Allow subscription form for guest user is enabled.
A new user is created using one of the payment plugins - Easy Digital Downloads or WooCommerce, depends on which one you use. Created user has a user role Subscriber.
Note: this option was introduced in version 2.5.2.
Important: This option doesn't work with offline payment methods, for example - Direct Bank Transfer by WooCommerce. If the user chooses offline payment method and pays, he will see the message that he must wait until the Administrator confirms the purchase. You can edit the message that the user will see by navigating to the Labels tab. Needed label is called eddpay_wait_until_admin_approve.
- Enable login form for guest user - If enabled, then default WordPress login form will be displayed below the paybox for guest users. If you have installed the WordPress Registration Form Plugin, then
[cmreg-login-form]shortcode will replace the default wordpress login form. - Show full post for post author and administrator - If enabled, the subscription form will not be displayed for post author and administrator.
- Autoredirect to paid post after purchase - Redirects from the checkout page to the paid content. You can set the waiting time in the option below.
- Waiting time for redirection (in seconds) - Set the waiting time for autoredirecting the user to post after the purchase. Default value is 5.
- Show Post Featured Image above restricted content - Enable this option if your theme doesn't support displaying featured images. Note: this option was introduced in version 2.6.3.
 |
More information about the WordPress Pay Per Post Plugin Other WordPress products can be found at CreativeMinds WordPress Store |
 |
Let us know how we can Improve this Product Documentation Page To open a Support Ticket visit our support center |