WordPress Glossary Plugin (CMTG) - Use Case - How to Make a Dictionary Site
Use Case - How to Make a Dictionary Site
Note: This guide covers features from:
- WordPress Glossary plugin (Ecommerce) - This document uses version 4.2.7.
Introduction
The WordPress Glossary plugin allows you to create a site with a complete glossary of terms. Each term definition can appear on mouse hover across the whole site. It is possible to build a language dictionary.
Use Case Front-End
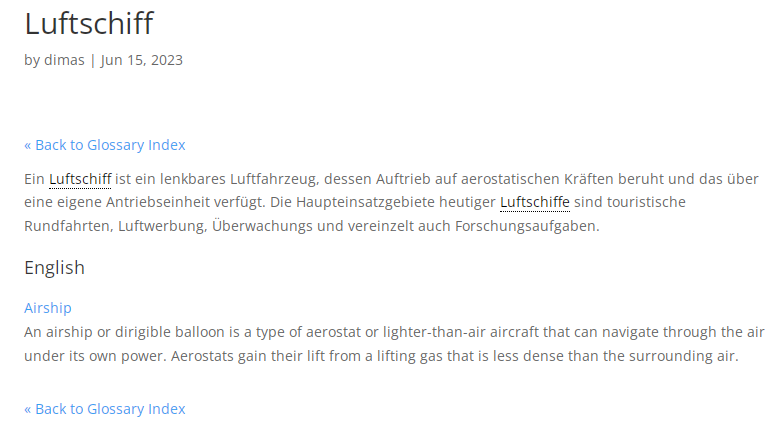
Example of English-German Dictionary:

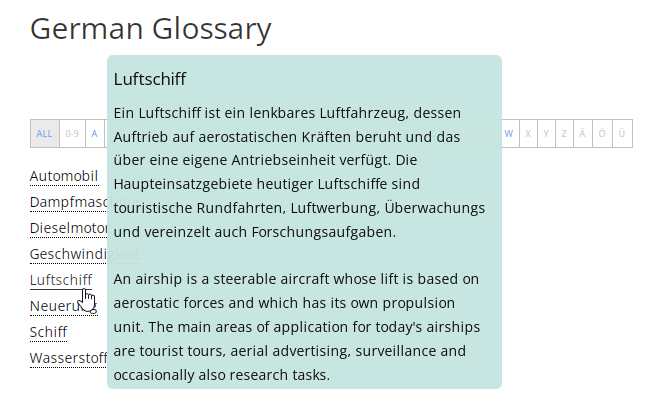
A term page with the German definition and its English translation:
A tooltip with the German definition and automatic translation to English using Google Translate:

Use Case Assumptions
In this example use case guide we will consider how to build up a dictionary site on the example of English-German Dictionary.
We consider that you have already bought the plugin, but not installed it yet.
It follows:
- Installing the plugin
- Quick recap
- Methods for creating a dictionary
- Creating and configuring languages
- Automatic translation of definitions with Google Translate
- Creating separate glossaries
- Overriding Google Translate language settings
- End result
Installing the Plugin

- Download the plugin from your customer dashboard.
- Log in to WordPress and navigate to the WordPress Admin → Plugins settings.
- Click on Add New.
- Activate it and add the license.
Quick Recap
In this use case we will cover only how to build a dictionary. If you want learn more about how to configure the plugin and create your glossary, please, refer to this use case guide:
Methods for Creating a Dictionary
In this use case guide we will consider two methods of creating a dictionary.
The first one is simpler - there will be definitions in two languages, English and German. When the user hovers on the term, he will see a tooltip in the language in which this term was created. Opening the term page will show this user the definition in both languages.
The second method is more complicated - when hovering on the term, the user will see the tooltip with an English definition, and below it the user will see this definition automatically translated by Google Translate to German.
Creating and Configuring Languages
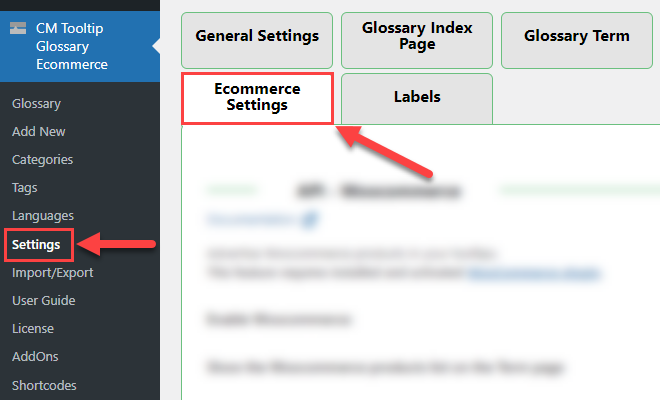
First, we need to enable and configure the feature with languages. To do this, navigate to Admin Dashboard → CM Tooltip Glossary Ecommerce → Settings → Ecommerce Settings tab.
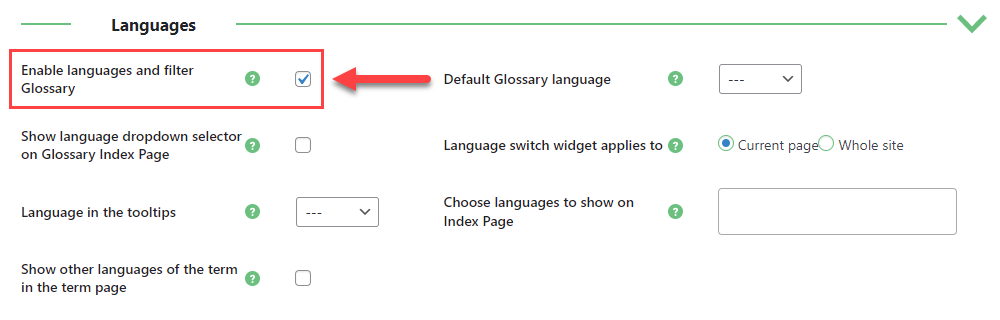
Scroll down and find the section Languages. Now you need to turn on only the option Enable languages and filter Glossary.
Then click the button Save Changes at the bottom of the page.

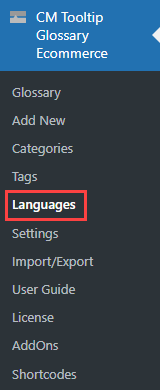
Now we need to create two languages. Head to Admin Dashboard → CM Tooltip Glossary Ecommerce → Languages tab.
On the left side of the screen you will see a form for adding a new language to your glossary. This form has the following fields:
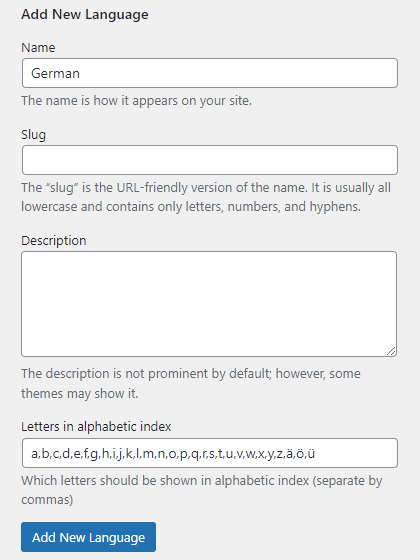
- Name - Here you need to define the name of the language.
- Slug - You can leave this field empty and the slug will be generated automatically when the language is created. However, you can specify a custom slug.
- Description - This field is optional for filling. You can enter the description which is used on the back-end.
- Letters in alphabetic index - Here you need to define the letters of the created language. It is needed for alphabetical navigation on the glossary index page.
When the form is filled, click the button Add New Language.
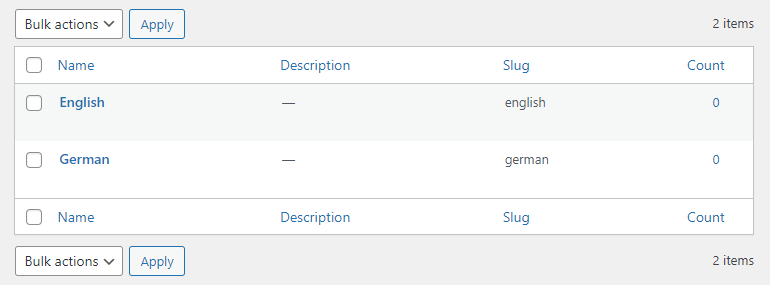
Let's create two languages for English and German. You can see all created languages in the table in the right half of the screen.
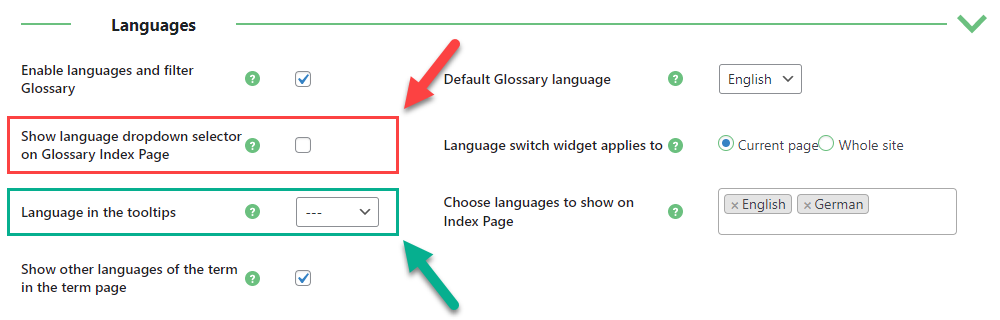
Now let's get back to the Language settings and configure the rest of the options. Here you can see the following settings:
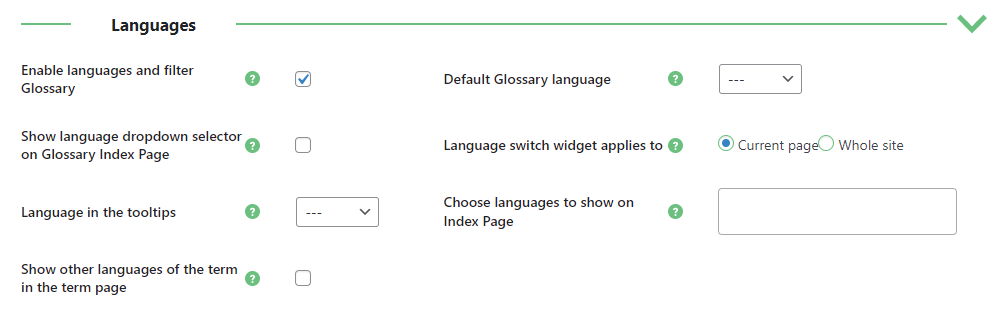
- Default Glossary language - Choose the language that will be displayed by default when the glossary index pages is opened.
- Show language dropdown selector on Glossary Index Page - If enabled, the language dropdown selector will be displayed on the Glossary index page, allowing users to switch between available languages.
- Language switch widget applies to - This option allows to define if to switch the language in tooltips only for one page or for the whole site.
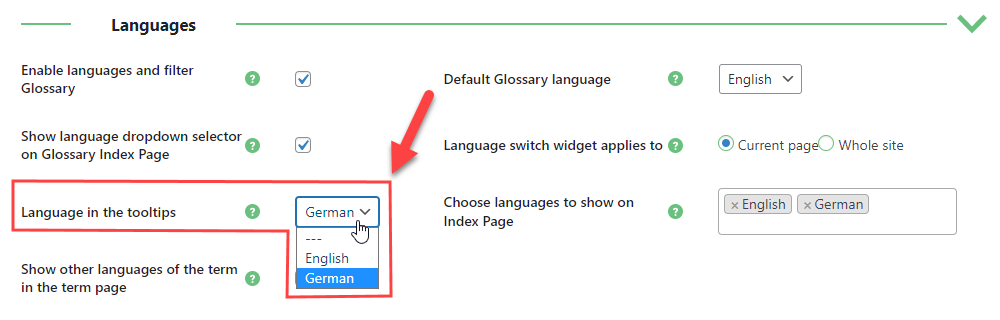
- Language in the tooltips - Choose the default language that the definitions will be displayed in tooltips. Let's not choose any language here now, so each term will be displayed in the language it was defined in.
- Choose languages to show on Index Page - Select languages that you would like to show on the Glossary index page.
- Show other languages of the term in the term page - Turn it on if you want to show other languages of the term on the term page.
So, our options look like this after configuring:
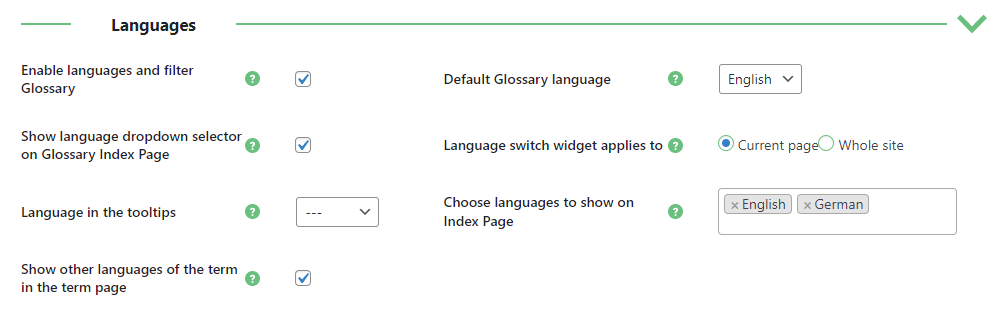
Click the button Save Changes at the bottom of the page:
Adding Terms
Now let's create a few terms in both languages.
Head to Admin Dashboard → CM Tooltip Glossary Ecommerce → Add New.
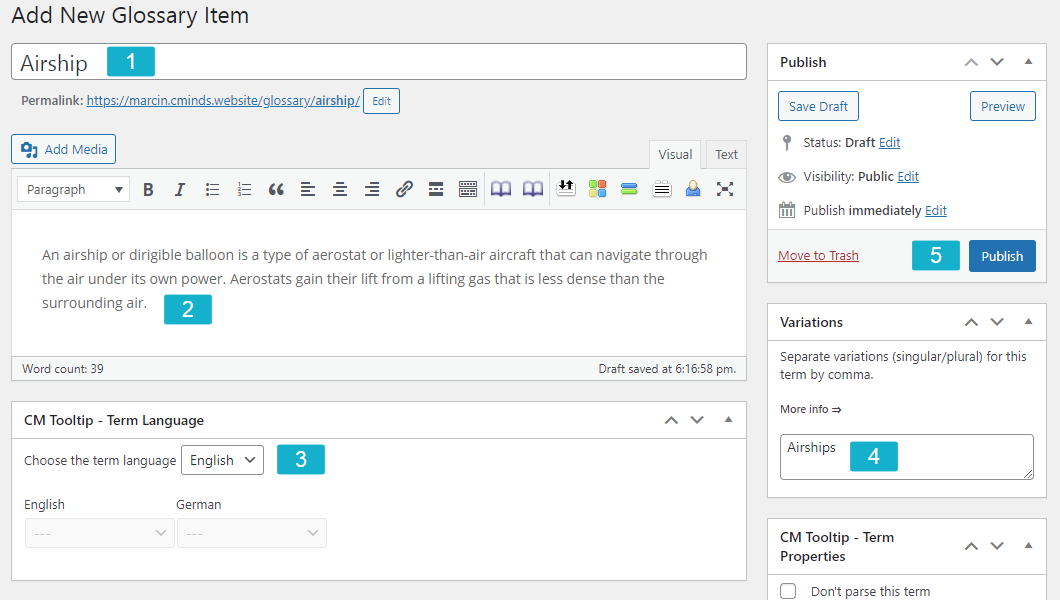
Let's create the first term in English. Here we do the following:
- Enter the term name.
- Enter the term definition.
- Choose the language of the term - in this case we choose English.
- Additionally we can specify the variation of the terms, for example, its plural version.
- Click the button Publish to create the term.
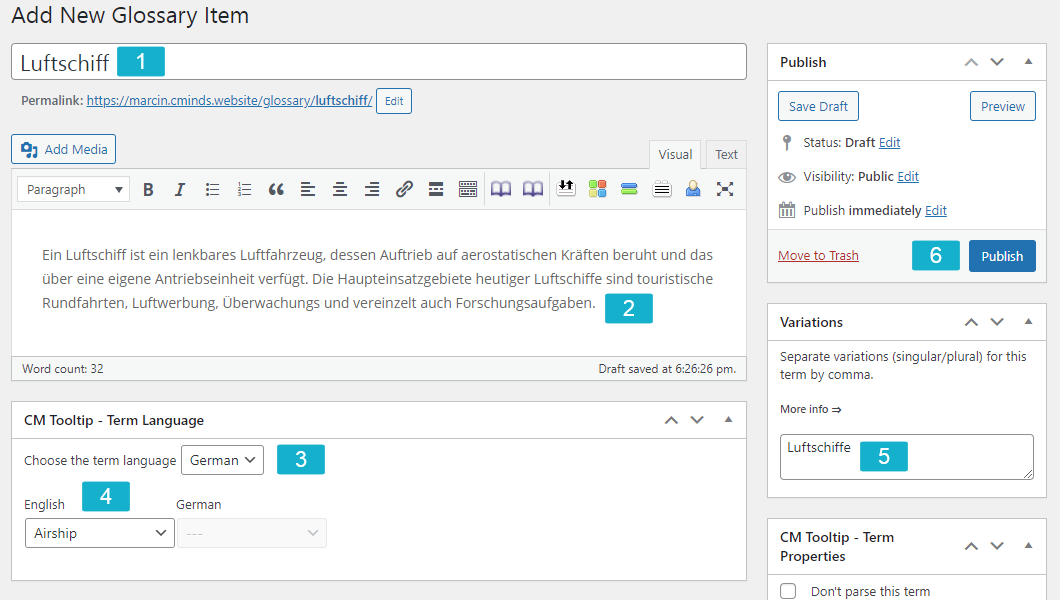
Now let's create a term in German that will match the term in English. The process is almost the same:
- Enter the term name.
- Enter the term definition.
- Choose the language of the term - in this case we choose German.
- Choose the term in English which matches the term that we create in German.
- Additionally we can specify the variation of the terms, for example, its plural version.
- Click the button Publish to create the term.
The same way we can create more terms.
Result
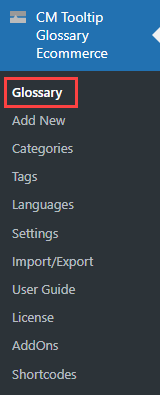
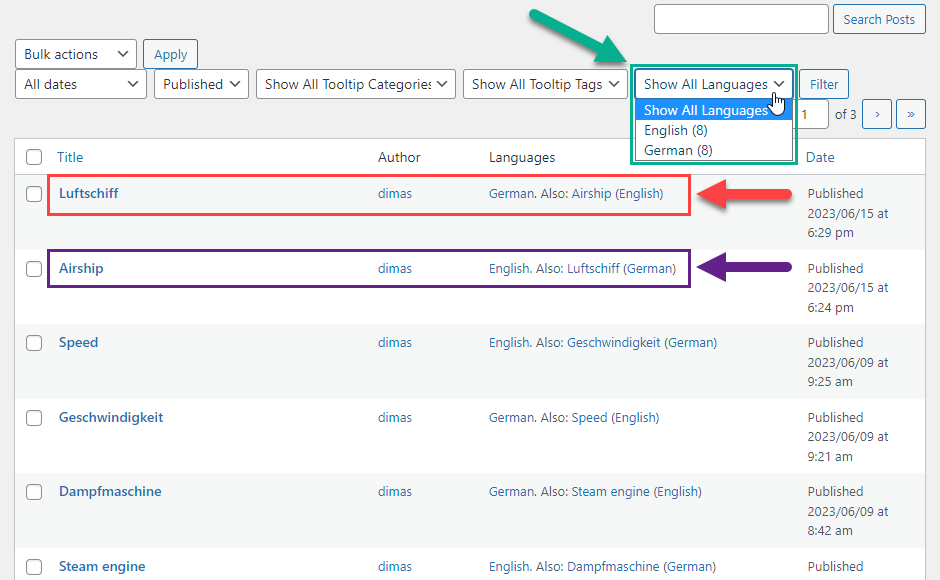
Now let's see how it looks like in the glossary dashboard on the back-end. Head to Admin Dashboard → CM Tooltip Glossary Ecommerce → Glossary.
Here you can see the list of all created terms. You can filter the results by the language, and you can also see for each term which terms in other languages match this one.
Now let's see our glossary on the front-end.
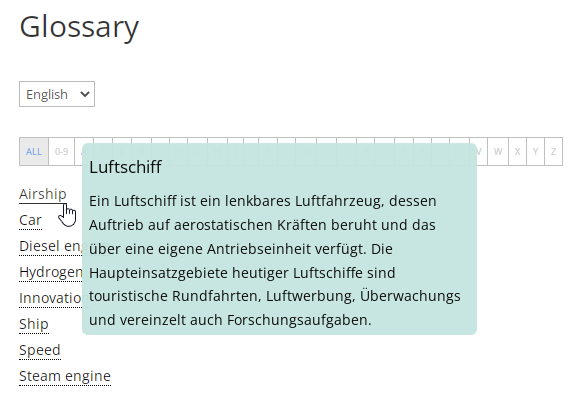
By default, the glossary shows the terms in English, and the alphabetic index is displayed corresponding to that language. The user can switch the language using a dropdown. When the user chooses German, the alphabetic index is switched to the corresponding language. And as we didn't specify a certain language to show in the tooltip, each term is displayed in the language in which it was created.

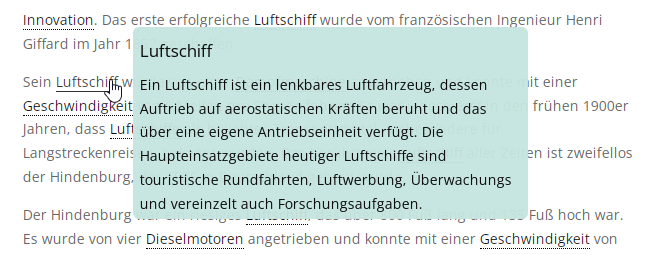
The tooltips displayed in articles will also be shown in the languages in which they were created:

When the user clicks on some term, he will be redirected to the term page. Here the user will see the definition itself and corresponding definition in other languages:

TIP
If in the option Language in the tooltips you choose the specific language, for example - German, then all definitions on the front-end will be displayed in this language.
In this case, for example, when the user hovers on the English term, it will show the corresponding definition in German.
Automatic Translation of Definitions With Google Translate
Another useful feature which you can use in combination with the method described above is the automatic translation of definitions.
The plugin allows to use third-party services and one of them is Google Translate. Have a note that it allows to show the translation of the definition only in tooltips, not on the term pages.
For this method we need to choose a certain language to display in tooltips, and choose the language that it will be translated to.
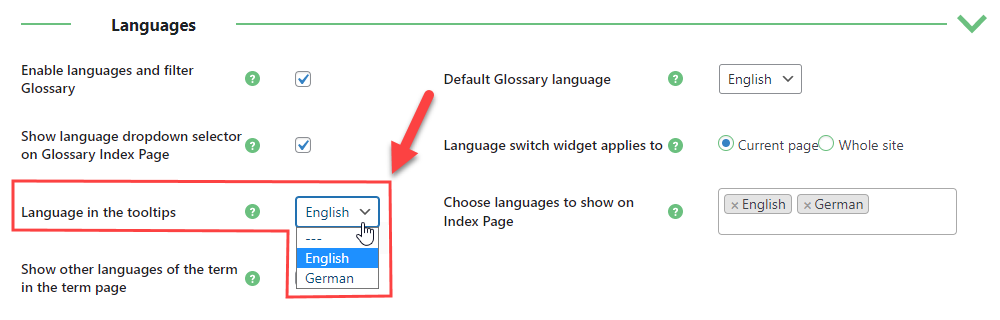
So, first, navigate to the Language settings. For our use case, let's choose English in the option Language in the tooltips.
Now let's configure the Google Translate feature. Navigate to Admin Dashboard → CM Tooltip Glossary Ecommerce → Settings → API tab.

Find the section API - Google Translate. Here you need to do the following:
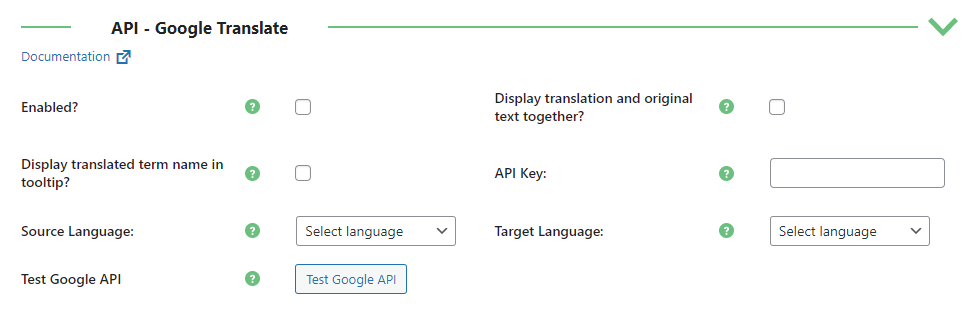
First of all, you need to get API Key from Google and enter it to the relevant field. It is needed to connect the Google Translate service to your site. Then you need to check the option Enabled. After you save the changes, you can click the button Test Google API to check if everything is configured well.
Next, to automatically translate the definition in the tooltip, you need to enable the option Display translation and original text together. There is also an option Display translated term name in tooltip, but we will keep it disabled, as if it is enabled, then the tooltip will show only the term name and its translation, without definition.
Next important couple of options is Source Language and Target Language. As we already defined that the definitions in tooltips are shown in English by default, then we choose here English as a Source Language and German as a Target Language.
Now you can save the changes.
Here is how our settings look like after configuration:

Result
Let's check how it works on the front-end.
Now both glossaries show the English definition and its translation to German.
Creating Separate Language Glossaries
You can create separate glossaries for each language. Thus, one glossary will display the English definitions and their German translations, while the second glossary will display the German definitions and their English translations.
To do this, let's get back to the Languages settings, then uncheck the option Show language dropdown selector on Glossary Index Page. Then choose "---" in the option Language in the tooltips - it is needed to show the definitions in tooltips in the language in which they were created.
Then save the changes.
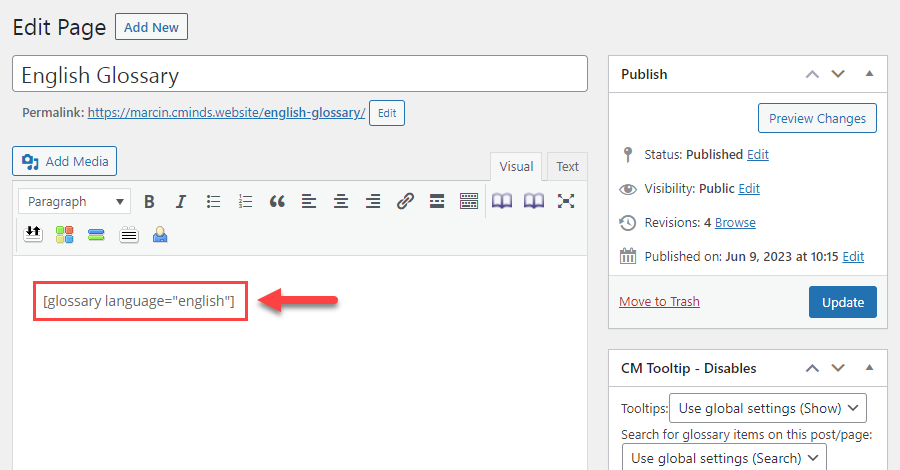
To place a glossary with certain language to the specific page, you need to use the shortcode [glossary] with the parameter language that allows to specify the language. The parameter language accepts the language taxonomy slug as a value.
For example, creating a page with the English language glossary terms will contain the following shortcode:
[glossary language="english"]
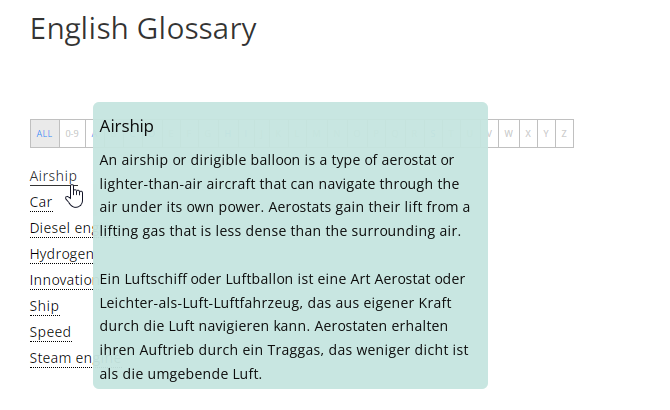
As we've already specified in Google Translate settings that the source language is English and the target language is German, the tooltip will show original definitions in English and their translations to German.
Overriding Google Translate Language Settings
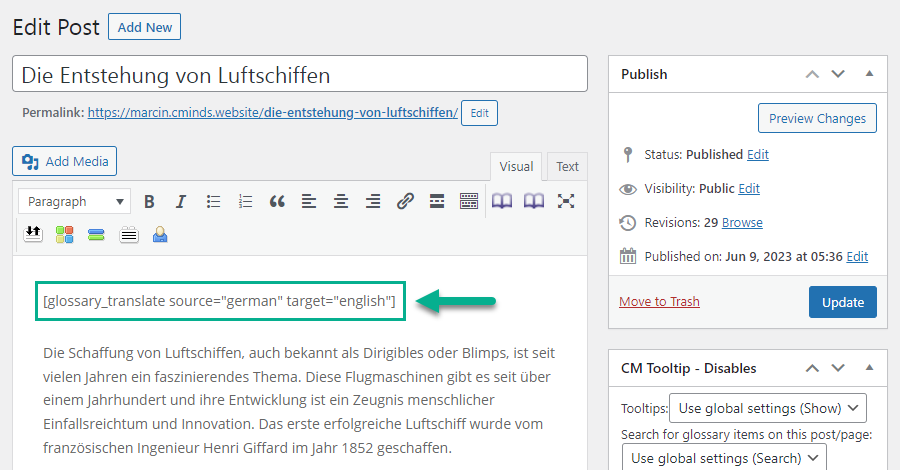
Now let's create a glossary for German language terms. But in this case we need to show in the tooltip the original definition in German and its translation to English. It can be done with the help of the shortcode [glossary_translate] that allows to override the plugin settings for source and target languages.
Our shortcode will look like this:
[glossary_translate source="german" target="english"]
So let's place both shortcodes on the page - for overriding the Google Translate settings and for placing the glossary with German language terms:

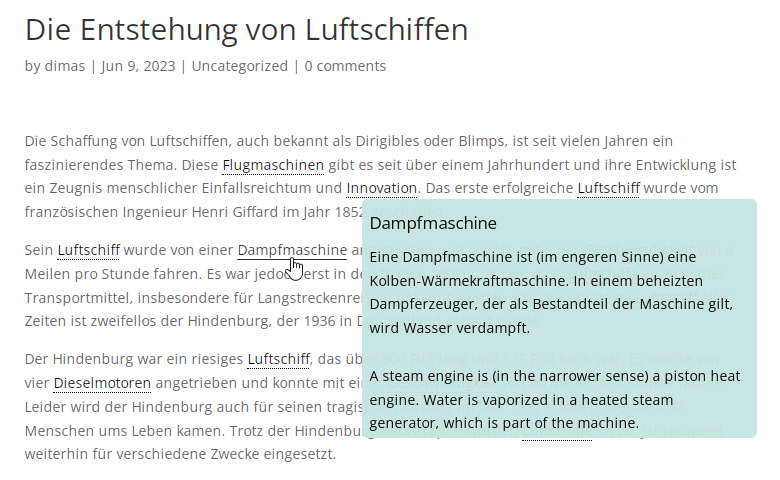
As a result, the tooltips on that glossary page will show the original definitions in German and their translations to English:
The same shortcode [glossary_translate] can be used for redefining the source and target languages in other posts and pages you need.
As a result, this page will not follow the plugin settings for Google Translate (to translate English to German) - it will translate German to English.
End Result
Use Case Front-End
Example of English-German Dictionary:
A term page with the German definition and its English translation:
A tooltip with the German definition and automatic translation to English using Google Translate:
 |
More information about the WordPress Glossary Plugin Other WordPress products can be found at CreativeMinds WordPress Store |
 |
Let us know how we can Improve this Product Documentation Page To open a Support Ticket visit our support center |