WordPress Glossary Plugin (CMTG) - Use Case - How to Highlight Terms Only In Specific Posts
Use Case – How to highlight terms only in specific posts
Note: This guide covers features from:
- WordPress Glossary plugin (Pro/Pro+/Ecommerce editions) - This document uses version 4.2.0.
Introduction
The WordPress Glossary plugin allows you to create a site with a complete glossary of terms. Each term's definition can appear on mouse hover across the whole site. It can also be displayed as footnotes. It means that some words/phrases in the post/page content will have a small link near them and the description at the end of the document.
Use Case Front-End
Displaying terms in the specific post:
Displaying terms in certain post areas only:
Displaying specific terms in a specific post:

Displaying terms of a certain category in a specific post:
Use Case Assumptions
In this example use case guide we will consider how to highlight specific glossary terms only in certain posts or certain parts of the post. This method can be applied to any post type.
This use case can be useful when you don't want to highlight glossary terms in all posts of a definite post type, and parse them only where you need it.
We consider that you have already bought the plugin, but not installed it yet.
It follows:
- Installing the plugin
- Quick recap
- Disable parsing terms for the post type
- Enabling parsing of terms in a specific post
- Filtering terms and term categories
- End result
Installing the Plugin
The process is the same for all CM plugins and add-ons.

- Download the plugin from your customer dashboard.
- Log in to WordPress and navigate to the WordPress Admin → Plugins settings.
- Click on Add New.
- Activate it and add the license.
Learn more: Getting Started - Installation And First Steps
Quick Recap
We recommend you first to get to know, how to work with the WordPress Glossary plugin and configure its base settings. Learn more about it:
Disable Parsing Terms for the Post Type
First thing you need to do, is to disable automatic parsing of terms on post types, where you don't need it.
To do this, navigate to Admin Dashboard → CM Tooltip Glossary → Settings → General Settings tab.
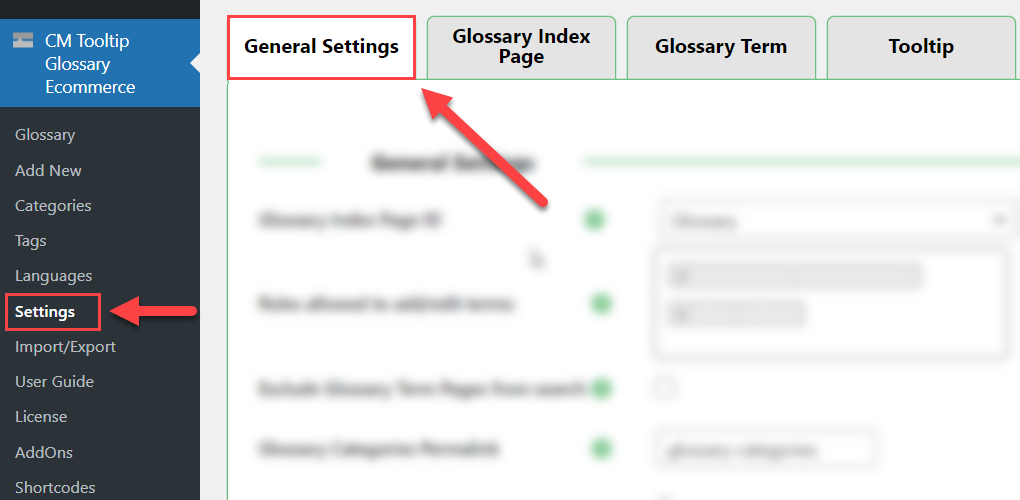
Find the option Highlight terms on given post types under the Term highlighting section. Remove all post types where you don't want the glossary terms to be highlighted automatically.
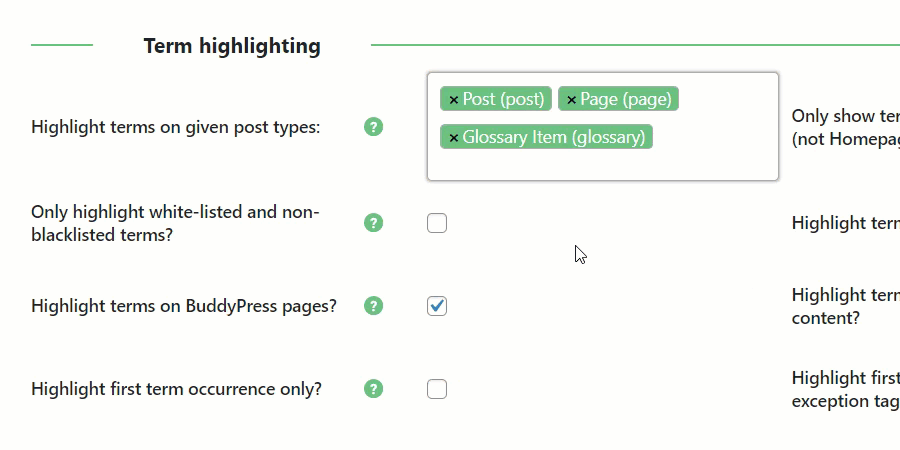
Then scroll down to the bottom of the page and click the button Save Changes.

Enabling Parsing of Terms In a Specific Post
To parse terms in a specific post, head to that post and start editing it.
There are two ways how you can parse the terms here:
- Parse terms in specific parts of the content only.
- Parse terms in the whole post.
Let's consider both methods.
Parsing Terms In Specific Parts of the Content Only
To parse only specific parts of the content, you need to wrap it with the shortcode [cm_tooltip_parse] . Example:
[cm_tooltip_parse] Content[/cm_tooltip_parse]
Let's wrap a few areas in our post:
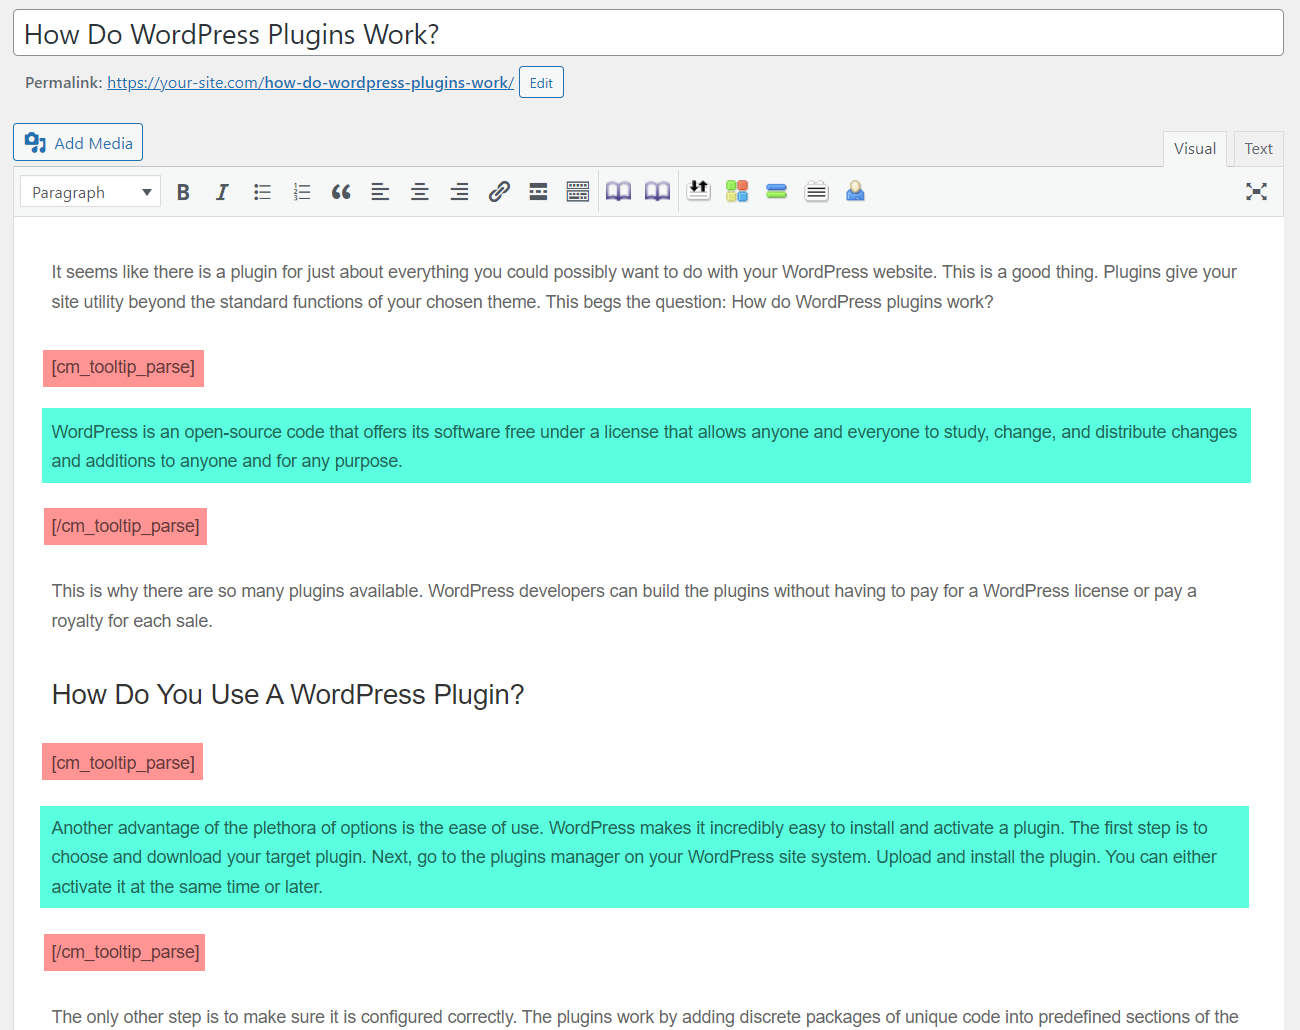
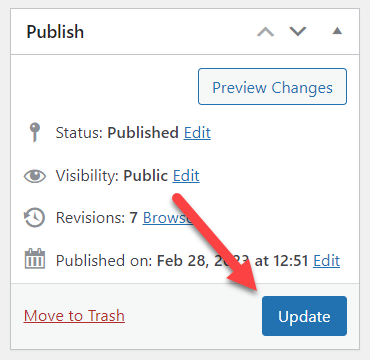
Click the button Update to save the changes:
Result on the front-end:
Parsing Terms In the Whole Post
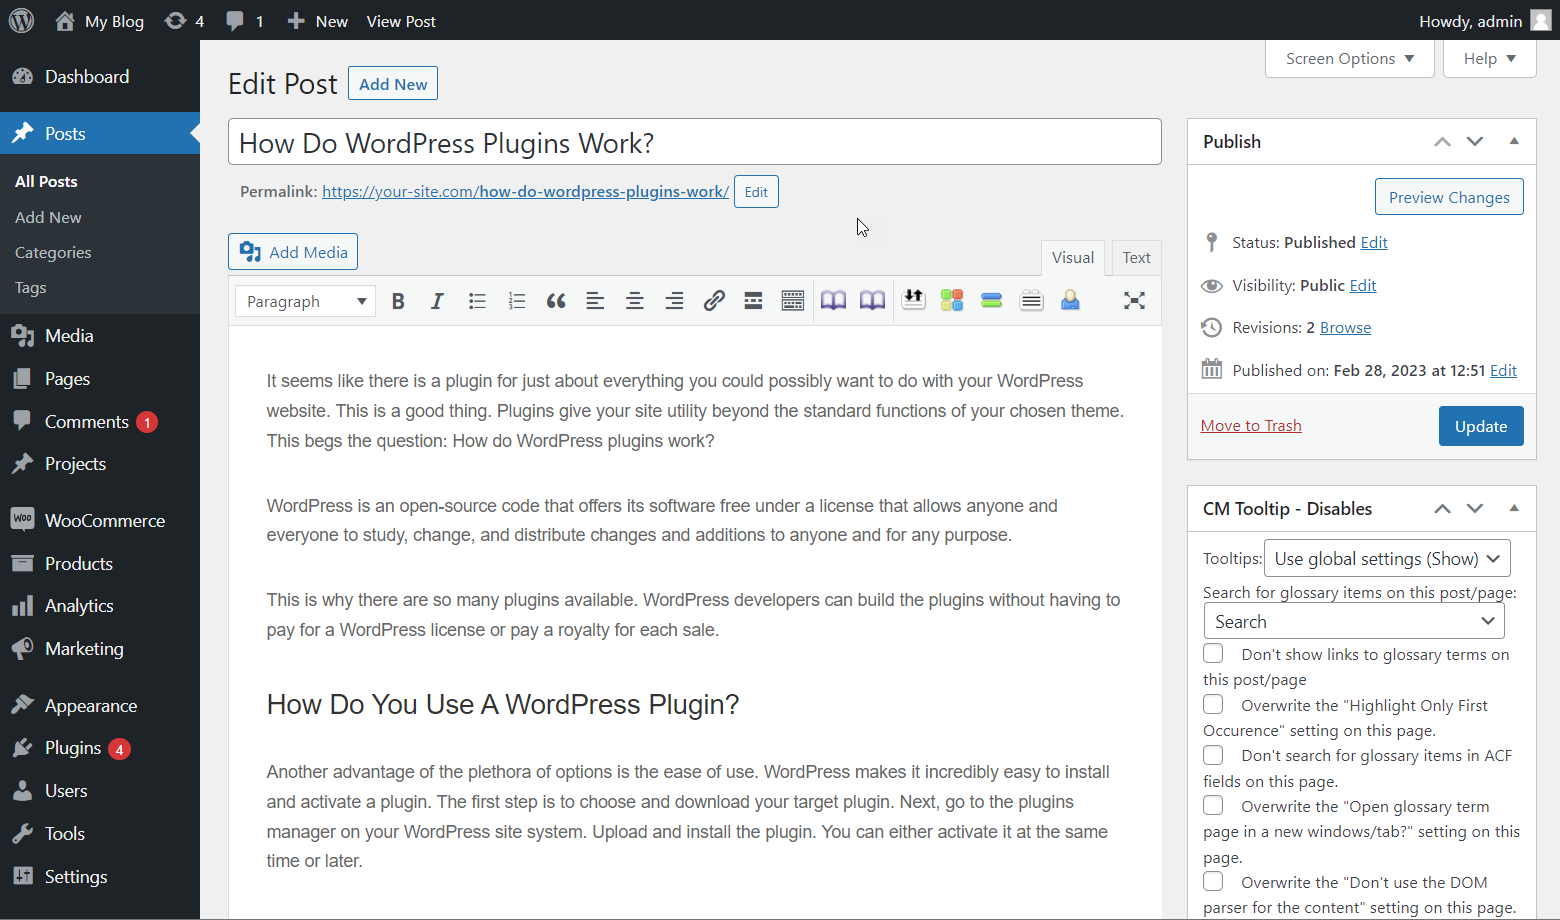
To parse terms in the whole post, find the metabox CM Tooltip - Disables. The option Search for glossary items on this post/page allows to override global plugin settings. Switch the option to Search and click the button Update to save the changes in the post.
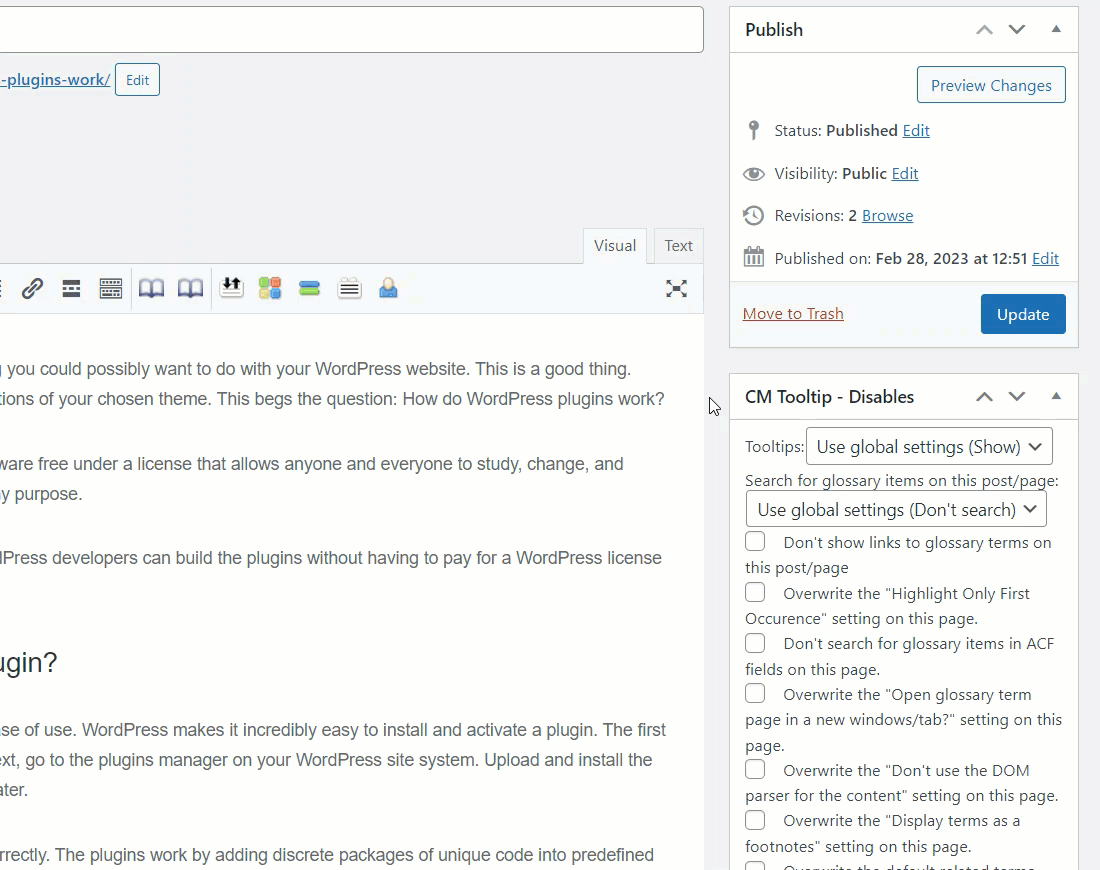
Note: this method overrides previous method. So, the terms will be parsed in the whole post, in spite of the shortcode [cm_tooltip_parse] .
Result on the front-end:
Filtering Terms and Term Categories
You can also filter which terms can be parsed in the post. In can be useful, when you need to highlight only specific terms in the specific post.
There are two ways how you can do this:
- By filtering certain terms.
- By filtering certain term categories.
Let's consider both methods.
Filtering by Certain Terms
While editing the post, find the metabox CM Tooltip - Filter Terms. There is an area, where you can enter terms (if more than 1 - separate them with comma. You can also choose a mode - Whitelist or Blacklist. If Whitelist is chosen, only the terms you entered will be highlighted in the post. If you choose Blacklist, then terms you entered will not be highlighted on the post - all other terms still will be shown.
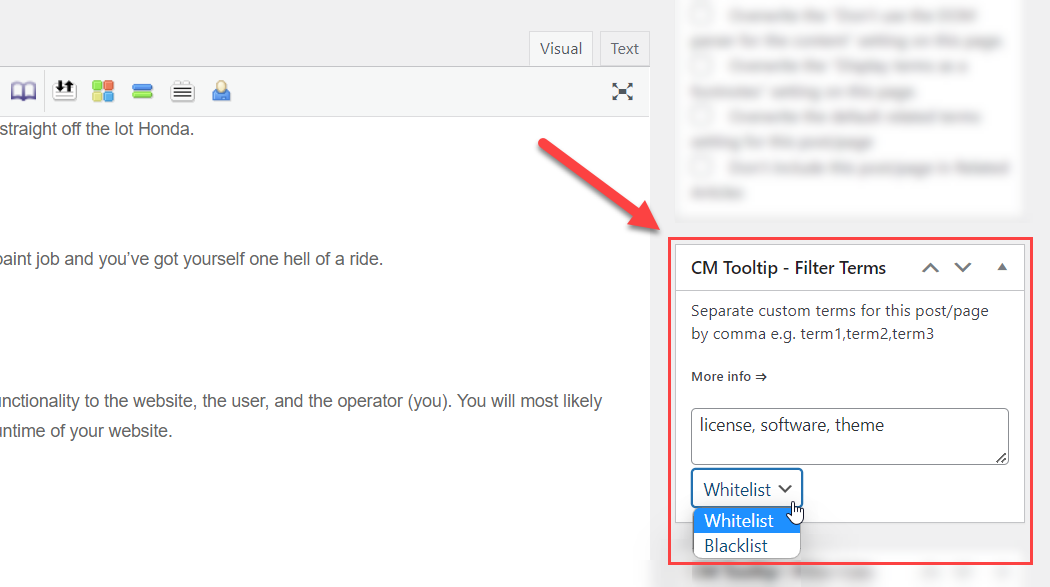
We choose Whitelist for our use case. Don't forget to click the button Update to save the changes.
Result on the front-end:
Filtering by Certain Term Category
The similar method is used with the term categories. For this method you need to classify terms into categories.
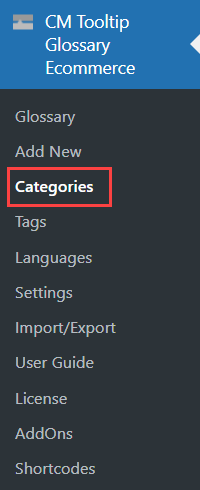
First, you need to create categories. To do this, navigate to Admin Dashboard → CM Tooltip Glossary → Categories.
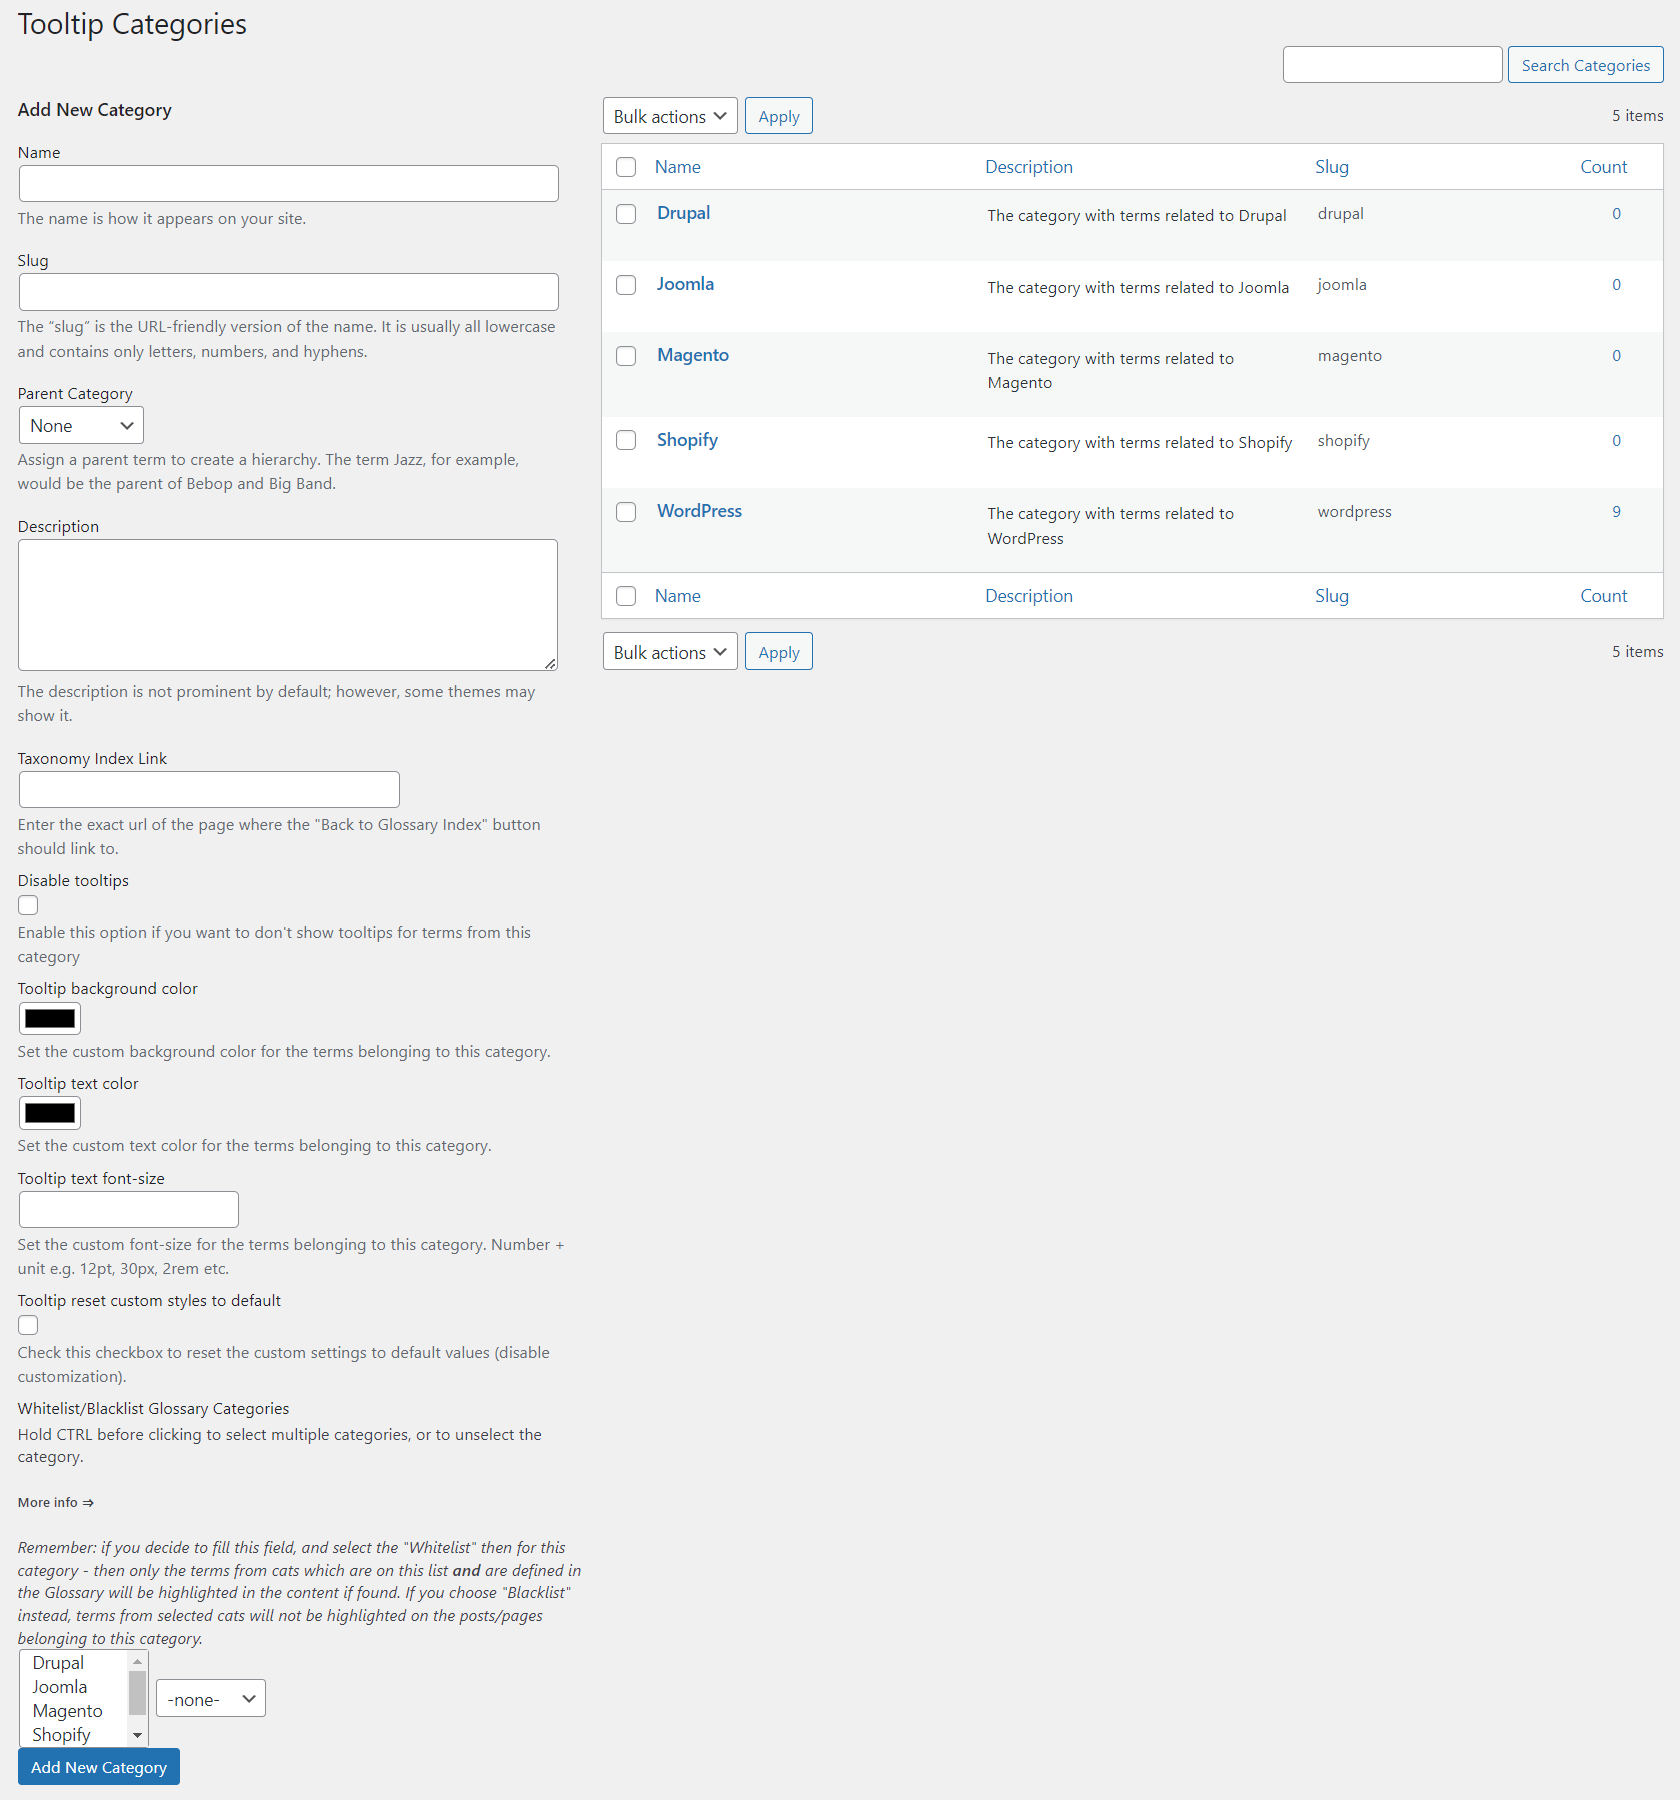
There you will see a form for creating a new category, and the table with all created categories.
Learn more about creating categories in this guide: WordPress Glossary Plugin (CMTG) - Terms - Using Categories - Dividing Glossary Into Sections
To add a term to a category, navigate to Admin Dashboard → CM Tooltip Glossary → Glossary. Hover on the needed term and click Edit.
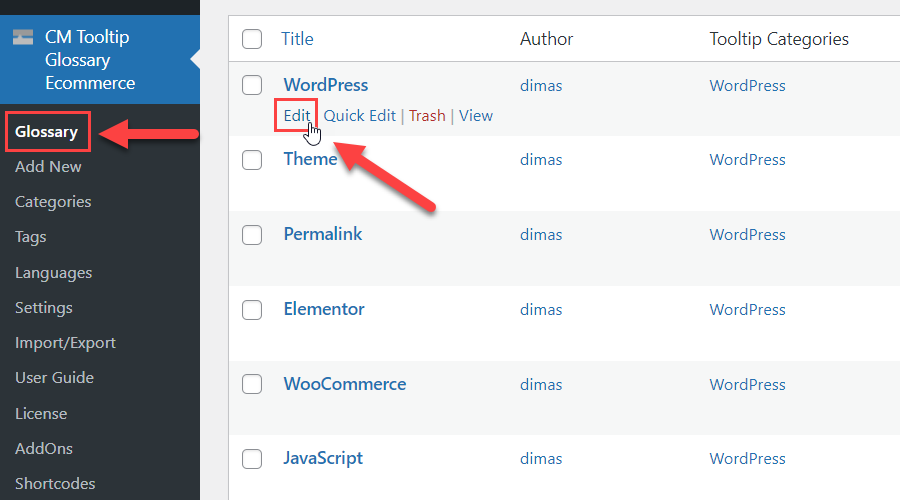
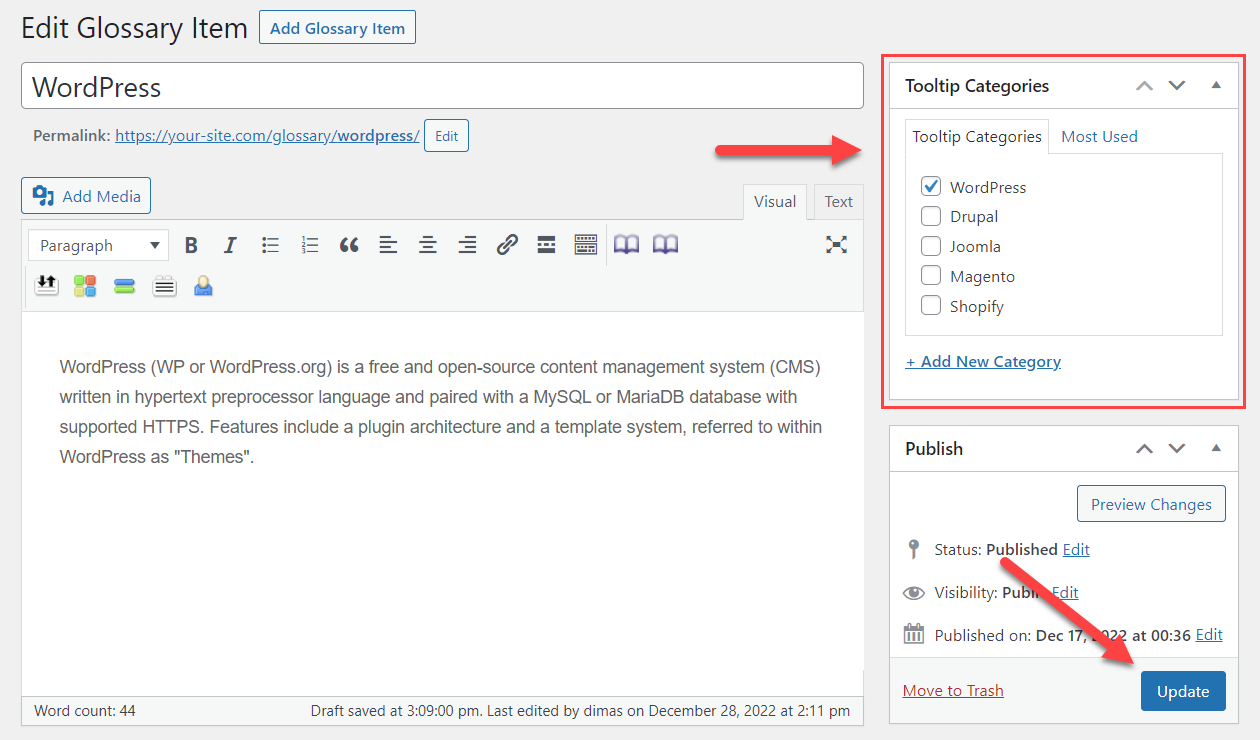
Find the metabox Tooltip Categories and select the categories which you want the term to belong to. Then click the button Update to save the changes.
Now let's get back to editing our post. Find the metabox CM Tooltip - Filter Cats.
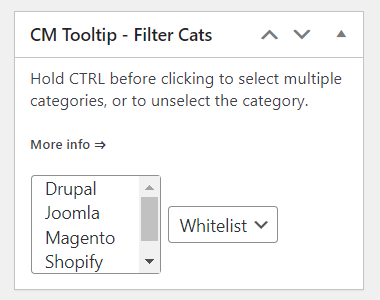
This metabox has a list of existing term categories and the option to choose Whitelist or Blacklist. So, we just need to choose categories whose terms of we want to highlight in the post and choose the option Whitelist. Then click the button Update to save the changes.

Result on the front-end:
End Result
Following instructions found in the plugin and guides you should be able to highlight specific glossary terms only in certain posts or certain parts of the post.
Use Case Front-End
Displaying terms in the specific post:
Displaying terms in certain post areas only:
Displaying specific terms in a specific post:
Displaying terms of a certain category in a specific post:
 |
More information about the WordPress Glossary Plugin Other WordPress products can be found at CreativeMinds WordPress Store |
 |
Let us know how we can Improve this Product Documentation Page To open a Support Ticket visit our support center |