WordPress Glossary Plugin (CMTG) - Whitelist/Blacklist Categories on a Post/Page
Whitelist/Blacklist Terms on a Post/Page
Note: features described in this guide are available only in Pro+ and Ecommerce versions.
The WordPress Glossary plugin comes with option blacklist or whitelist Glossary Categories on Post/Page.
To use the functionality you just need to navigate to the post/page editor on the Admin Dashboard and once you're there find the CM Tooltip - Filter Cats metabox in the right column.
Then, choose in the selector categories you want to put on whitelist or blacklist. To choose more than 1 category hold the button CTRL/CMD and click on needed items. Finally choose the list type: Whitelist or Blacklist. Update the post or page to save changes.
Remember: If you decide to fill this field, and select the "Whitelist" then for this page only the terms from categories which are on this list and are defined in the Glossary will be highlightened in the content if found. If you choose "Blacklist" instead, terms from selected categories will not be highlighted on the page.
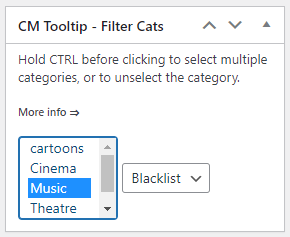
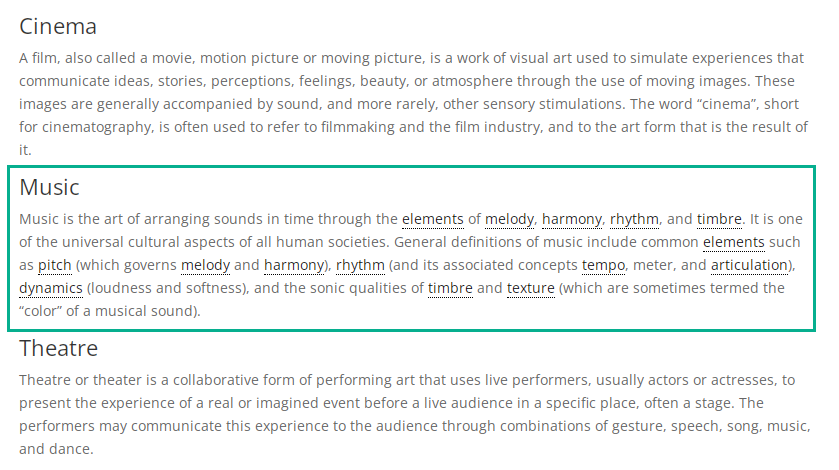
Blacklist Example
For example, we have terms that belong to three different categories: "Cinema", "Music" and "Theatre". Lets say we do not want to highlight the terms from the "Music" category on the post page. Let's choose this category in the selector and choose Blacklist. Update your post.
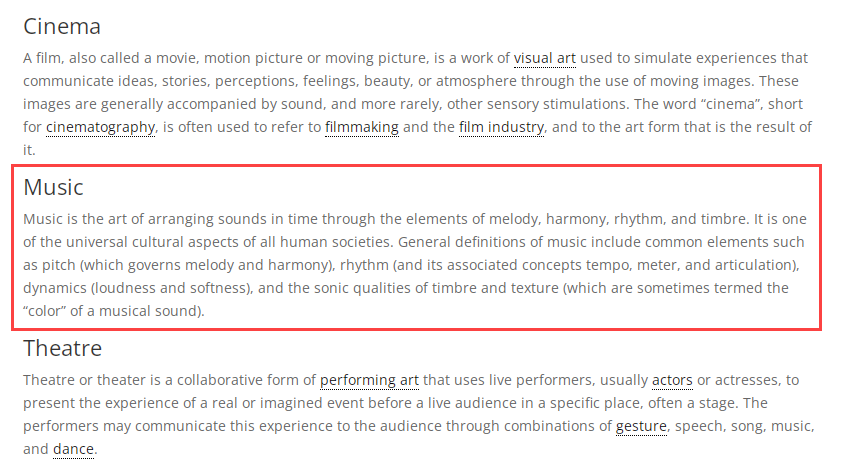
Now, on the front-end view of the post, all terms that belong to the "Music" category are not highlighted.
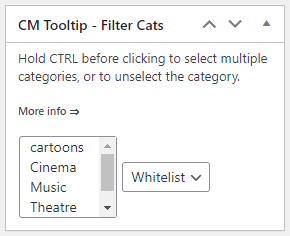
Whitelist Example
Procedure is almost the same as in the Blacklist Example. With Whitelist you can display only terms that belong to one or a few chosen categories.
Now let's do the opposite - highlight only terms that belong to the "Music" category, so all terms that belong to any other category will not be highlighted.
Choose the "Music" category in the selector, choose Whitelist and update your post.

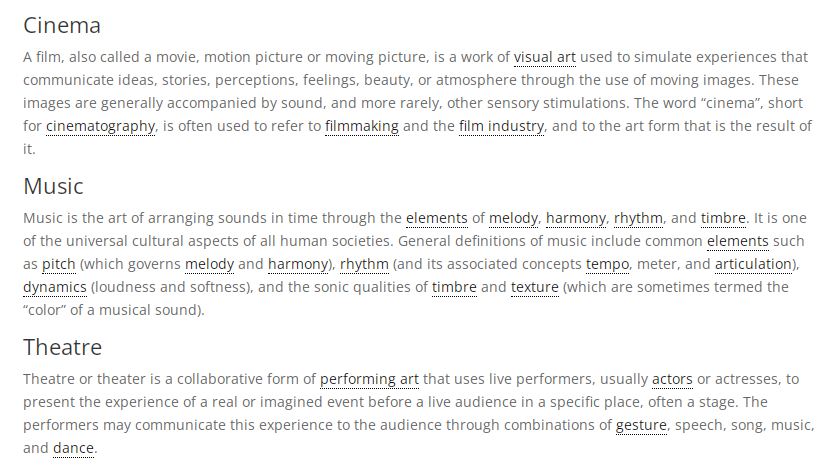
Now, on the front-end page view, only the terms that belong to the "Music" category are highlighted.
 |
More information about the WordPress Glossary Plugin Other WordPress products can be found at CreativeMinds WordPress Store |
 |
Let us know how we can Improve this Product Documentation Page To open a Support Ticket visit our support center |