WordPress Video Lessons Manager Plugin (CMVLM) - Use Case - How to Configure Restricted LMS with Sequenced Videos Using List Layout
Use Case - How to Configure Restricted LMS with Sequenced Videos Using the List Layout
Note: This guide requires:
- WordPress Video Lessons Manager Plugin - This document uses Pro version 3.6.5.
Video Use-Case
Introduction
The WordPress Video Lessons Manager plugin gives the ability to organize videos into lessons to create a video-based learning environment on your WordPress site.
Use Case Front-End
Use Case Assumptions
In this example use case guide, we'll cover how to configure restricted LMS with sequenced videos using list layout on your site. List layout works a little bit differently than two other layouts - Playlist and Tiles, so it demands a different way of configuring. We are also going to make an LMS with sequential videos that open one by one depending on the progress.
We consider that you have already bought the plugin, but not installed it yet. We also suppose that you already know how to import videos and create lessons and courses. If not, please, check this use guide first: WordPress Video Lessons Manager Plugin (CMCLM) - Use Case - Creating a Video Lessons LMS And Tracking Student Progress
It follows:
- Installing the plugin
- Quick recap
- Courses page
- Restricting courses
- Enabling video sequence
- Initial user limits
- List layout settings
- Lesson settings
- Labels
- Notifications
- Front-end interface
- End result
Installing the Plugin
The process is the same for all CM plugins and add-ons.

- Download the add-on from your customer dashboard.
- Log in to WordPress and navigate to the WordPress Admin → Plugins settings.
- Click on Add New.
- Activate it and add the license.
Learn more: Getting Started - Plugin Overview
Quick Recap
We recommend you to configure well the plugin first. If you have some issues with the following topics:
- Connecting Vimeo or Wistia
- Importing videos from Vimeo or Wistia
- Changing the appearance of the video platform
- Organizing videos into lessons and courses
- Showing lesson and courses to users
- Student progress and report
- User interface - The dashboard
- Notifying the admin and students
- Translating the interface
- Restricting how much time users have to watch videos
Then read this use case guide: WordPress Video Lessons Manager Plugin (CMCLM) - Use Case - Creating a Video Lessons LMS And Tracking Student Progress
Courses Page
First thing we need to do, is to create a page that is needed for displaying all courses when we use List layout. Navigate to Admin Dashboard → CM Video Lessons Manager Pro → Settings → General tab. Find there the option Courses page.
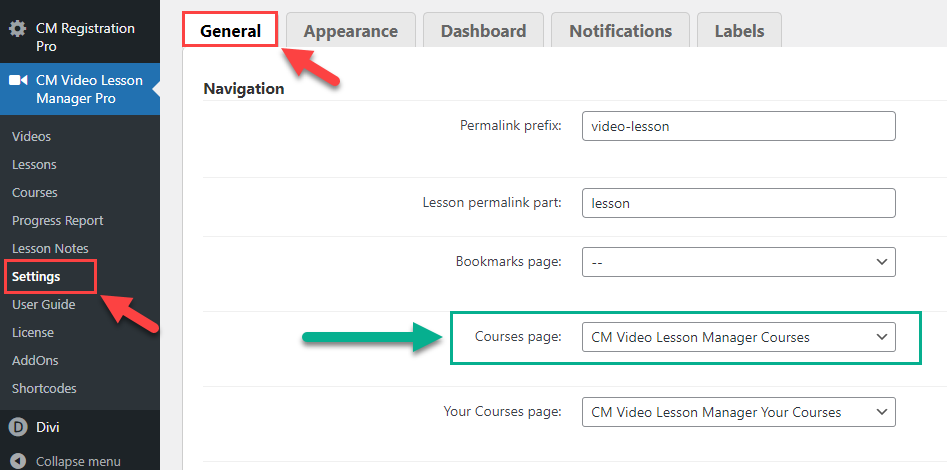
There are two ways to create needed page:
- Create the page manually and place there a shortcode
[cmvl-courses-list]. After that you need to choose this page in the Courses page dropdown. Then click the Save button under the settings. -
Choose in the Courses page dropdown the option -- create new page --, and when you click the Save button under the settings, the page will be created automatically.

Creating a page for displaying courses

Restricting Courses
As we are going to make LMS with sequenced videos that are unlocking one by one depending on the progress, we need to restrict our courses for logged-in users only. For that, we need to do a couple of things.
On the same setting tab, scroll down to the section Access. We need there the following options:
- Who can watch videos - Choose the option Logged-in users to restrict the courses.
- Login page URL - Here you need to put the URL of a page with a login form where non-logged-in users will be redirected when trying to access the course. You need to prepare that page in advance.

Enabling Video Sequence
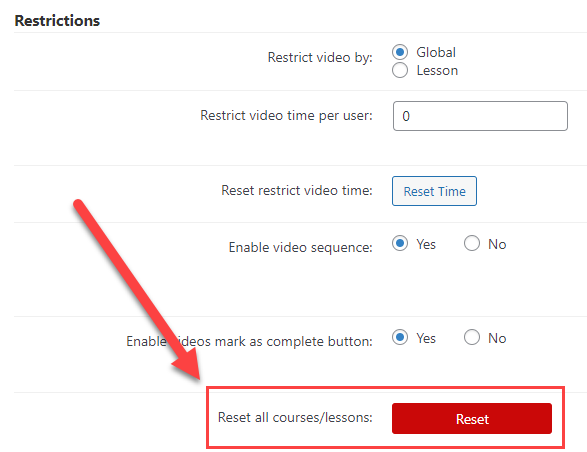
Last section that we need in the General tab is Restrictions. Here are two important options:
- Enable video sequence - When the option is enabled, all videos in the course will be locked, except the first one. So, to unlock new video, the user should watch last unlocked video.
- Enable videos mark as complete button - This option is not obligatory. If enabled, the user will be able to manually mark videos as completed to unlock next video. Note: the video can be marked as completed only in case if all conditions for unlocking the next video are met. We will talk about these conditions further in this guide.
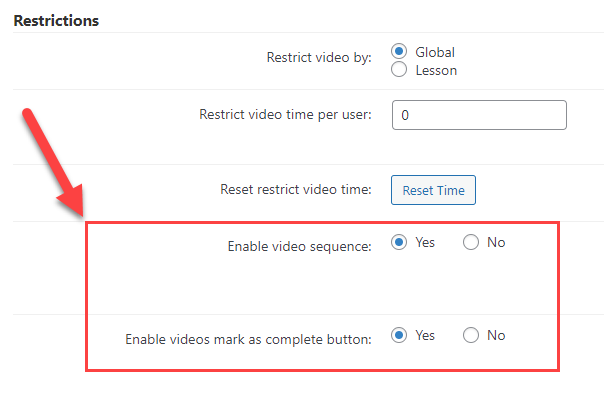
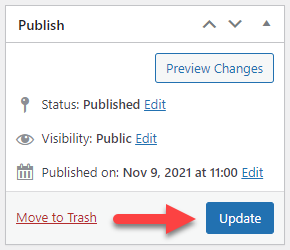
Don't forget to save the changes by clicking the button Save at the bottom of the page.

Initial User Limits
By default, when you restrict the videos with the option Enable video sequence, at the beginning all users have only one first video of each lesson unlocked. It can be changed manually by the admin for each user. To do this, navigate to Admin Dashboard → Users → All Users.
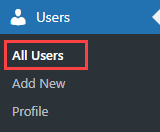
Hover on needed user and click Edit.
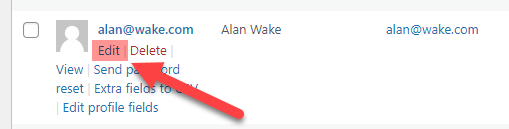
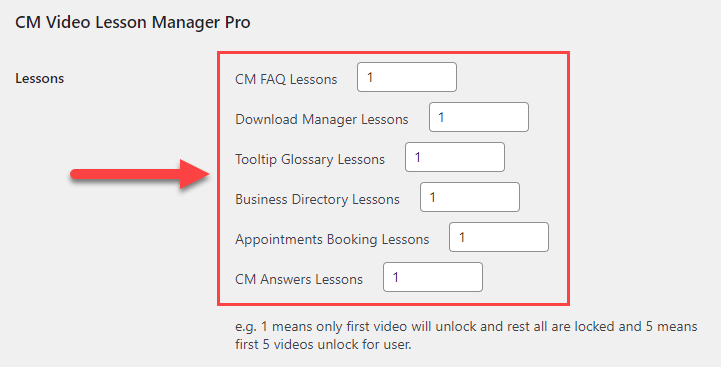
Scroll down to the section CM Video Lesson Manager Pro. There you can find the list of all your lessons. "1" means, that only first video is unlocked in the lesson. When the user watches videos in the lesson, these values will increase. The admin can change these values. For example, if we change "1" to "5", then 5 first videos will be unlocked for the user in this lesson.
TIP: Reset the Counters
You can reset these counters specifically for each user by clicking the button Reset.

Or you can reset them for all users at once in the plugin settings on the General tab, under the Restrictions section - using the option Reset all courses/lessons:
When you make some changes, don't forget to click the button Update User at the bottom of the page.
Important! In the List layout, if the course consists of a few lessons, there can be unlocked first videos only in the lesson that goes first in the course. To unlock next lesson and its videos, the user should first finish previous lesson.
List Layout Settings
Now we are going to enable the crucial option for the List layout. Navigate to Admin Dashboard → CM Video Lessons Manager Pro → Settings.
Head to the Appearance tab. Choose List in the option Default videos layout.
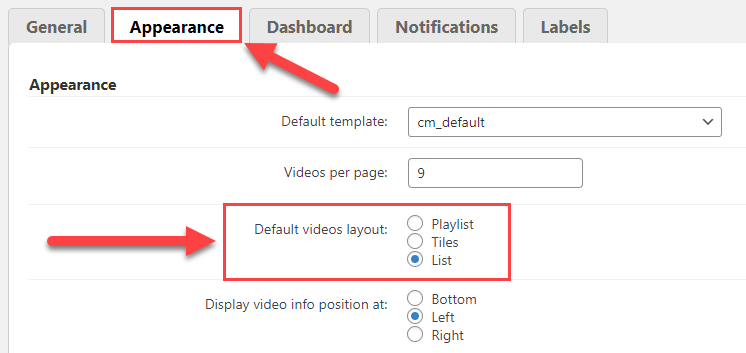
The rest of the options in this tab are mostly related to two another layouts - Playlist and Tiles. A few options that can affect the List layout are:
- Show course description - Displays the description of the course.
- Show icons for documents - Displays the document icons, if they're attached to the video or a course.
- Show video description - Displays the description of the video above it.
- Show lesson description - Displays the description of the lesson under the lesson name.
- Show video note text area - Displays the area for user's notes under the video.
When you finish configuring here, click the button Save at the bottom of the page.
Lesson Settings
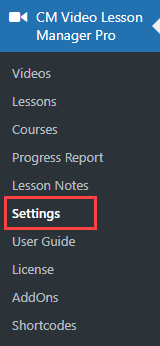
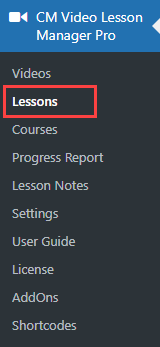
Now let's go to our lessons to configure conditions for unlocking videos and other things. Navigate to Admin Dashboard → CM Video Lessons Manager Pro → Lessons.
Hover on the needed lesson and click Edit.
Unlock Attributes
You can find a metabox Unlock Attributes on the right side of the page, where you need to define the conditions for unlocking videos. There you need:
- Define how much time in percentage the user should watch the video to unlock next video. The minimum percent that you can set is "5". To disable the percentage restriction set it to "0".
- Define when the video will be unlocked. Set the amount of days that should pass after unlocking current video to unlock the next one. Set this value to "0" to disable the days limitation.
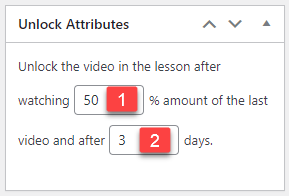
Note: if both options are enabled, they will work together. It means, to unlock the next video, both conditions must be met: the user should watch the required minimum time of a video and there should pass enough amount of days.
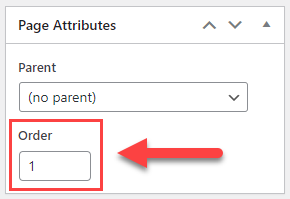
Lessons Order
Another useful metabox is Page Attributes. By default, lessons in the course are ordered alphabetically by their titles. You can change the order manually by setting the index number in the Order field. The lowest number appears first in the list of lessons.
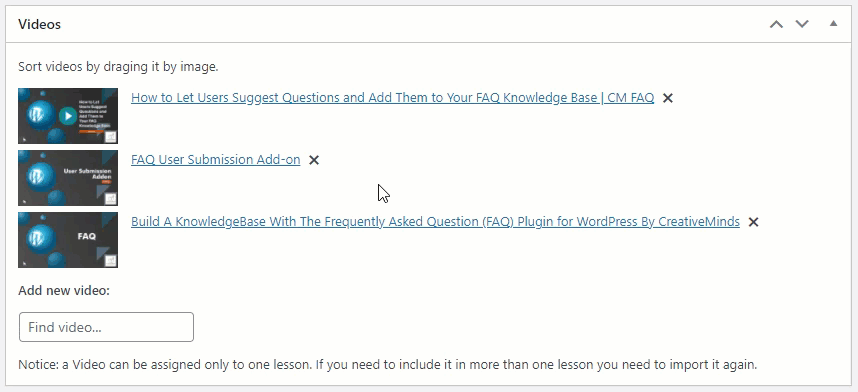
Videos Order
And, of course, you can change the order of videos in the lesson. Find the section Videos with the list of your videos. To change the order of the video, just click and hold the left button of the mouse on the needed video, then drag and drop in the needed place.
When you finish editing the lesson, click the Update / Publish button.
The same way you can configure each lesson.
Labels
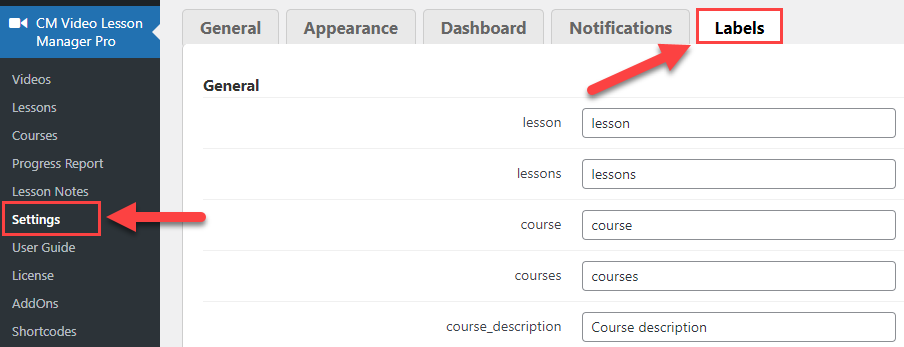
The WordPress Video Lessons Manager plugin has lots of front-end labels that you can edit or translate. Navigate to Admin Dashboard → CM Video Lessons Manager Pro → Settings → Labels tab.
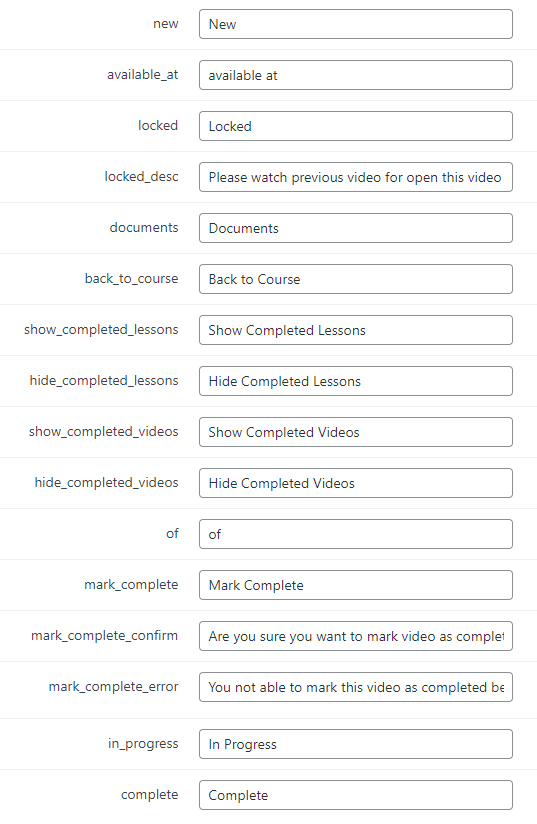
You can see the labels that are actual for the List layout on the screenshot below:
When you finish editing labels, click the button Save at the bottom of the page.
Notifications
The plugin also has a few email notification options. You can learn more about all of them in the guide about Notifications. In this guide we will consider only one of them. Navigate to Admin Dashboard → CM Video Lessons Manager Pro → Settings → Notifications tab.
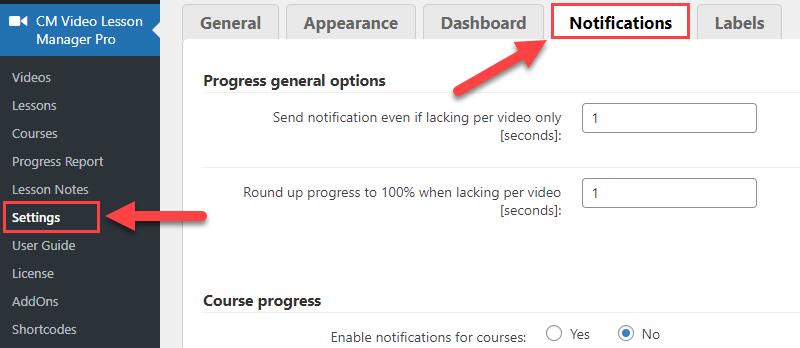
Scroll down to the notification Video Unlock Notifications. This notification is sent to the user when new video unlocks for him. Here you need to configure the following:
- Enable notifications for video unlock - Enable or Disable the notification.
- Email subject - Add the email subject using the following placeholders for adding dynamic info:
- [blogname] - website's name
- [video_name] - name of the video
- Email body template - Create the email template, you can use the following placeholders for adding dynamic info:
- [blogname] - website's name
- [home] - website's home url
- [lesson_name] - name of the lesson
- [lesson_permalink] - permalink to the lesson
- [video_name] - name of the video
- [video_permalink] - permalink to the video
- [username]
- [userlogin]
- [useremail]
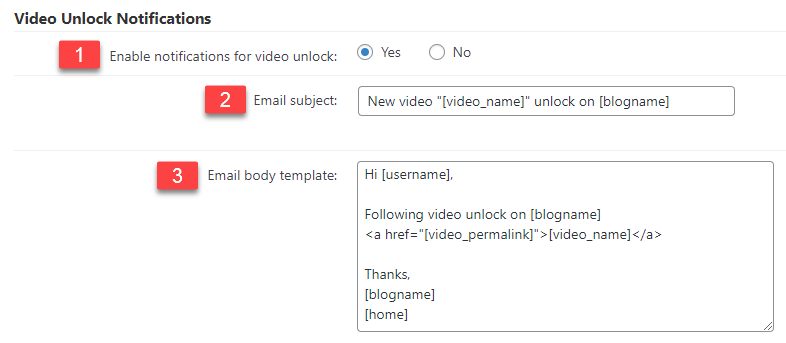
When you finish editing the notification, click the button Save at the bottom of the page.
Front-End Interface
Now everything is configured, let's see what the user sees on the front-end.
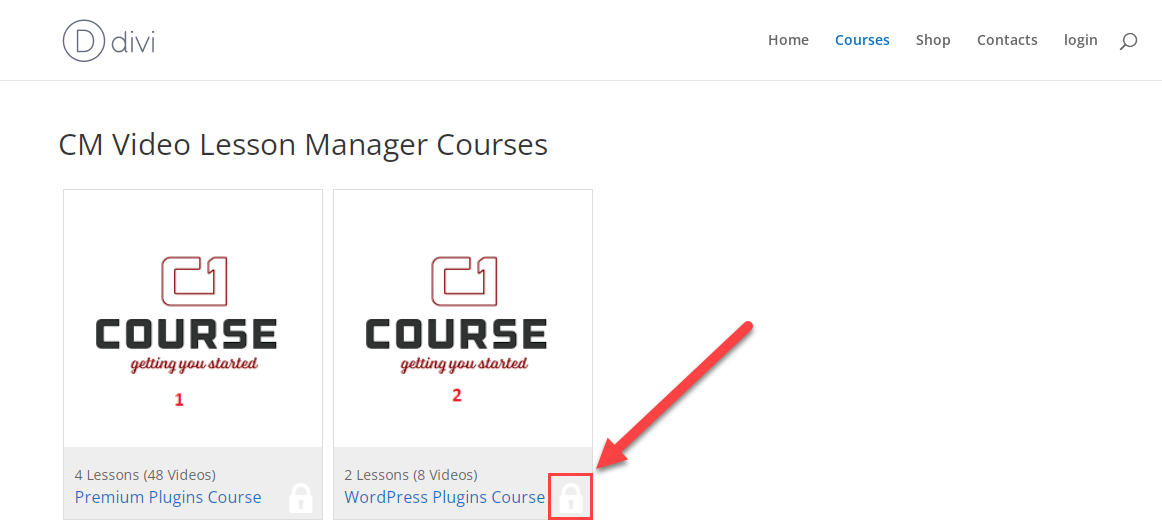
Navigate to the Courses page that we created at the beginning. The user can see there the list of all courses. If he is not logged-in, the courses will be restricted for him - it will be marked by the "lock"-icon on the courses. Attempt to access will direct the user to the login page that we've prepared in advance.
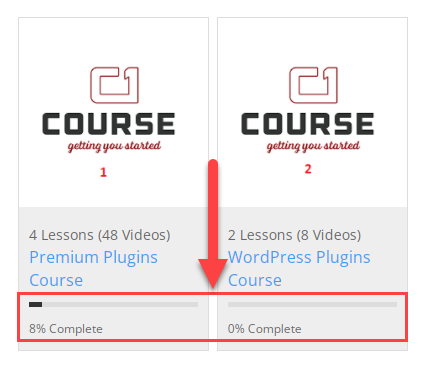
When the user is logged-in, he will see the progress bar for each course:
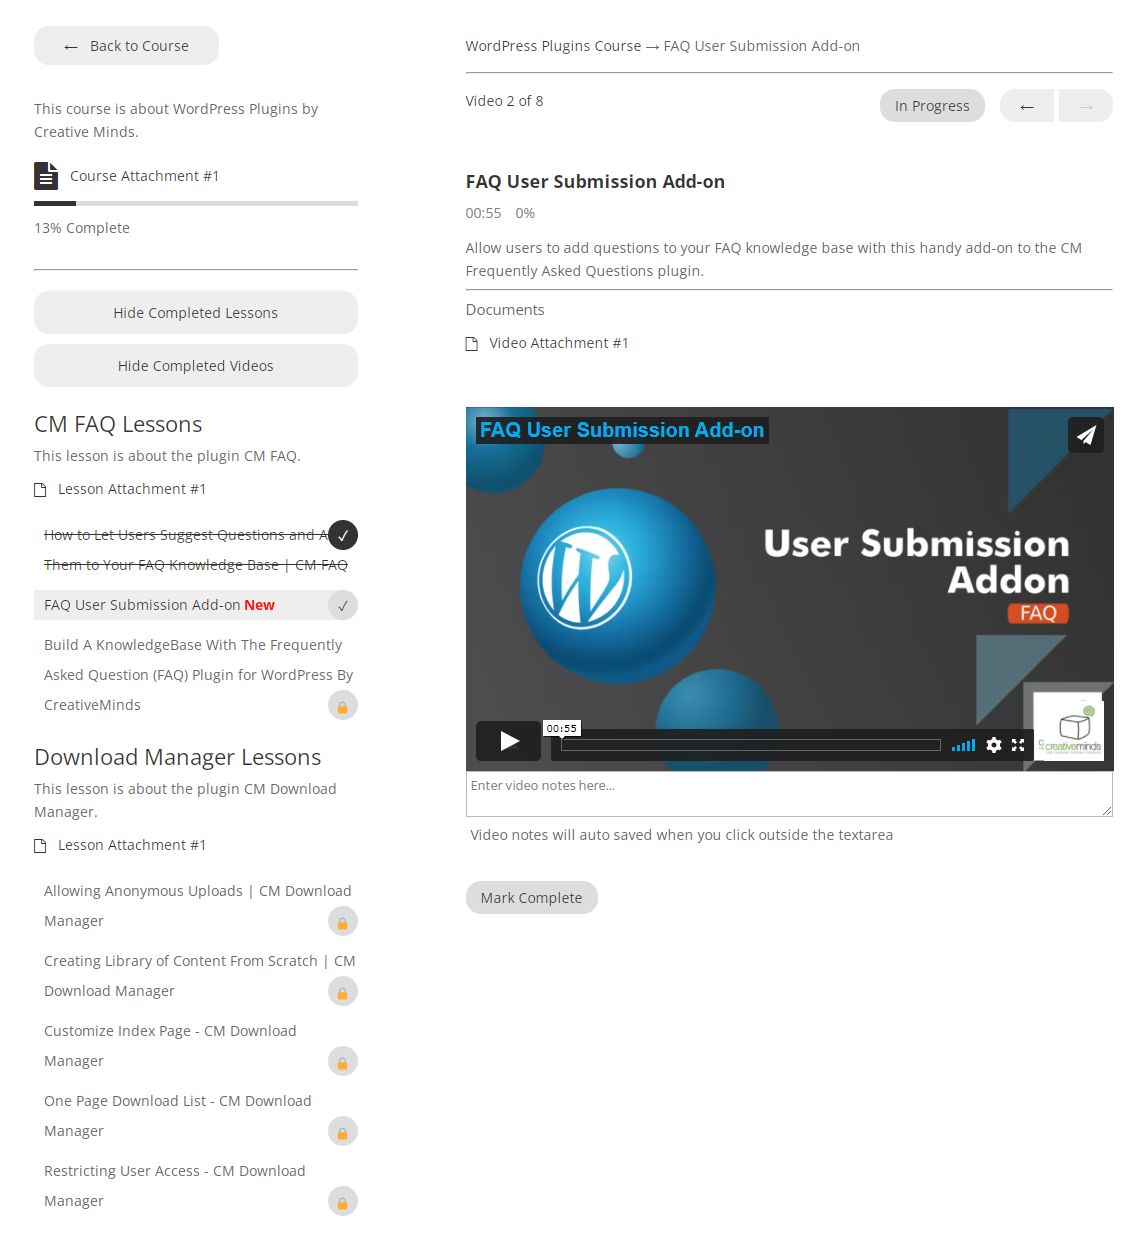
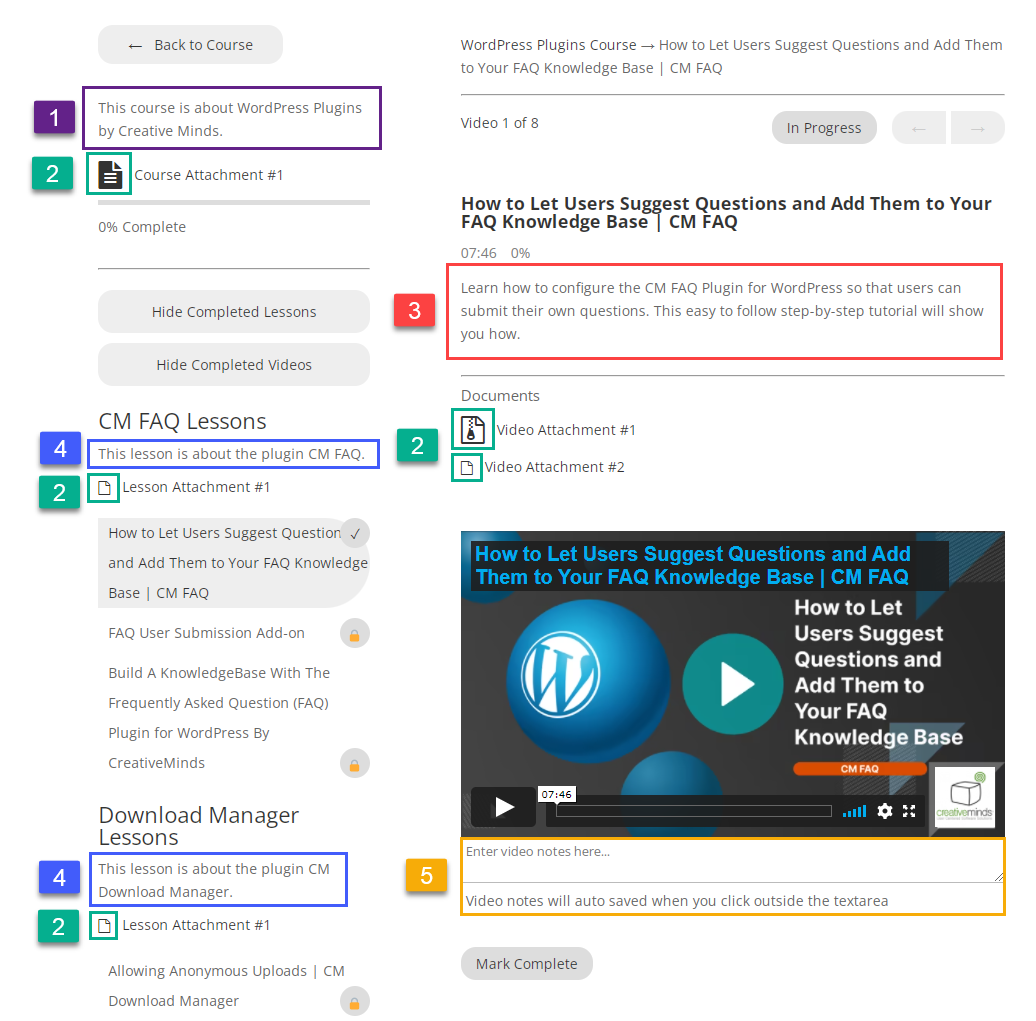
Let's access one of the courses. You can see how the page looks like on the screenshot below. Let's talk more detailed about the elements.
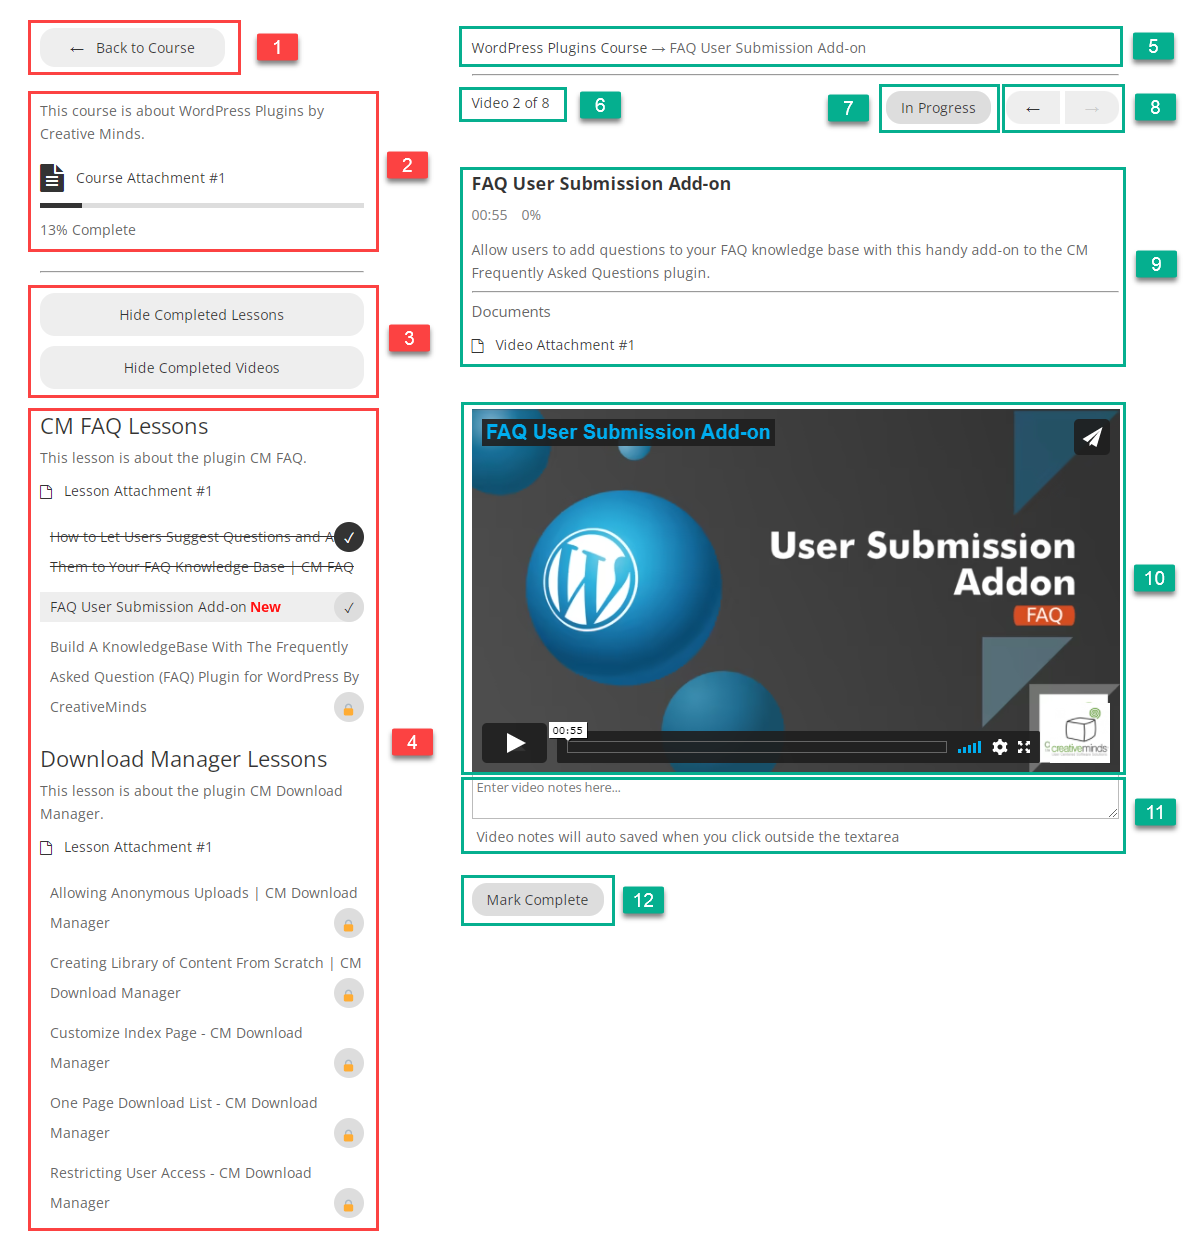
- Back To Course - The button that gets the user back to the list of all courses.
- Course Information - This area shows the course description, attached files and the progress of watching the course.
-
Hide/Show Completed Lessons/Videos - Clicking on these buttons will hide or show lessons or videos that the user has already completed from the list. Completed videos are marked as crossed out.

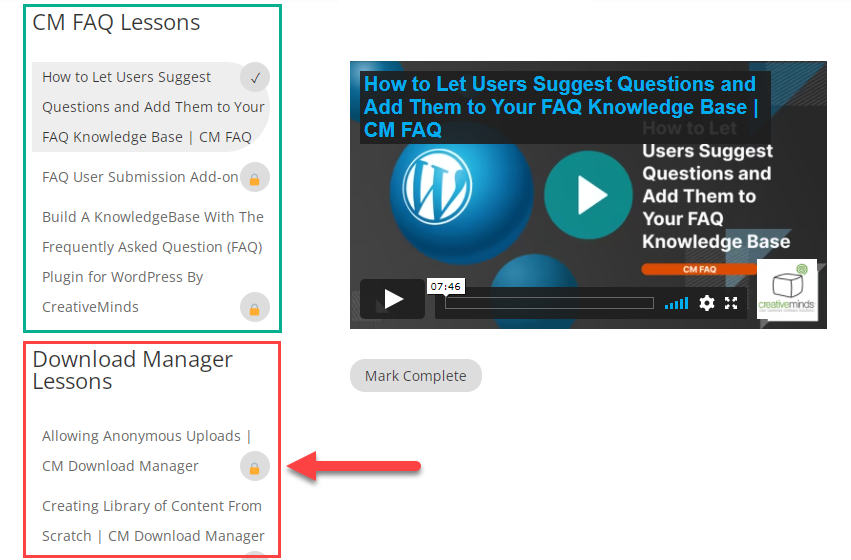
Hide / Show completed lessons and videos - Lessons Information - Here the user can see the list of the course lessons, the title and description of each lesson, attached to the lesson files, list of videos of each lesson. The user can choose between unlocked videos to watch. Locked videos are marked with a "lock"-icon. Unlocked videos are marked with a "checkmark"-icon. Completed lessons are crossed out.
- Breadcrumbs - Here the user can see the breadcrumbs of current videos and current course.
- Number of Videos - Shows the number of the current video out of all videos in the current course.
- Status of the Video - Here are possible two statuses:
- In Progress - When the video is not completed yet.
-
Complete - When the video is already completed.

Marking the video as completed
- Navigation Bar - Navigation buttons between unlocked videos (next video and previous video).
- Video Information - Here the user can see the information about current video: title, description, duration, how many % of the video is watched and attached to the video files.
- Video - The video itself.
- Video Notes - The area where the user can make his notes to the current video.
-
Mark Complete - The user can click this button to complete the video. When the video is completed, the button disappears. Note: The user can't complete the video if he hasn't watched enough % of the video and not enough amount of days passed - in case if you defined the relevant conditions. In that case the user will see the message about necessity to watch required % of the video.

Attempt to complete not watched video


End Result
Following instructions found in the plugin and guides, you should be able to configure restricted LMS with sequenced videos using list layout on your site.
Use Case Front-End
 |
More information about the WordPress Video Lessons Manager Plugin Other WordPress products can be found at CreativeMinds WordPress Store |
 |
Let us know how we can Improve this Product Documentation Page To open a Support Ticket visit our support center |