WordPress Two Factor Authentication (CMAUTH) - Use Case - How to Create 2FA Login to Your Site With SMS
Use Case - How to create 2FA login to your site with SMS
Note: This guide requires:
- WordPress Two Factor Authentication – This document uses version 1.6.7.
Video Use-Case
Introduction
WordPress Two Factor Authentication rebuilds the account security for your WordPress users by offering integration with four widely accredited two-factor authentication (2FA) methods: Google Authenticator, Mobile Phone SMS, Email verification and Email code. By not relying on the password alone, users feel confident that their credentials and data are stored safely.
Use Case Front-End
Use Case Assumptions
In this example use case guide we will consider how to create 2FA login to your site with SMS verification code.
SMS Code - In order to access the account, the user has to input a code which is sent by SMS (short message service) to his/her mobile. This message is generated by the reliable Amazon SMS service (AWS SNS), which boasts compatibility with most countries.
It follows:
- Installing the plugin
- General settings
- SMS Code
- Individual user settings
- IPs and devices restrictions
- Appearance
- Notifications
- Labels
- End Result
Installing the Plugin
The process is the same for all CM plugins and add-ons.

- Download the plugin from your customer dashboard.
- Log in to WordPress and navigate to the WordPress Admin → Plugins settings.
- Click on Add New.
- Activate it and add the license.
Learn more: Getting Started - Plugin Overview
General Settings
Enabling SMS protection on your site is quite simple. To configure all base options you need to navigate to Admin Dashboard → CM Secure Login Pro → Settings → General tab.
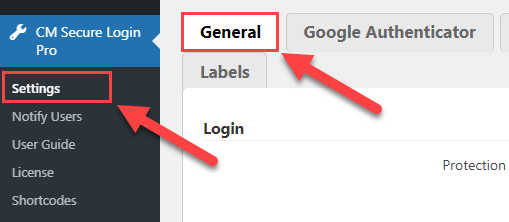
There you can find a few sections with the options. Let's consider the ones that are important for configuring SMS protection.
Login
-
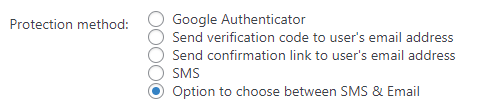
Protection method - This option is a core of the plugin. Here you need to choose which protection method you want to use. You can choose from four protection methods: Google Authenticator, Email verification code, Email confirmation link, SMS verification code. You can also let users choose between SMS code and e-mail code. In this use case we choose SMS method.

Choosing protection method Other Protection Methods
Learn more about other protection methods in these use cases:
-
Require chosen protection method for all users - Enable this option if you want to apply the previously selected solution for all users.

Choose if to require chosen protection method for all users -
Require chosen protection method for chosen roles - If previous option is disabled, you can apply chosen protection method only for definite user roles that you can choose in the list.

Requiring chosen protection method for specific user roles TIP: Notify Users
You can notify your users about the changes in login process by sending them emails. You can learn more about how to do it in this guide: WordPress Two Factor Authentication (CMAUTH) - How To - Notify Users About Login Process Changes


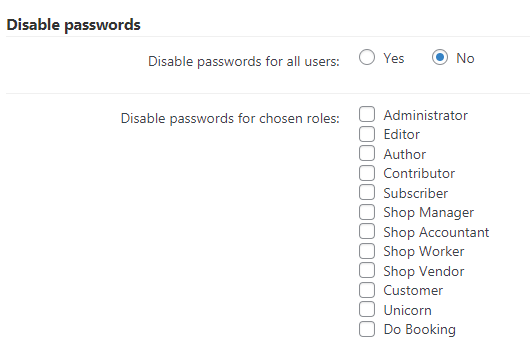
Disable passwords
You can disable the password for every user or only for those with certain roles. Note that disabling the password does not mean the users will only need their username to sign in. Instead, they will login with their usernames and the chosen authentication method.
- Disable passwords for all users - Choose Yes to disable passwords for all users.
- Disable passwords for chosen roles - Choose here roles that won't need to use password for login. Works if previous option is disabled (chosen No).
Common
Here you can configure additional security options.
-
Expiration time for the email/SMS code or link [minutes] - Define the time in minutes when the sent one-time code expires.

Specifying expiration time for email/SMS code or link -
Logout after activity/inactivity time [minutes] - Users will be logged out after this period of activity/inactivity (in minutes). Set to 0 to disable.

Specifying logout time -
Logout mode - Here you can choose in which cases to logout the users: after some period of inactivity, or in both cases - activity and inactivity. Works if previous option is enabled.

Choosing logout mode -
Characters set to generate the code from - Set the characters that will be used to create the random code. To make it simpler for users to enter we can use just numerical symbols for an SMS code.

Specifying the list of characters for generating codes -
Code length - Set the authentication code length. To make it simpler for users to enter we can make an SMS code not so long - for example, just 6 symbols.

Specifying code length


SMS Code
Next important tab we consider is SMS.
In this tab are located some options that are crucial for working of SMS protection method.
Confirmation Settings
Limit sending one SMS per every X [minutes] - Lets you limit the frequency of text messages, so as not to disturb users. The field accepts values in minutes, so, by inserting 2, for example, users will receive maximum one message every 2 minutes. Inserting different characters, like "4.2" or alphabetic characters will result in an error. Entering "0" or a negative value will cause the SMS to fail to send.

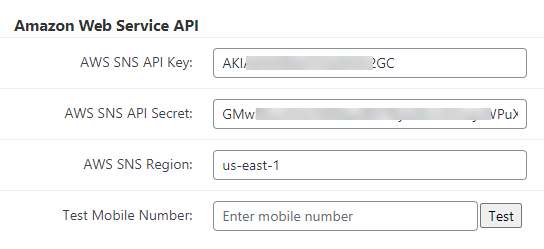
Amazon Web Service API
Here, you must insert the Amazon SNS API Key and Secret, and choose the Region. Amazon has a guide on how to obtain these, you can also check our guide about it: General Support - Enabling SMS Messages (Amazon SNS API)
You can also test the service by adding a test number, starting with the country code. For example +1xxxxxxxxxx for a US number.
Message
These fields allow you to customize the SMS the users will receive: both the sender name and the message itself can be personalised.
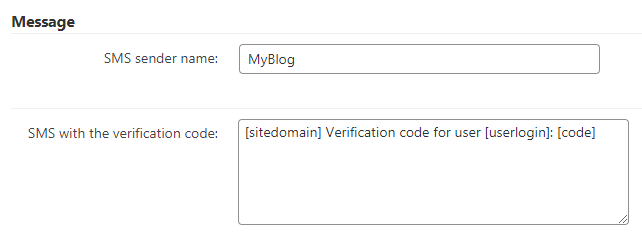
Here you can customize:
- SMS sender name - Set the sender name that will be displayed on the phone. Maximum 11 characters without spaces.
- SMS with the verification code - Customize the message. You can use the following shortcodes:
- [code] - verification code that user have to enter on the login form. Note: this shortcode is essential, as it will contain the verification key the user will have to input to sign in.
- [blognameshort]
- [sitedomain]
- [userdisplayname]
- [userlogin]
- [useremail]
Email Template
You can edit the template for the message the user will receive when he/she tries to login without having registered a telephone number. There are two fields: subject and the message body.
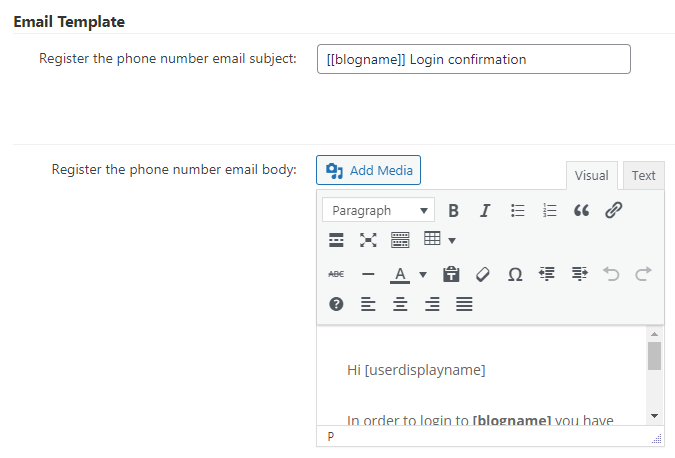
You can use the following shortcodes to add dynamic content to subject and body of these emails:
- Subject shortcodes:
- [blogname]
- [siteurl]
- [userdisplayname]
- [userlogin]
- [useremail]
- Body shortcodes:
- [link] - the link that user have to open to enter his phone number. Note: this shortcode must be in the email.
- [blogname]
- [siteurl]
- [userdisplayname]
- [userlogin]
- [useremail]
Result
Base configuration is done, so don't forget to click the button Save at the bottom of the page, and let's check how it works on the front-end.
When the user tries to login for the first time after 2FA is enabled, his phone is not registered yet, so he needs to enter his username/email, and then click Send verification code. He will be notified that his phone is not specified and the link for doing this was sent to his email. In the email the user needs to click the link and then write his phone in the provided form. The he can get back to the login form, enter his username/email and password, and then click Send verification code. The user needs to enter the code from received SMS to the Verification Code field and click Log In.
TIP: Choose between Email Code and SMS Code
You can let the user to choose between sending the verification code to email or via SMS. You just need to choose Option to choose between SMS & Email in the option Protection method on the General tab.
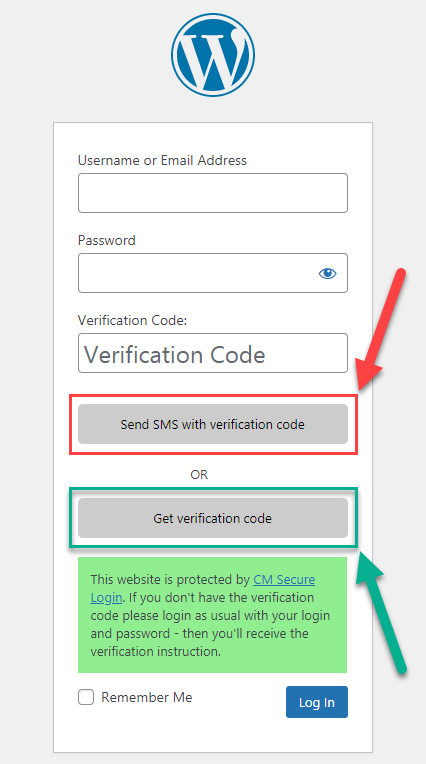
You might also need to customize the labels so the user could distinguish the buttons for SMS and Email codes.
Example on the front-end:
Individual User Settings
WordPress Two Factor Authentication allows you to apply the chosen secure method not only to all users or specific roles, but also allows you to change settings specifically to each user.
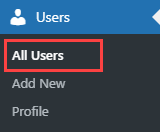
To do this, navigate to Admin Dashboard → Users → All Users.
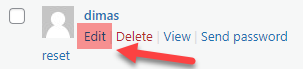
Hover on the needed user and click Edit.
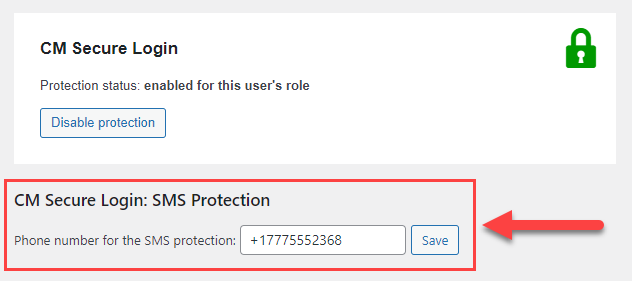
You will see the following panel in the user's page:
On the screenshot above you can see an example of the panel for the user that belongs to the user role with enabled 2FA protection. It works the same for the user roles with disabled 2FA protection.
The options are:
- Disable/enable protection - Either turns the 2FA on or off for this user.
- Clear admin decision - Resets any individual changes in favor of global settings.
User's Phone Number
Here you can also view and manage the phone number the user provided in his profile:
IPs and Devices Restrictions
There are a few more features for additional security of the accounts.
To configure them get back to Admin Dashboard → CM Secure Login Pro → Settings.
IP
First tab we need - IP.
You can choose how many IP addresses are allowed for each user role.
The options are:
- Restrict user IPs - Enables the feature.
- User roles affected by IPs restriction - Mark which roles will be affected.
- Maximum of IPs allowed to each user - Choose a number (1 or higher).
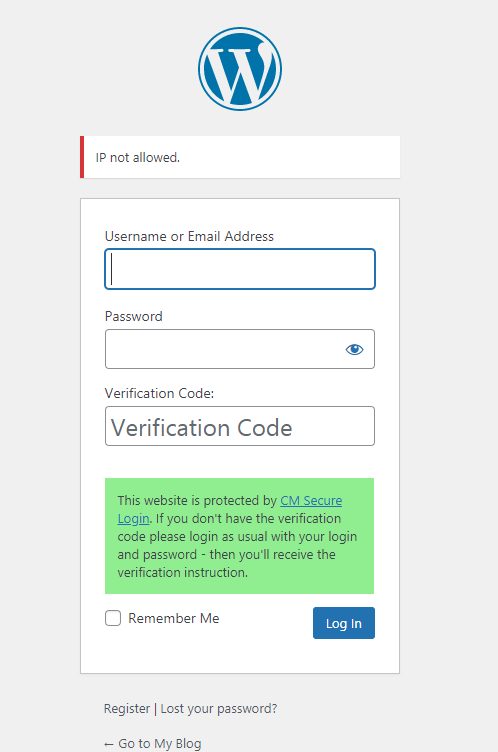
- Accept only IPs chosen by the admin - Only allows logins from specific IPs defined by the admin per each user. This means that login attempts from other IPs will be blocked even if more IPs slots are available.

In result, if someone tries to login to the account from new IP, and IPs limit is reached, or this IP is not allowed by the admin, there will be a following message:
Learn more about IPs restrictions in this guide: WordPress Two Factor Authentication (CMAUTH) - How To - Restrict User Login By Number of IPs
Device
Another tab we need - Device.
You can restrict certain user roles from logging in from too many different devices.
- Restrict user devices - Enables the feature.
- Select user roles with devices restricting - Mark which roles will be affected.
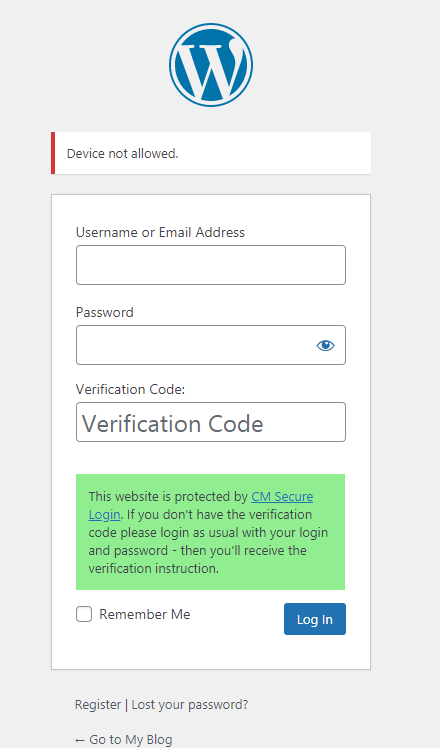
- Maximum number of devices allowed to user - Choose a number (1 or higher).
In result, if someone tries to login to the account from new device, and devices limit is reached, there will be a following message:
Learn more about devices restrictions in this guide: WordPress Two Factor Authentication (CMAUTH) - How To - Restrict User Login By Number of Devices
Appearance
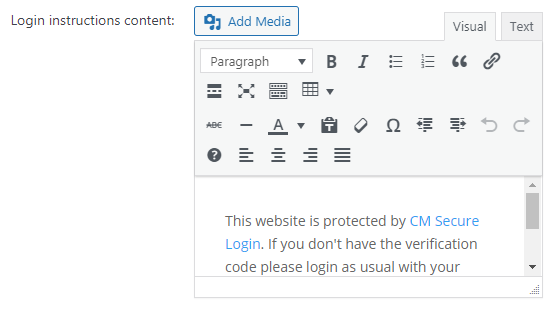
On the Appearance tab you can add and change instructions and modify the appearance of the login form with CSS.
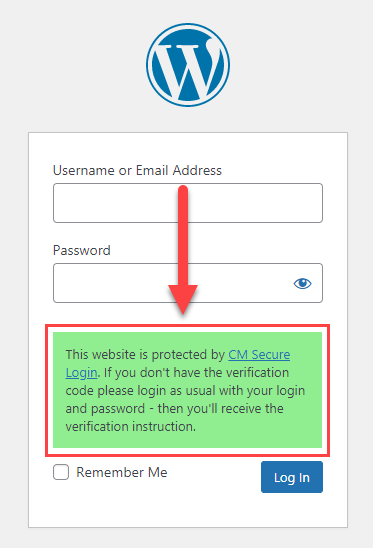
- Enable login instructions - Enables this option.

- Login instructions content - Enter the login instructions that will be displayed on the login form.
- Custom CSS - To further personalize your form, you can insert custom CSS. It will affect the following hooks: wp_head, admin_head, login_head.
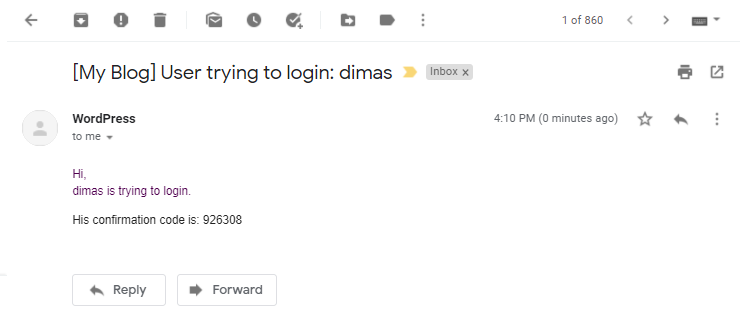
Notifications
When a user attempts to log in, he/she receives a code or link.
WordPress Two Factor Authentication allows you to send an email to another user informing about the login attempt. This can be useful to monitor which users are trying to log in and how.
To configure it, navigate to the Notifications tab.
-
Send auth code to additional email - Enable it to send the code or link to additional email addresses.

Enabling sending auth code to additional email -
Email address to send the notification - Write here comma separated email addresses. This setting will only have effect if the previous option is set to Yes.

Adding email addresses for sending notifications -
Enable for chosen roles - Define which user roles will trigger the additional email.

Enabling for chosen roles Email template - Customize the subject and body template of the email.

Email template - Both fields accept shortcodes:
- Subject shortcodes:
- [blogname]
- [siteurl]
- [userdisplayname]
- [userlogin]
- [useremail]
- Body shortcodes:
- [code] - the Email Code or SMS Code.
-
[link] - link that user have to open to confirm the login.
Note: the email must contain one of these two shortcodes [code] or [link] - depending on the protection method you chose.
- [blogname]
- [siteurl]
- [userdisplayname]
- [userlogin]
- [useremail]
- Subject shortcodes:
- Both fields accept shortcodes:


Example of the e-mail:
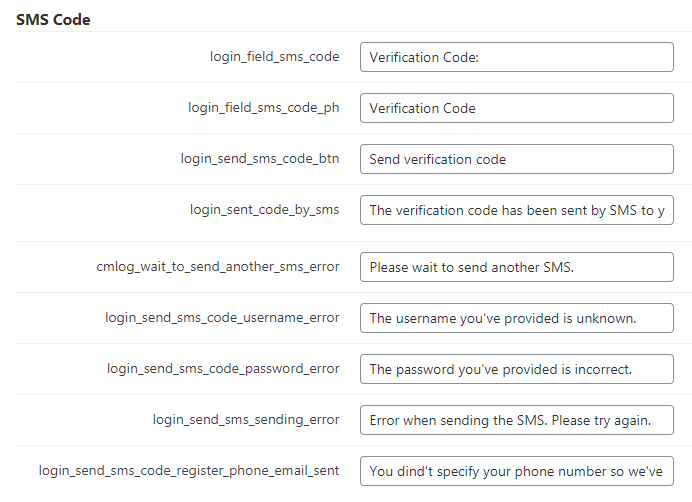
Labels
On the Labels tab you can change the text of every label on the front-end. This feature is especially useful for localizing the form to different languages.
SMS Code labels:
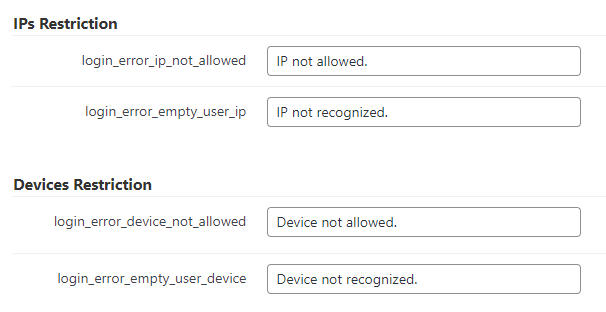
IPs and Devices Restriction labels:
End Result
Following instructions found in the plugin and guides, you should be able to create 2FA login to your site with SMS code verification.
Use Case Front-End
 |
More information about the WordPress Two Factor Authentication plugin Other WordPress products can be found at CreativeMinds WordPress Store |
 |
Let us know how we can Improve this Product Documentation Page To open a Support Ticket visit our support center |