WordPress Two Factor Authentication (CMAUTH) - How To - Notify Users About Login Process Changes
Notify Users
It's important to notify users about changes in their login process.
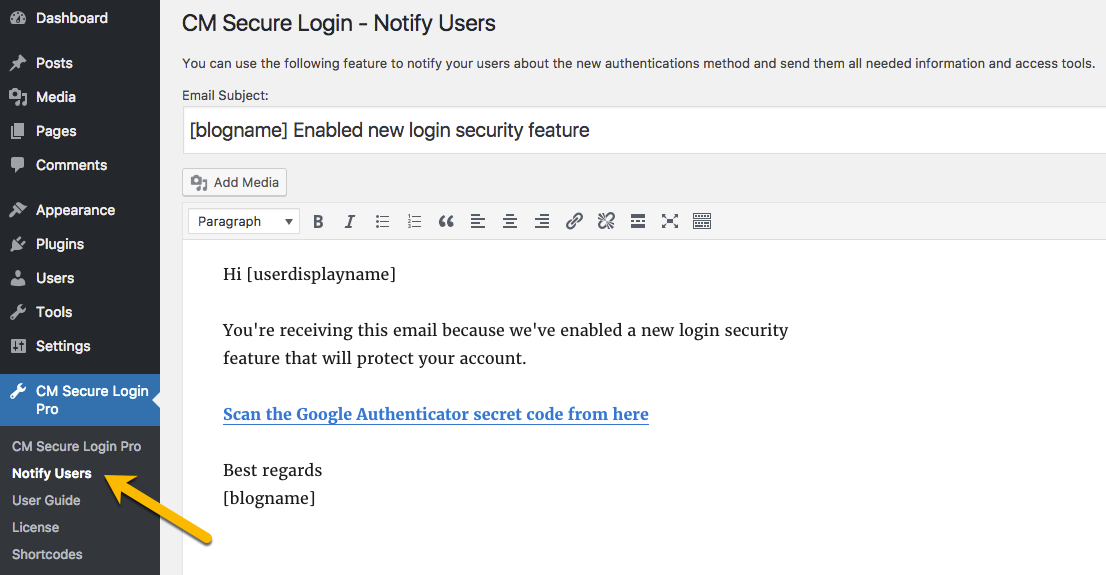
WordPress Two Factor Authentication allows you to quickly make these announcements either to everyone or only to a selected group of users. To perform this action, head to Admin Dashboard → CM Secure Login Pro → Notify Users, as shown:
Customizing the email
You can change the content and layout of the email each user will receive. It's much like editing a WordPress post: the Email Subject is in the place of the title and the Email Body is in the text area. RTF (Rich Text Format) and HTML editing are available.

Using shortcodes
- Blog info:
- [blogname]: The title of the site, like "Secure Login and Two-Factor Authentication solution for WordPress";
- [blognameshort] : The short version of the name. If the site doesn't have one, [blogname] will be used;
- [siteurl]: URL of the site, like https://www.cminds.com/secure-login-two-factor-authentication-solution-wordpress;
- [sitedomain]: URL of the domain, like www.cminds.com.
- User info:
- [userdisplayname]: The name set by the user to be shown on Wordpress;
- [userlogin]: The login name;
- [useremail]: The registered email.
- Other
- [ga_qrcode_url]: Generates the link for the user's Google Authenticator code. It displays a URL and so has to be placed in the text as a hyperlink. Two examples:
-
With the visual editor:

Adding link to the GA QR code -
With the HTML editor:

Adding link to the GA QR code using HTML
-
- [ga_qrcode_url]: Generates the link for the user's Google Authenticator code. It displays a URL and so has to be placed in the text as a hyperlink. Two examples:


Tip: Writing a shortcode between brackets returns its value inside them. For instance, if the blog name is "Writing 101", inserting [[blogname]] will return [Writing 101].
Selecting recipients and sending the message
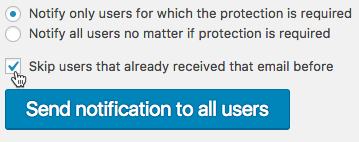
You can choose who will receive the email by combining some options. For instance, by selecting to notify only users for which the protection is required and skipping those who have already received the message, you will ensure strictly those directly affected by the update will be contacted.
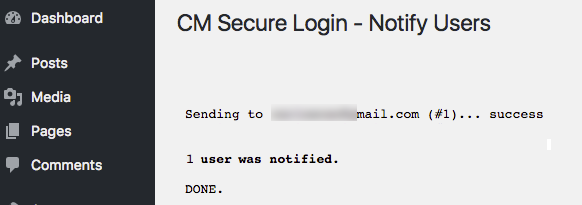
After clicking the button, the plugin will process the requests, which can take some time depending on the number of emails. In the end, a list of the emails and a success confirmation for each address should appear, as shown:
Message example
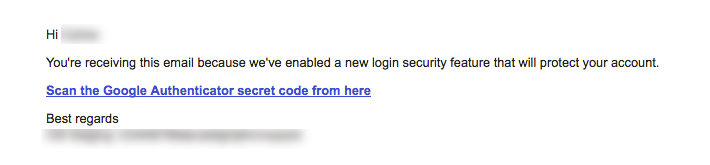
Below, you will find an example of how the message will show up in the user's inbox.
 |
More information about the WordPress Two Factor Authentication plugin Other WordPress products can be found at CreativeMinds WordPress Store |
 |
Let us know how we can Improve this Product Documentation Page To open a Support Ticket visit our support center |