WordPress Telegram Bot - Use Case - How to Create a Bot on Telegram and Teach It to Respond to Specific Terms
Use Case – How to create a bot on Telegram and teach it to respond to specific terms.
Note: This guide requires:
- WordPress Telegram Bot – This document uses version 1.0.3
Video Use-Case
Introduction
WordPress Telegram Bot is a WordPress plugin that allows you to send automatic messages, emails and SMS based on Telegram conversations and much more. You can use the WordPress Telegram Bot plugin to automate business workflows involving the messenger app.
Main functionalities:
- Email Repeater – Send messages sent on a Telegram group to one or many emails. Mark words as “stop words” to prevent them from triggering the bot.
- Personal Messages – Mention a user after certain words or expressions are sent to the group together with a message to this user.
- Group Messages – Emit message to all users based on certain conditions in a specific group.
- SMS Repeater – Send a copy of Telegram group conversations to a mobile device.
- SMS Alerts – Send notifications to multiple phone devices whenever certain keywords are used.
- WordPress Repeater – Store all messages from a specific group or several groups in WordPress and output the content using a shortcode.
Use Case Front-End
Example: on the chosen Telegram group the bot must respond to the user when he types words "hi", "hey" or "hello". The message must include the words "help" or "urgent", and must not include the words "admin" or "administrator".
Result:
Use Case Assumptions
In this example we will consider how to create a bot on Telegram and how to teach it to respond to specific terms or phrases in Personal Messages.
Learn more about other types of rules:
Requirements
- The WordPress Telegram Bot plugin will only work on sites with installed SLL certificates (HTTPS).
- You cannot use the same access token (bot API) on different sites.
- The bot may not perform properly with supergroups.
It follows:
- Installing the plugin
- Creating a Telegram account
- Creating a bot and connecting it to plugin
- Creating a group and adding the bot as admin
- Creating rules - Personal Messages
- Creating, duplicating and deleting a rule
- Viewing the log - checking performed rules
- End Result
Installing the Plugin
The process is the same for all CM plugins and add-ons.

- Download the plugin from your customer dashboard.
- Log in to WordPress and navigate to the WordPress Admin → Plugins settings.
- Click on Add New.
- Activate it and add the license.
Learn more: Getting Started - Plugin Overview
Creating a Telegram Account
To start working with the plugin, first thing you need to do is to create a Telegram account. The phone number is required. To create an account you can use web browser or application that is supported for different types of devices. You can learn more about it in official documentation.
When the account is created, you need to create a bot.
Creating a Bot and Connecting It to Plugin
Telegram Resources
Official Telegram documentation: How To Create a Bot | @BotFather Commands
This feature depends on Telegram, so steps and interface may change at any time.
If you feel this article is deprecated, please get in touch with us.
In order to create a Telegram Bot, follow these steps:
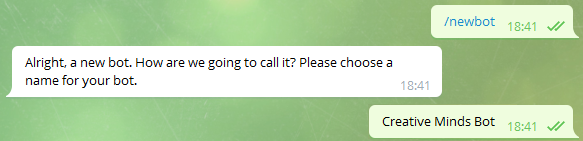
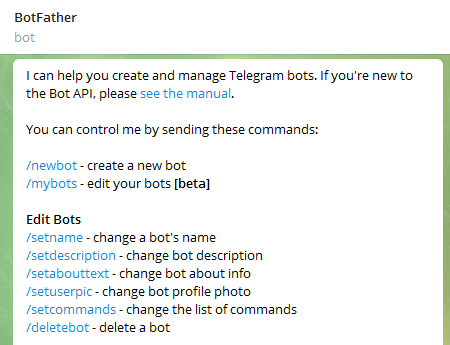
1) Contact the user @BotFather on Telegram and start a chat.
Either follow the link @BotFather or look for its username.

2) Write /newbot to @BotFather and choose a friendly bot name. Friendly names can contain spaces. Example: Creative Minds Bot.
3) Specify the bot username. This name can't contain spaces and must end with "bot". Example: CmindsBot.
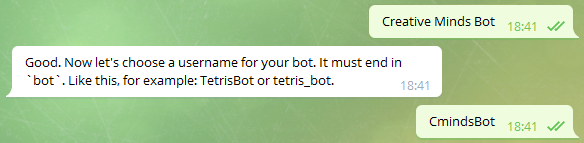
Your bot has been created! You will now receive the access token.
You can find it on the @BotFather message logs. Alternatively, message /token @xxx to it, with xxx being the bot name. For example: /token @CmindsBot.
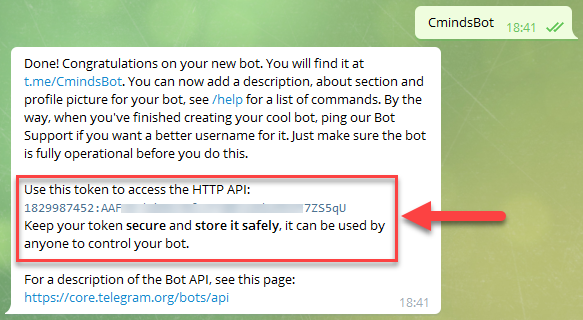
4) Copy this token and navigate to the plugin: Admin Dashboard → CM Telegram Bot → Settings → API Settings tab.
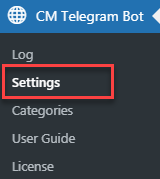
There in the section Telegram API Settings you need to fill the following fields:
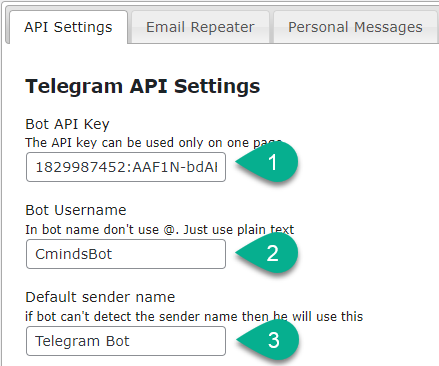
- Bot API Key - Paste here copied token.
-
Bot Username - Here you need to write bot username without @. In our example it's CmindsBot.
Remember: the username is the one without spaces and ends with bot:

Bot username example - Default sender name - If the bot can't detect the sender's name then he will use this one.

And then click the Save button.

TIP: Edit the Bot
Using the @BotFather you can edit your bot: name, description, about info, profile photo and list of commands. Just follow the instructions by @BotFather.
Creating a Group and Adding the Bot as Admin
Note: the following steps are shown in a desktop application, as there's no possibility to set a bot as admin on the web version of Telegram.
The WordPress Telegram Bot plugin requires the bot to be part of one or multiple groups to fetch messages and interact with users.
It can only perform actions if it has admin permissions. So, next step - you need to create a new group (if you haven't done it yet) and add your bot as administrator.
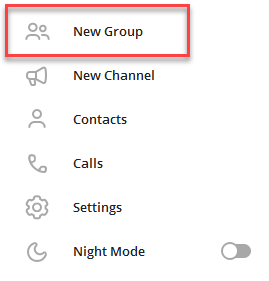
Open the Telegram's menu and click New group.
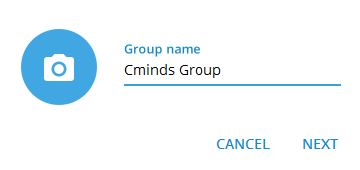
In the pop-up window you need to write a name for your group and click Next.
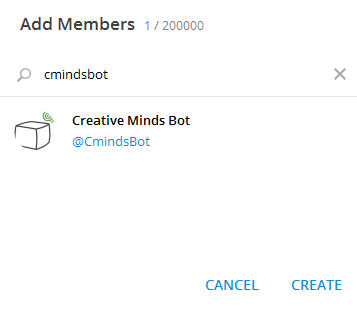
On the next step invite new members to the group. Now you need to find your bot, choose it and click Create.
And the final step: setting the bot as administrator. Navigate to the group settings, click Manage Group → Administrators → Add Administrator. Then choose the bot and click Save and Close.

Creating Rules - Personal Messages
Now it's time to teach our bot to respond on some definite words or phrases. Rules are the main features of the WordPress Telegram Bot plugin and you can create multiple of them.
Examples:
- Send all messages from a group to an email address of choice, except it they have the word "hey" or "hi"
- If someone writes "help" in a group, send an SMS with contact information to a chosen number
In this use case we will consider responses by the bot on Telegram only to the user, who sent the message containing the words or phrases from the rule. So, navigate to Admin Dashboard → CM Telegram Bot → Settings → Personal Messages tab.
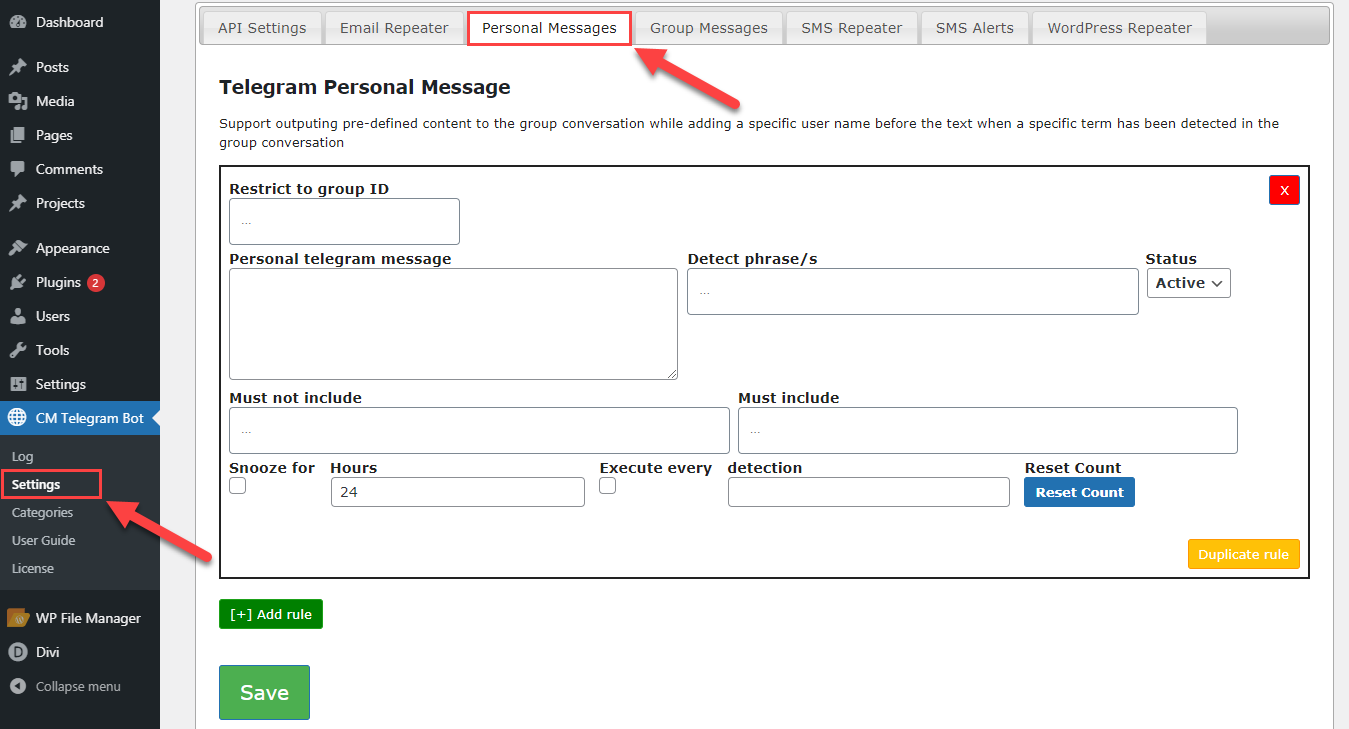
There you can find the following fields and options:
-
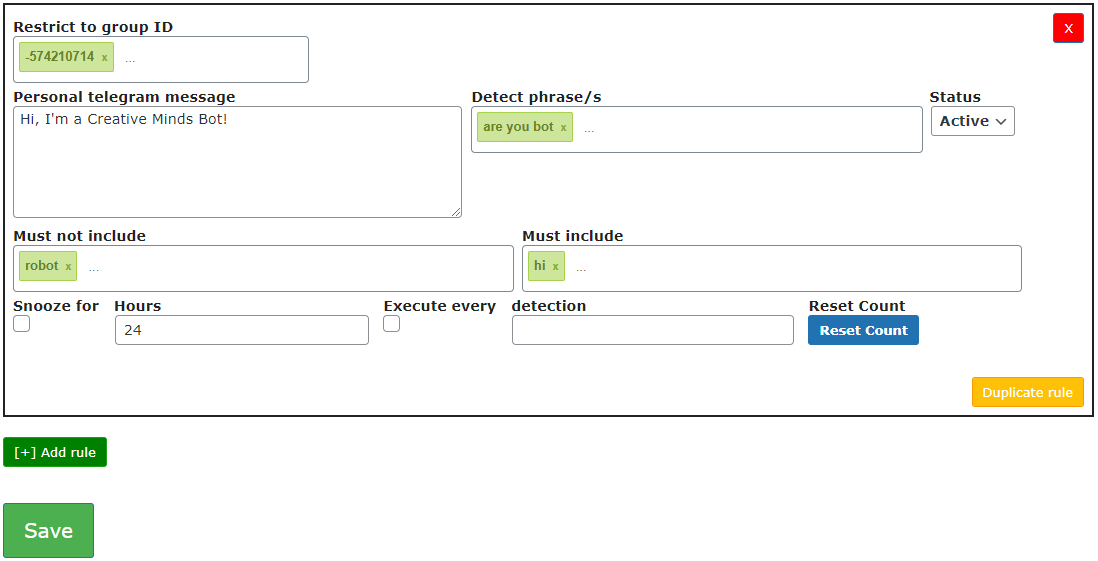
Restrict to group ID - Here you need to write ID of your Telegram group. This field can contain multiple IDs for different groups. Must follow the format "-xxxxxxxx" (the character "-" followed by nine numerals). Note: leaving this field empty will apply the rule to ALL groups, where the bot is set as administrator.
To get ID navigate to Telegram and type /getGroupId in your group.
Note: Telegram bot commands are case-sensitive! As such, /getGroupId will work and /getgroupid will not work.
In respond you will get group ID:

Getting a Group ID - Personal telegram message - Write here the message that the user will get in respond to his word or phrase.
- Detect phrase/s - The rule will only run if it DOES include AT LEAST ONE of these words or phrases.
- Status - Set the rule as active or paused.
- Must not include - The rule will only run if it DOES NOT include ANY of these words.
- Must include - The rule will only run if it DOES include at least one of these words.
- Snooze for - Set a number in hours in the field. After the rule is activated, it will "snooze" for X hours before being ready to activate again. Useful to avoid spamming.
- Execute every - Execute the rule after every X times the trigger is activated. For example, if detection is set to 3 the rule will be set on the following 1,4,7.
- Reset count - Click the button to set the count of Execute every to 0. Example: the rule is executed every 10 messages and 9 have been sent, so it will be executed again in the next message. Click on Reset Count and the rule will start counting from start.
- Fire Shortcodes - You can place here one or multiple shortcodes which should be executed on the site running the bot once the message has been fired. The output of this shortcode will be printed to the telegram group associated with this message. Have a note that not all shortcodes can be executed in order to print the output in Telegram group. Learn more about how it works in this guide. Note: this option was introduced in version 1.0.5.

Let's fill this form for our example in the following way: the rule must respond the personal message when someone types words "hi", "hey" or "hello". The message must include the words "help" or "urgent", and must not include the words "admin" or "administrator".
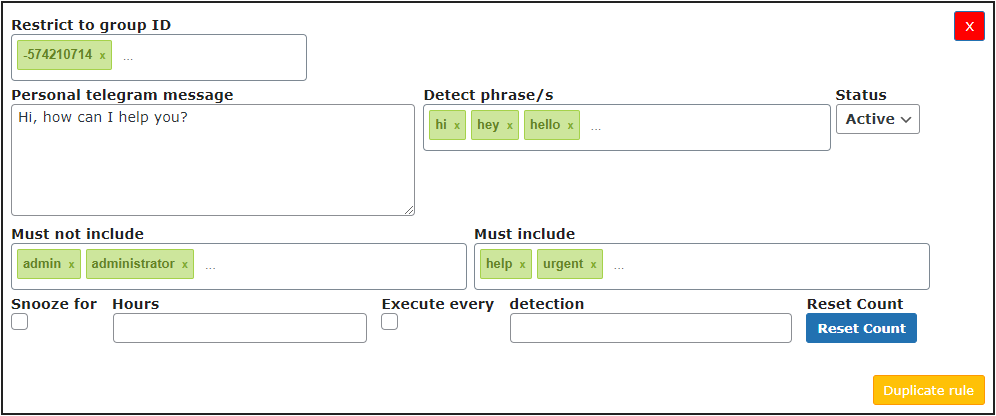
And then click the Save button:
Keyword Conditions Summary
Within this rule, you can set three conditions involving keywords. They all work in tandem.
For example, if you have these:
- Detect phrase(s) - "Hi", "Hey", "Hello"
- Must include - "help", "urgent"
- Must not include - "admin", "administration"
The following will happen with each message:
- "Hi, I need urgent help!" - Will trigger the rule
- "Hello guys this is urgent!" - Will trigger the rule
- "Hey, this is the admin. Does anyone need help?" - Will not trigger the rule, because it has "admin"
- "Hey!" - Will not trigger the rule, because it doesn't have "help" or "urgent"
- "Admin help!" - Will not trigger the rule, because it includes "admin". Additionally, it doesn't have "Hi", "Hey" and "Hello"
Let's see the result on the front-end:
Creating, Duplicating and Deleting a Rule
Every tab comes with an empty rule.
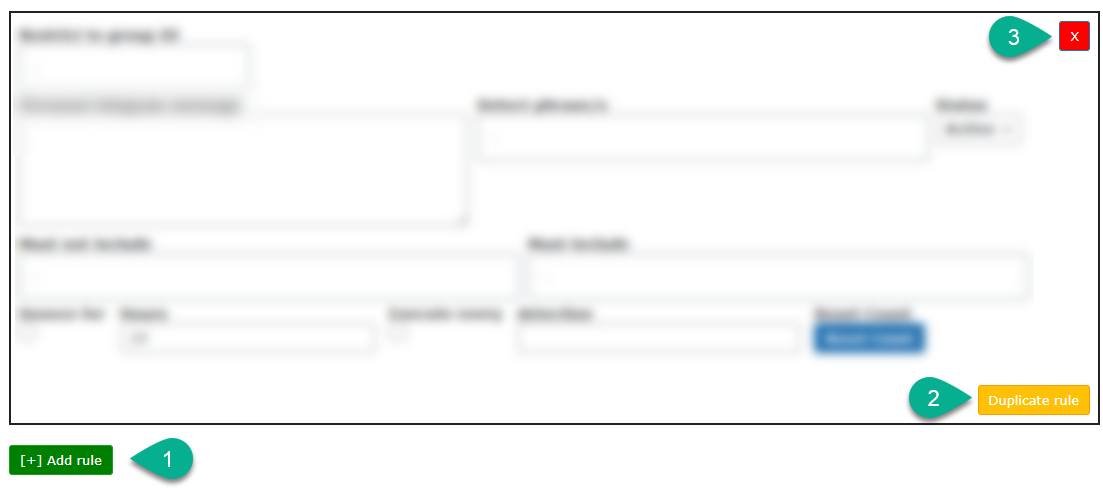
- Add rule - Create more rules at any time by clicking this button.
- Duplicate rule - You can duplicate rules and edit the copies.
- Delete rule - Delete the rule. Note: be careful, as there is no confirmation for this action.
All changes (including deletion) are only performed after you click the Save button.
Viewing the Log - Checking Performed Rules
You can check all performed actions in the log. It helps you monitor the bot responses and operation and, in case of errors, lets you understand what is the rule that did not work as expected.
Capturing Group ID
The log is also useful for detecting the group ID. Once adding the Bot to a group as an admin, it will start sending the content of that group to the plugin. In such case you can find out what is the group number without using the command line within the group stream.
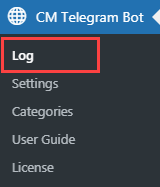
To see the log navigate to Admin Dashboard → CM Telegram Bot → Log.
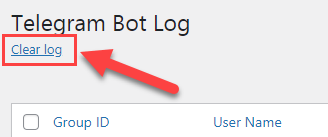
The log shows the information about each action:
- Group ID - This column can be useful to retrieve this number (you can also order this column by ID).
- User Name - You can order this column by user names.
- Message - All group messages are logged, even if they don't trigger any rule.
- Actions - Identifies the rules and, and if it was processed successfully or failed by some reason.
- Status - Status of the message.
- Date - Date when the message was sent.
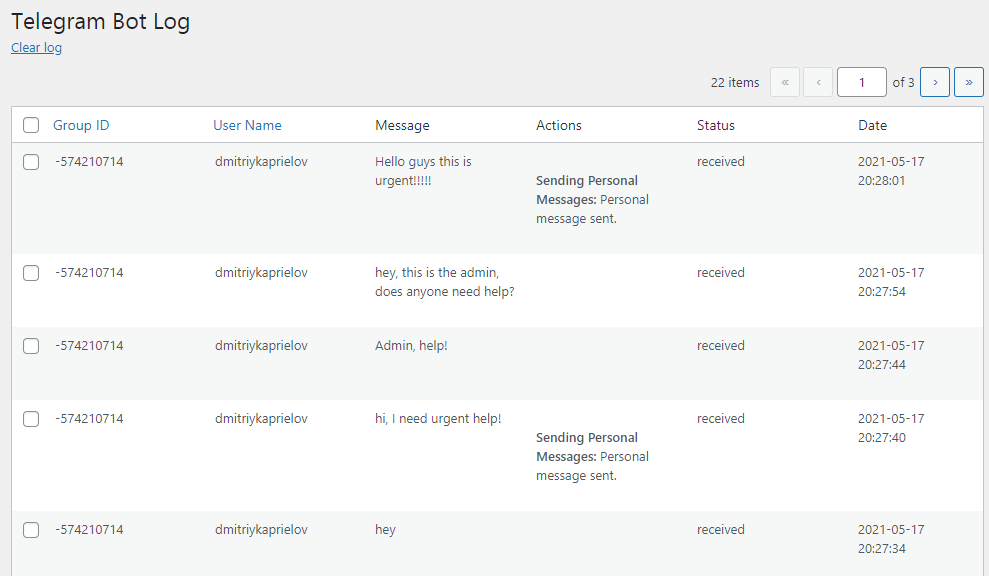
You can clear the log at any moment by clicking the button Clear log.
End Result
As you can see, using the WordPress Telegram Bot plugin you can create the rules, and the bot will respond reacting only on definite word or phrases, that optionally must include or not include some definite keywords. You can create any number of different rules that will respond to different words of phrases.
Use Case Front-End
 |
More information about the WordPress Telegram Bot plugin Other WordPress products can be found at CreativeMinds WordPress Store |
 |
Let us know how we can Improve this Product Documentation Page To open a Support Ticket visit our support center |