WordPress Registration Form Plugin (CMREG) + Payments - Use Case - Charging Users to Register to Your WordPress Site
Use Case - Charging Users to Register to Your WordPress Site
Note: This guide requires:
- Pro version of WordPress Registration Form Plugin - This document uses version 3.1.0
- Registration Payments add-on
- Easy Digital Downloads (EDD) / WooCommerce - To connect payment gateways such as PayPal or Stripe
- Recurring Payments - Subscriptions with Easy Digital Downloads (paid) / Auto Register - Easy Digital Downloads (free) / WooCommerce Subscriptions - WordPress Subscription Plugin (paid) - To allow recurring payments
Video Use-Case
Introduction
WordPress Registration Form Plugin allows your users to login and register to your site via beautiful pop-ups. The Registration Payments add-on lets you charge users for registering.
Use Case Front-End
Use Case Assumptions
Want to Learn From The Start?
If you still haven't configured the WordPress Registration Form Plugin, check the use case:
In this example use case guide, we'll cover how to allow users to add payments to your registration process. We consider that you have already bought the Registration Payments add-on, but not installed it.
It follows:
- Preparation
- Create and assigning prices
- Display multiple subscription options
- Accounts without payment: notifications and auto-delete
- Enable recurring payments (subscriptions)
- Labels
Installing the Add-on
The process is the same for all CM plugins and add-ons.

- Download the plugin from your customer dashboard.
- Log in to WordPress and navigate to the WordPress Admin → Plugins settings.
- Click on Add New.
- Activate it and add the license.
Learn more: Getting Started - Plugin Overview
Installing Payment Plugin (EDD or WooCommerce)
You must choose between either Easy Digital Downloads or WooCommerce.
EDD or WooCommerce? No Difference For The Plugin
As far as the Payment add-on is concerned, there is almost no difference between using either EDD or WooCommerce. Both are free and provide free and paid add-ons.
Head to Admin Dashboard → Plugins → Installed Plugins and click Add New.
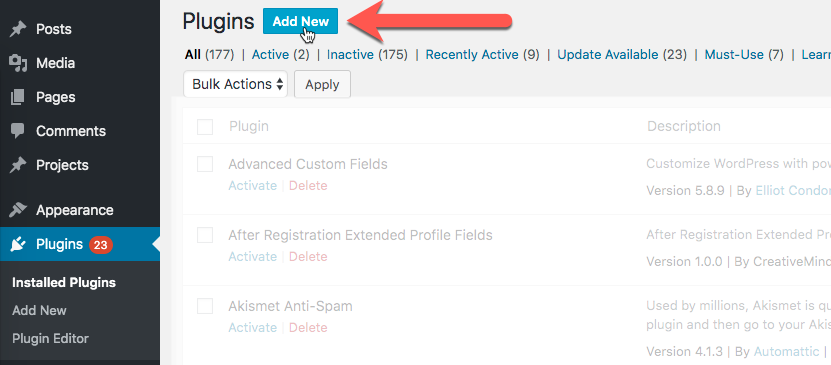
Search for either Easy Digital Downloads or WooCommerce and install it.
Configure Payment Plugins
Don't forget to configure the payment plugin! This way you can connect it to payment providers such as PayPal or credit card companies.
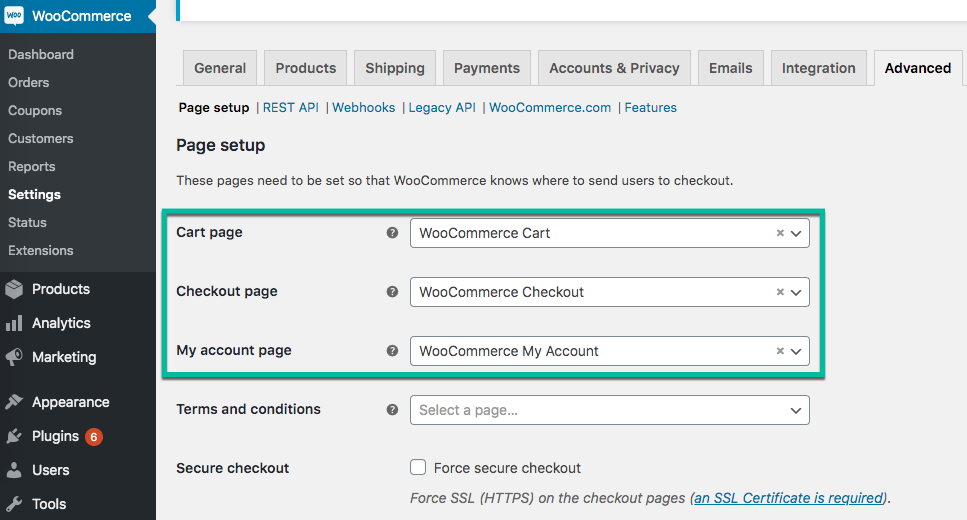
Important
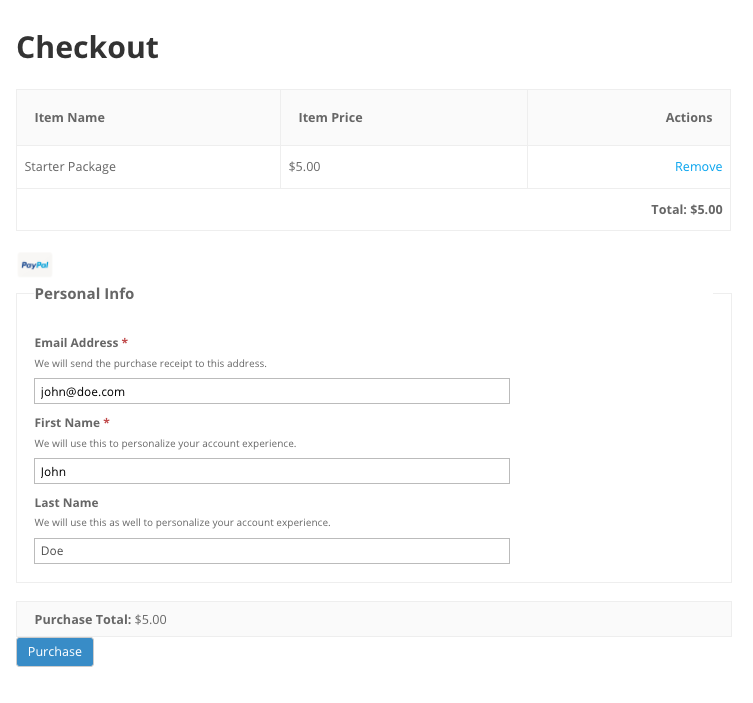
Be sure that your payment plugin has the correct Checkout and Cart pages set up. They are used by the plugin.
External Resources
Initial Setup
For the following steps, the login/registration pop-up has to be properly set up.
If you still haven't configured:
- Installing the base plugin
- Showing and configuring the pop-up
- Configuring how users log in
- Registration required fields
- Email notifications
- Invitation codes
- Labels
Please, check:
Creating and Assigning Prices
What You WIll Achieve
Users who wish to registrate will have to complete a payment through the chosen payment system.
This is the most important part of the process, and it's quite straightforward. We start by creating price options (one or more). To do so, follow the path CM Registration Pro → Settings → Payments tab.

Start by selecting the payment provider (note that EDD/WooCommerce has to be activated to show up on the list).
Assigning Prices
You can set the products associated with the payment. For each you can set:
- An assigned product
- An assigned user role for new members (optional)
- Background color
- Text color
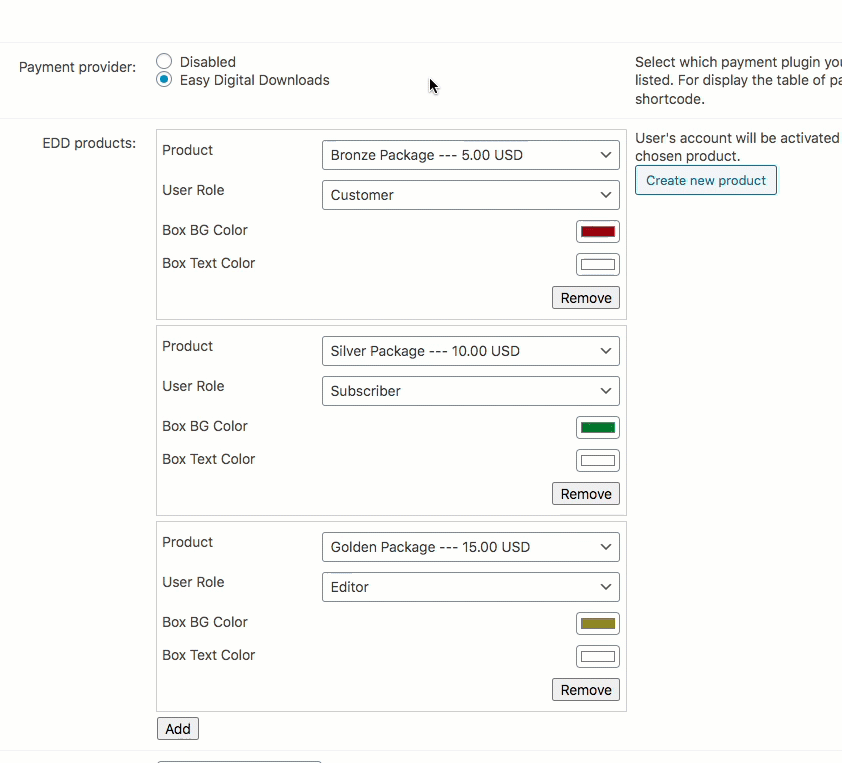
TIP: Create Product Shortcut
You can quickly create new products for either services by clicking the button Create new product.

Why Multiple Prices?
You can set different prices to allow users to pay for different user roles.
For instance, $5 for subscriber and $15 for editor. We'll explain below how to show these differences to users.
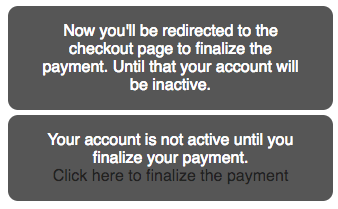
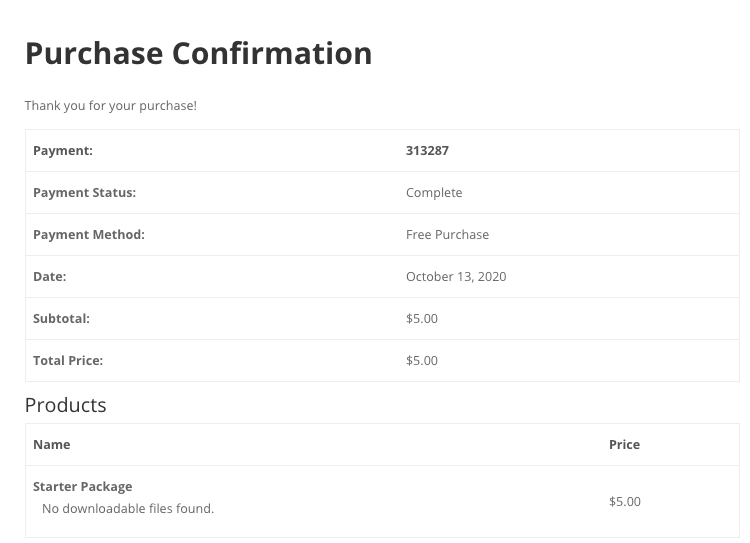
User View - What Happens During Payment Process
Once the user chooses to register, they will be redirected to checkout.

And after payment, the account will be created.
Displaying Multiple Subscription Options (Shortcode and Registration From)
There are two ways to show payment options when you have more than one.
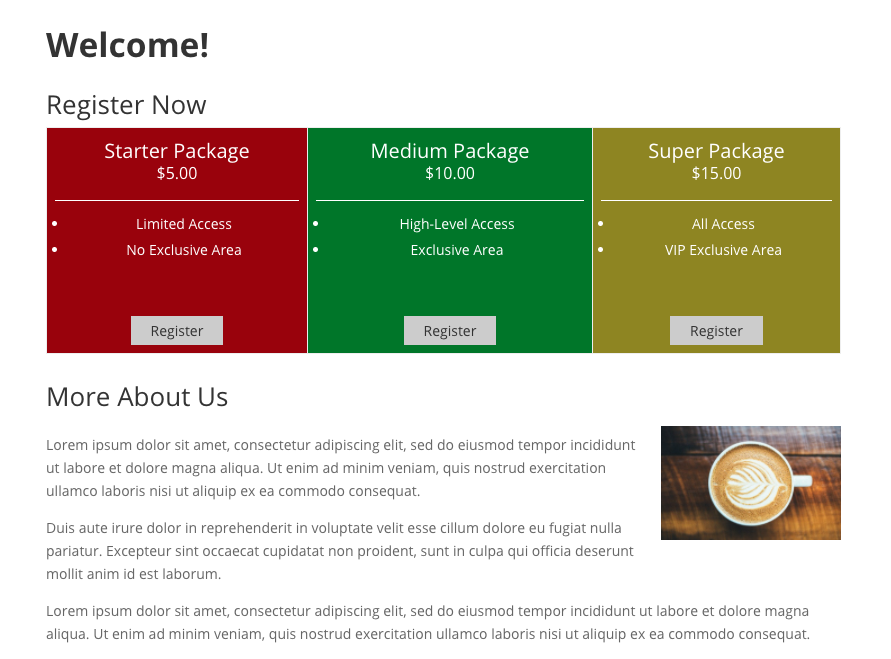
1) Displaying The Package Table
Use the [cmreg-packages] shortcode on any post/page to display all payment options. Example:

Where Does The Data Comes From?
This shortcode displays data from the products, such as title and description. Example from EDD:
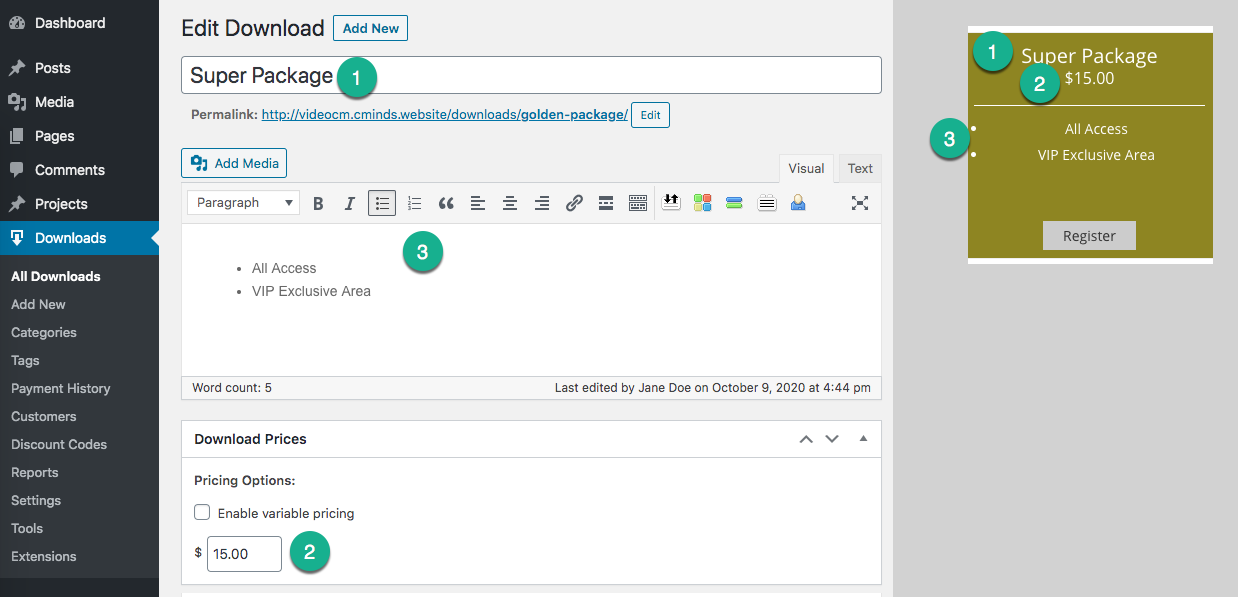
The colors come from the plugin's settings.
TIP: What Are Shortcodes
Shortcodes add dynamic content to your site via a small piece of code.
Learn more: Shortcodes - How To Use | Finding ID of Post/Page/Other Content
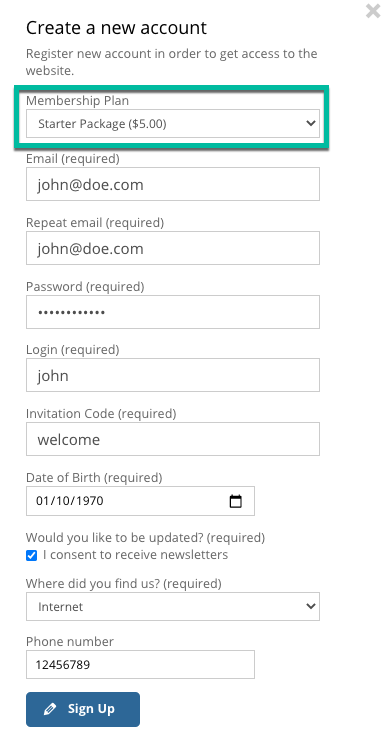
2) Displaying on the Registration Form
The package options will be displayed automatically on the Registration Form, under "Membership Plan".
Accounts Without Payment: Notifications and Auto-Delete
Back in the Payments tab, you can configure the payment reminder and auto-delete accounts from users that didn't pay.
Remind Users About Missing Payment
This message will be sent every a set number of days to users who registered but didn't pay.

TIP: Customize Email Message
You can customize this message in the Email tab. Learn more about it in the Customizing the Email Reminder article.
Delete Inactive Accounts After X Days
This option allows the system to delete accounts that still have the payment pending.
The number represents the number of days and inputting 0 disables the feature.
Enabling Recurring Payments (Subscriptions)
How It Works
Recurring payments are handled by the payment plugins (EDD or WooCommerce).
Once that is configured, accounts will be paused as soon as the subscription is cancelled.
If You Use WooCommerce
Learn how WooCommerce subscriptions work: Introduction to WooCommerce Subscriptions
It's required to install and set up:
If You Use EDD
Learn how EDD subscriptions work: Recurring Payments - Overview
It's required to install and set up EITHER one of these plugins:
- Recurring Payments - Subscriptions with Easy Digital Downloads (paid)
- Auto Register - Easy Digital Downloads (free)
Learn more: Registration Payments - How To - Enable Subscriptions - CreativeMinds Products Documentation
Translating Messages About Payments
The Registration Payments add-on adds two extra label which can be customized. Read more about Registration Pro's labels.
To configure this, head to the Labels tab.

Scroll down and, under Payments, you will see the relevant labels:

End Result
Following instructions found in the plugin and guides, you should be able to charge your users for registering.
Use Case Front-End
 |
More information about the WordPress Registration Form Plugin Other WordPress products can be found at CreativeMinds WordPress Store |
 |
Let us know how we can Improve this Product Documentation Page To open a Support Ticket visit our support center |