WordPress Pay Per Post Plugin (CMPPP) - How To - Restrict Sections Of The Content (Shortcode)
Restricting Sections of The Content
TIP: What Are Shortcodes
Shortcodes add dynamic content to your site via a small piece of code.
Learn more: Shortcodes - How To Use | Finding ID of Post/Page/Other Content
What is This Feature
The WordPress Pay Per Post plugin version 2.1.3 introduced a shortcode to restrict sections of the content.
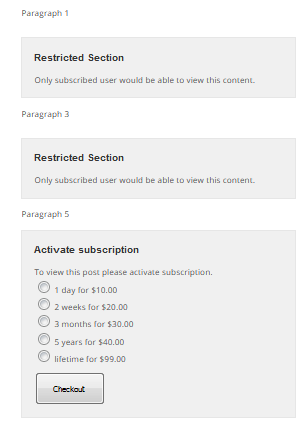
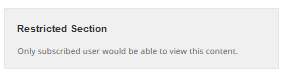
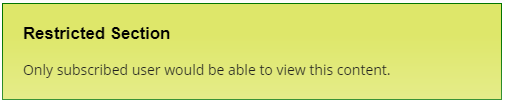
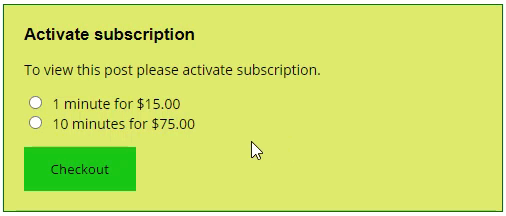
If the user is not a subscriber, they will see a "Restricted Section" box instead of the locked content. A paybox will be triggered at the end of the content.
How It Works
The subscription model setting applies to this shortcode.
- "Pay per each post" - users have to activate subscription for each post.
- "Pay per pricing group" - users have to activate subscription once for pricing group and they will have access to all posts associated with this pricing group.
- "Pay per pricing group or single post" - users can see both subscription options mentioned above on every post or page. (Feature added in version 2.0.7).
Learn more: Settings - Subscriptions Settings (General Tab)
How to Use the Shortcode
Locking the content is easy. Simply surround it with the shortcode, as shown:
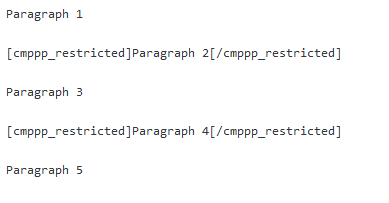
[cmppp_restricted] any content [/cmppp_restricted]
Example
You can use the shortcode many times in the same content. The following is an example of the Back-End:
And the resulting Front-End:
TIP
It is also possible to show specific content before the purchase and hide it after the post is purchased. Learn more about it: WordPress Pay Per Post Plugin (CMPPP) - How To - Hide Specific Content After Paying for Post (Shortcode)
Elementor Limitation
When using the Elementor page builder, it's necessary to use this shortcode to block any page on top of assigning the post to a price (see How To - Assign a Post to a Price/Subscription (Video).
This limitation is due to Elementor not using the _content hook.
Customizing the Text
You can customize the text of the restricted section box:
To do so, navigate to the Admin Dashboard → CM Pay Per Posts Pro → Settings.
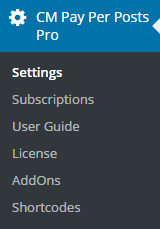
Then click on the Labels tab.

There are two relevant labels:
- restricted_shortcode_heading - default is "Restricted Section"
- restricted_shortcode_content - default is "Only subscribed user would be able to view this content."

Cusomizing the Boxes and Checkout Button
The following feature was introduced in version 2.4.3.
You can customize the appearance of the Restricted section box, Paybox and Checkout Button.
To change the style navigate to Admin Dashboard → CM Pay Per Posts Pro → Settings → Styles tab.
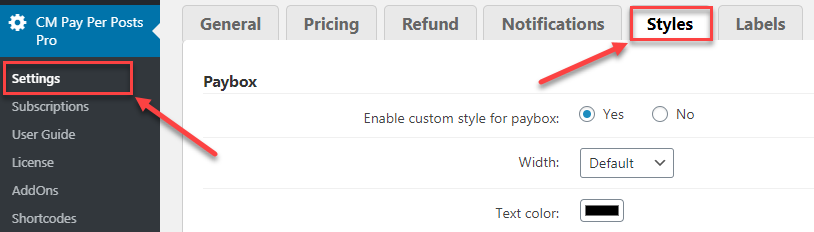
There are two sections - section Paybox for configuring the style of Paybox and Restricted section box, and the second section is for configuring the style of the Checkout Button.
Learn more: CM Pay Per Post (CMPPP) - Settings - Styles
 |
More information about the WordPress Pay Per Post Plugin Other WordPress products can be found at CreativeMinds WordPress Store |
 |
Let us know how we can Improve this Product Documentation Page To open a Support Ticket visit our support center |