WordPress Pay Per Post Plugin (CMPPP) - Use Case - How to Sell Content Access via Recurring Subscriptions
Use Case - How to Sell Content Access via Recurring Subscriptions
Requirements
This use case requires these plugins to be installed and activated:
- WordPress Pay Per Post Plugin + EDD Direct Payments Add-on (You receive both products upon purchase) - To block content. This document uses version 2.7.0.
The plugin also requires installing and using one of the following payment plugins:
Introduction
The WordPress Pay Per Post plugin allows you to charge users for accessing content on your site. The admin can set up prices for different periods of access time.
Use Case Front-End
Purchasing access to content with recurring payments:

Use Case Assumptions
In this example use case guide, we'll cover how to let users buy access to content via subscriptions instead of one-time purchases.
We also consider you have already bought the plugin, but not installed it yet.
It follows:
- Installing the plugin
- Quick recap
- What is recurring payments
- Choosing payment plugin
- Enabling recurring payments feature
- Automatically created products
- Managing orders and subscriptions on the back-end
- User dashboard
- End result
Installing the Plugin
The process is the same for all CM plugins and add-ons.

- Download the plugin from your customer dashboard.
- Log in to WordPress and navigate to the WordPress Admin → Plugins settings.
- Click on Add New.
- Activate it and add the license.
Quick Recap
In this use case guide we will focus mostly on setting up the recurring payments. To learn more about the plugin basic and how to configure it, please check the following use case guide:
What is Recurring Payments
Recurring payments allow users to automatically purchase access to content at regular intervals - daily, weekly, monthly, or annually. Instead of making a one-time payment, the user subscribes to an automated plan, ensuring they always have access to the chosen content, while providing the site owner with a steady revenue stream.
Choosing Payment Plugin
To enable recurring purchases, the WordPress Pay Per Post plugin must work together with one of the following e-commerce solutions:
- WordPress MicroPayments
- Easy Digital Downloads (EDD) with the Recurring Payments add-on.
- WooCommerce with the WooCommerce Subscriptions add-on.
Note
Recurring payments cannot be tested with the default test gateway included in EDD or WooCommerce, as it does not support subscription billing. We recommend using a payment gateway compatible with recurring payments, such as PayPal or Stripe.
- EDD + Recurring Payments: EDD Docs - Payment Gateways
- WooCommerce Subscriptions: WooCommerce Docs - Payment Gateways
Enabling Recurring Payments Feature
Once the needed payment plugins and add-ons are installed, you can enable the recurring payments feature.
To do this, navigate to Admin Dashboard → CM Pay Per Posts Pro → Settings → Pricing tab.

Find and turn on the option Enable Recurring Payments, then save the changes.

Once it's done, you will be able to configure recurring plans for content access for groups or individual posts and pages. Let's consider them one by one.
Enabling Recurring Payments for Pricing Groups
Depending on which payment plugin is enabled, a relevant section will be shown for creating pricing groups in the Pricing tab.

To create a pricing group, click the button Add Group for a relevant payment system. In our use case, we will use Easy Digital Downloads, but it works the same for other payment systems.
Once you add a new group, you can do the following:

- Add a group name.
- Remove group.
- Add pricing options.
- Add posts and pages to the pricing group.
- Create more pricing groups.
TIP
In this use case we will focus mostly on the recurring payments feature. Learn more about creating pricing groups in this guide:
When you add a pricing option, you can define specific period of time the access will be given, for example: 10 minutes, 5 hours, 3 days, etc. For one-time purchase pricing options you can choose the following period types:
- minutes
- hours
- days
- weeks
- months
- years
- lifetime
For each pricing option that you add, there's a checkbox Recurring Payments. Once you enable it, you can define only how often the payment will be charged, and the available options are:
- days
- weeks
- months
- years

Let's add a few post and pages to this pricing group. Click the button Manage assigned posts, pages etc. Here you can switch between tabs with supported post types and use a search bar to find and add needed posts:

After you finish creating pricing groups, don't forget to save the changes.
Once it's done, relevant products will be created in either EDD or WooCommerce (learn more below).
Enabling Recurring Payments for Individual Posts and Pages
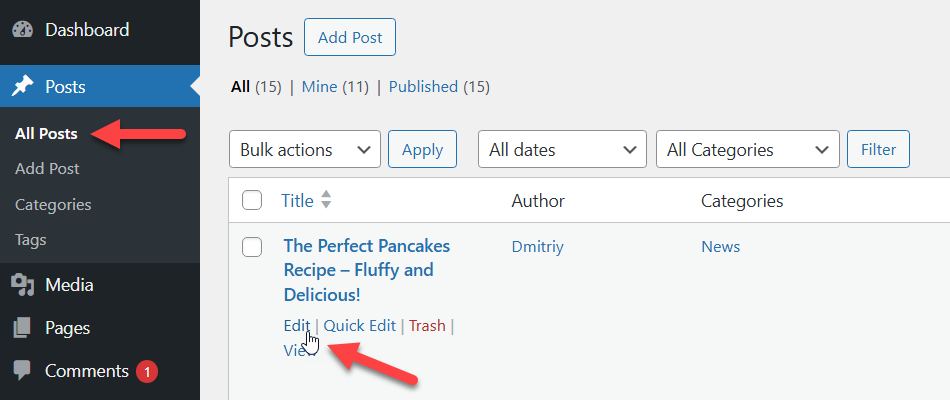
To define recurring payments for a post or page, you need to start editing it. For example, to edit a post, navigate to Admin Dashboard → Posts → All Posts, hover on the needed post and click Edit. In our use case we will edit the same post, which we added to the pricing group.
Find the metabox CM Pay Per Posts Pro: Easy Digital Downloads Pricing and enable the option Allow buying as individual. The rest works similarly - check the box Recurring Payments and define the period and price, then save the changes. The difference is that you can define only a single price here.

After setting up the payment settings, click the button Update to save the changes.

Once it's done, a relevant product will be created in either EDD or WooCommerce (learn more below).
TIP
When editing a single post or page, you can also select the pricing groups you want the post to be assigned to.

Front-end Result
Now let's check the result on the front-end. Have a note that users must be logged in to purchase recurring access.
The post content is hidden, and in order to access it, the user is offered to pay. Two payboxes are displayed, so the user can choose how to pay:
- The first paybox shows prices from the pricing group.
- The second paybox shows the individual price of the post.
In both cases, the recurring plans are marked with a relevant label.

Labels
You can change the labels related to marking recurring transactions in the plugin settings, under the Labels tab. Learn more about the plugin labels.

When going to the checkout page of the chosen payment plugin (EDD or WooCommerce), the user can also see the conditions of the purchase, for example: "Billed once per day until cancelled". Below is an example of the EDD checkout page.

Automatically Created Products
When you create pricing groups or set up an individual price for a post, a relevant product is automatically created in the payment plugin EDD or WooCommerce, depending on what you chose.
When using WordPress MicroPayments, separate products are not created in the way they are in Easy Digital Downloads or WooCommerce. This is because WordPress MicroPayments uses its own built-in recurring billing logic. The recurring rules are handled directly by the MicroPayments system, and WordPress Pay Per Post Plugin communicates with it internally.
Let's take a look at how these products look in EDD and WooCommerce.
Easy Digital Downloads
Navigate to Admin Dashboard → Downloads → Downloads. Here you can see created products. The automatically created products are named according to the related post or pricing group and the defined access duration. To see the details, hover on the product and click Edit.

In the metabox Download Details you can see that the recurring options are enabled with a relevant renewal period.

WooCommerce
The same is here. Navigate to Admin Dashboard → Products → All Products, hover on the needed product and click Edit.

In the metabox Product data you can see that the chosen type of the product - Simple subscription, and the relevant recurring period.

MicroPayments
When using WordPress MicroPayments, recurring access can be purchased using virtual points instead of traditional payment gateways.
In this case:
- Users purchase points in advance
- Points are deducted according to the defined recurring pricing
- Access duration is controlled by WordPress Pay Per Post Plugin
Note: WordPress MicroPayments does not create separate subscription records in WooCommerce or Easy Digital Downloads.
Managing Orders and Subscriptions on the Back-end
If you want to track orders and subscriptions in your payment system, please refer to the official documentation of the solution you are using:
Each system provides its own interface for managing orders, renewals, cancellations, and subscription status.
The WordPress Pay Per Post Plugin also provides its dashboard for managing subscriptions, either one-time or recurring purchases. You can find it by going to Admin Dashboard → CM Pay Per Posts Pro → Subscriptions.

This dashboard allows the administrator to track:
- The user who purchased access
- The related post or pricing group
- The access expiration date
- Whether the subscription is recurring
- The current status

From this screen, the admin can:
- Manually cancel access
- Delete subscription records
- Review subscription history
User Dashboard
Users can track all their Pay Per Post subscriptions on the dedicated page that contains the shortcode [cmppp-subscriptions] :

On this page, users can:
- View all purchased access (one-time and recurring)
- Check whether access is currently active
- See the expiration date
- Manually deactivate active access (if allowed)
EDD and WooCommerce also provide their own subscription management pages:
- Easy Digital Downloads - via the shortcode
[edd_subscriptions] - WooCommerce - via the shortcode
[woocommerce_my_account]
These dashboards allow users to manage billing-related actions such as viewing renewals, updating payment methods, or cancelling subscriptions.

End Result
Following instructions found in the plugins and guide, you should be able to let users buy access to content via subscriptions instead of one-time purchases.
Use Case Front-End
Purchasing access to content with recurring payments:
 |
More information about the WordPress Pay Per Post Plugin Other WordPress products can be found at CreativeMinds WordPress Store |
 |
Let us know how we can Improve this Product Documentation Page To open a Support Ticket visit our support center |