WP Popup Plugin (CMP) - Use Case - Adding Popups With Image, HTML and Video to Your Site
Use Case - Creating Popups With Image, HTML and Video
Note: This guide covers features from the Pro version of WP Popup Plugin - This document uses version 1.5.0
Video Use-Case
Introduction
This WP Popup Plugin allows you to show different kinds of popups on your website.
Use Case Front-End
FlyIn Banner

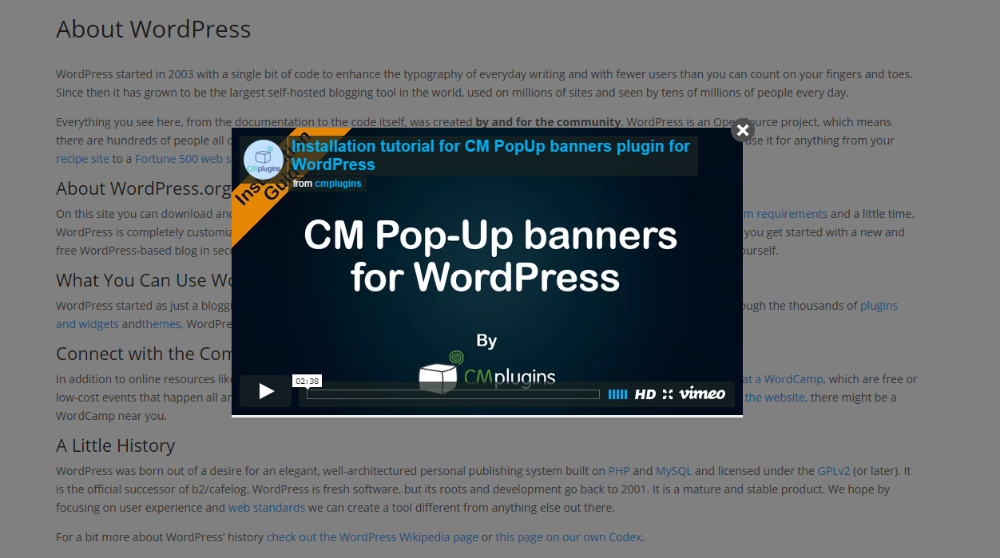
Popup With Video

Use Case Assumptions
In this example use case guide, we'll cover how to create simple popups with the plugin. We consider that you have already bought the plugin, but not installed it.
It follows:
- Installing the plugin
- Configuring the WP Popup plugin
- Adding the first popup
- Popup examples
- Recording user statistics
Installing the Plugin
The process is the same for all CM plugins.

- Download the plugin from your customer dashboard.
- Log in to WordPress and navigate to the WordPress Admin → Plugins settings.
- Click on Add New.
- Activate it and add the license.
Learn more: Getting Started - Plugin Overview
Configuring The WP Popup Plugin
What You Can Change
- Turn statistics on or off
- Turn Geolocation on or off
- Show popup campaigns in different post types
- Max popup width for displays across all campaigns
Navigate to the Admin Dashboard → CM Pop-Up banners for WordPress → Settings.
In the General Options tab you can find the plugin options.
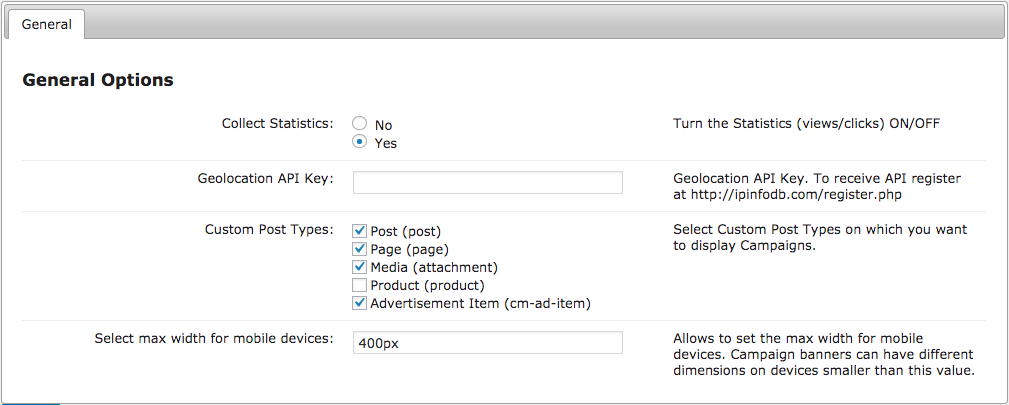
- Collect Statistics - Turn the Statistics module (views/clicks) ON/OFF.
-
Geolocation API Key - enter the Geolocation API Key in the provided box.
Where is Geolocation Used?
The Geolocation will be used for the plugin log file. If it is not present, the log file will not include the country name. You can receive the API key by registering at http://ipinfodb.com/register.php.
- Custom Post Types - Select Custom Post Types on which you want to display Campaigns. Showing a specific popup campaign on a custom post type also depends on each campaign settings.
- Select max width for mobile devices - Will apply to all popup campaigns.
Adding First Popup
How It Works
- You can create multiple popup campaigns.
- Each campaign can have multiple banners.
- Each campaign has different options, such as when and where it appears.
With the WP Popup plugin ready to go, it's time to add the first popup! Navigate to the Admin Dashboard → CM Pop-Up Banners → Add New Campaign.
Enter a title for the new popup campaign in the provided box. The title will not be shown on the popup itself but will help you identify the campaign in the plugin statistic panel.

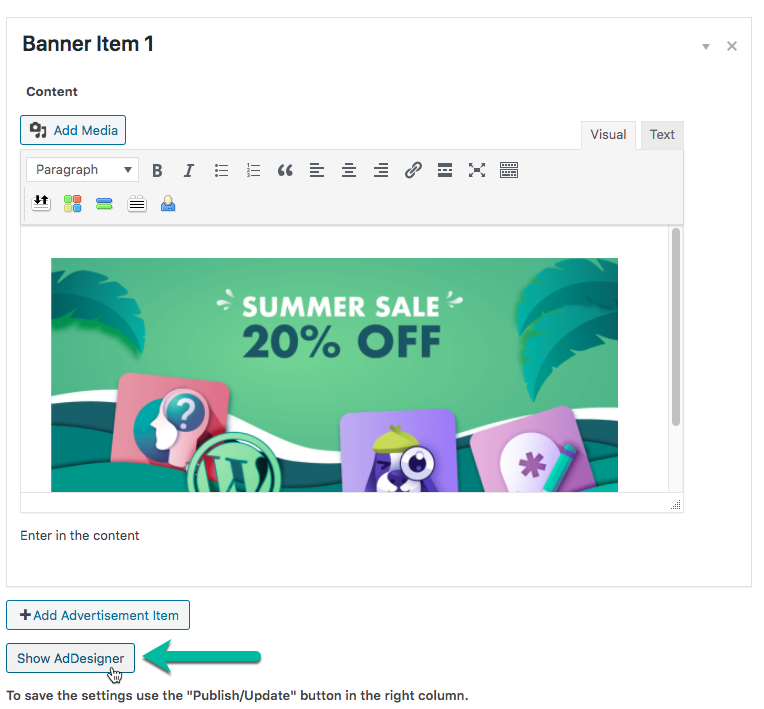
In the Advertisement Items box, enter the content for the popup campaign in the box, as well as any other media, links, etc.
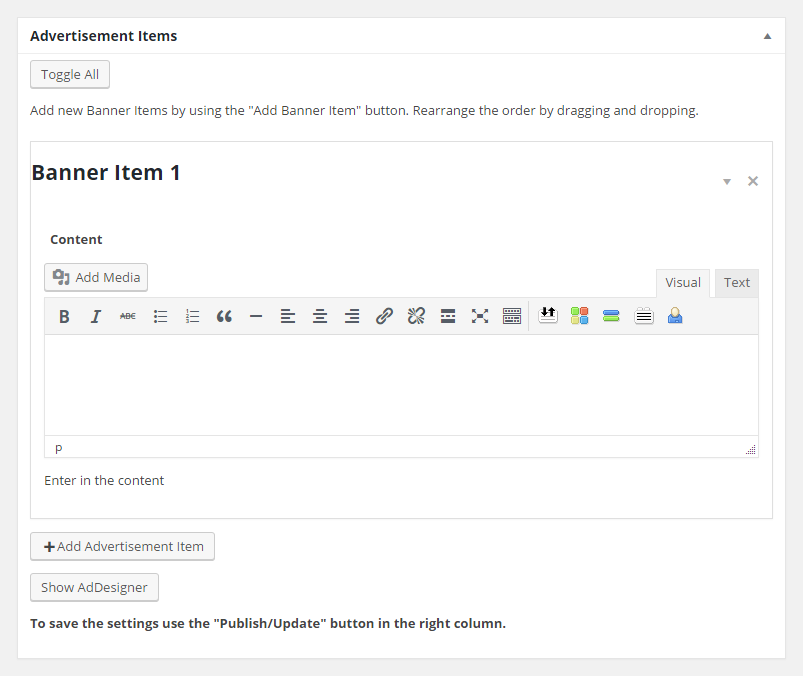
Underneath the box, click on the Add Advertisement Item button to add the new item.
This is used in cases where you want to have a random popup to show up or once you have a new and old copy you want to choose between. Click on Show AdDesigner to use a visual designer for the Popup.

Banner Types
Popup Banner
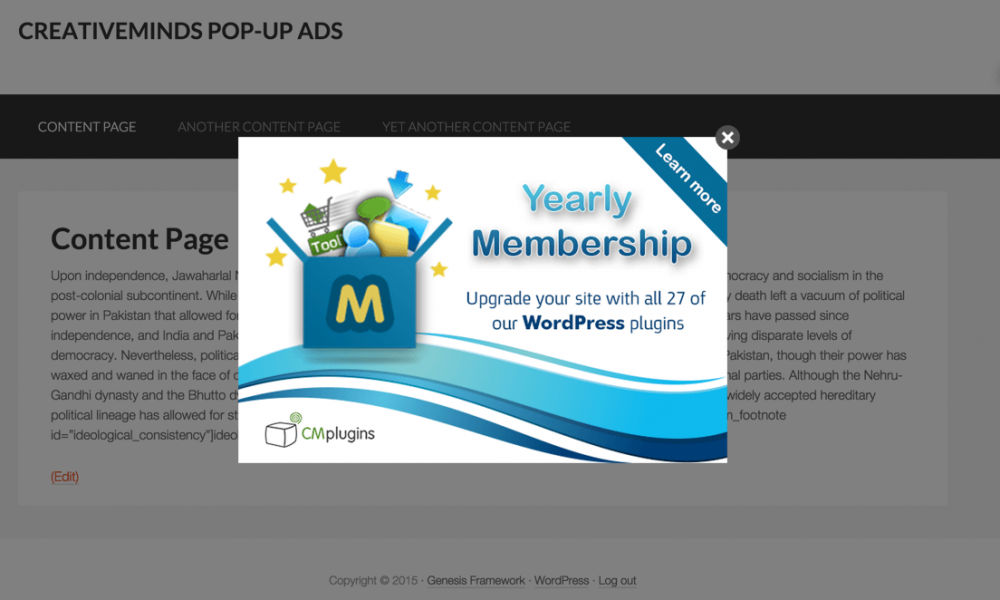
The popup can be text only, image only or a mix of both. In the above example, an image was used. You can also place a video inside the box if needed.
Fly-In Banner
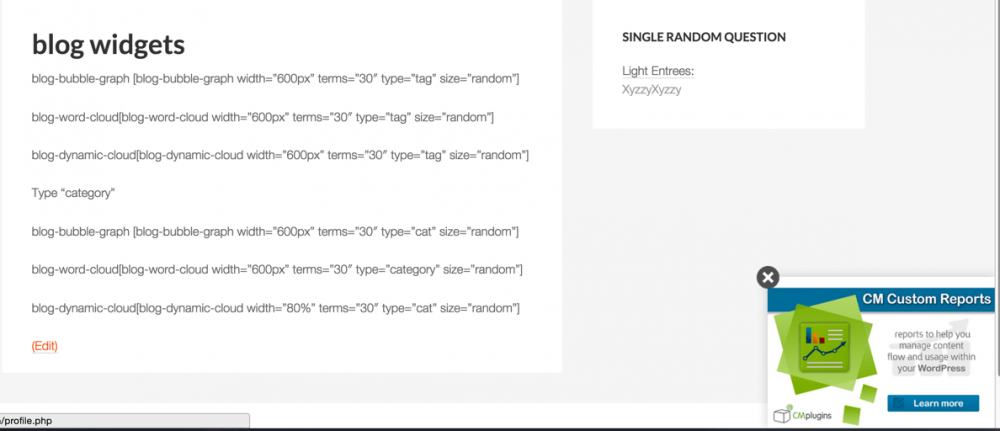
Same for Fly-In. It just appears on the corner of the page.
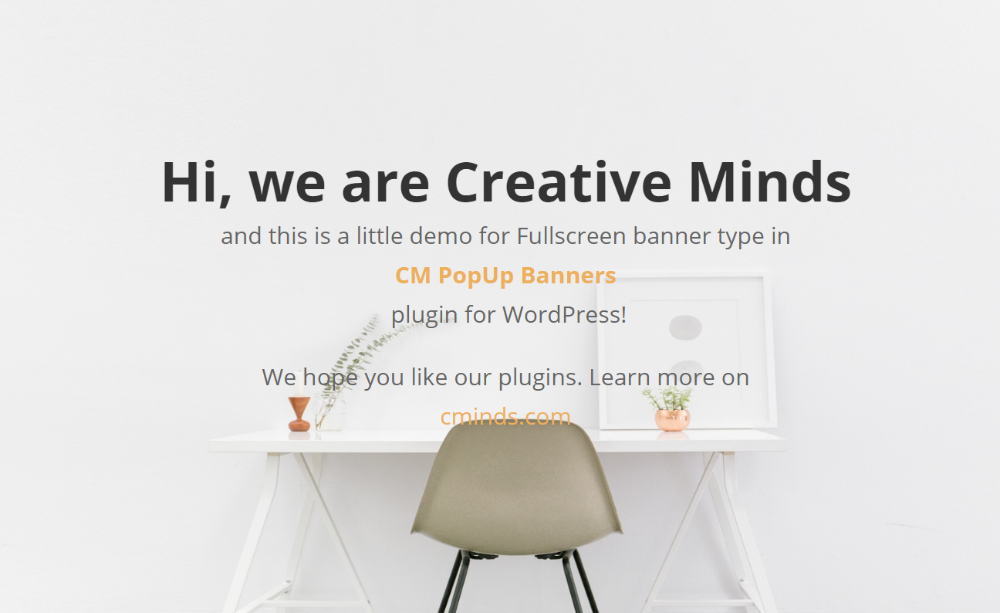
Full Page
Basic Visual
In this section, you can define the size, shape and position of the popup.
- Type - Choose the type of popup campaign you want from the drop-down menu.
- Pop-Up - modal on the center of the screen, with tinted background
- Fly-In Bottom - modal in the bottom right corner of the page
- Full Screen - displays the modal on the full screen, with the background color covering the whole site
- Display method - Click the box to select the display method for the campaign, either random or selected. This is used when you have several items available for the same Popup. Once selected is used and you have more than one item please choose the one you would like to show up.
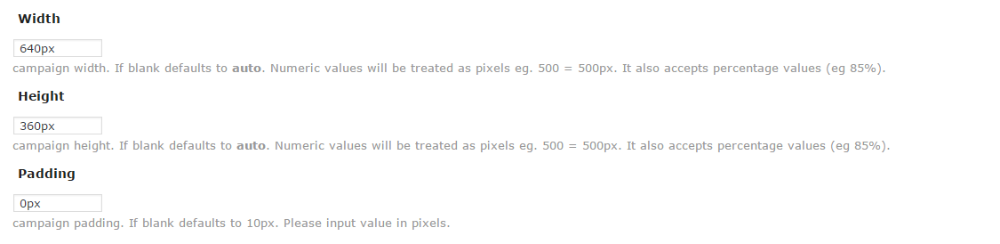
- Width - Enter a value in the provided box for the popup campaign width. Accepted values include: numbers (in pixels), percents (eg 75%) or "auto".
-
Height - Enter a value in the provided box for the popup campaign height. Accepted values include: numbers (in pixels), percents (eg 75%) or "auto".
- Padding - Popup campaign padding. If blank defaults to 10px. Please input the value in pixels.
- Z-index - The 'z-index' of the popup. If you find that the popup is under other elements, increase this value. If blank defaults to 100. Please input an integer value (0-10000000000).
- Background colors - Enter a value in the provided box for the popup campaign background color. Accepts also "transparent".
- Background image - Campaign background image. Enter the URL of the image you'd like to use for all of the popups in the campaign.
- Shape - Choose the shape of the modal from the drop-down menu.
- Center content vertically/horizontally - If this checkbox is selected then this campaign's popup content will be centered vertically/horizontally.
Advanced Visual
Define effects, delay, statistics count and behavior - when it appears and for how long.
- Show effect - Choose a show effect for the campaign by selecting from the drop-down menu. The show effect will add animation in how the popup will appear.
- Delay to show - Enter a value in the provided box to choose the delay time before the popup appears on the page.
- Show interval - Choose a show interval for the campaign by selecting from the drop-down menu.
- Every Time Page Loads - when this option is selected the popup will be displayed every time, on each page where it's set to show.
- Only First Time Page Loads - when this option is selected, the popup will be displayed for each user once on all of the pages where it's set to show.
- Once on Any Page - when this option is selected the popup will be displayed just once per user. If it's set to show on multiple pages it will be displayed only on the first one of them.
- X amount of times till reset - How many times campaign should be shown. Resets after "Interval reset time". This option is good when you want the user to see the campaign only X amount of time and to reset this count every Y days
- Underlay type - Choose the underlying type for the campaign from the drop-down menu. In a dark underlay is chosen all the web page content behind the popup will be hard to read while popup appears.
- Statistics clicks counting method - Choose an option for the statistics clicks counting method, either Only one click per banner show or All clicks until close button click. This will affect the information which is collected for the campaign statistics and reports.
Sound
Enable a sound triggered when the popup shows.
- None - no sound will be played.
- Default - the generic sound bundled with the plugin will be played.
- Custom from media library - after selecting this option you'll need to provide the URL of the sound file you would like to play. For the best results, you should first upload the mp3 file to your Library and copy its direct link.
Activity
Define where the popup will show and to which users/devices.
- User type for pop-up - Select which group of users will see the popup. The options are:
- All users.
- Only logged-in.
- Only non-logged-in (guests).
- Show pop-up after users registration - If this option is enabled, this popup will appear when a guest user successfully registers. It requires the WordPress Registration Form plugin.
- Show on every page - Check the box to display the popup campaign on all posts and pages.
- Show on homepage - Check the box to display the popup campaign on the homepage.
- When fire the popup? - Choose when to fire the popup. Read more on this page.
- Minimum device width - Enter a value in the provided box to choose a minimum width for the campaign popup. This option let you limit the campaign to show only on non-mobile devices.
- Maximum device width - Similar to the previous option.
- Show on URLs matching pattern - Enter a url to display the campaign on the page. You can define a pattern in which this popup campaign will appear. It can be a category or a permalink path - for example your blog articles /blog/. This will cover all URL with the following pattern /blog/*.
- Show on selected posts/pages - Select from the drop down menu to choose the specific pages and posts the campaign will be displayed on. Click the add a page button to add a page that is not listed.
- Activity dates - Read below:
Activity Dates
Determine if the popup campaign will show up only on specific dates.
Click on the blue plus button to set an activation dates for the campaign. You can define multiple date range including the exact time per each.
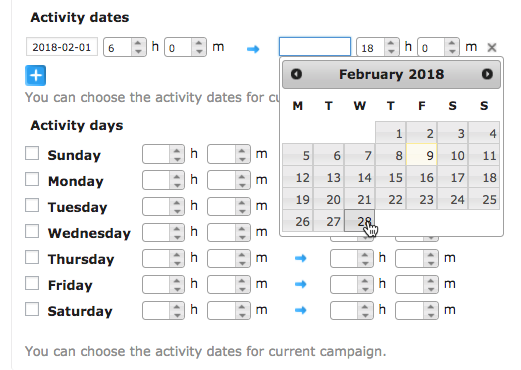
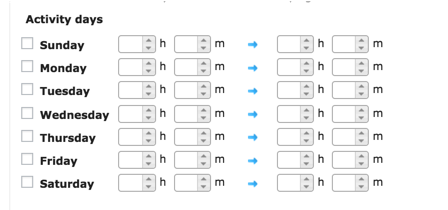
Activity Days
Run the popup campaign at the exact same time every week.
You can specify more than one day for the recurring campaign activity.
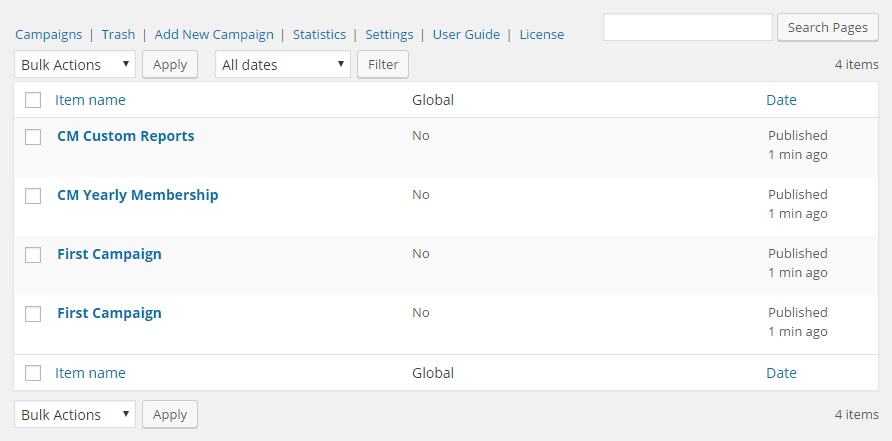
TIP: Managing Campaigns
You can manage all campaigns from the Campaigns screen. It's possible to filter and quickly see if a campaign appears across all site (Global column).
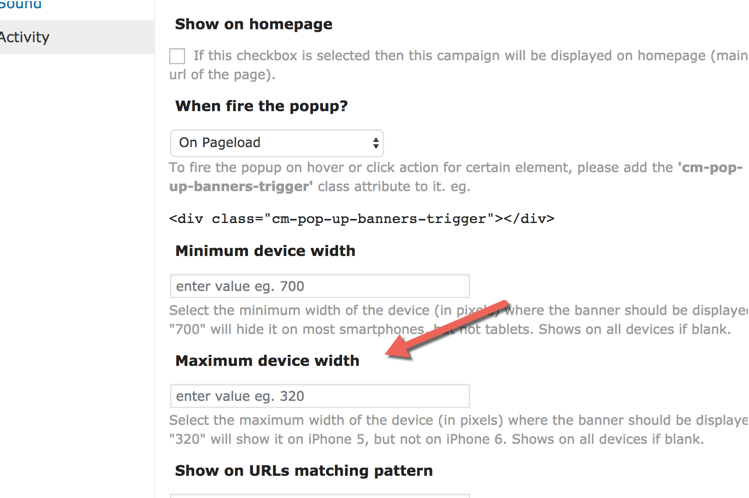
TIP: Limiting Campaign to Mobile Devices
As a reminder, on each campaign setting, you can set the maximum width of the screen size in pixels to show on a specific campaign.
This will help you limiting the devices. For instance, Minimum device width 700 will hide the campaign in most smartphones.
Learn more: WP Popup Plugin (CMP) - Adding/Editing Campaign
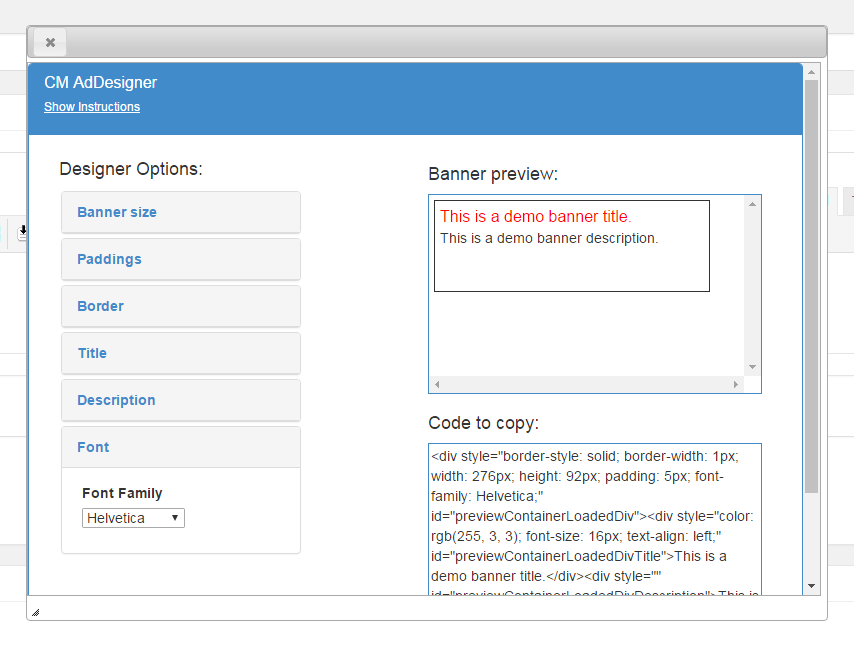
Using The AdDesigner
The AdDesigner is a handy tool to generate quick popups. You can customize the size, border, title, font and more.
TIP: Accessing AdDesigner
Using AdDesigner
-
Using the controls you can change the way how the popup should look like. All the changes are previewed live in the box labeled Banner preview.

Example of generating a popup with AdDesigner -
Once you've finished, copy the HTML code from the box labeled Code to copy into the HTML Ad editor.

Code to copy of the generated popup


Example: Popup With Image Form
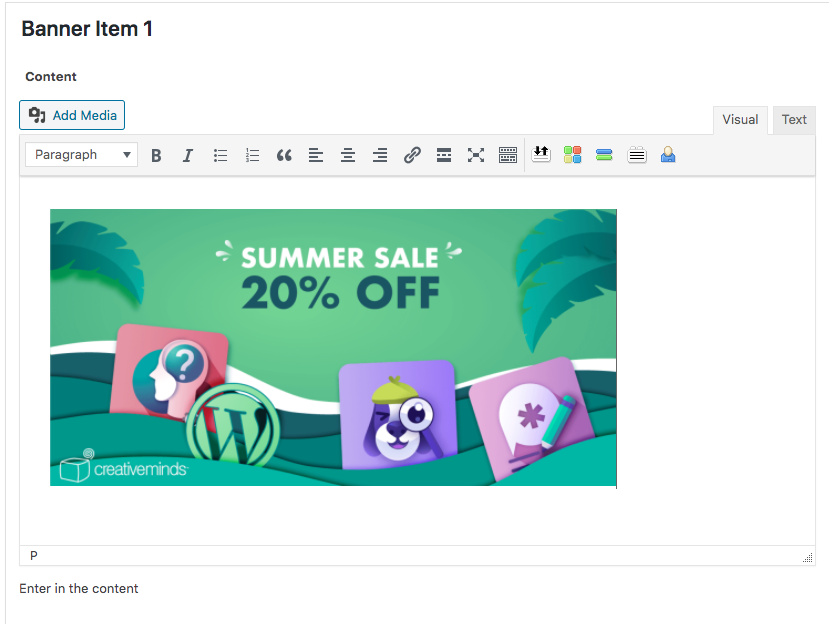
Adding a popup with one or multiple images is easy!
When creating a popup, you can use the WordPress visual editor, meaning it's easy to upload images anywhere.
Learn more: WP Popup Plugin (CMP) - Creating Image Popup - CreativeMinds Products Documentation
Example: Popup With Video
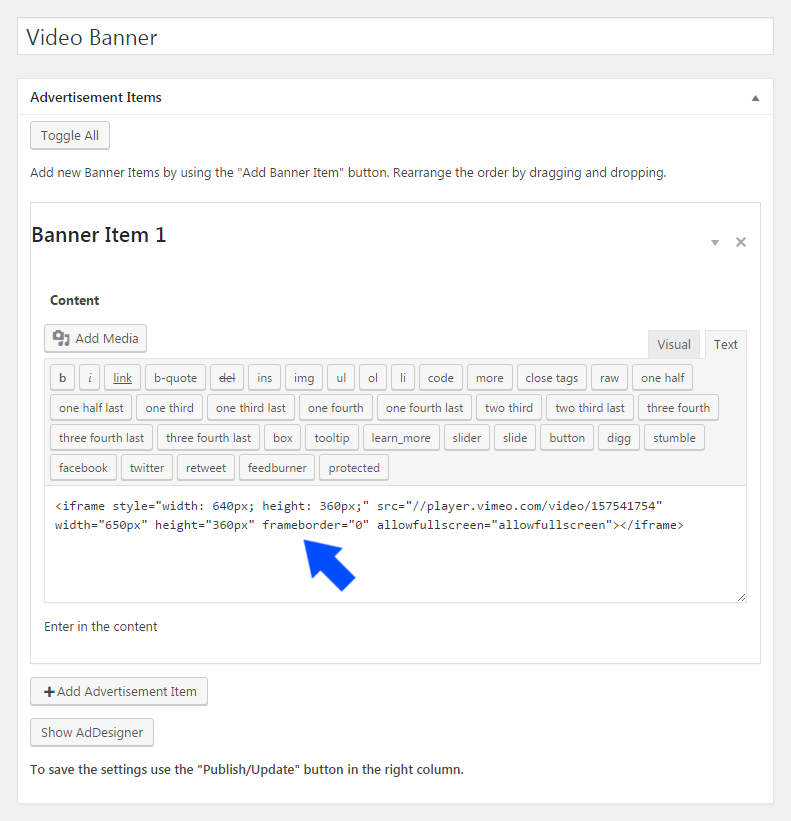
To display video (for example from Vimeo) in the popup, place <iframe> element with video URL as src attribute in the content (make sure you are in Text mode).
Learn How To Get Embed Code:
You can also set weight and height attributes like shown below:
<iframe src="//player.vimeo.com/video/VIDEO_ID" width="650px" height="360px" style="width: 640px; height: 360px;"></iframe>
Scroll down to the Campaign Options.
TIP: Sizing
In the Basic Visual tab, match the values of Width and Heights to the iframe attributes.
To complete Campaign set the rest of popup options (read more here) and publish Campaign.
TIP: Adding AutoPlay
Making the video autoplay depends on the parameters you use in the iframe and depends on the platform you use (Vimeo, Youtube, Wistia or other).
For YouTube you need to pass something like this:
<iframe width="640" height="360" src="[YouTube Video URL]?rel=0&autoplay=1" frameborder="0" allowfullscreen></iframe>
For Vimeo simply add ' &autoplay=true' at the end of your embed src URL.
Video Recap
Learn more: WP Popup Plugin (CMP) - Video Popup
Advanced Example: Popup With HTML Form
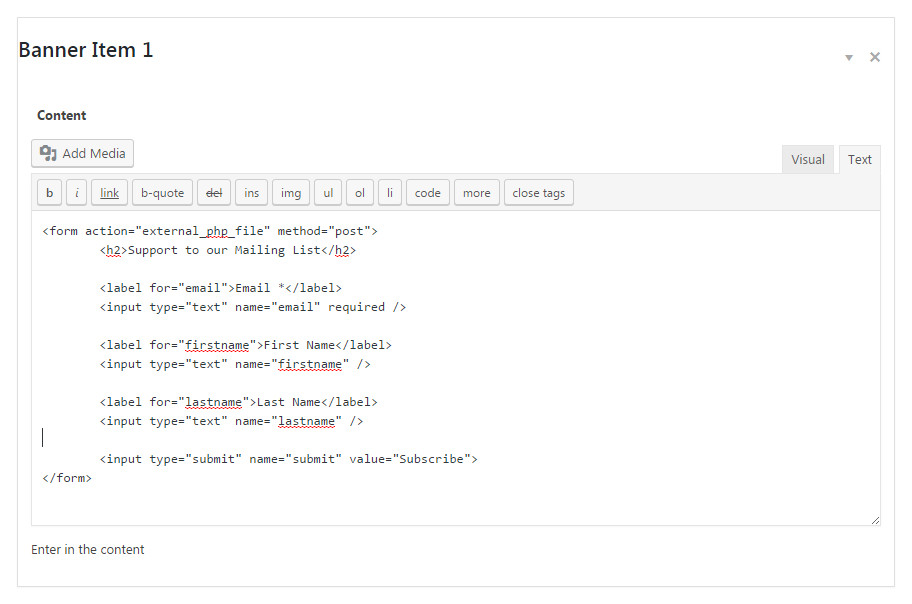
To create a form in the popup, navigate to the Admin Dashboard → Add New Campaign.
In the content field place form code (see example code on the below).
As an action attribute set path to the PHP file with function to handle form data after sent. (Writing the PHP code for handling the form won't be covered in this documentation).
Forms Coming From Shortcodes
Most times you will not want to write your own form nor the code handling it, instead, you can place a shortcode coming from the 3rd party plugin which will generate the form HTML automatically and make sure the data sent from the form is saved.
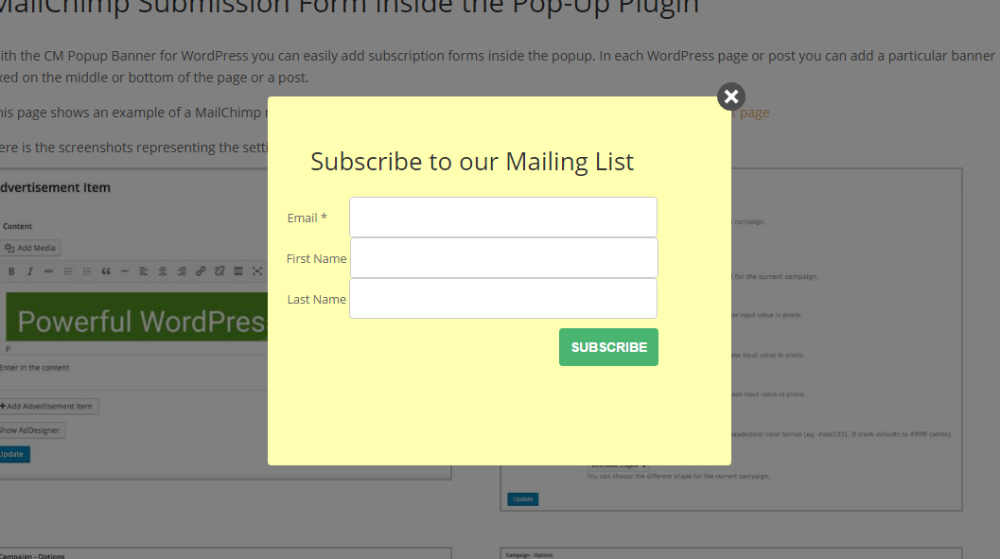
Example
Popup with provided sample form looks like this. After the "Publish" is clicked the data from the form will be sent to the url passed in the "action" attribute of the form.
TIP: JavaScript Is Supported
You can also place JS scripts here to support validation on the client-side, tooltips, etc.
Recording User Statistics
How It Works
- The setting Collect Statistics has to be enabled
- You can track views and clicks of each popup campaign
- No personal information, such as IP, is collected
Navigate to the Admin Dashboard → CM Pop-Up Banners for WordPress → Statistics.
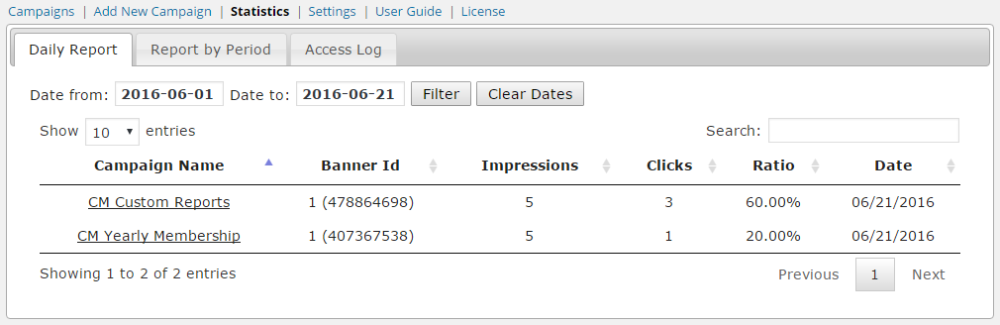
Daily Report
The report shows the Impressions and Clicks of all of the Campaigns and Popups within the set time frame, divided by each day.

- Click on the Daily Report tab.
- Enter a date in both fields to generate a report based on that time frame.
- Click "Filter" to display the report.
- Click "Clear Dates" to clear the dates and start over.
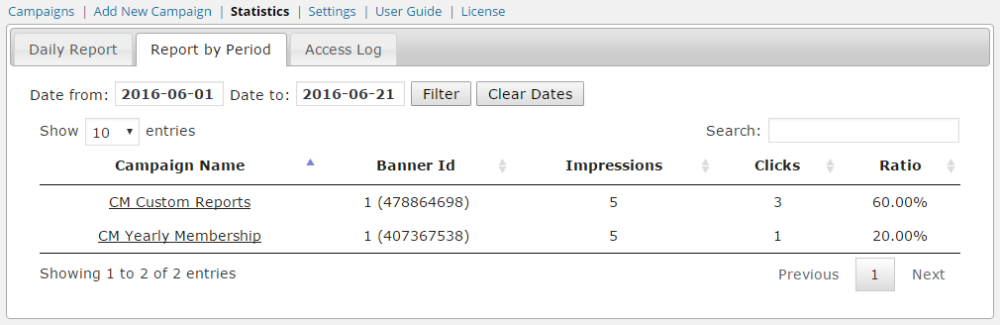
Report by Period
This report summarizes the usage for each popup over a period of time.

- Click on the Report by Period tab.
- Enter a date in both fields to generate a report based on that time frame.
- Clear the dates to start over.
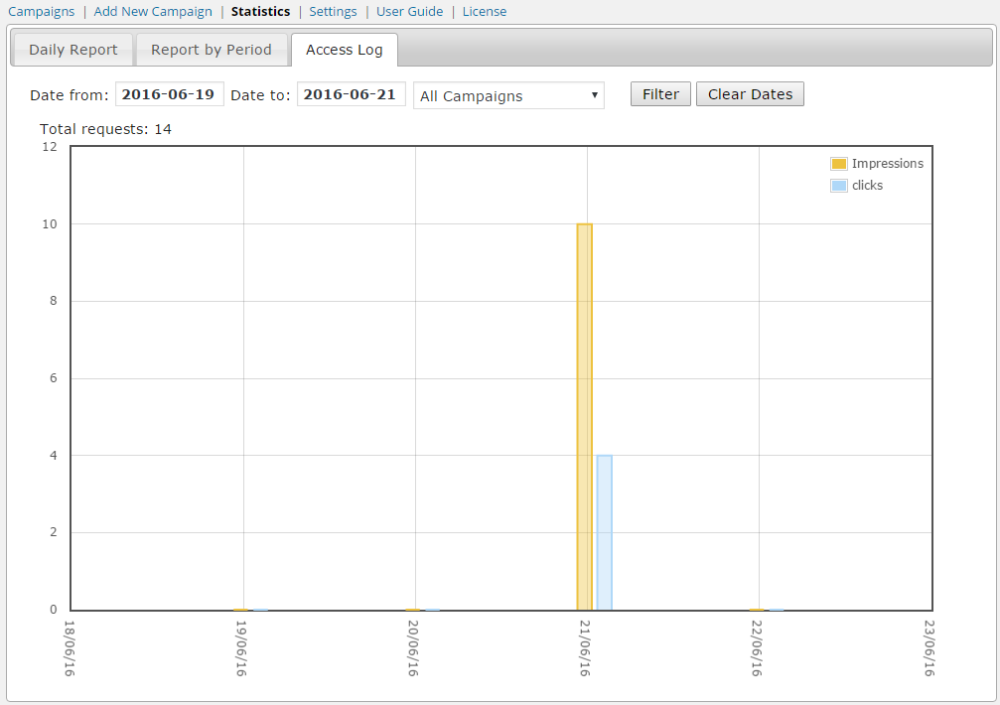
Access Log
The access log shows the overall use of popup on all sites in a histogram graph view, where the values on the X-axis are dates and on the Y-axis are numbers of requests.

- Click on the Access Log tab.
- Enter a date in the boxes provided to generate a report based on that time frame.
- Select the campaign from the drop-down menu.
Learn more: WP Popup Plugin (CMP) - Statistics - CreativeMinds Products Documentation
End Result
Following instructions found in the plugin and guides, you should be able to complete the directory with multiple popups.
Use Case Front-End
FlyIn Banner
Popup With Video
 |
More information about the WP Popup Plugin Other WordPress products can be found at CreativeMinds WordPress Store |
 |
Let us know how we can Improve this Product Documentation Page To open a Support Ticket visit our support center |