Appointment Booking Calendar - Calendars - Tiles View Catalog of Calendars
Tiles View Catalog of Calendars
Note: The features described in this guide were introduced in version 2.2.5 of Appointment Booking Calendar.
Introduction
It is possible to display the catalog with all active calendars in a tile view. Each tile shows the name, description and image of the calendar. Clicking on a tile opens a page with the relevant calendar.

How It Works?
By default, calendars that you create don't have their own pages. They can be displayed anywhere using a shortcode with the calendar ID. The tiles view feature works in a different way. Here you need to create two pages:
- One page with a shortcode to display the catalog.
- Second page with another shortcode that will be able to open needed calendar without creating a permanent page for each calendar.
Let's consider the whole process step-by-step to make it clearer.
Meta Information in Tiles
First, a little digression: let's see more detailed, what information is displayed in tiles. Each tile displays the following information about the calendar:
1. Description of the Calendar.
2. Image of the Calendar.
3. Name of the Calendar.
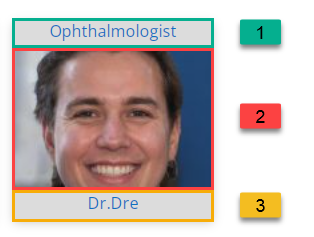
These parameters can be changed on the editing page of each calendar.
Name and Description:
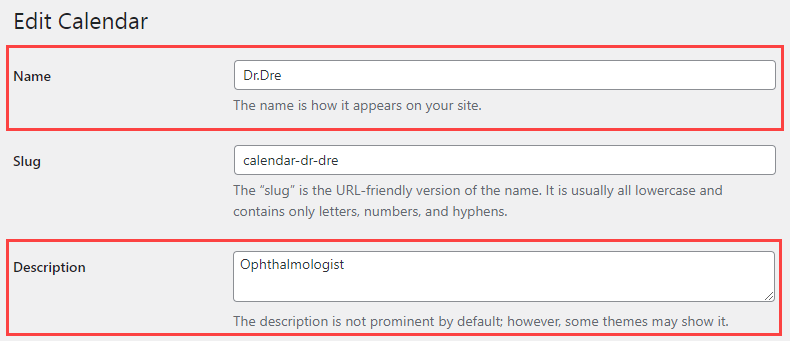
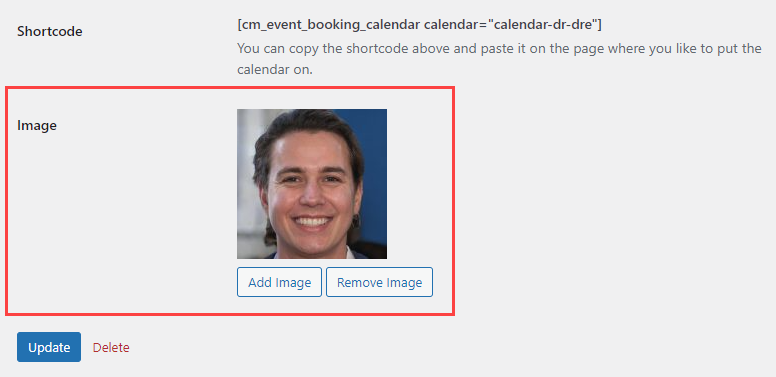
Image:
Creating Pages Using Shortcodes
TIP: What Are Shortcodes
Shortcodes add dynamic content to your site via a small piece of code.
Learn more: Shortcodes - How To Use | Finding ID of Post/Page/Other Content
Now let's create the pages that are needed for implementing Tiles View Catalog of Calendars to your site.
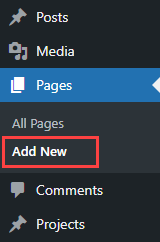
Navigate to Admin Dashboard → Pages → Add New.
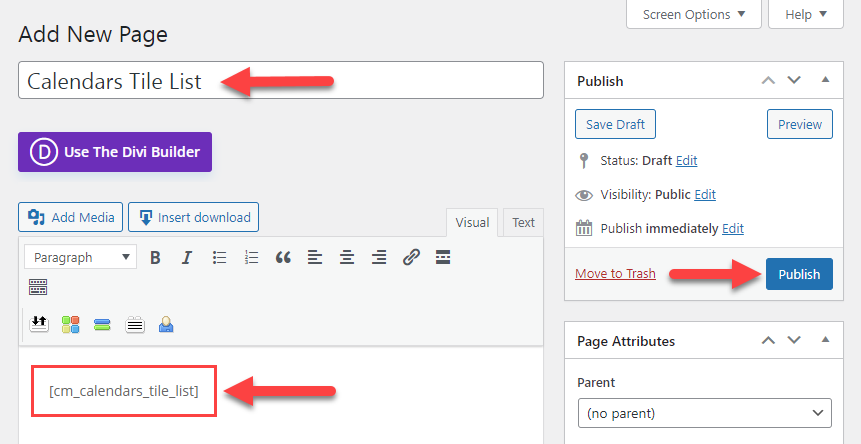
First shortcode that that we use is [cm_calendars_tile_list] . This page will display the catalog with calendars. Just place the shortcode in editing area, give this page a name and publish the page.
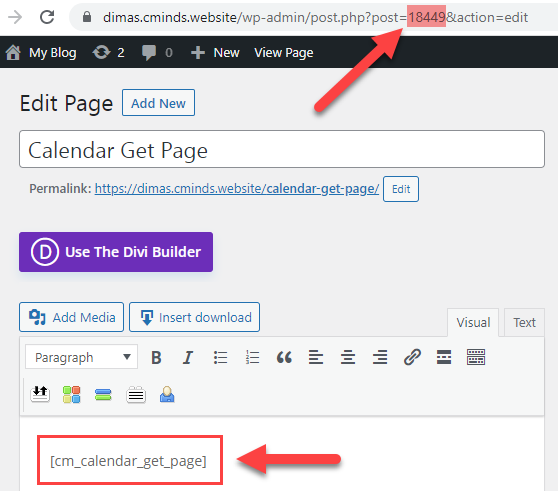
In the same way we create the second page and place there a shortcode [cm_calendar_get_page] . The page with this shortcode is responsible for displaying chosen calendar in the catalog when you click on it. And very important thing is about ID of this page - we will need to use this ID in plugin settings. You can see where to find its ID on the screenshot below:
When both pages are created, we can go to the plugin settings.
Settings
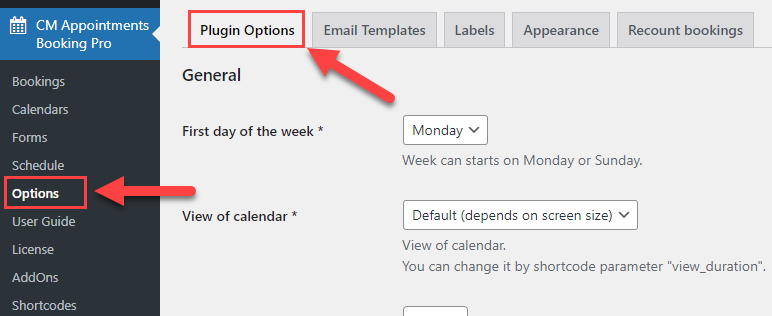
Navigate to Admin Dashboard → CM Appointments Booking Pro → Options → Plugin Options tab.
Scroll down and find there the following options:
-
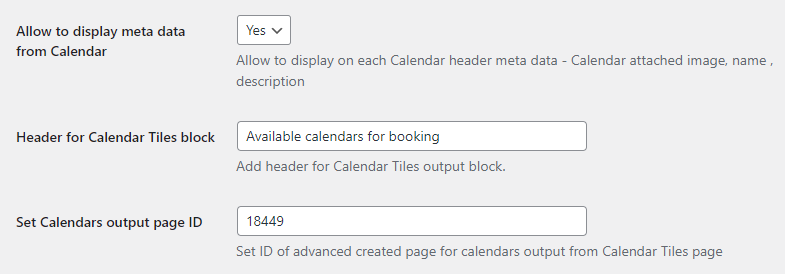
Allow to display meta data from Calendar - Choose Yes if you want to display meta data in the header of each calendar: calendar name, calendar description and calendar image (if it is added).

Displaying meta data on the calendar page -
Header for Calendar Tiles block - You can edit the header of the page with tiles view of the list with all calendars.

Header in the tiles view - Set Calendars output page ID - Here you need to set the ID of the page where we placed the shortcode
[cm_calendar_get_page].


When you finished configuring, don't forget to click the button Save Changes on the bottom of the page.

Result
That's all. Now we can go to the page where we place the shortcode [cm_calendars_tile_list] and see the result on the Front-end:
 |
More information about the Appointment Booking Calendar plugin for WordPress Other WordPress products can be found at CreativeMinds WordPress Store |
 |
Let us know how we can Improve this Product Documentation Page To open a Support Ticket visit our support center |