WordPress Review Plugin - Getting Started - Installation
Initial Plugin Installation
Prefer a Complete Step-by-Step?
Check our use case guides:
- WordPress Review Plugin - Use Case - How to Customize the Review Form
- WordPress Review Plugin - Use Case - How to Import and Manage Reviews From WooCommerce Products
- WordPress Review Plugin - Use Case - How to Add Multiple Reviews On the Same Page
- WordPress Review Plugin - Use Case - How to Manage All Reviews from a Single Dashboard
Below is a detailed guide showing you how to install & activate the WordPress Review plugin:
1) Download - To manually install the plugin, you must first download it from WordPress.org (free version) or Client Dashboard (Pro version) to your computer.
2) Navigate to the Plugin tab on the Wordpress Admin Panel to install the plugin.
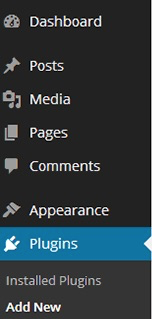
3) Hover over the Plugin tab and click on Add New.
4) Select Upload from the options shown and upload the plugin file.

5) Install the plugin.
6) Once the plugin is installed, it will appear on the Plugin tab for you to activate and use.
7) Go ahead and activate the plugin if you wish to add its functionality to your website.
8) Next, you need to activate the license key. Navigate to the License section (which is found at the header of your Admin dashboard, or on your CM Reviews menu) and add the license which you have received from CreativeMinds.
Save it first, and then activate it. A green label will show if the plugin license was successfully activated.
Congratulations! You have successfully installed and activated the WordPress Review plugin.
 |
More information about the WordPress Review Plugin Other WordPress products can be found at CreativeMinds WordPress Store |
 |
Let us know how we can Improve this Product Documentation Page To open a Support Ticket visit our support center |