WordPress MicroPayments (CMMP) - Use Case - How to Let Users Transfer Points to Each Other
Use Case - How to Let Users Transfer Points to Each Other
Note: This use case requires this to be installed and activated:
- WordPress MicroPayments - This document uses version 2.0.6
Video Use-Case
Introduction
The WordPress MicroPayments is a payment system for WordPress that allows you to create digital wallets for your users, reward them with points, and let them pay for them using real money.
Use Case Front-End
Wallets: What is a Wallet?
The Wallets are the "accounts" to which the points have to be connected to. They work very similar to bank accounts, or real life wallets.
Use Case Assumptions
In this example use case guide, we'll cover how to let users transfer points to each other.
We consider that you have already bought the plugin, but not installed it.
It follows:
- Installing the plugin
- Setting up WordPress MicroPayments - Recap
- Transferring points between users
- Success and error messages
- Labels
- End result
Installing the Plugins
The process is the same for all CM plugins.

- Download the add-on from your customer dashboard.
- Log in to WordPress and navigate to the WordPress Admin → Plugins settings.
- Click on Add New.
- Activate it and add the license.
Learn more: Getting Started - Installation And First Steps
Setting Up WordPress MicroPayments - Recap
If you still have question with these steps:
- Installing the plugin
- Setting up WordPress MicroPayments
- How users can obtain points
- Grant points for purchase
- Use points for discounts
- Translating the interface
- Shortcodes
- Reports
- Exporting wallets to CSV
- Adding or subtracting points periodically
- Troubleshooting
Then check the guide WordPress MicroPayments (CMMP) - Use Case - How to Allow Users to Buy Points Using Real Money
Transferring Points Between Users
To transfer points between user wallets directly (give someone points) you have to create a page with the following shortcode:
[transfer_wallet_points]
Description: Shows the form which allows making a transfer of points from your own wallet to the other wallet with the known ID or username. Of course, only the amount of points lower or equal to the amount of points available on the wallet, and not less than "1" can be sent.
When you place the shortcode on the page, the form for transferring points on the front-end can look a bit differently in some cases. Let's consider them all step-by-step.
Note: The form can be displayed only for logged-in users.
One or Multiple Wallets
The appearance of the form can depend on if the option Assign a single wallet to each customer in plugin options is enabled. To find this option navigate to Admin Dashboard → CM Micropayment Platform → Settings → General tab.
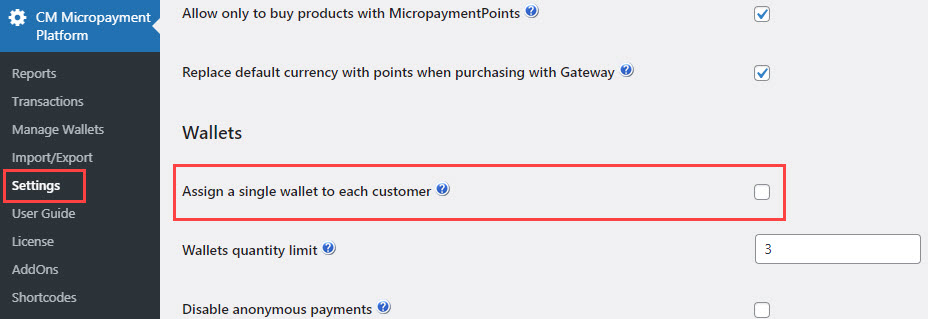
When the option Assign a single wallet to each customer is enabled, each user can have only one wallet assigned to him.
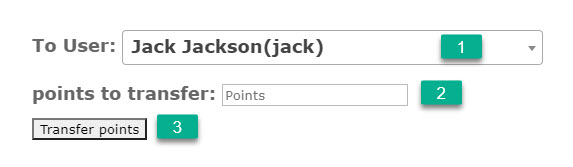
So, in the form for transferring points the user just needs to choose in the To User (1) dropdown menu to which user he wants send the points to. Then define the amount of points to send in the points to transfer (2) field and click the button Transfer points (3).
If the option Assign a single wallet to each customer is disabled, each user can have more than one wallet. In this case there will be the field To Wallet ID instead of To User.

The user has to know the wallet ID of the user, which he wants to send points to.

Admin View
The admin has more possibilities than regular users. In the form for transferring points a new field appears for that role - From Wallet ID.
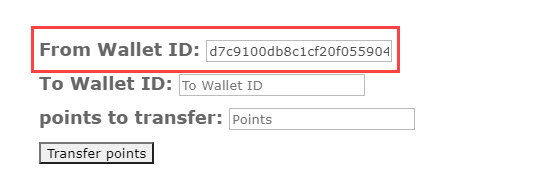
It means, he can send points not only from his wallet, but also from the wallet of any other user. By default, in the field From Wallet ID is written admin first wallet ID - to send points from another user wallet he needs to paste another wallet ID.

Adding Comments
You can let users add comments when they perform a transfer. To do so, add these parameters to the shortcode:
- comment_enable - Set "0" to disable comments and "1" to enable them.
- comment_required - Set "0" for optional, "1" for required. Only works if comment_enable parameter is enabled.
Example: enable adding comments that are not required.
[transfer_wallet_points comment_enable="1" comment_required="0"]
A text area Comment will appear in the form:
These comments can be seen only in the back-end for the admin in wallets transactions of two users - sender and receiver.

Success and Error Messages
There are a few types of messages for sending points.
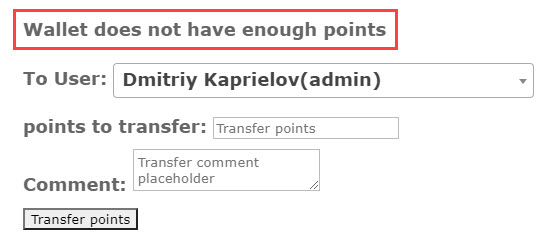
If everything is correct, the points will be transferred immediately, and the user will see the message that the points are sent successfully.

Otherwise a message with the error will be displayed, for example that the wallet does not have enough points.
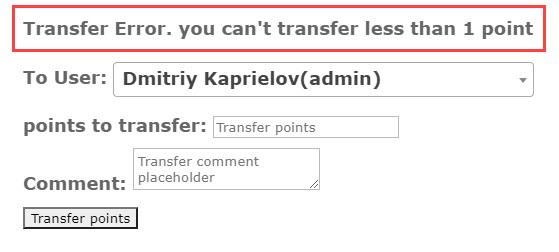
Or if the user entered the value less than 1.
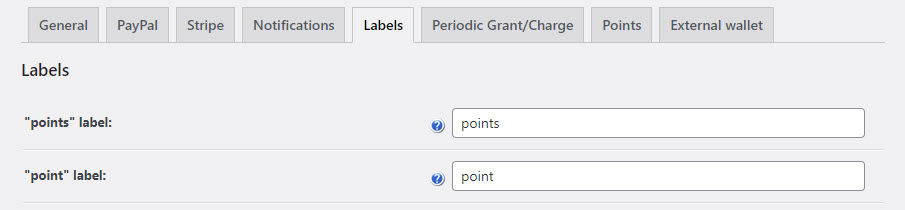
Labels
All WordPress MicroPayments labels and messages in the form can be customized or translated to another language. To do this, navigate to Admin Dashboard → CM Micropayment Platform → Settings → Labels tab.
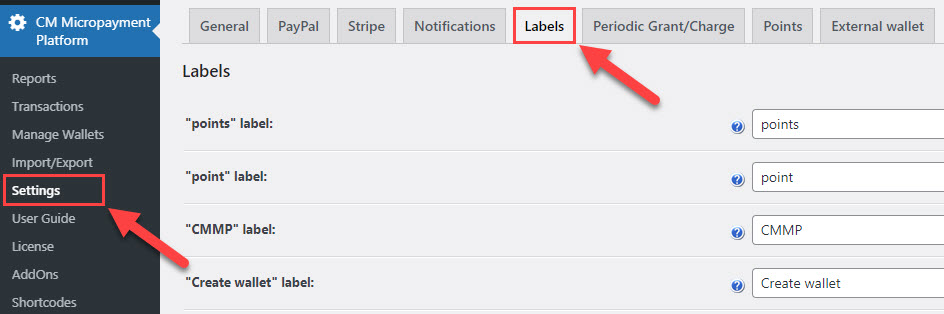
Here are the labels that you can change in the form for transferring points:
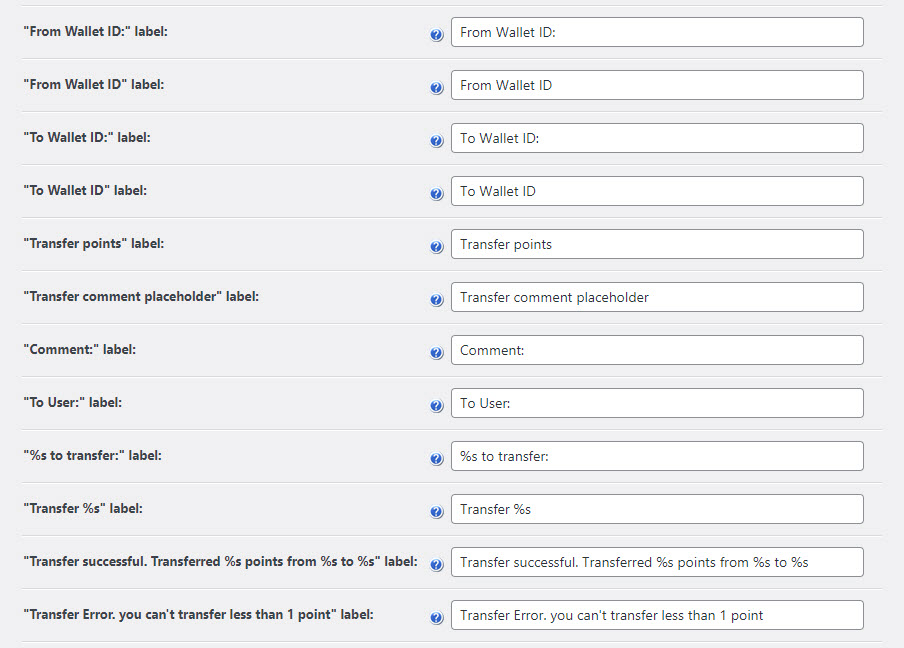
Variable Value
A few labels contain the "%s" symbol.
In the "Transfer successful. Transferred %s points from %s to %s" label, first "%s" will be substituted with the sent amount of points, and the second and third "%s" will be substituted by wallets IDs of sender and receiver respectively.
In "%s to transfer:" and "Transfer %s" labels, "%s" will be substituted by the name of points on your site. You can change the name of points to the one you need in first two labels - for plural and for singular name of points.
End Result
Following instructions found in the plugin and guides, you should be able to configure the form to let users send points to each other.
Use Case Front-End
 |
More information about the WordPress MicroPayments plugin Other WordPress products can be found at CreativeMinds WordPress Store |
 |
Let us know how we can Improve this Product Documentation Page To open a Support Ticket visit our support center |