WordPress OnBoarding Plugin (CMOB) - Use Case - How to Create Onboarding Experience for Your Users from the WordPress Backend
Use Case – How to create onboarding experience for your users from the WordPress backend
Note: This guide requires:
- WordPress OnBoarding plugin – This document uses version 1.4.0
Video Use-Case
Introduction
The WordPress OnBoarding plugin helps you create a site walk-through, website guided tour or a guidance widget to improve the user onboarding experience and support user training.
Use Case Front-End

Use Case Assumptions
In this example we will consider how to create onboarding experience for your users from the WordPress backend. The process is almost the same as creating onboarding experience for users on the Front-end: WordPress OnBoarding Plugin (CMOB) - Use Case - How to Create Onboarding Experience for Your Users from the Frontend by Their Role
Let's consider in our example the situation, that we need to make a list of useful links for documentation that helps to work with our WordPress OnBoarding plugin and will be visible for admin on the Back-end on needed for work pages.
It follows:
- Installing the plugin
- Configuring the plugin
- Add help items - Content
- Add help items - Options
- End Result
Installing the Plugin
The process is the same for all CM plugins and add-ons.

- Download the plugin from your customer dashboard.
- Log in to WordPress and navigate to the WordPress Admin → Plugins settings.
- Click on Add New.
- Activate it and add the license.
Learn more: Getting Started - Plugin Overview
Configuring the Plugin
First of all, you can configure the plugin according to your needs: appearance and behavior of the plugin, icon settings, labels. Learn more: WordPress OnBoarding Plugin (CMOB) - Plugin Settings.
When everything is configured you can start creating help items.
Add Help Items - Content
The Widgets created by the WordPress OnBoarding plugin are made useful by filling them with Help Items. Help Items require a little setting up and adjustment to look and work in a desirable way.
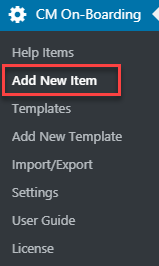
To add new Help Items to a widget navigate to CM On-Boarding → Add New Item.
There you can see a form for setting up the Help Item. Let's go filling it step by step.
Add Title field at the very top - give the name to this item. It can be displayed on the Front-end only in case if you turned on the option Shop Help Item's title in the widget in plugin settings.
Next - form for filling the content of Help Item.
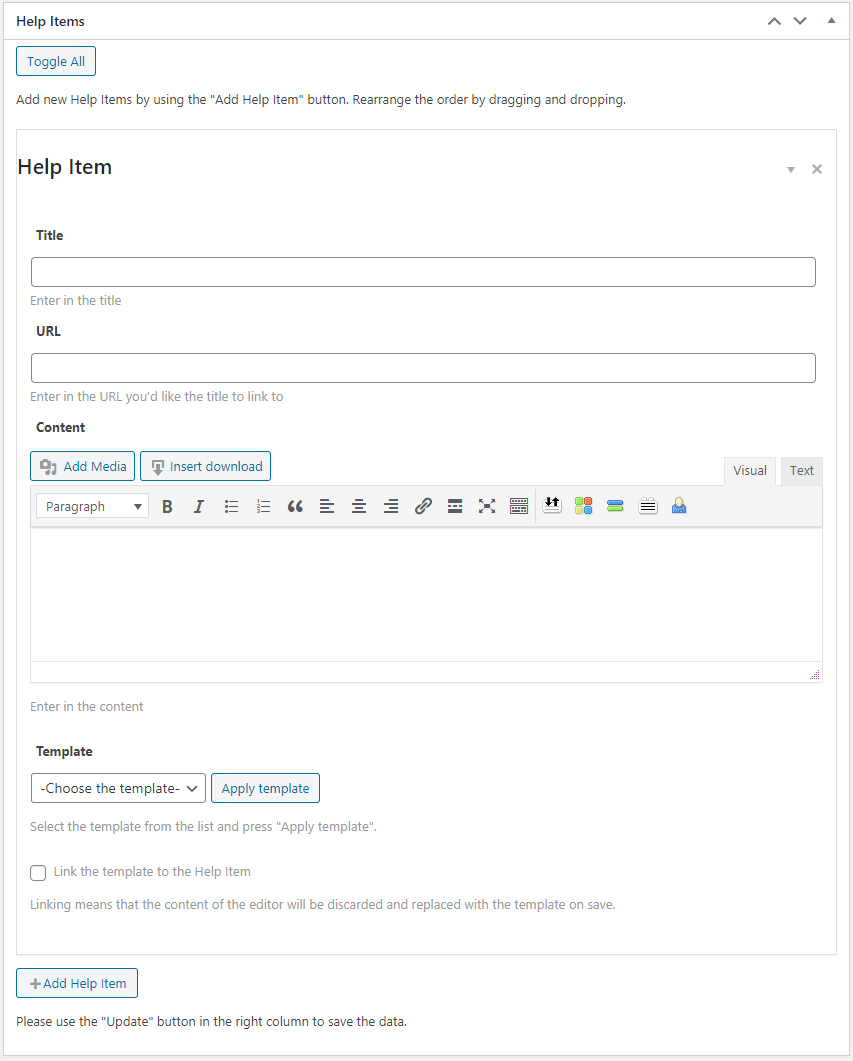
- Toggle All - This button can collapse or expand all created Help Items.
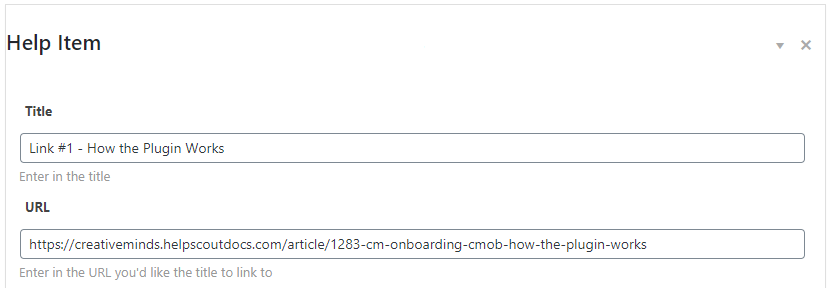
- Title - This title is what will be displayed in the menu item in the sidebar.
- URL - This is an optional web address. If an address is entered here then clicking on the title will direct to the address rather than displaying Content.
- Content - The Content is the body of the Help Item. It can be information, pictures, videos, HTML content or even shortcodes to various features such as contact forms.
- Template - It's possible to save templates and reuse them later to save time. This is particularly useful if a Help Item is to be used over and over but not necessarily on every page on the site. Or if there needs to be a general layout with slight modifications to the Help Item for different pages.
- Add Help Item - Clicking on this will create a new empty Help Item form below the one being edited. There can be added any number of Help Items. This is not for adding or saving the current Help Item, this must be done by clicking Publish or Update in the top right.
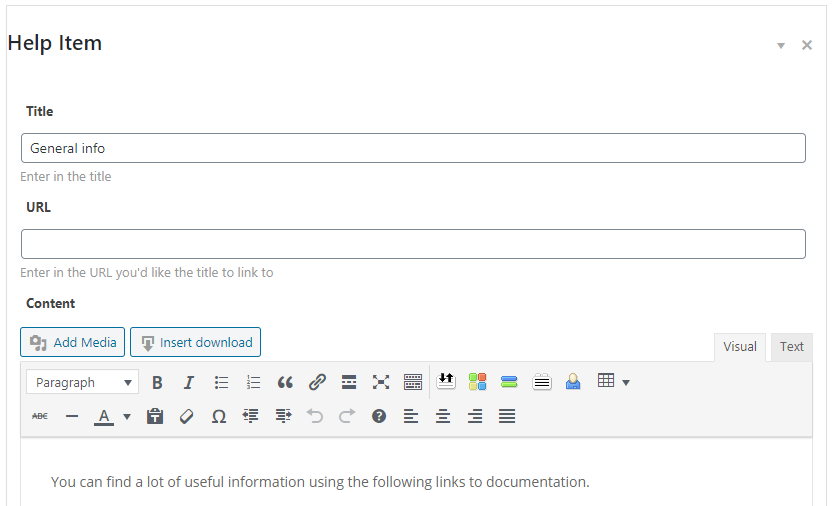
Let's add a few Help Items, the first one called "General info" with regular text in the field Content:
Then we click Add Help Item button, and in the second one we will write a title with the name of the document, and here we will not need the Content field, we can use URL field.
The same way we can add a few more Help Items.
Note: you can add any number of Help Items, but keep in mind, that if you add too many of them - not all widget types can be suitable. These types as Accordion or Side have some screen limits if the list of Help Items is too long. If you have many Help Items it's better to choose Select or Slider widget types.
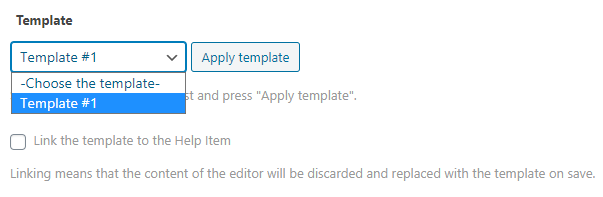
Templates
For every Help Item that you add you can see the Template section with a dropdown and the Apply template button.
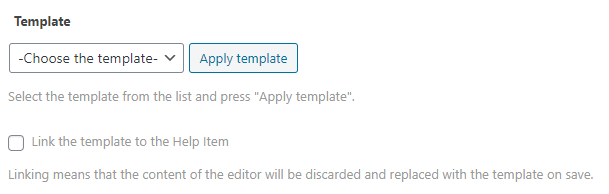
Help Item templates can be created to be used across multiple widgets. Upon updating a template any Widget that is being used at the time are automatically updated too.
It is useful when there are lots of Help Items repeated across multiple Widgets and may need to be used again and again and maintained over time. As the template can be updated once and the effects seen across every widget it has been used in.
All you need to do to use the template - choose it in the dropdown list and click the Apply template button.
If you want to replace the template and make changes to the content do not check the Link the template to the Help item checkbox. If you want only to update the content of the item once in the template section, check this option.
TIP: How to Create a Template?
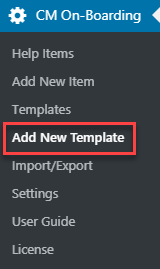
To create a Template using the WordPress OnBoarding plugin, navigate to CM On-Boarding → Add New Template.
There you will find a form with only two fields: a field for the title and a field for the content.
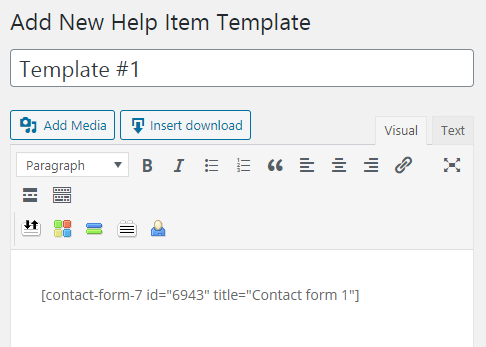
Just fill it and click the Publish button, and this Template will appear in the dropdown while creating/editing Help Item.
You can view and edit the list of created Templates by navigating to CM On-Boarding → Templates.
Learn more about templates:
Next step - we need to configure our Help Item.
Add Help Items - Options
The Options form consists of 3 tabs - Visual, Activity, Button Text.
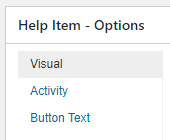
Let's consider them step by step.
Options - Visual
First tab Visual is about appearance of the widget.
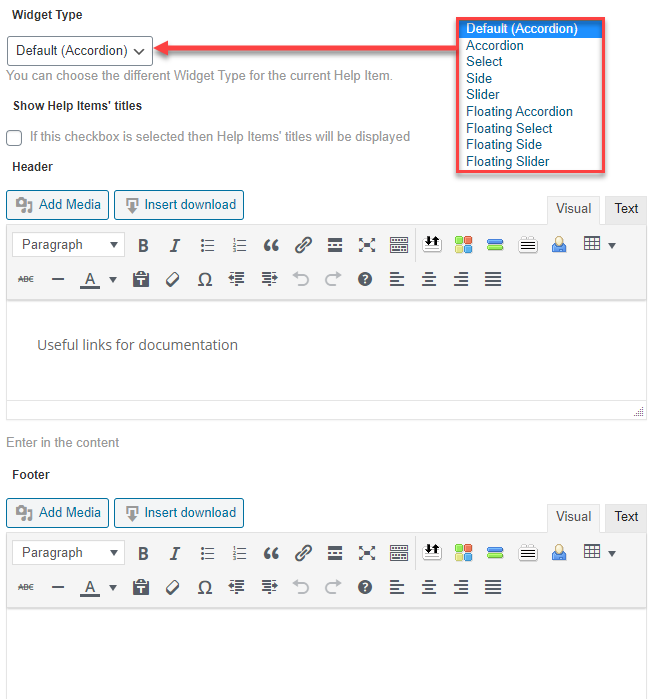
- Widget Type - Sets the type/style of the Widget. Choices are:
- Default (defaults to what the global setting is in Settings)
- Accordion
- Select
- Side
- Slider
- Floating Accordion
- Floating Select
- Floating Side
- Floating Slider
- Show Help Items' titles - If checked then titles for every Help Item you created will be displayed in the Widget.
- Header - Adds a Header to the Help Item. This feature is optional.
- Footer - Adds a Footer to the Help Item. This feature is optional.
We can keep here Default options as it's Accordion type of the Widget by default and it's quite suitable for our case. And we can write here some info in the Header field.
More options for setting up the appearance of the Widget can be done in settings. Learn more: WordPress OnBoarding Plugin (CMOB) - Plugin Settings
Options - Activity
Next tab in the Options section is Activity. It defines, where and for whom the Help Item Widget will be displayed.
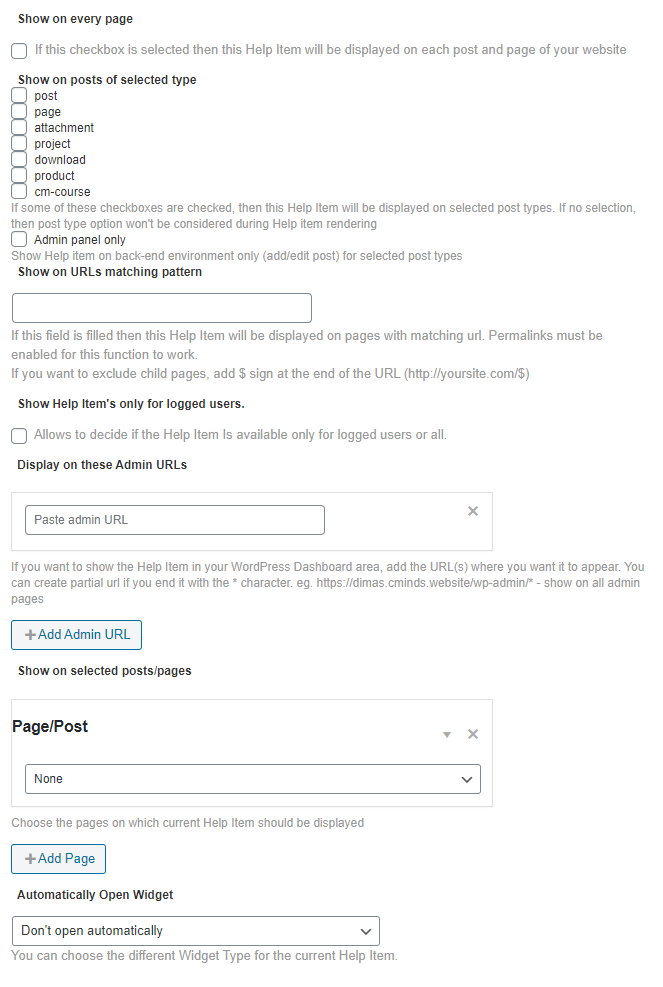
- Show on every page - Checking the box displays the Help Item Widget on every page on the site.
- Show on posts of selected type - Allows assigning the Help Item for selected post types only. Additionally, if the option Admin panel only enabled then Help Item will be displayed on the selected post types only while adding or editing.
- Show on URLs matching pattern - Goes through all the URLs on the site and displays the Help Item on any pages with URLs matching partially what is entered in this field.
- You can exclude child pages by adding $ to the end of the URL. For instance:
- Inputing https://example.com/shop-manager/ WILL include all child pages, such as https://example.com/shop-manager/john and https://example.com/shop-manager/mary
- Inputting https://example.com/shop-manager/$ WILL NOT include any child pages https://example.com/shop-manager/john and https://example.com/shop-manager/mary
- The format of the URL must be https:// or http://
- You can exclude child pages by adding $ to the end of the URL. For instance:
- Show Help Item's only for logged users - Toggles whether or not users must be logged into the site to see Help Items.
- Display on these Admin URLs - Displays the Help Items only for the back-end URLs entered here. To add more than one click the +Add Admin URL.
- Show on selected posts/pages - Configures the Help Item to appear only on the selected posts or pages. To add the Help Item to multiple specified posts or pages click the +Add Page.
- Automatically Open Widget - Allows to define if the Widget must be opened automatically or not when the page is loaded. You can choose one of three options:
- Don't open automatically
- Open automatically on defined post/pages, every time
- Open automatically on defined post/pages, only first time
For our example let's use the options Display on these Admin URLs and add the links that correspond to menu items of our plugin:

When everything is filled, click the Publish button on the right top (this button turns to Update, if you are editing the Help Item).
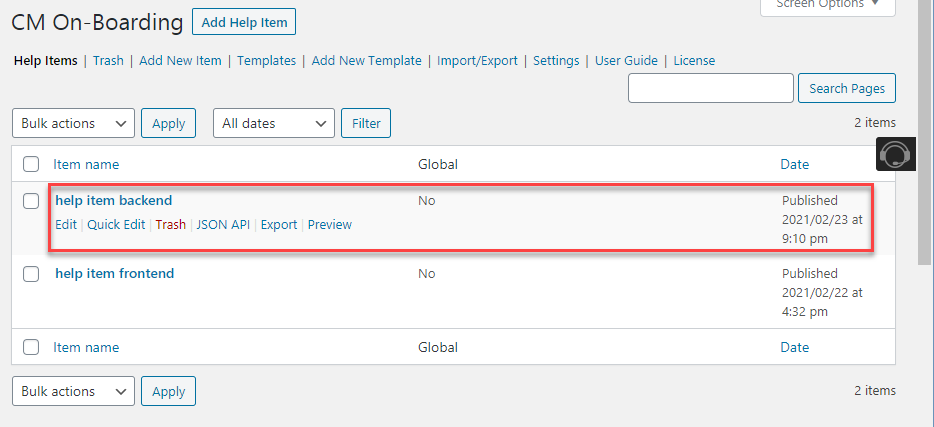
You can find the list of all created Help Items by navigating to CM On-Boarding → Help Items.
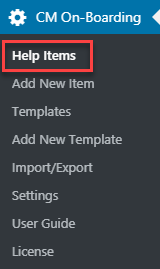
You can view Help Items, edit, view the JSON API, export or delete them.
Now let's see the result.
End Result
Following instructions found in the plugin and guides, you should be able to create onboarding experience for your users from the WordPress backend.
Use Case Front-End
 |
More information about the WordPress OnBoarding Plugin Other WordPress products can be found at CreativeMinds WordPress Store |
 |
Let us know how we can Improve this Product Documentation Page To open a Support Ticket visit our support center |