General Support - Advanced - Creating and Editing Custom Templates
Creating and Applying Custom Templates
Use Child Themes Or Changes Will Be Overwritten
When you update a parent theme, the folder with template files created for the CM plugin will be deleted.
However, if you are working with a child version of that theme and update it, the files will not be deleted.
Learn more: What Are And How To Child Themes (WordPress.org)
TIP: Advanced!
Editing templates is an advanced process that may require HTML, CSS and coding skills.
Make sure to back up all files before saving changes. This article provides examples of changes, but they are illustrative and not meant to be followed literally.
Introduction
Many plugins support using custom template on specific pages. You can apply a template to single course pages or to all at once.
This article will cover how to create and implement templates, step-by-step. It uses Course Catalog as an example.
Why Custom Templates?
Custom templates help you adapt the plugin pages look and feel to your site's identity. You have complete control over each element's placement and overall appearance.
Other CM Plugins With Custom Template Settings
These plugins also allow you to easily change the template from the settings
CM FAQ | WordPress Video Lessons Manager plugin | Expert Directory plugin | Product Directory plugin | Business Directory plugin | WordPress Course Catalog plugin | Download and File Manager plugin
1) Locating The Plugin Template
First, we will locate and copy the plugin folder where the template files are located.
For this article, we are using a WordPress File Manager plugin.
1. Navigate to WordPress page directory → wp_content → plugins.
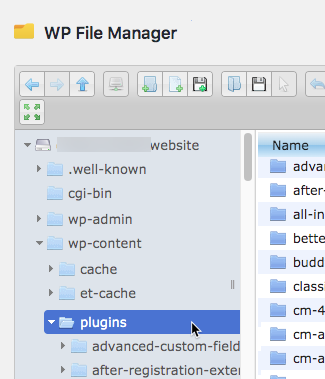
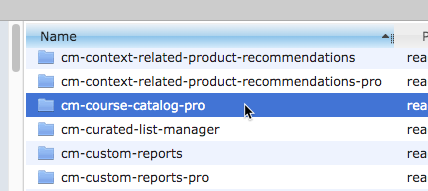
2. Locate the folder cm-course-catalog-pro.
3. Head to frontend → template.
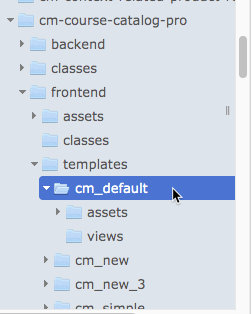
4. Copy the contents of this template folder to:
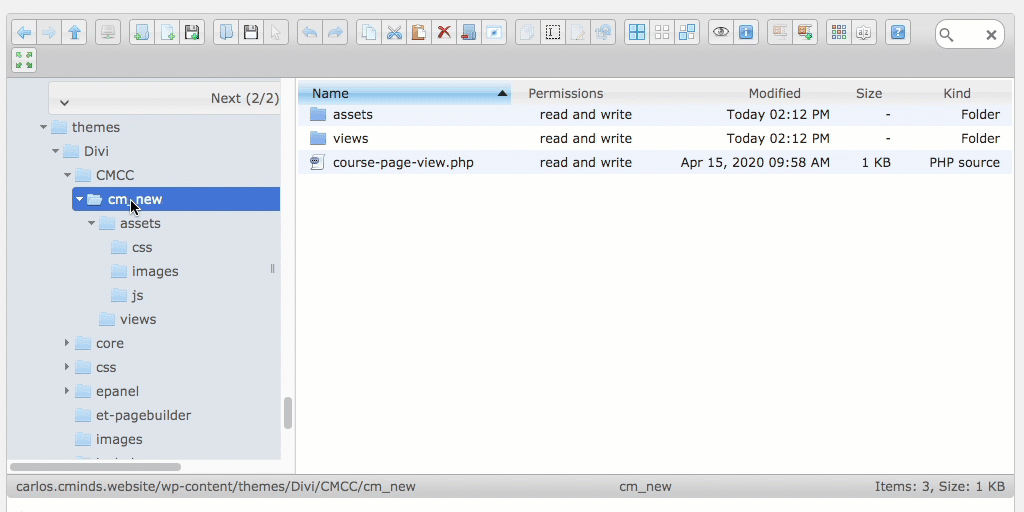
wp-content/themes/<active_theme>/CMCC/<template_name_dir>
<active_theme> is the theme you are currently using. In the example below, it's Divi.
<template_name_dir> is the name of your custom template. In the example, it's cm_new.
a) Creating the folder (if this is the first time):

b) Copying the content:

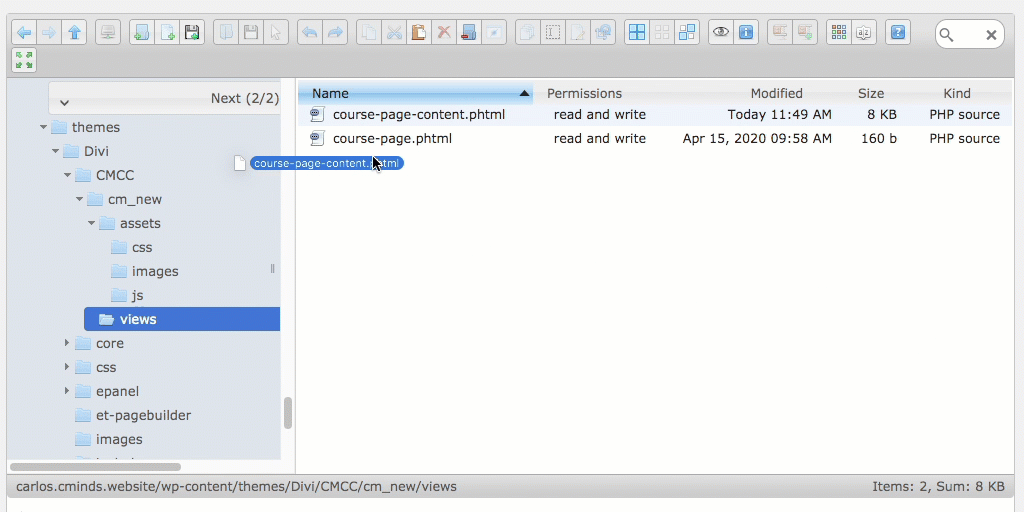
2) Edit Template Files
Inside the template folder, you will find many files.
It's time to edit the files. This step is heavily dependant on what you want to achieve and your experience.
Examples
For our two examples, we will use the Sublime Text editor to edit the Course Page in the WordPress Course Catalog plugin.
The relevant file is course-page-content.phtml.

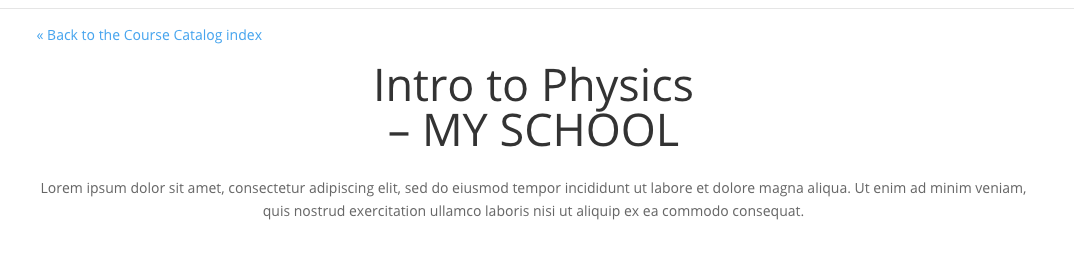
Example 1: Add " - MY SCHOOL" To All Course Names
- Locate the h1 element. Note that it uses the [cmcc_post_title] shortcode to fetch the title.
- Edit its content, adding "- MY SCHOOL" after the shortcode.

Result
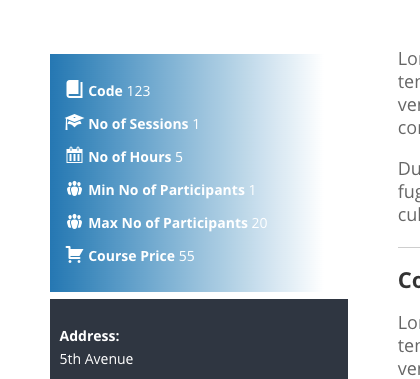
Example 2: Gradient Background in Details Widget
- Locate the div.course-widget#cmcc-info.
- Edit the content of the background attribute.

Result
3) After The Files Have Been Edited
a) Reupload Edited Files
Go back to your file manager and upload the edited the files to the same directory:
wp-content/themes/<active_theme>/CMCC/<template_name_dir>
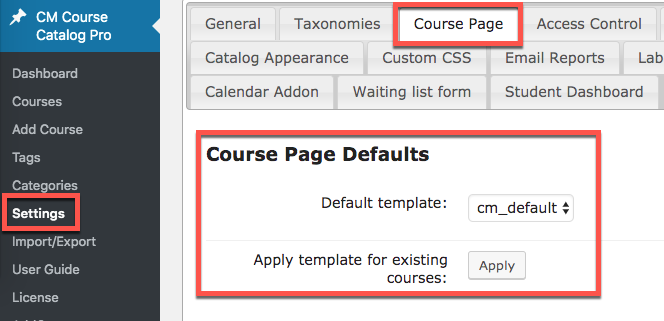
b) Changing The Plugin's Settings
Head to CM Course Catalog Pro → Settings → Course Page tab → Course Page defaults section.
Change the "Default template" to the one you edited.
 |
Other WordPress products can be found at CreativeMinds WordPress Store |
 |
Let us know how we can Improve this Product Documentation Page To open a Support Ticket visit our support center |