WordPress Registration Form Plugin (CMREG) - How To - Improve the Registration Form With Custom Fields
Improve the Registration Form - Adding Custom Fields to User Profiles
Video Tutorial
What Are Custom Fields
Custom Fields are a way to enrich the Registration Page people will use to sign up to your website. The possible uses are endless. They can be used for adding a phone number, a short blurb about themselves, a description of the service they provide, asking if a subscriber is over 18 or not. The list goes on.
They can be set as optional or required and they can be configured to be specific to certain user roles or generic for all users. They appear in the registration form which site visitors use to sign up to your site and they appear in the edit details form, for customers to later edit or update their details.
Automatically Added Custom Fields
The WordPress Registration Form Plugin creates important fields automatically for you, depending on your Registration Settings (check the specific guide on them).
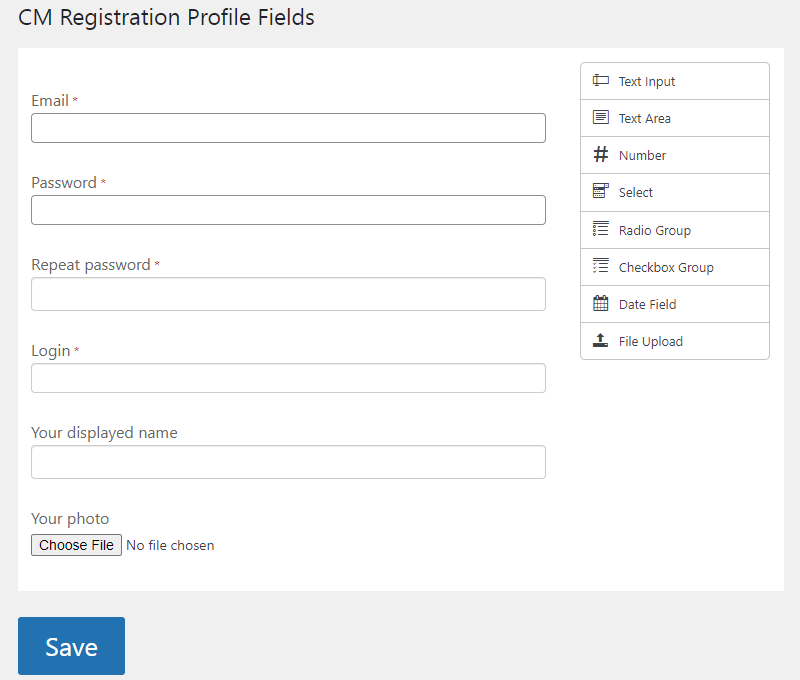
It always creates the fields "Email" and "Password", as those are necessary for any registration process - if these fields are removed, the plugin will create them again.
Also, it will create the fields "login", "display name" and "repeat password" if you chose to make these obligatory in the settings.
Other Fields
If the option "Email verification on secondary email" is enabled ( read more), it's necessary to add a Text Input Field with the relevant Meta Key. This guide explains in detail how to do this (skip to it).
Adding Custom Fields to the Registration Form
From the WordPress dashboard navigate to CM Registration Pro → Profile Fields.
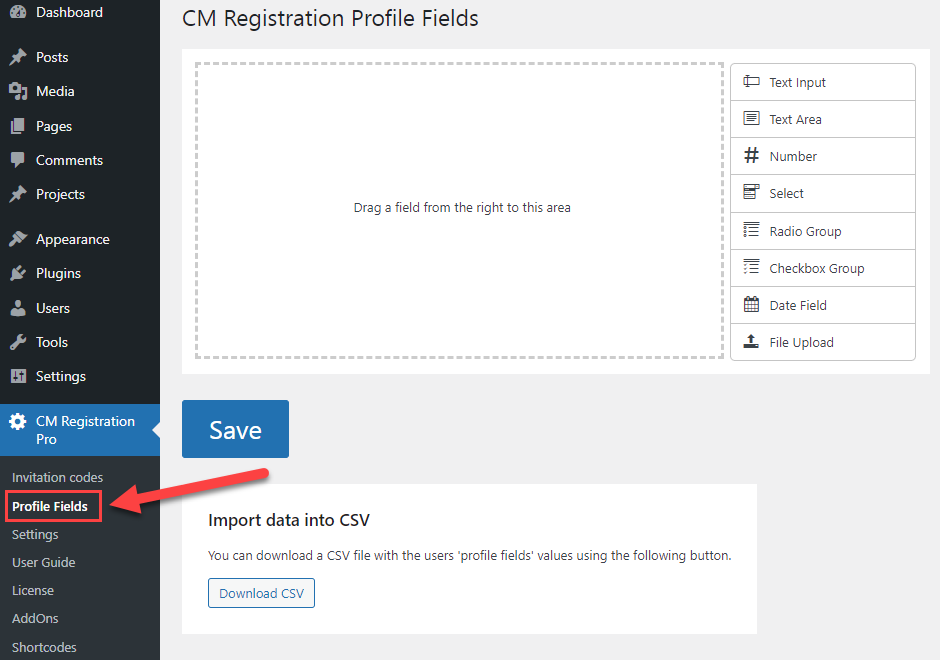
The custom field builder should then appear, as shown above.
Drag the desired input fields from the list on the right into the area on the left. For convenience, the fields can be minimized by clicking on the pencil icon that appears in the top right while hovering over an input field's settings area.
Custom input fields will appear below the default input fields on the registration form. The custom input fields can be reordered by clicking and holding on the field that is to be moved and dragging it up or down as desired.

Types of Input Fields
There is a selection of different input fields available to choose from to control the type of data being entered by users.
- Text Input - Creates a small input area for plain text.
- Text Area - Creates a large input area for play text. Better for blocks and paragraphs of text.
- Number - Creates an input area that will allow numbers only.
- Select - Creates a drop-down menu to choose from.
- Radio Select - Creates a list to choose from by clicking on radio buttons. Limited to one choice.
- Checkbox Group - Creates a list to choose from by clicking checkboxes. Allows multiple choices.
- Date Field - Creates a date selection field with a drop-down calendar date picker, an up-down incremental selector or manual input options. (Relevant: Age Verification Support)
- File Upload - Allows users to upload a single image. Note: this options was introduced in version 3.4.0.
Each of these input types has its own configurations specific to them.
Settings Common to All Input Fields
There are also settings that are common to every field and affect the general behavior of the form. They are highlighted below:
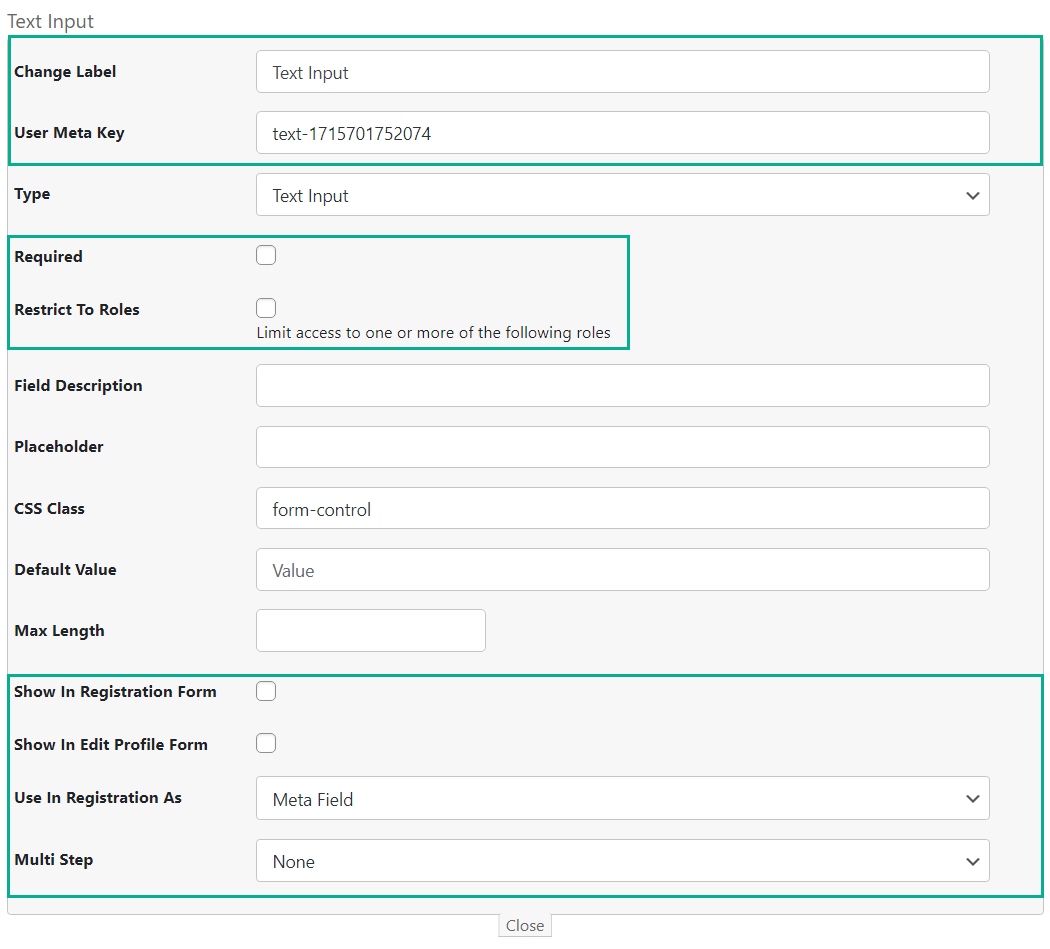
- Change Label - Edit the front-end label for the input field.
- User Meta Key - The key to the user meta record in the database. It's recommended to change this to something more easily remembered using alphanumeric characters and underscores. Learn how to retrieve the meta keys of a given user.
- Required - Check this box to make the input field required for the user to complete the registration form.
- Restrict to Roles - Explained in-depth below.
- Show in Registration Form - If this information appears in the Registration Form
- Show in Edit Profile Form - If this information appears in the User Profile.
- Use in Registration As - Choose the specific capability of the field.
- Multi Step - Assign the field to the specific step of the multi-step registration. Note: this option was introduced in version 3.7.4. Learn more: WordPress Registration Form Plugin (CMREG) - How To - Organize Multi-step Registration
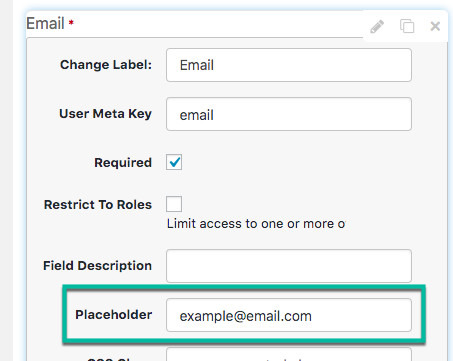
Placeholder
Text fields also have the Placeholder field by default. It allows you to set a text that will be displayed as a tip.
Setting
Result
Restricting Fields to Specific User Roles
It's possible to show chosen custom form fields only to specified users. This will require different registration pages to be created using shortcodes that have been modified for that user role.
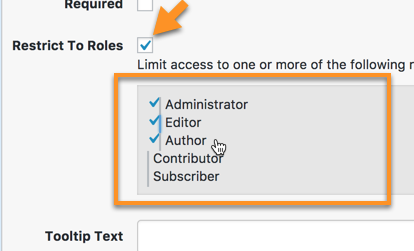
While editing a form field, check the "Restrict To Roles" checkbox to reveal the various default and custom user roles stored on the site.
Click on the users that this custom field is to appear during their registration process.
To learn more about creating user role specific registration forms, view this article.
The Secondary Email Field
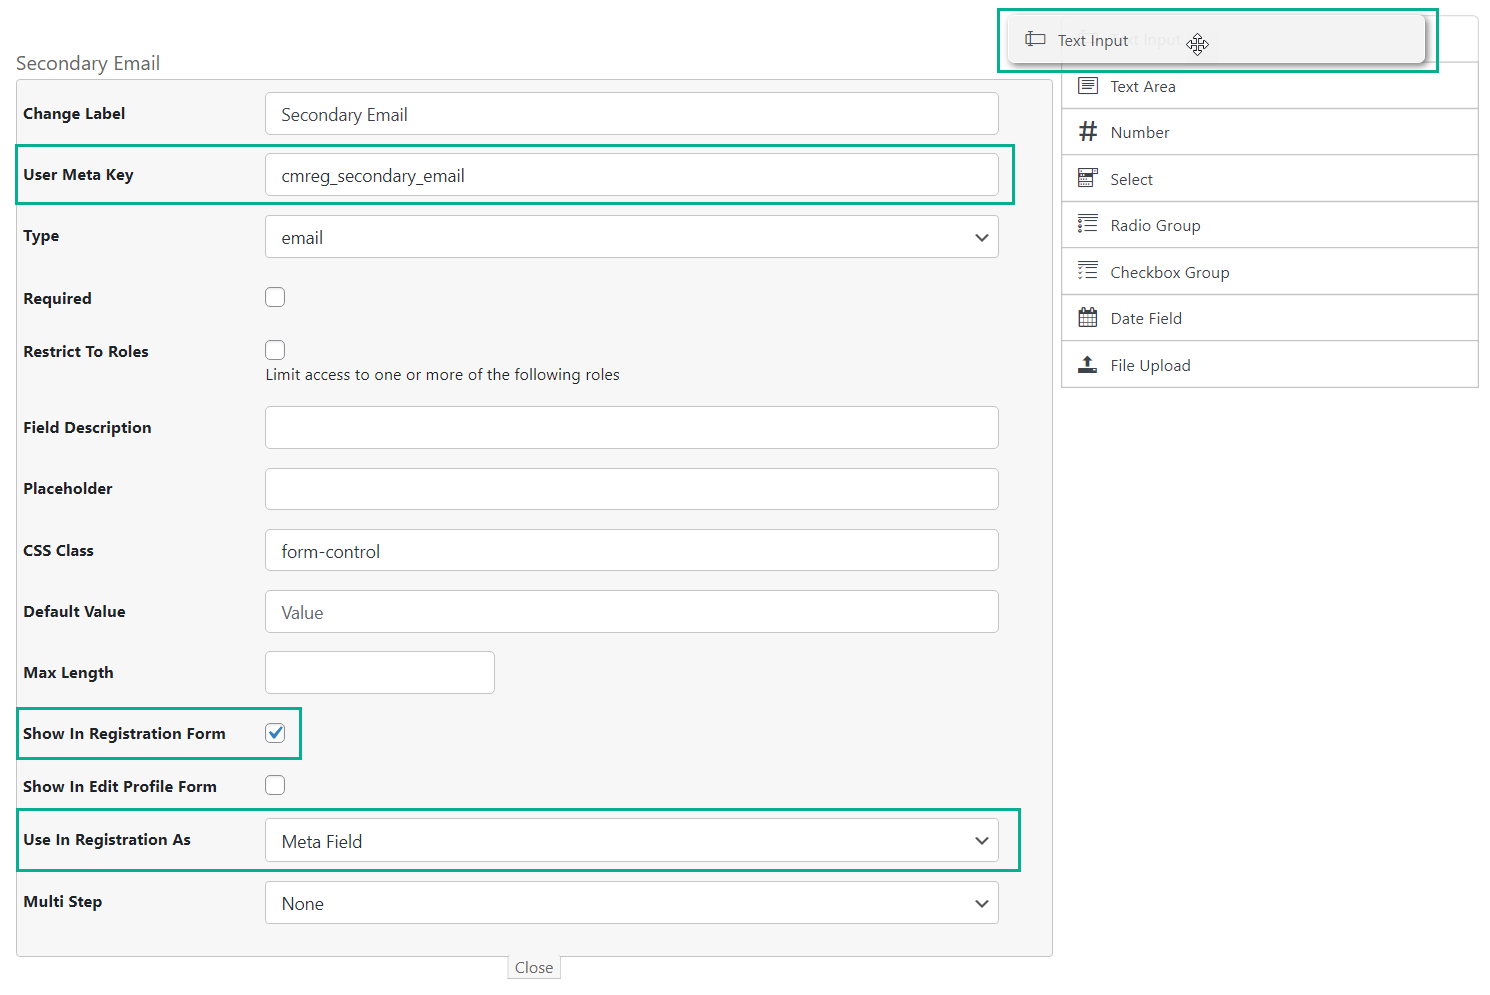
To add the secondary email field, add a Text Input field, and make sure that:
- User Meta Key corresponds to the value in the option Meta key of the secondary email field. The default value is cmreg_secondary_email.
- Show in Registration Form is enabled.
- Use in Registration As is set to meta field.
Native User fields in Wordpress (first name, last name)
You can add the custom fields that will be natively supported by Wordpress, for example, first name and last name. You just have to use a proper user meta names for it.
You can use the following meta names:
- first_name
- last_name
- nickname
- description
Retrieving The User Meta Field of a User (Advanced)
You can also retrieve the information by inserting a short PHP code into your page.
Syntax
<?php
echo get_user_meta(USER_ID, 'USER_META_KEY', true);
?>
Example 1
<?php
echo get_user_meta(12, 'cmreg_secondary_email', true);
?>
Example 2
<?php
echo get_user_meta(10, 'last_name', true);
?>
Reference: WordPress Function
For reference, the WordPress function get_user_meta retrieves the meta fields information of a given user. As of writing, this is the code:
function get_user_meta($user_id, $key = '', $single = false) {
return get_metadata('user', $user_id, $key, $single);
}
To learn more, check WordPress' documentation: get_user_meta() | Function | WordPress Developer Resources
 |
More information about the WordPress Registration Form Plugin Other WordPress products can be found at CreativeMinds WordPress Store |
 |
Let us know how we can Improve this Product Documentation Page To open a Support Ticket visit our support center |