WordPress Email Registration Blacklist (CMRB) - Use Case - How to Prevent Fake User Registrations with ChatGPT Integration
How to Prevent Fake User Registrations with ChatGPT Integration
Note: This guide uses:
- WordPress Email Registration Blacklist - This document uses version 1.8.2.
Optionally, for adding custom fields to the registration form:
- WordPress Registration Form Plugin - This document uses version 3.8.8.
Introduction
The WordPress Email Registration Blacklist plugin allows you to block users who try to register on your WordPress site using an email from a domain/email/IP defined in your blacklists/online lists. It also allows you to approve only users from a whitelist.
The plugin also integrates with ChatGPT in order to detect and reject registrations with fake names and fake email domains.
ChatGPT analyzes the entered first name, last name, and email domain to determine whether they look realistic or randomly generated, and automatically decides whether the registration should be accepted or rejected.
Use Case Front-End
Domain verification:
Name verification:

Use Case Assumptions
In this use case, we will show how to configure the ChatGPT integration to prevent user registrations with fake data on your site.
It follows:
- Installing the plugin
- Quick recap
- What is ChatGPT?
- Creating API key
- Enabling ChatGPT integration on your site
- Domain verification
- Name verification
- Editing error messages
- End result
Installing the Plugin
The process is the same for all CM plugins and add-ons.

- Download the plugin from your customer dashboard.
- Log in to WordPress and navigate to the WordPress Admin → Plugins settings.
- Click on Add New.
- Activate it and add the license.
Learn more: Getting Started - Plugin Overview
Quick Recap
We recommend you first to get to know about other methods of how to secure the registration process on your site using the plugin:
What is ChatGPT?
ChatGPT is an AI chatbot developed by OpenAI that uses natural language processing and machine learning to generate human-like responses based on user input.
ChatGPT processes text using Tokens - small units of words or characters that the model uses for understanding language. For English text, one token is roughly four characters or about three-quarters of a word. Each time the plugin sends a request to ChatGPT, tokens are consumed.
To use the API, you need to have a valid payment method on your OpenAI account. Every request consumes tokens, which are billed according to OpenAI’s pricing.
To connect your forum with ChatGPT, you need to obtain an API key from your OpenAI account.
Creating API Key
To get the API key, please do the following:
- Go to the OpenAI Platform.
- Sign in to your OpenAI account or create a new one.
- Open your profile menu (top right corner) and select View API keys.
- Click Create new secret key.
- Copy the generated key and store it in a safe place - it provides access to your account.
Because this process is handled by a third-party service, the exact interface might change from time to time. Follow the instructions shown on the OpenAI website when creating your API key.
Enabling ChatGPT Integration On Your Site
First, we need to enable the integration with ChatGPT. To configure it, navigate to Admin Dashboard → CM E-Mail Registration Blacklist → General tab.
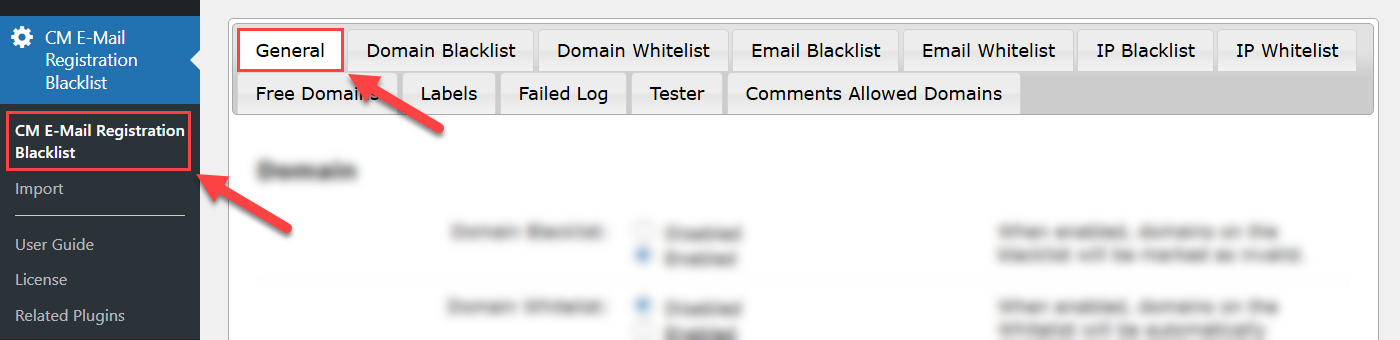
Scroll down and find the section ChatGPT. The options are:

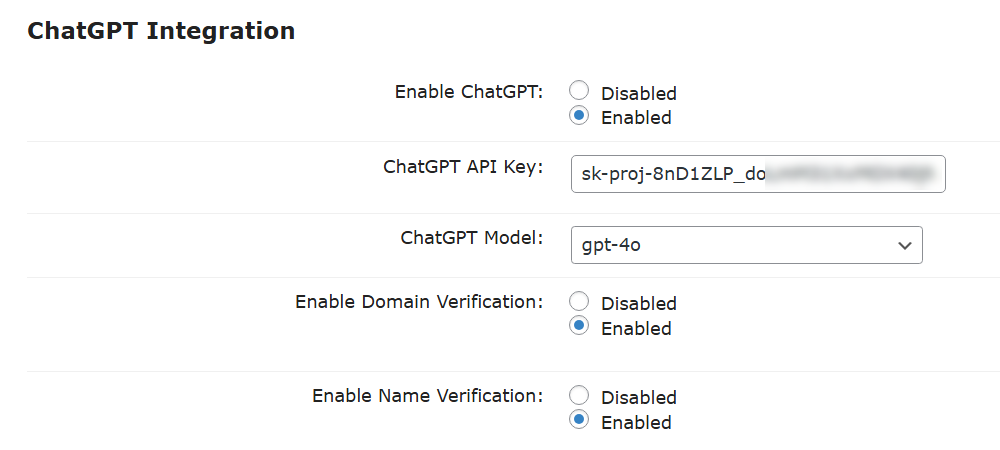
- Enable ChatGPT - Enabling this option allows ChatGPT to check if the email domain or First and Last name entered by the user in the registration form look like real ones.
- ChatGPT API Key - In order to make the feature work, you need to enter your OpenAI API. It can be obtained on OpenAI site.
- ChatGPT Model - This option allows you to choose a ChatGPT model. You can see the list of supported models after entering the API key and saving the changes.
- Enable Domain Verification - Turn on this option if you want ChatGPT to check if the email domain looks like real. It allows to prevent entering fake emails with random characters.
- Enable Name Verification - Turn on this option if you want ChatGPT to check if the First name and Last name entered by user look like real. Have a note that the standard WordPress registration form doesn't contain these fields by default, so you might need a third-party plugin to add these fields to the registration form. These fields should correspond the meta keys "first_name" and "last_name".
Click the button Update to save the changes after configuring the settings.
This is how the settings look like after our configuration:
Now let's check the verification process.
Note: Since the plugin needs to send the registration data to ChatGPT and wait for the AI response, the registration process may take a few seconds more than usual.
Domain Verification
Example: if the user enters the email "jack@difvnjkn.jdf", he will not be registered, as ChatGPT will consider the domain of that email as fake.
Name Verification
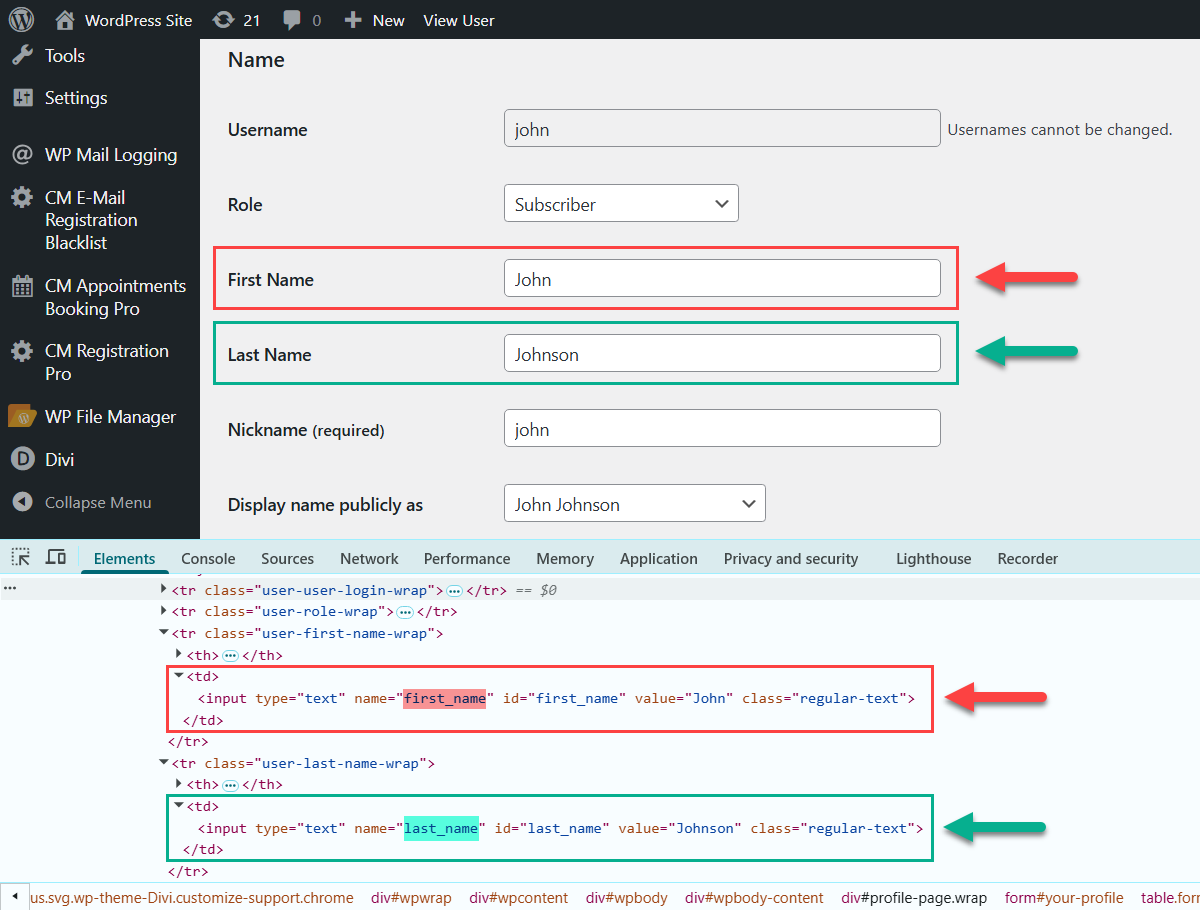
WordPress provides fields for adding First Name and Last Name in the user profile, and these fields have the meta keys "first_name" and "last_name". But the standard WordPress registration form doesn't contain the First and Last name fields by default, so you might need a third-party plugin to add these fields to the registration form.
In our use case we will use the WordPress Registration Form Plugin to add custom fields and check the verification there. This plugin allows your users to login and register to your site via a custom popup forms.
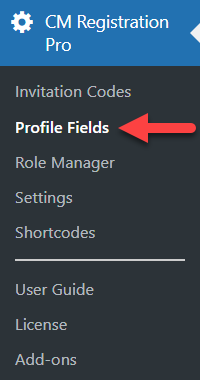
To do this, navigate to Admin Dashboard → CM Registration Pro → Profile Fields.
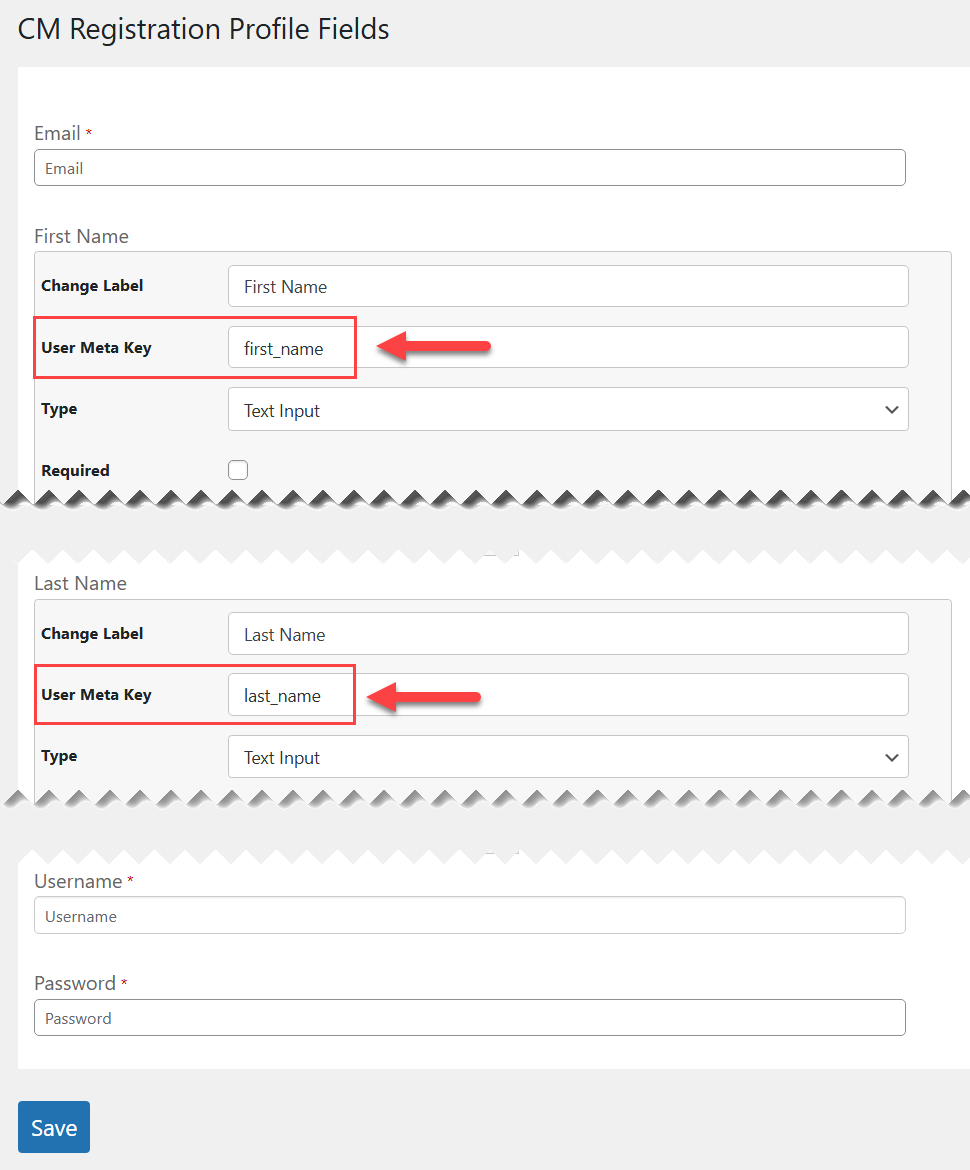
There is a form builder, which allows to add different field types and customize them to fit your needs.
TIP
Learn more how to work with the registration plugin and form builder:
This way we add 2 custom fields for first and last name with relevant meta keys:
Now let's check how verification works on the front-end.
We will fill the First Name and Last Name fields with random letters and numbers and try to register. As these are obviously not real names, the registration will fail:
Editing Error Messages
You can customize the messages which are displayed on the front-end - either edit them or translate them into another language.
To do this, navigate to Admin Dashboard → CM E-Mail Registration Blacklist → Labels tab.
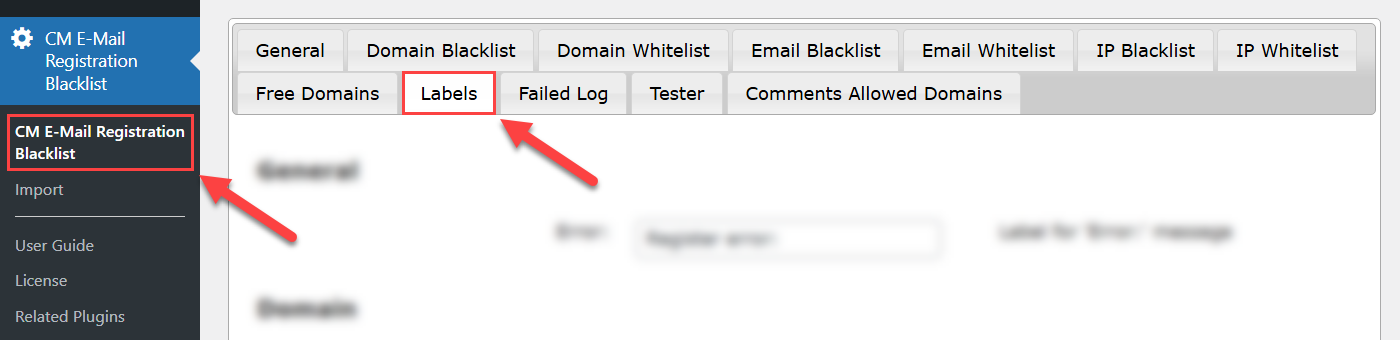
Scroll down to the section ChatGPT. There you can find 2 editable labels:

End Result
Following instructions found in the plugin and guides, you should be able to configure the ChatGPT integration to prevent user registrations with fake data on your site.
Use Case Front-End
Domain verification:
Name verification:
 |
More information about the WordPress Email Registration Blacklist plugin Other WordPress products can be found at CreativeMinds WordPress Store |
 |
Let us know how we can Improve this Product Documentation Page To open a Support Ticket visit our support center |