WordPress Email Registration Blacklist (CMRB) - Use Case - How to Secure Your Site Registration Process (List All Methods by Email, by Domain, by IP)
Use Case – How to secure your site registration process (list all methods by email, by domain, by IP).
Note: This guide requires:
- WordPress Email Registration Blacklist - This document uses version 1.6.8
Video Use-Case
Introduction
The WordPress Email Registration Blacklist plugin allows you to block users who try to register on your WordPress site using an email from a domain/email/IP defined in your blacklists/online lists. It also allows you to approve only users from a whitelist.
The plugin helps to avoid spam with viruses, malwares, disposable emails, and unwanted users.
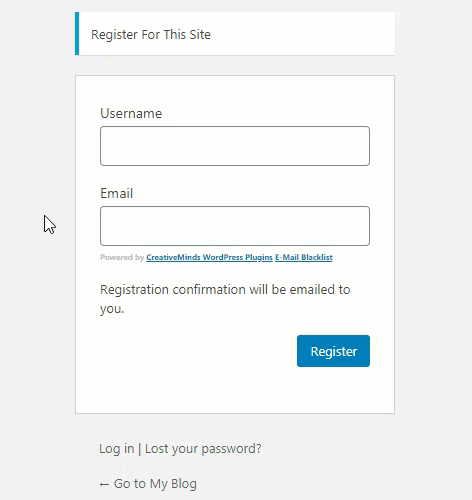
Use Case Front-End
Use Case Assumptions
In this example we will consider how to defend your site from unwanted registrations to avoid spam, viruses and malware.
It follows:
- Installing the plugin
- Setting up
- Domain Blacklist
- Domain Whitelist
- Email Blacklist
- Email Whitelist
- IP Blacklist
- IP Whitelist
- Free Domains
- Labels
- Failed Log
- Tester
- End Result
Installing the Plugin
The process is the same for all CM plugins and add-ons.

- Download the plugin from your customer dashboard.
- Log in to WordPress and navigate to the WordPress Admin → Plugins settings.
- Click on Add New.
- Activate it and add the license.
Learn more: Getting Started - Plugin Overview
Setting up
To configure the plugin, navigate to Admin Dashboard → CM E-Mail Registration Blacklist → General Settings tab.
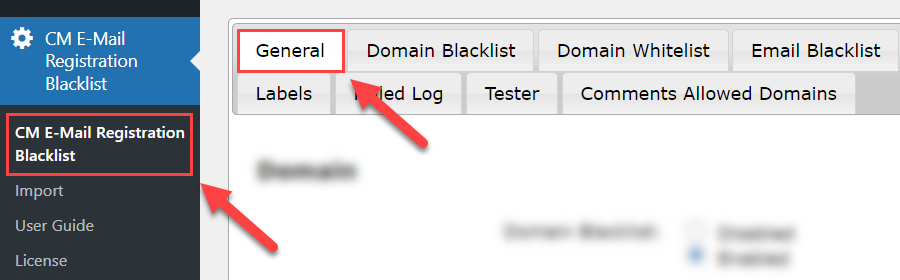
Here you can find the following options:
Domain
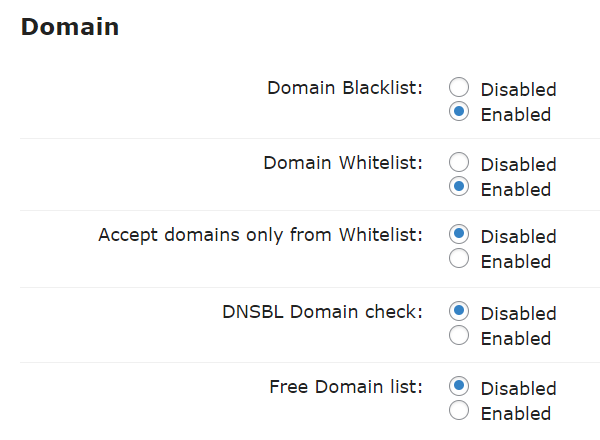
- Domain Blacklist - Blocks emails of domains added to the blacklist.
- Domain Whitelist - Protects emails of certain domains added to the whitelist from being blocked while the registration attempt.
- Accept domains only from Whitelist - If enabled, only users with emails that belong to whitelisted domains will be allowed to register.
- DNSBL Domain Check - DNSBL Information provides a single place where you can check that blacklist status of your mail server's IP address on more than 100 DNS based blacklists. This is an additional filter you can add on top of all the existing filters to prevent domains registration to your site. It does not replace the Free Domains list, but can come in addition to it based on the general setting you define for your domain registration behavior.
- Free Domain List - Fetches list of spam addresses from Spam Assassin. Read more. Learn more about Spam Assassin.
TIP: Using Free Domain and DNSBL Lists
If you enable DNSBL Domain Check and Free Domain List keep in mind, that some popular domains like gmail.com can be included in these lists. If you want these domains to be allowed to register you need to disable these lists, or add needed domains to Domain Whitelist.
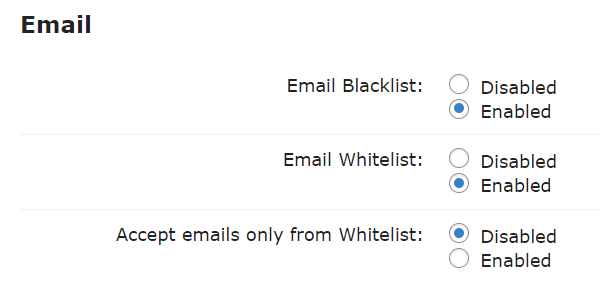
- Email Blacklist - Enable it to block the registration attempts which are done with emails added to the Black List.
- Email Whitelist - Enable it to prevent blocking registration attempts which are done with emails added to the White List.
- Accept emails only from white list - If enabled, only users with emails from whitelist will be allowed to register.
IP
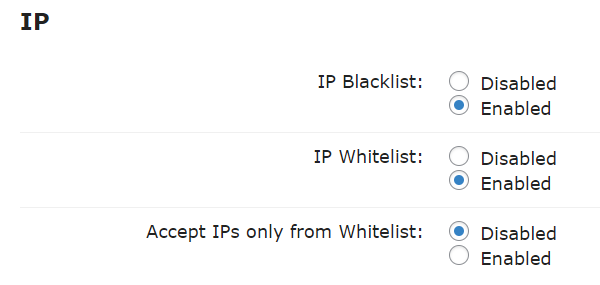
- IP Blacklist - Enable it to block the registration attempts which are done from blacklisted IP addresses.
- IP Whitelist - Enable it to prevent blocking registration attempts which are done from whitelisted IP addresses.
- Accept IPs only from Whitelist - If enabled, only users with whitelisted IPs will be allowed to register.
Others

- Enable for edit profile - Applies filters when the user updates the email from the edit profile section. This prevents users from updating their emails to blocked ones. Currently only works on:
- Default WordPress profile form editor
- WordPress Registration Form Plugin profile form editor
- Show Powered by CreativeMinds - Show or hide "Powered by CreativeMinds" in the registration screen.
- Remove HTML tags from error messages - Removes any tags (such as links or formatting) from error messages.
Google ReCaptcha
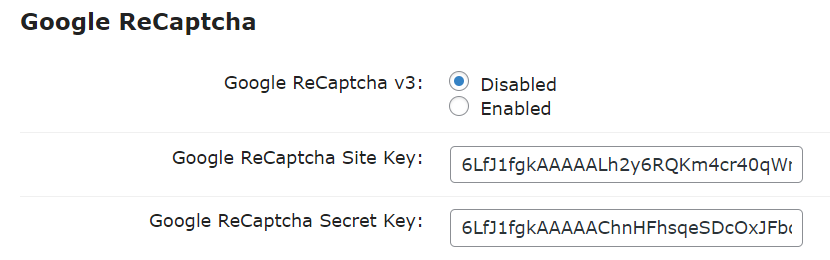
- Google reCAPTCHA - Enables verification via reCAPTCHA. You need to provide:
- Google ReCaptcha Site Key
- Google ReCaptcha Secret Key
Learn more: General Support - reCAPTCHA - What is It and How to Enable.
Restriction
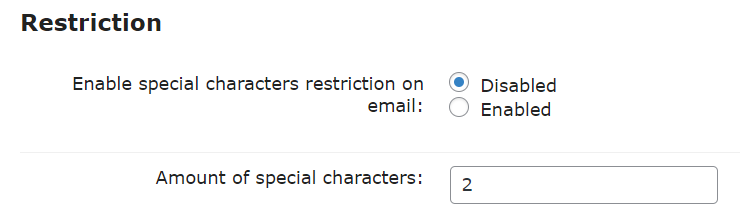
- Enable special characters restriction on email - Enable this option if you want to prevent emails which have more than X amount of special characters (.,#$%+-!^*) in the email.
- Amount of special characters - Here you can set the amount of special characters. This will work when you enable the previous option.
Integration
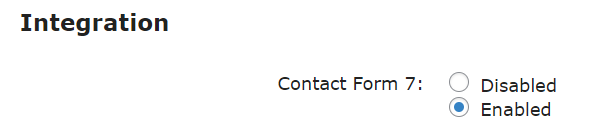
-
Contact Form 7 - Enable this option if you want to filter emails which can be entered in forms provided by the plugin Contact Form 7.

Integration with Contact Form 7
Domain Blacklist
Next tab is Domain Blacklist.
The blacklist contains a list of all of the domains that will be blocked from registering on your site. Add a new domain by typing in the box provided.

Anyone with an email address matching the domain you enter on the blacklist will be unable to register for your site.
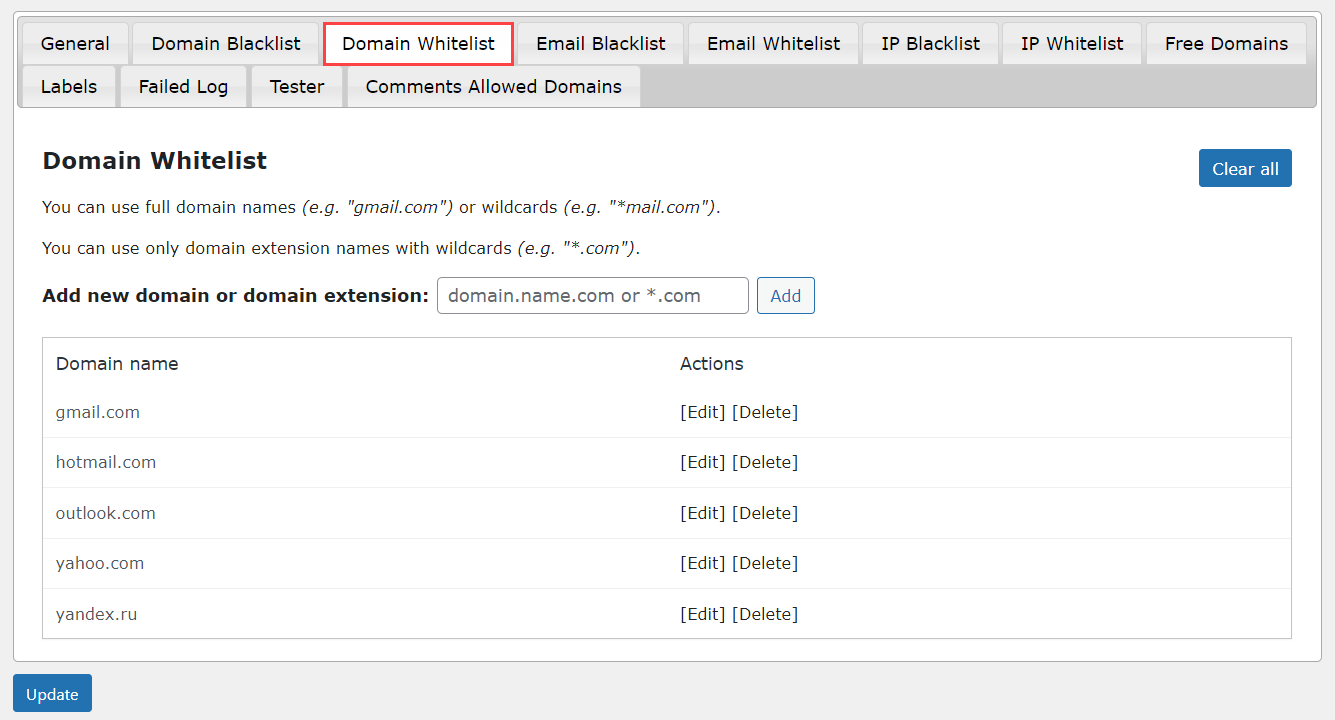
Domain Whitelist
Next tab is Domain Whitelist.
Whitelisted domains are domains that have been flagged, but are still allowed to register a domain on your site.
Add a new domain to the whitelist by typing it in the provided box. Adding a domain to the whitelist will allow users to register with even if it has already been tagged as spam in the blacklist or free domain list.
Email Blacklist
Next tab is Email Blacklist.
The blacklist contains a list of all of the emails that will be blocked from registering on your site regardless of their domain status. Add a new email by typing in the box provided.
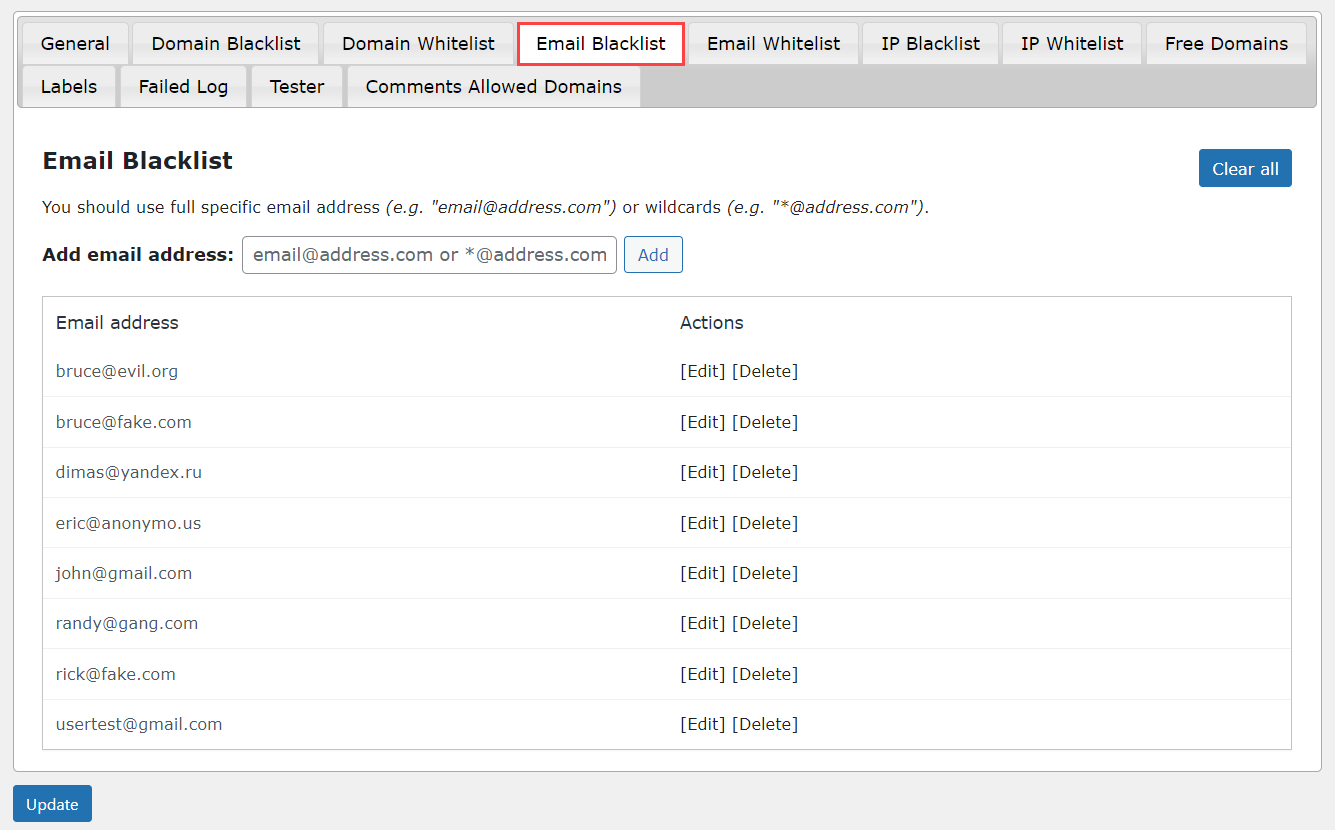
Anyone with an email address matching the address you enter on the blacklist will be unable to register for your site.
TIP: Note on Gmail Domain
Google allows its users to modify the email address by including dots or plus inside the address. This applies to @gmail.com and @googlemail.com accounts.
You can block all these variants by adding the "clean" version to the blacklist, without including any dot or plus signs. In the example above, that would be johnsmith@gmail.com.
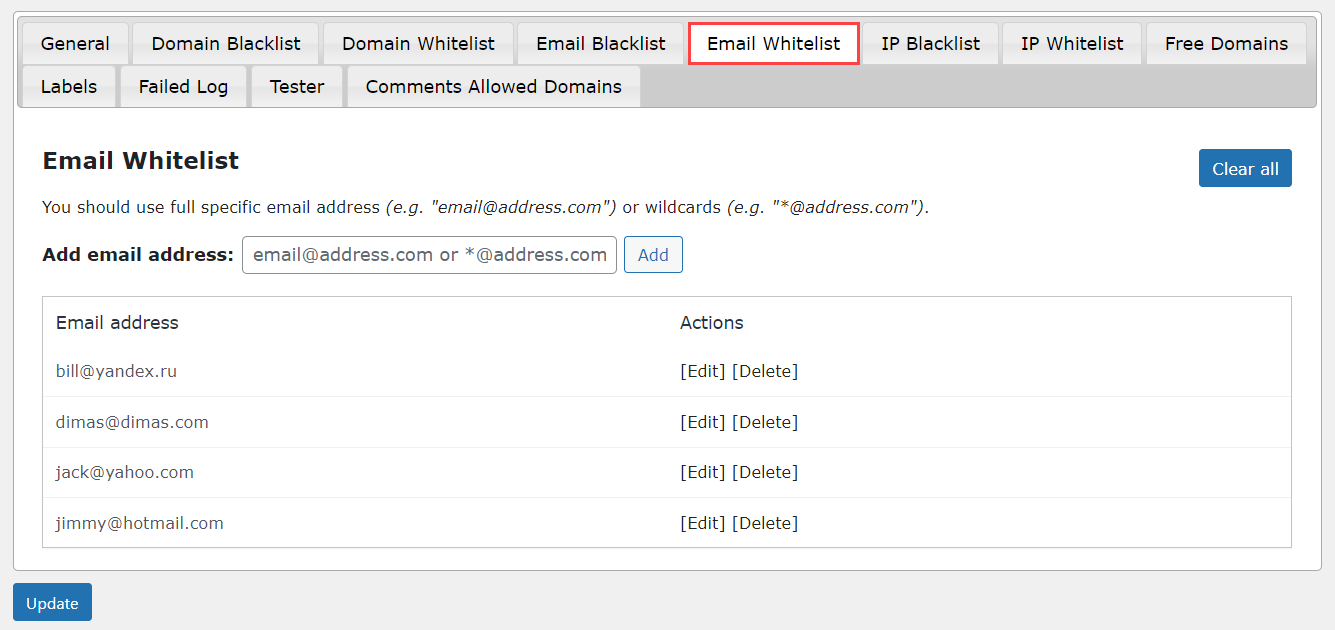
Email Whitelist
Next tab is Email Whitelist.
Whitelisted emails are addresses that have been flagged, but are still allowed to register an email on your site. It can also include emails from domains that have been blocked by any of the plugin tools. So any email which appears on this list will always be able to register.
Add a new email to the whitelist by typing it in the provided box. Adding an email to the whitelist will allow users to register with even if it has already been tagged as spam in the blacklist emails list.
IP Blacklist
Next tab is IP Blacklist.
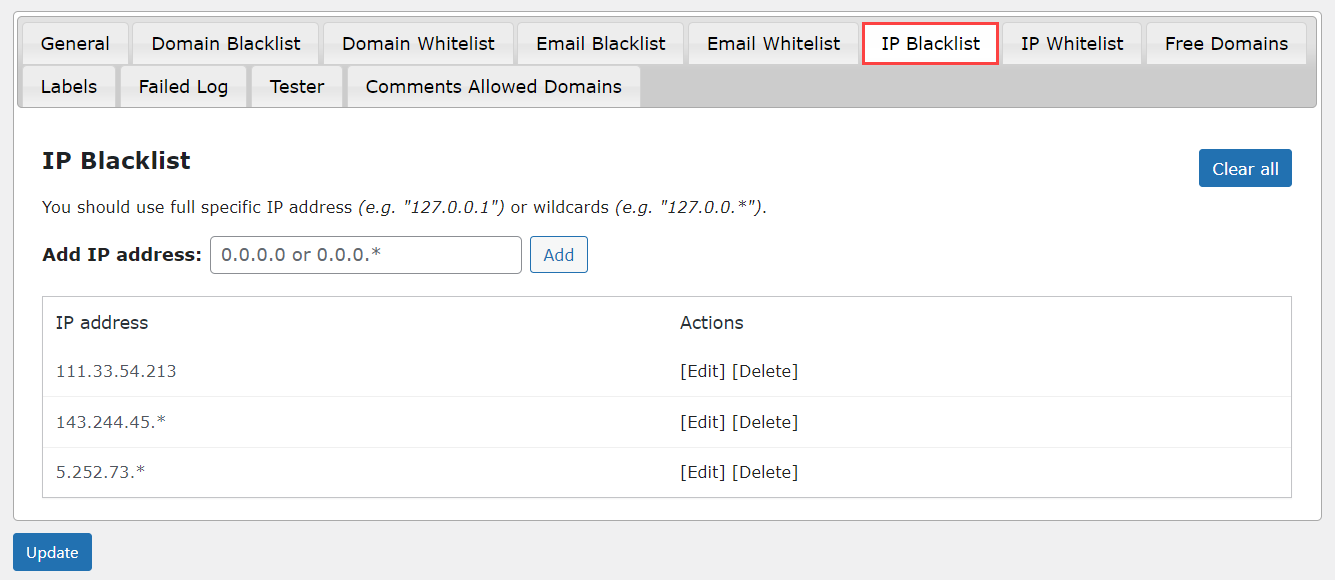
The blacklist contains a list of IPs that will be blocked from registering on your site. Add a new IP by typing in the box provided.
The Blacklist allows you to enter IP addresses using wildcards, for example - "127.0.0.*", it means that any IP which starts with "127.0.0." will be blocked, e.g. "127.0.0.1", "127.0.0.2", "127.0.0.3", etc.
Anyone with an IP matching the IP you enter on the blacklist will be unable to register for your site.
IP Whitelist
Next tab is IP Whitelist.
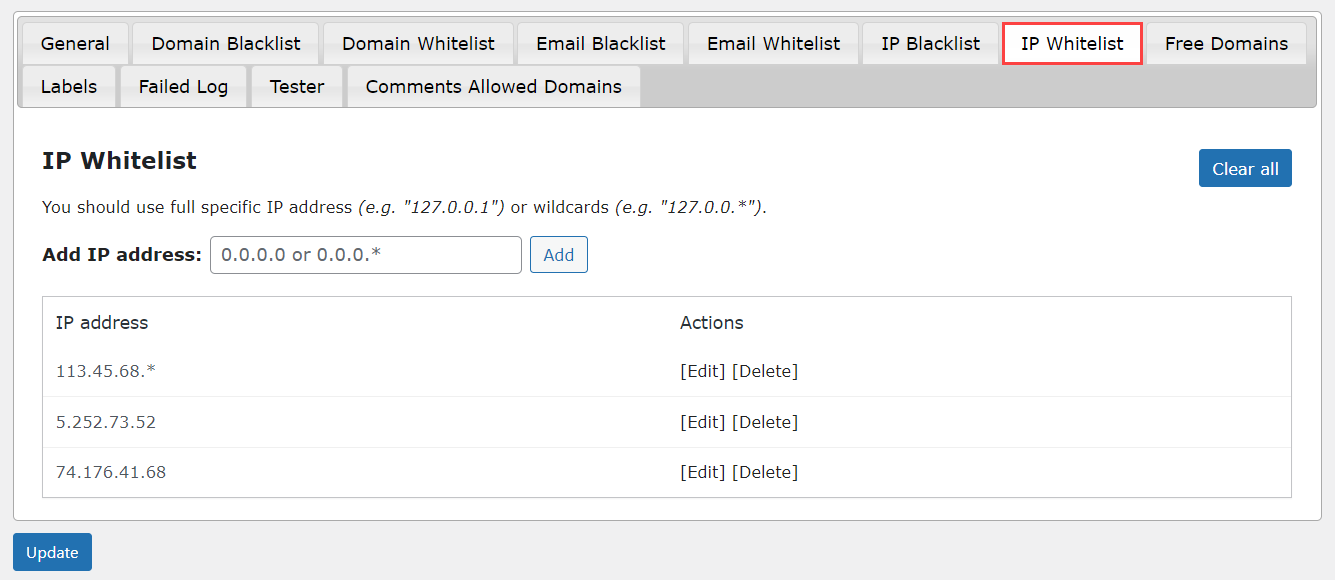
Whitelisted IPs are IPs that are allowed to register on your site.
Add a new IP to the whitelist by typing it in the provided box. Adding an IP to the whitelist will allow users to register with even if it has already been tagged in the blacklist.
The Whitelist allows you to enter IP addresses using wildcards, for example - "127.0.0.*", it means that any IP which starts with "127.0.0." will not be blocked, e.g. "127.0.0.1", "127.0.0.2", "127.0.0.3", etc.
Free Domains
Next tab is Free Domains.
Here you will find the list of free domains that have already been identified as spam by the website SpamAssassin, and added to the blacklist.
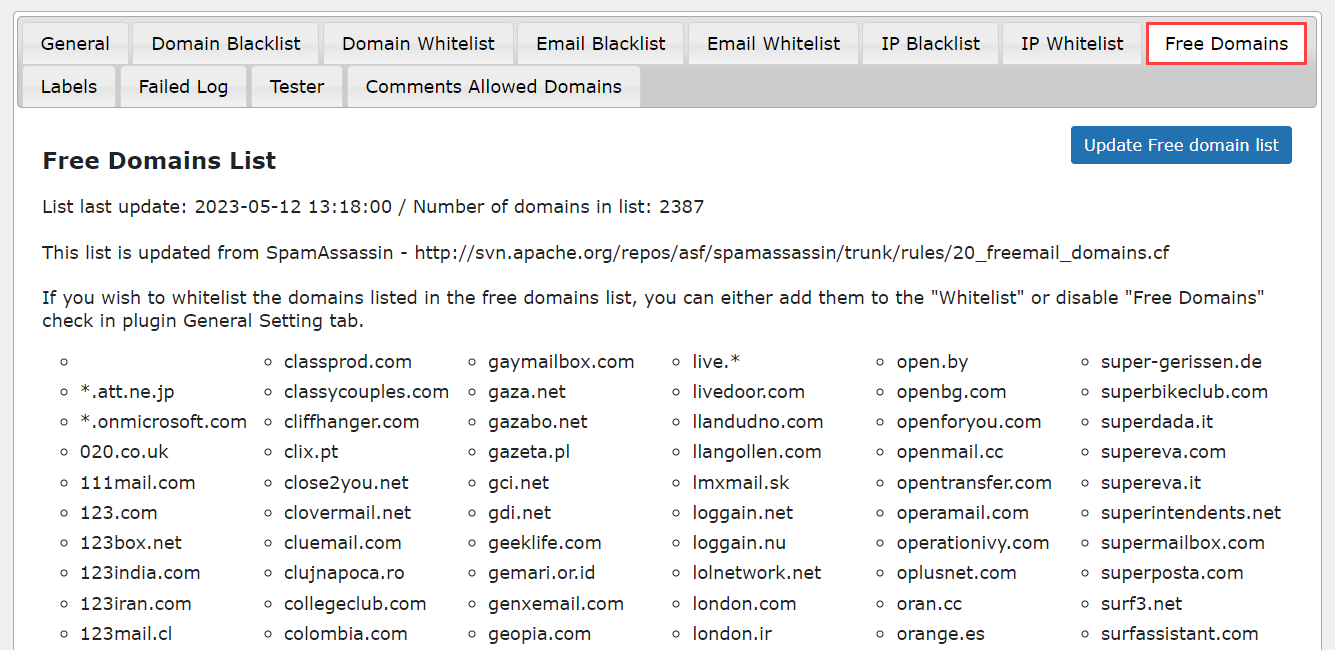
You have the option of updating the list by clicking the blue update button in the upper right hand corner of the box. Updating the list will fetch the latest list and update the plugin information on your WordPress database.
Labels
Next tab is Labels.
This tab controls the messages that will appear on the screen when a user tries to register and gets blocked. These messages will appear if the domain/email/IP is blacklisted, listed on the Free Domain list, or not included in the whitelist.
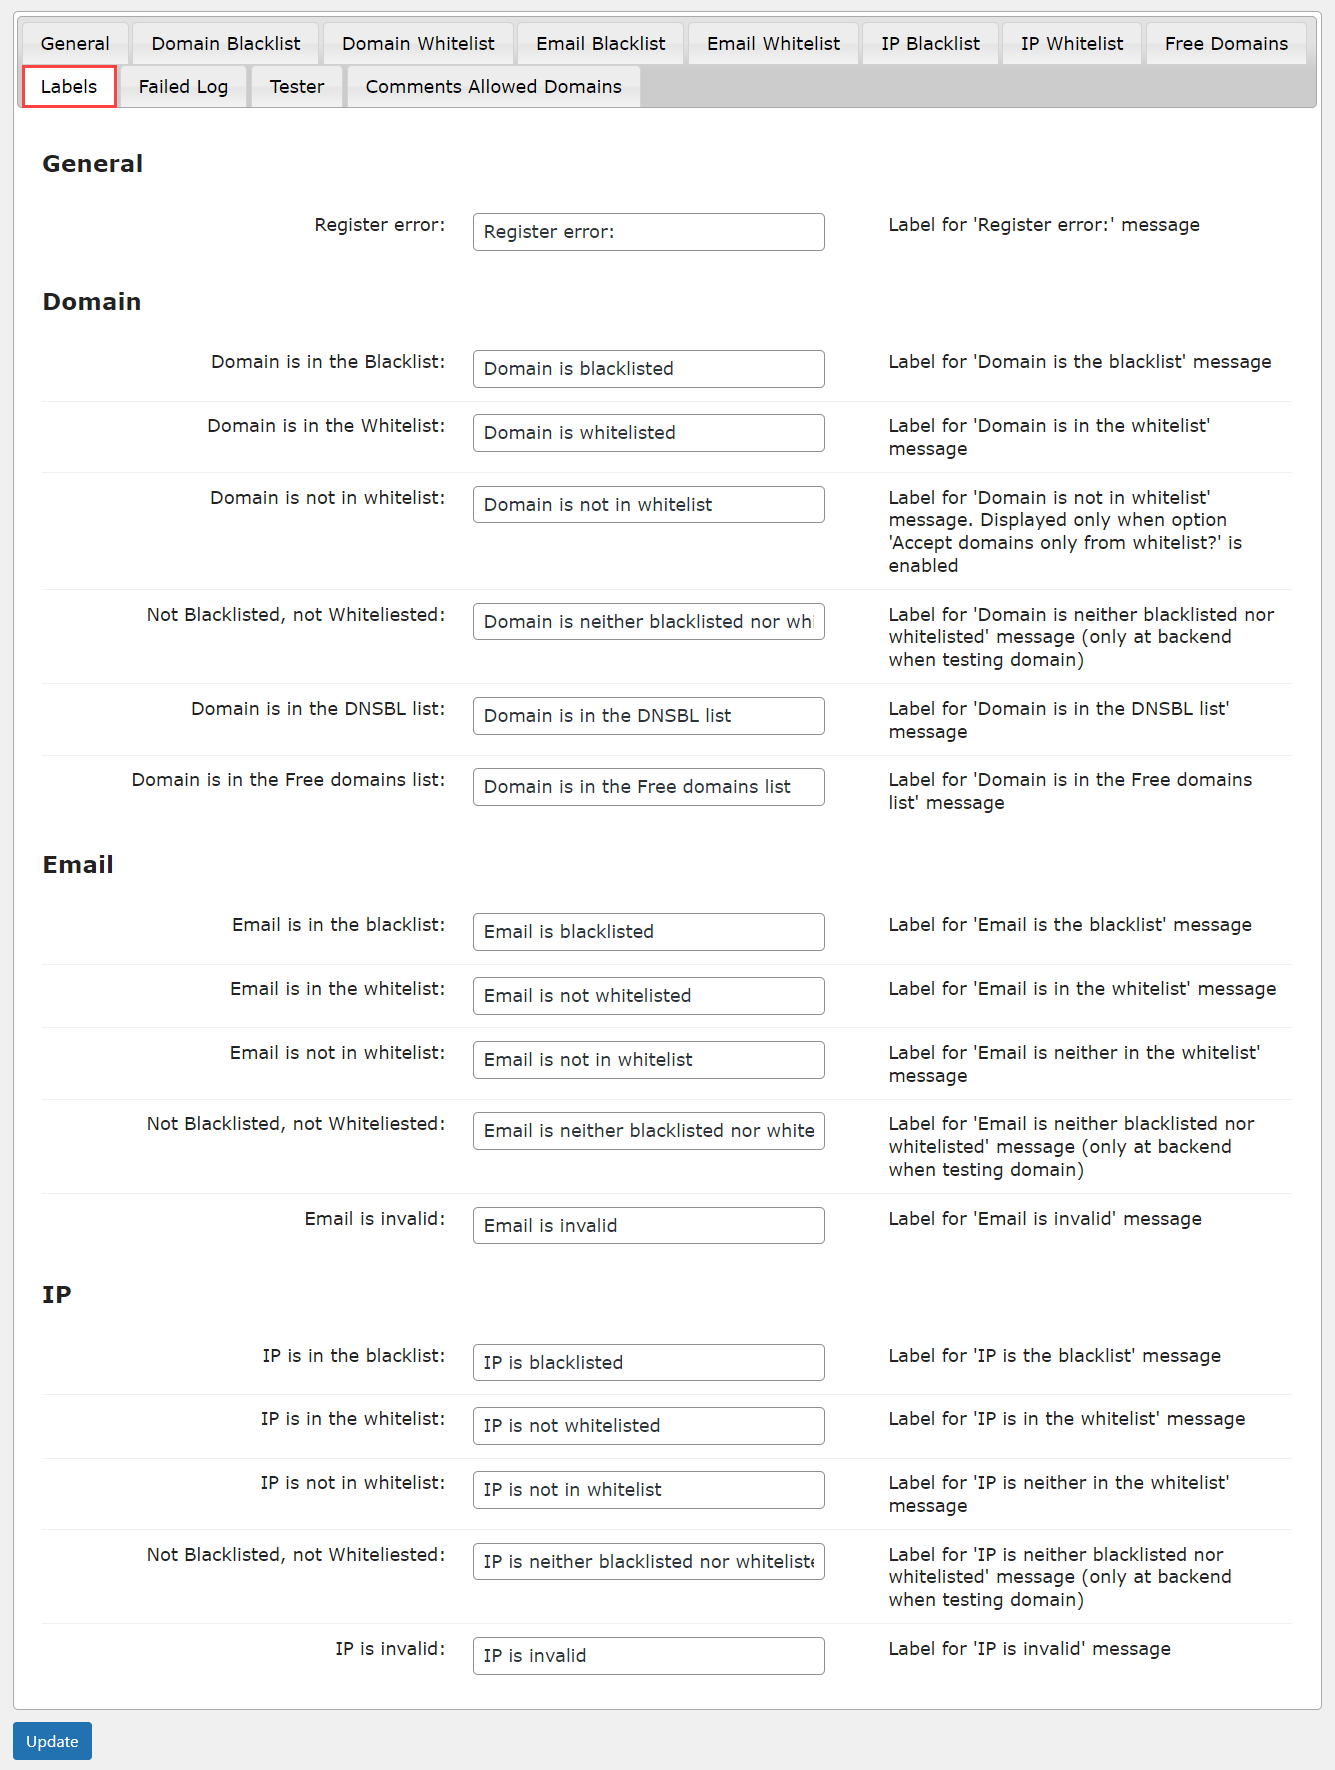
Change the text in each box to alter the message that appears when a user is unable to register on your site. The same label will also show once you use the Tester.
Failed Log
Next tab is Failed Log.
This box contains the list of failed registration attempts including the date, time, email, reason for the failure and the IP address used.
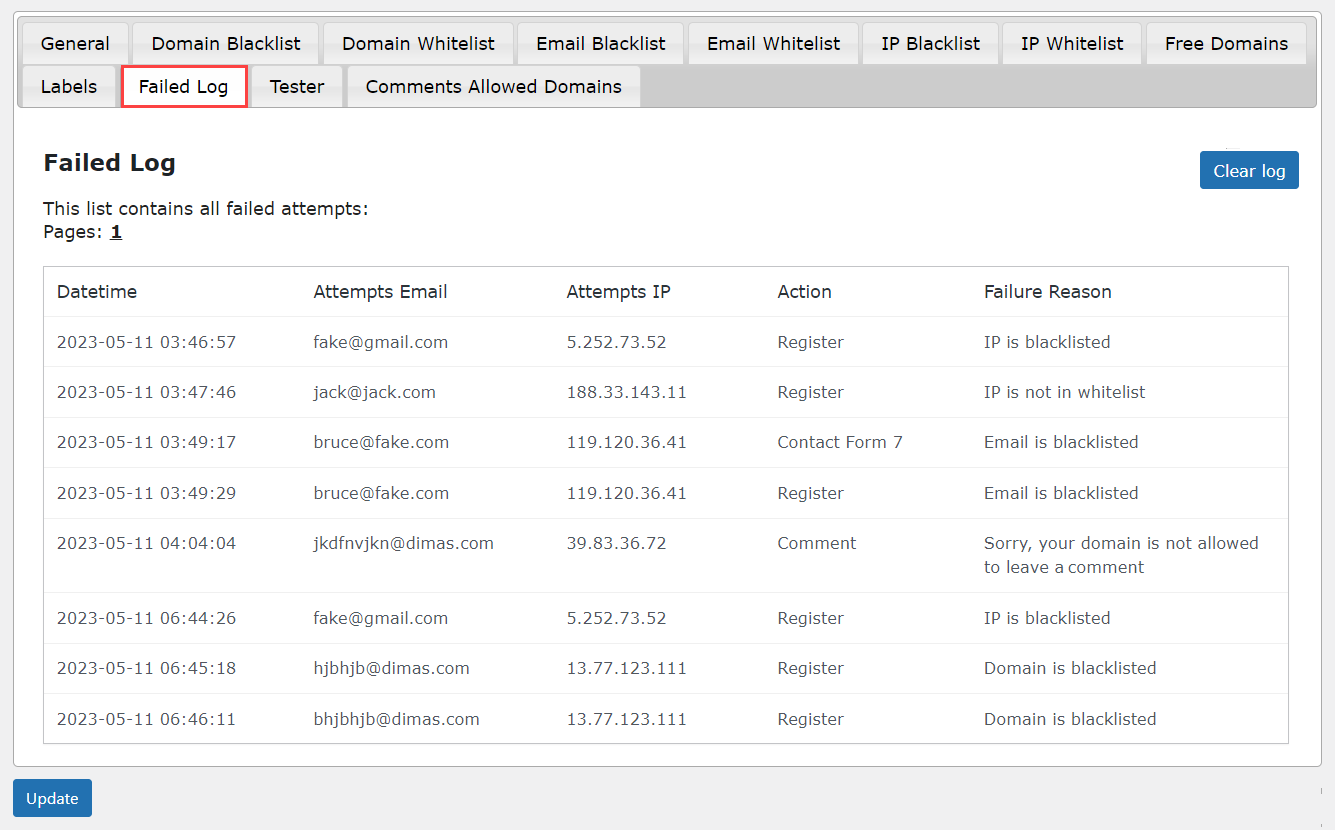
You can clear the log by clicking on the Clear Log button. Once you clear all log data will be erased from the Database.
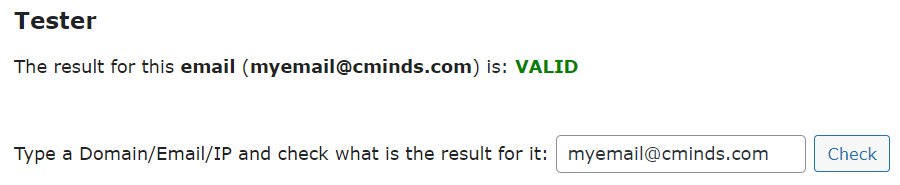
Tester
Next tab is Tester.
In the Tester box, type in a domain/email/IP and click check and see if the domain/email/IP will be accepted or not.
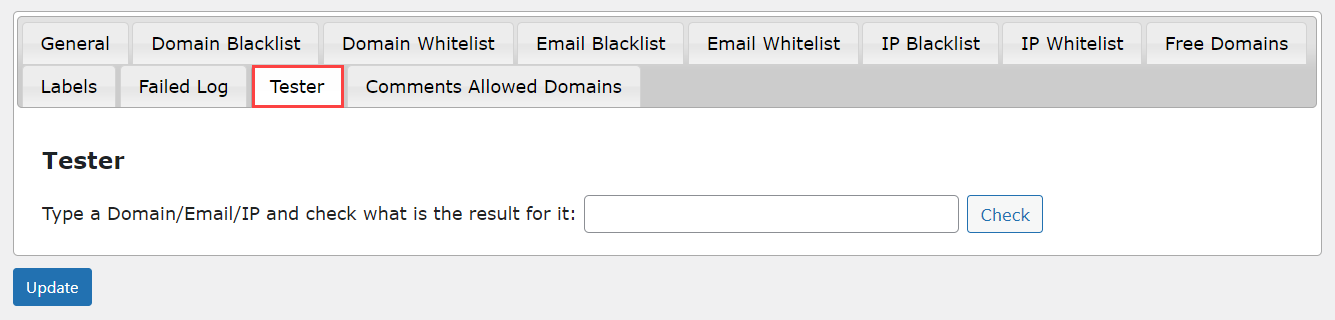
If the domain/email/IP is blacklisted, the word INVALID will appear and the search results will say that the domain/email/IP and show the reason.
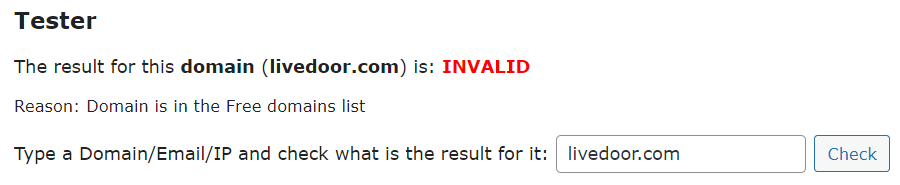
If the domain/email/IP is whitelisted/not-blacklisted, the word VALID will appear.
End Result
Using this simple instruction you can avoids spam with viruses and malware, disposable emails, and unwanted users.
Use Case Front-End
 |
More information about the WordPress Email Registration Blacklist plugin Other WordPress products can be found at CreativeMinds WordPress Store |
 |
Let us know how we can Improve this Product Documentation Page To open a Support Ticket visit our support center |