WordPress Footnotes (CMF) - Use Case - How to Add a List of Sources to Your Article
Use Case - How to Add a List of Sources to Your Article
Note: This guide requires:
- WordPress Footnotes - This document uses version 2.1.6.
Introduction
WordPress Footnotes is a plugin that allows users to define some words/phrases in the post/page content by adding a small link near the given word/phrase and the description at the end of the document.
Footnotes are often found in books and papers which use rare/old/specialist terms. They are a useful way to further explain these concepts in a later moment or to cite sources.
Use Case Front-End
Adding footnote links and a list of sources to the article:
Using footnote links in action:

Use Case Assumptions
In this example we will consider how to add a list of sources to the article on your website.
We assume that you have already bought the plugin, but not installed it yet.
It follows:
- Installing the plugin
- Creating footnotes
- Importing footnotes using CSV
- Adding footnotes to the content
- Display and appearance settings
- End result
Installing the Plugin
The process is the same for all CM plugins and add-ons.

- Download the plugin from your customer dashboard.
- Log in to WordPress and navigate to the WordPress Admin → Plugins settings.
- Click on Add New.
- Activate it and add the license.
Learn more: Getting Started - Plugin Overview
Creating Footnotes
Navigate to the post or page where you want to add a list of sources.
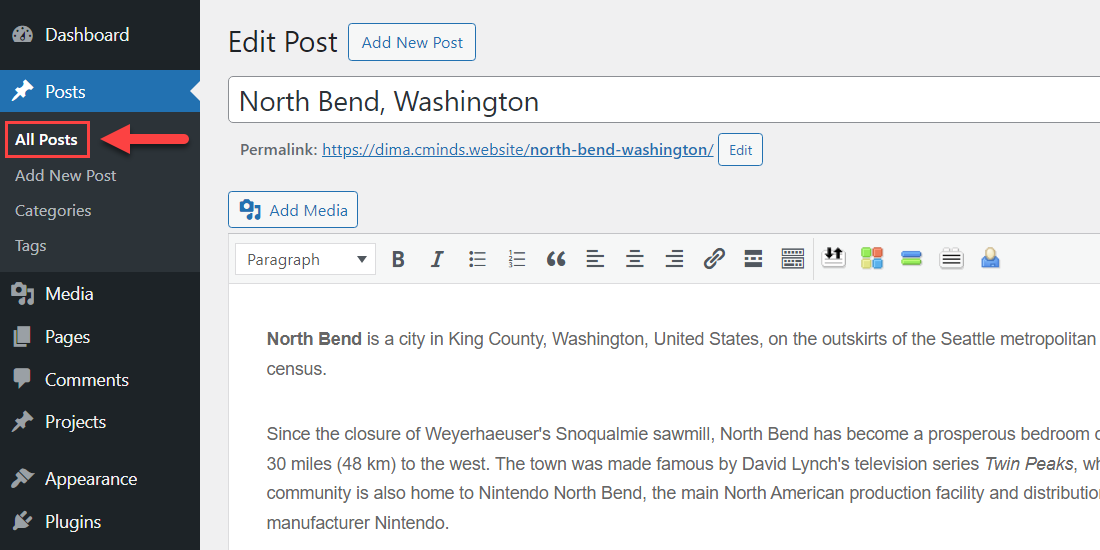
Scroll down and find the box called CM Footnotes - Definitions. Here you can create a list of sources for the current article. The options are:
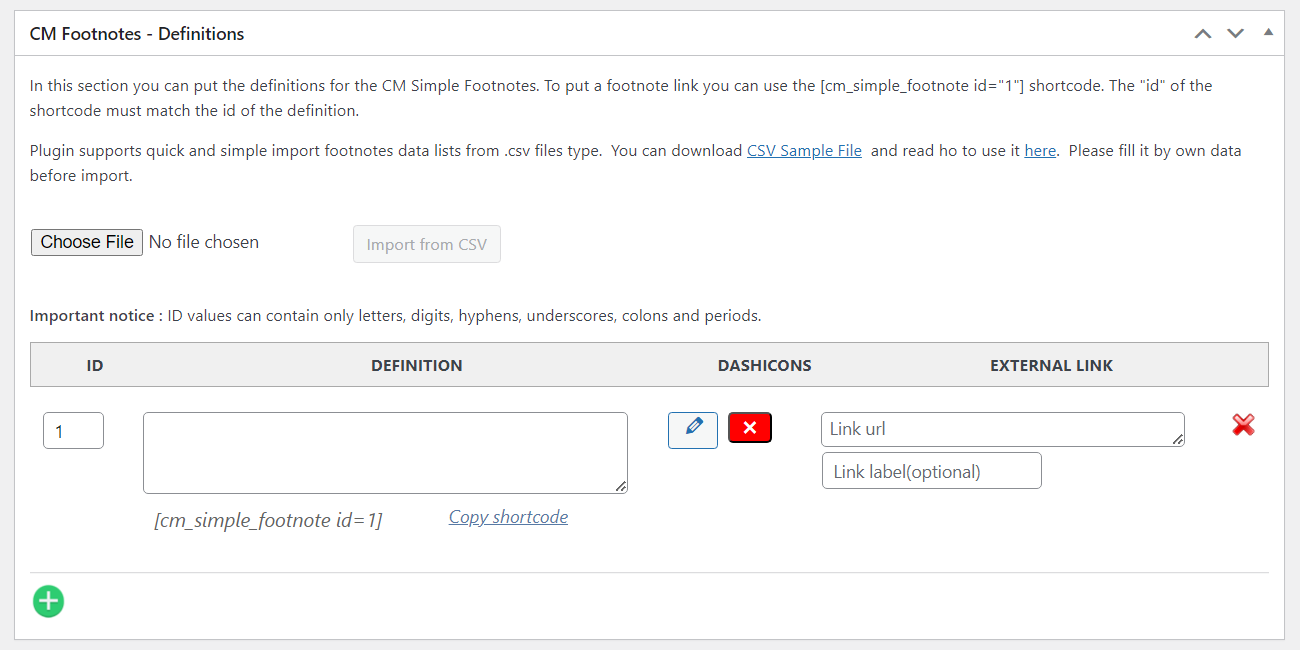
- ID - Here is defined the ID that will be used in the shortcode. You can either use IDs that are created automatically (1, 2, 3...), or you can write here any other ID - it can be for instance letters or special characters.
- Definition - This field should contain the definition/explanation, which the link created by the shortcode will refer to.
- Dashicons - You can define an icon for every definition using WordPress icon's set. It will be displayed in the bottom of the page in the footnote list.
- External Link
- Link URL - This field is for adding an external link that will be included to the definition.
- Link label (optional) - Define the label for the added URL.
To delete a definition, click the red "x" button, and to add a new definition, click the green "+" button.
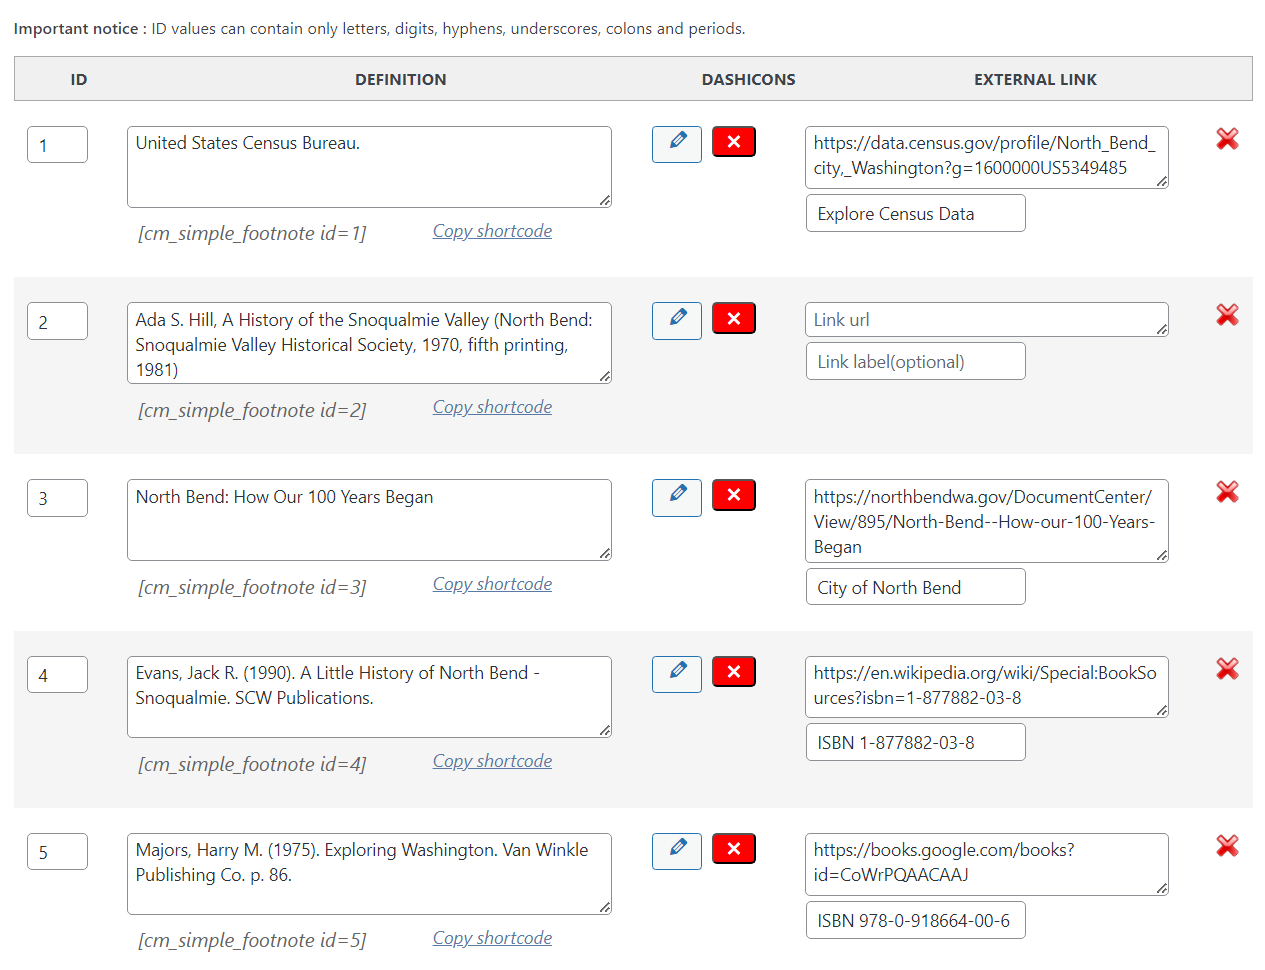
Let's add a few sources by defining their IDs, some descriptions and links with labels:
Importing Footnotes Using CSV
There's an alternative way to create a list of sources in the post or page. You can import them using CSV file.
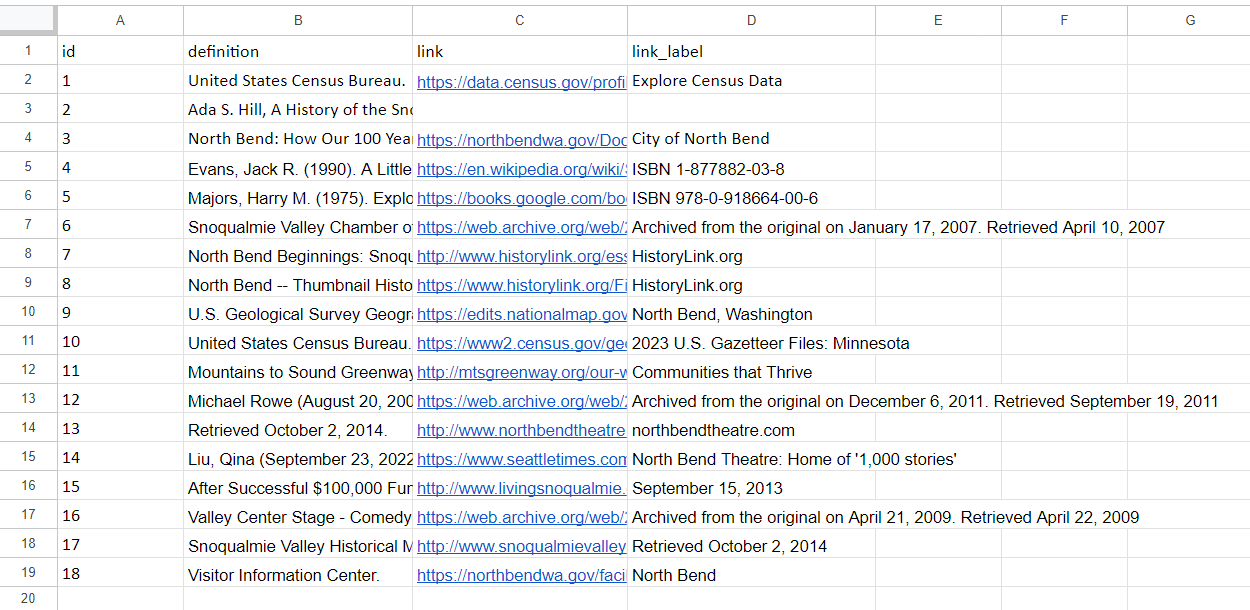
The CSV must contain 4 columns with first line as a header. The columns are:
- id
- definition
- link
- link_label
You can download a CSV sample file or see the example below:
In the box CM Footnotes - Definitions click the button Choose File and pick the needed CSV file (or just drag-and-drop it), then click Import from CSV.
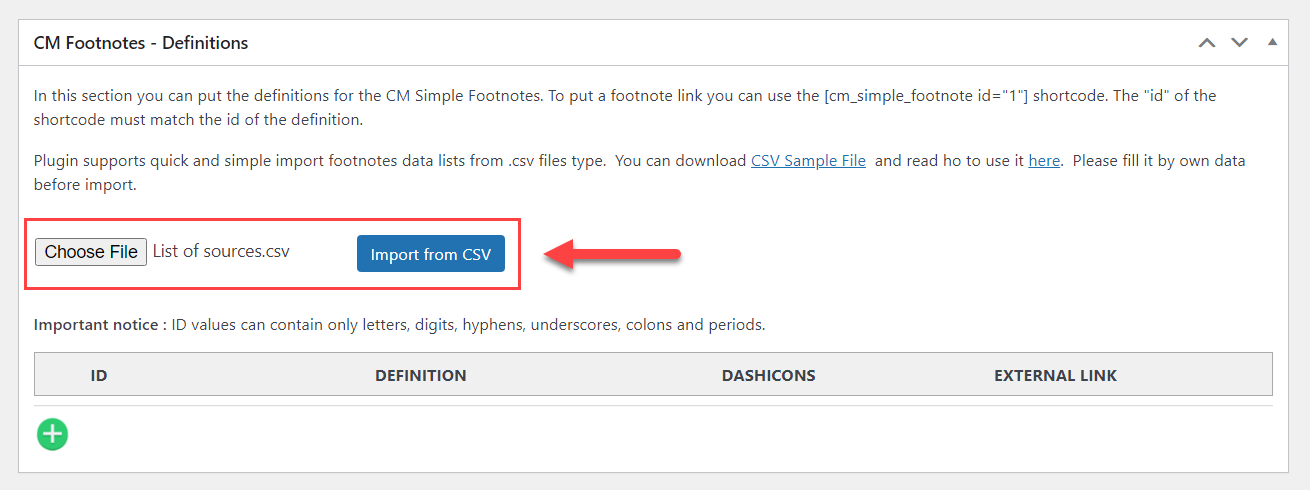
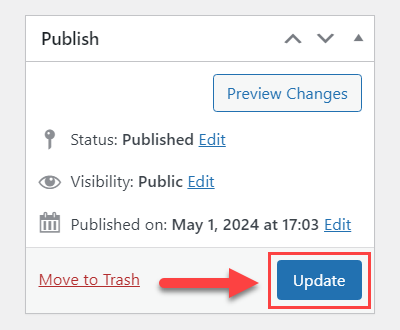
The list of definitions/sources will be added. Don't forget to save the changes after adding them.
TIP
Learn more about importing definitions from CSV file:
Adding Footnotes to the Content
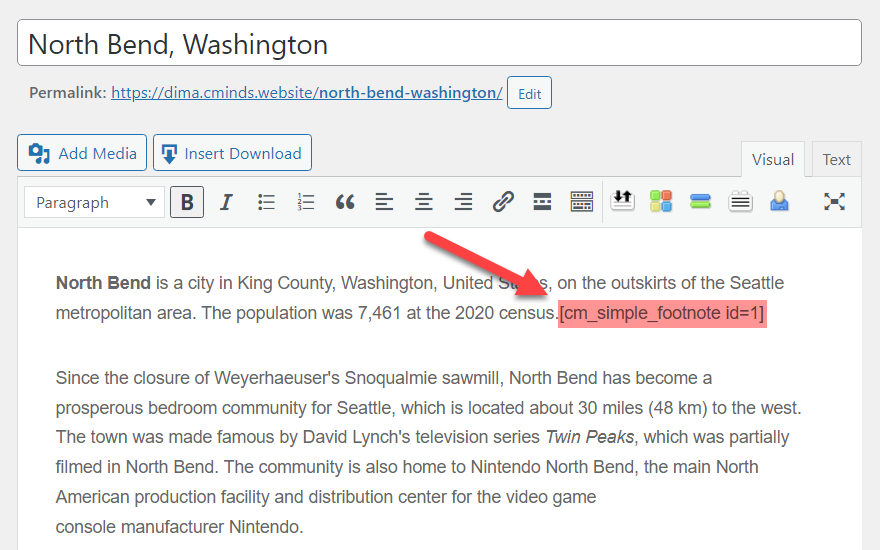
Adding footnotes to the content is done using shortcodes.
The shortcode is [cm_simple_footnote id=xx], where xx is ID of the footnote definition.
Under each footnote definition a relevant shortcode is displayed, which you can easily copy by clicking Copy shortcode.
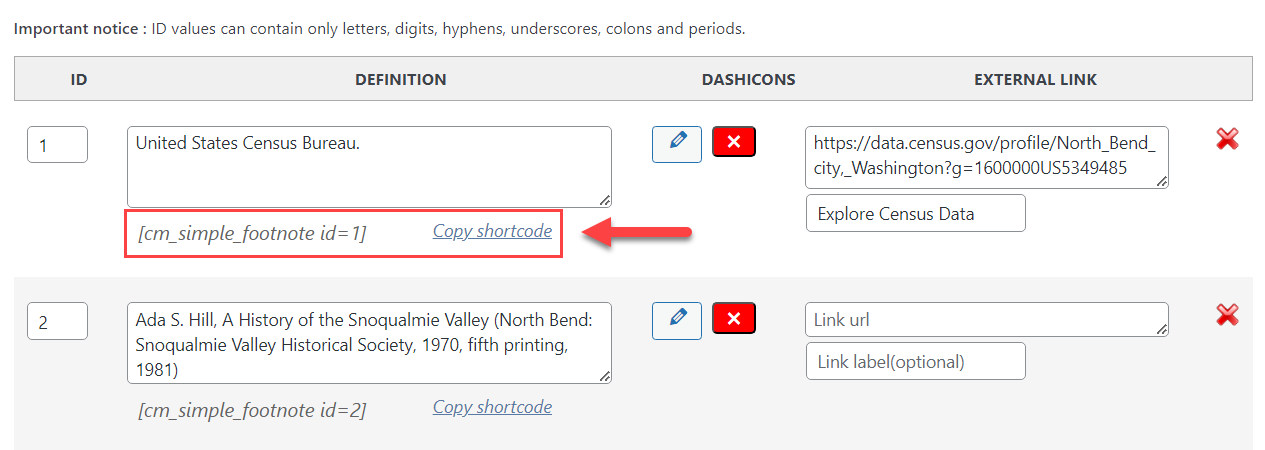
You need to paste the copied shortcode to the place in the content where you want to show a relevant footnote link.
After adding all needed shortcodes, don't forget to save the changes.
Now let's see how it looks like on the front-end.
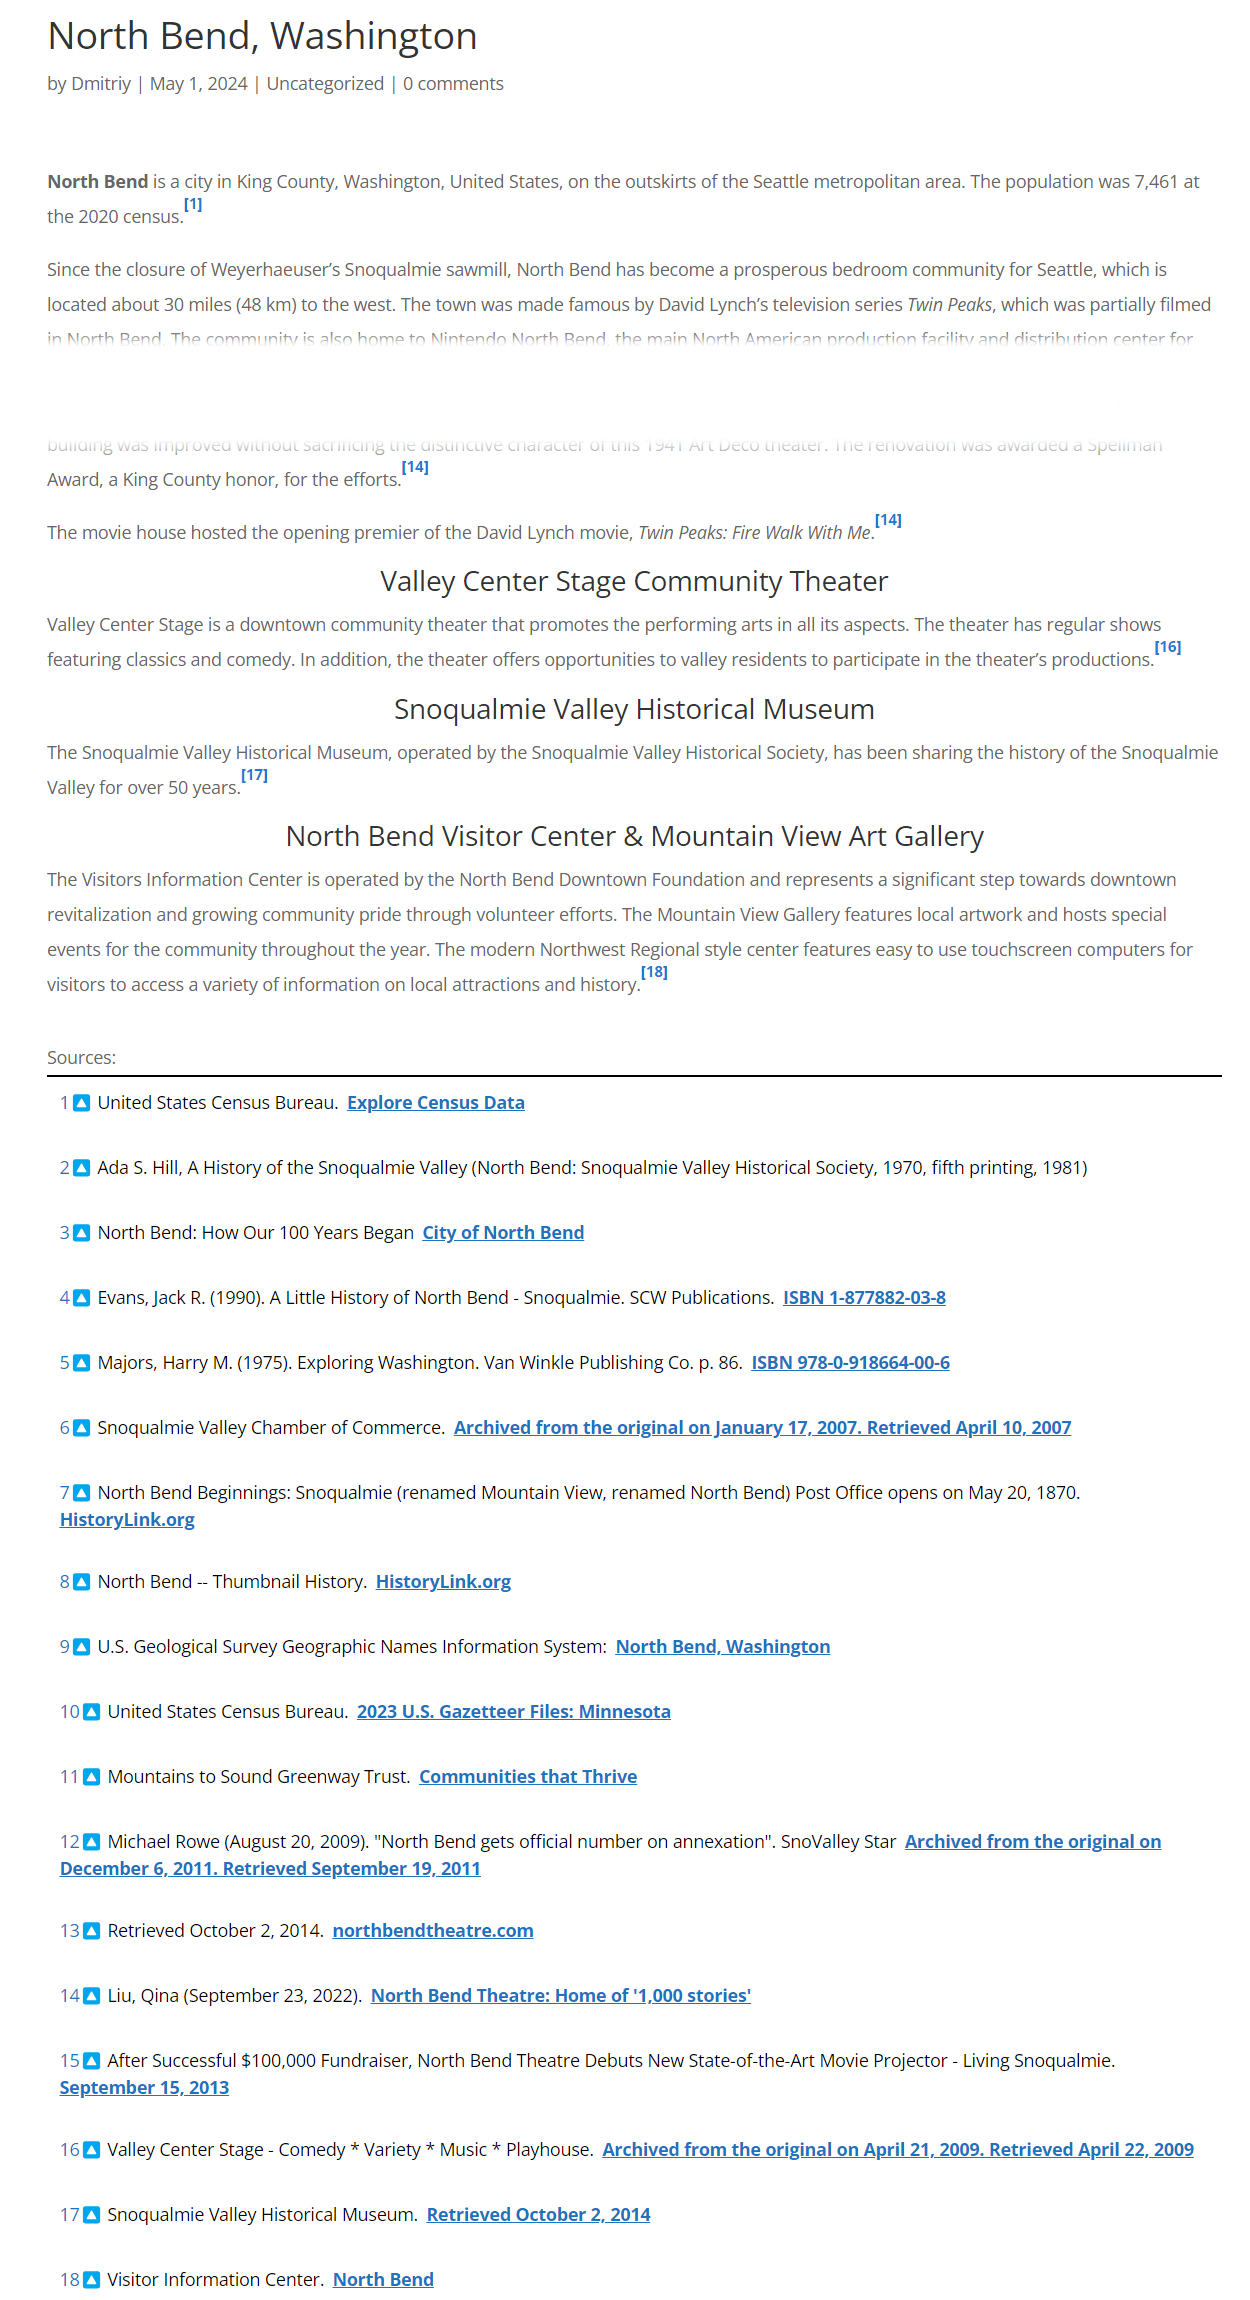
Front-End Example
Currently, we can see a footnote links and a list of sources below the article. But currently it looks quite raw. So we need to change the appearance settings to make it look better and more readable.
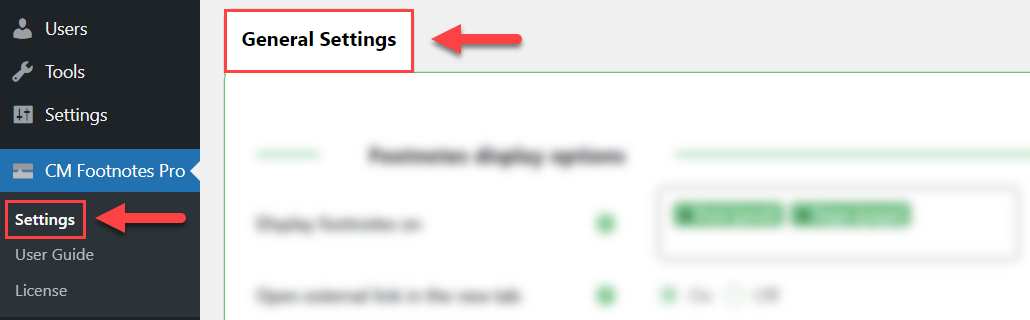
Display and Appearance Settings
To find the plugin settings, navigate to Admin Dashboard → CM Footnotes Pro → Settings → General Settings tab.
First section is Footnotes display options. Here we are going to edit the following settings:
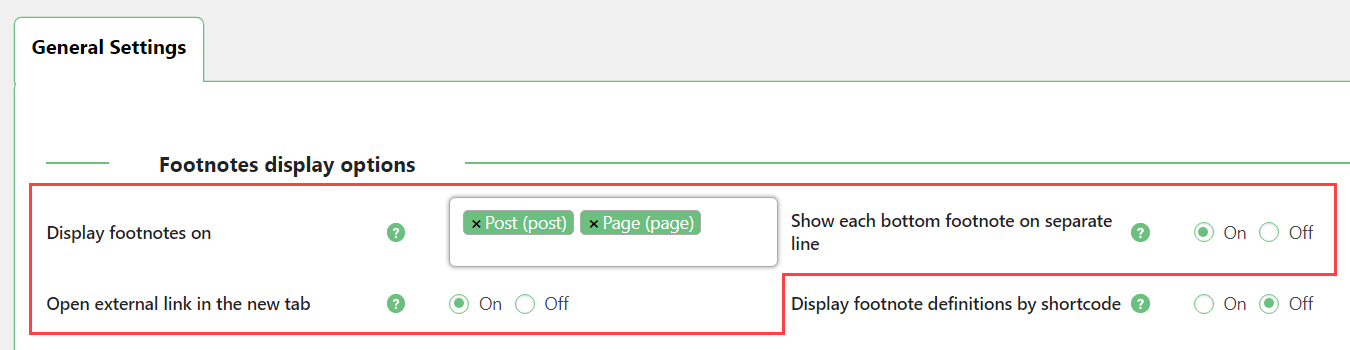
- Display footnotes on - Choose post types where you want to allow displaying footnotes.
- Show each bottom footnote on separate line - Enable it if you want to display each bottom footnote on a separate line. If disabled, the bottom footnote definitions will be displayed in 3 columns.
- Open external link in the new tab - If enabled, when clicking on the link in the footnote definition, it will be opened in a the new tab.
Next section is Footnotes content links styling. Here we define the style of the footnote links which are displayed within the content. We've changed the following settings:
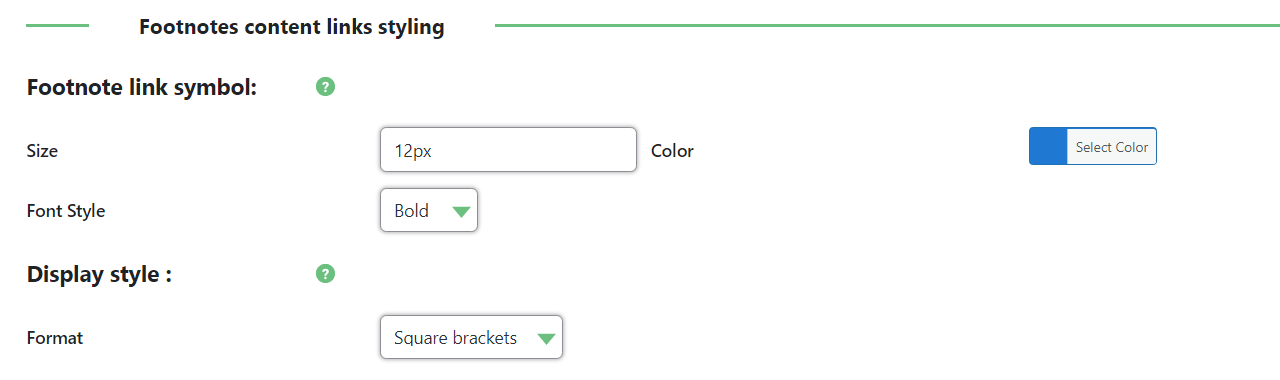
- Footnote link symbol:
- Size - We set it 12px.
- Color - We set it to blue.
- Font Style - We set it to Bold.
- Display style:
- Format - There are a few styles, but we kept the default Square brackets.
One more section is Footnotes bottom styling. We have changed the following settings:

- Footnote link anchor style:
- Size - We set it 14px.
- Color - We set it to blue.
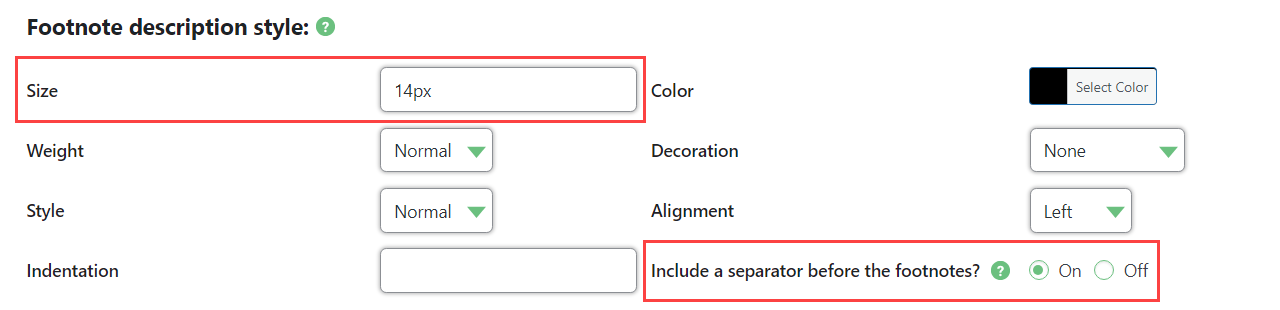
- Footnote description style - here we changed only 2 options, the rest are kept default.
- Size - We set it 14px.
- Include a separator before the footnotes - It adds a separator line between the article and a list of sources. Settings for customizing a separator line will be below.

- Backlink style - Here we changed only 1 option:
- Symbol - It allows you to define a custom backlink symbol, which brings the user from the bottom definition back to the place where he clicked on the footnote link. It can be placed either before or after the definition, we kept it standard, before the definition. And the color option doesn't affect on the symbol which we have chosen.

- Separator style - Here we changed 3 options:
- Title - Added a title for a section with bottom footnotes.
- Line width - Changed the line width to 100%.
- Line thickness - Change it to Medium.

- External link style:
- Size - We set it 14px.
- Color - We set it to blue.
- Weight - We set it to Bold.
- Decoration - We set it to Underline.
Configuration is done, click the button Save Changes.

TIP
There are some more settings which you can change. Learn more about them in this guide:
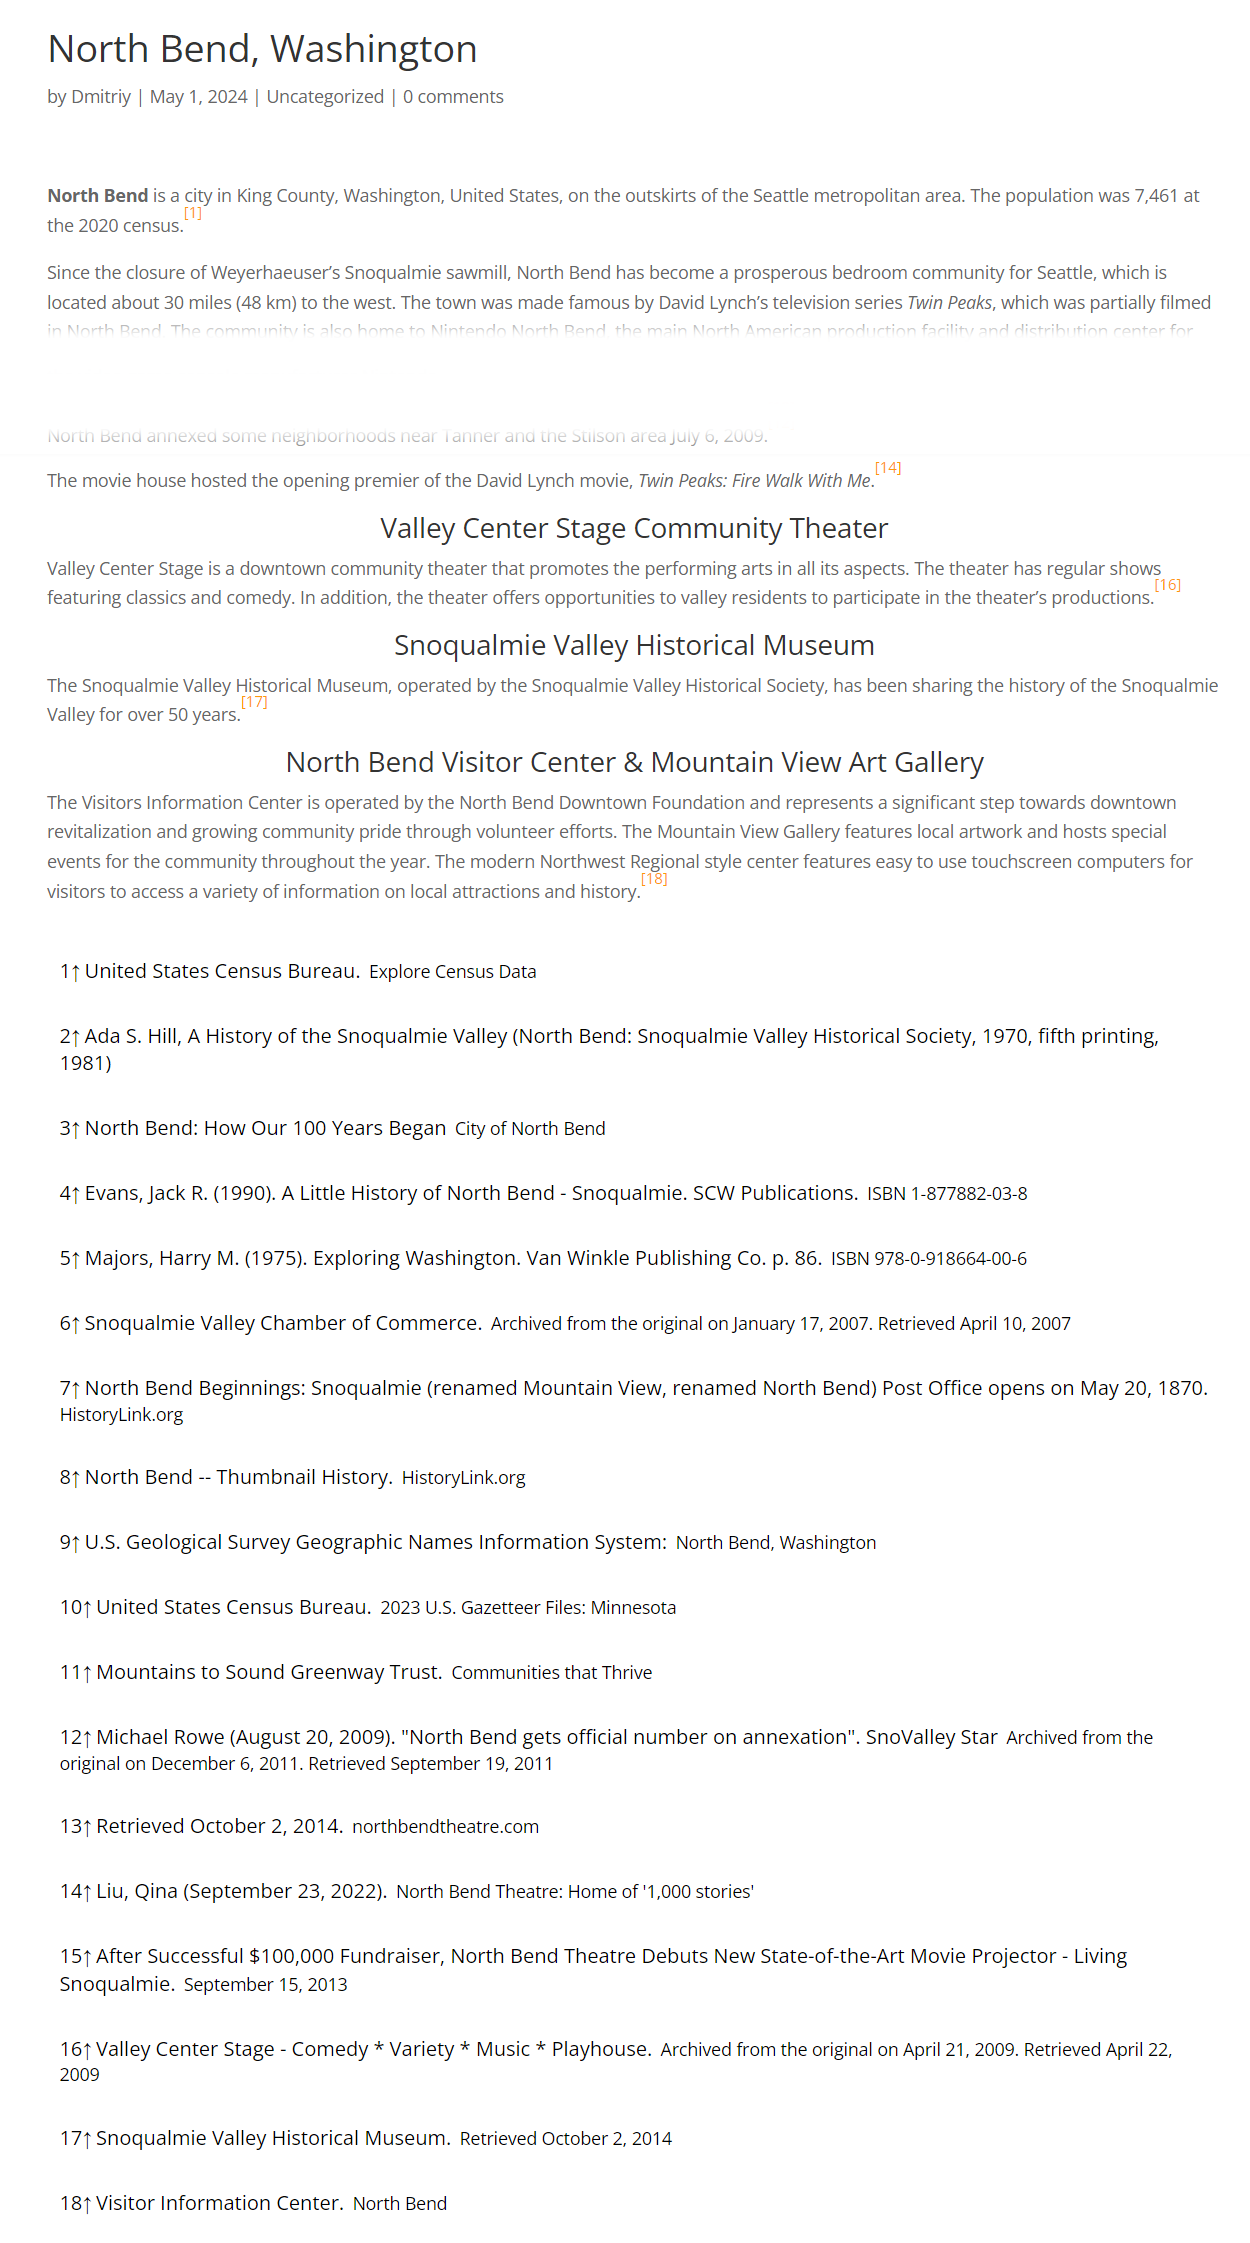
Front-End Example
Now let's check how our footnotes look now.
The footnotes links are seen much better. The bottom section with sources now is separated from the article and has a title. External links are highlighted properly.
Now let's see how it works in action.
When the user clicks on the footnote link, the page is automatically scrolled down to the footnote definition at the bottom of the page. Clicking on the backlink brings the user back to the place where he was reading the article and clicked the footnote link. It is very convenient when there are a few footnote links which are refer to the same footnote definition.
End Result
Following instructions found in the plugin and guides, you should be able to manage footnotes on articles posted on your site.
Use Case Front-End
Adding footnote links and a list of sources to the article:
Using footnote links in action:
 |
More information about the WordPress Footnotes Plugin Other WordPress products can be found at CreativeMinds WordPress Store |
 |
Let us know how we can Improve this Product Documentation Page To open a Support Ticket visit our support center |