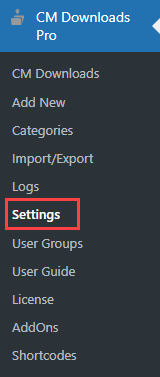
WordPress File Manager Plugin (CMDM) - Downloads - How To Setup an Expiration Date For a Download
How To Setup an Expiration Date For a Download
Video Tutorial
The WordPress File Manager plugin allows you to setup the expiration date for each download. It means that the download will not be available for downloading after specific date.
The expiration date can be configured in two ways:
- The admin can setup the amount of days and the download will be automatically deleted after specified period of time after first download.
- The author of the download can decide on his own which expiration date to setup for the download.
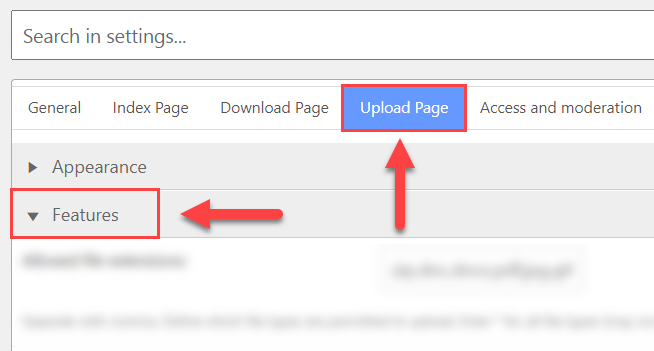
To configure it, navigate to Admin Dashboard → CM Downloads Pro → Settings.
The crucial options that we need are located under the tab Upload Page, in the section Features.
So, let's consider two methods of setting up the expiration date.
Default Expiration Period
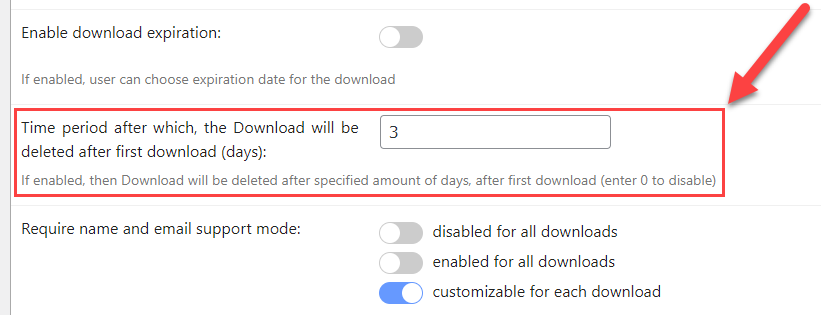
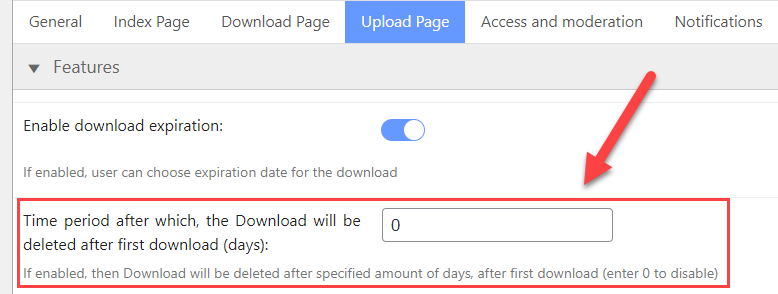
Find the option Time period after which, the Download will be deleted after first download (days). To enable it, you need to set the amount of days which should pass after first download to delete this download. Let's set it for 3 days, for example.
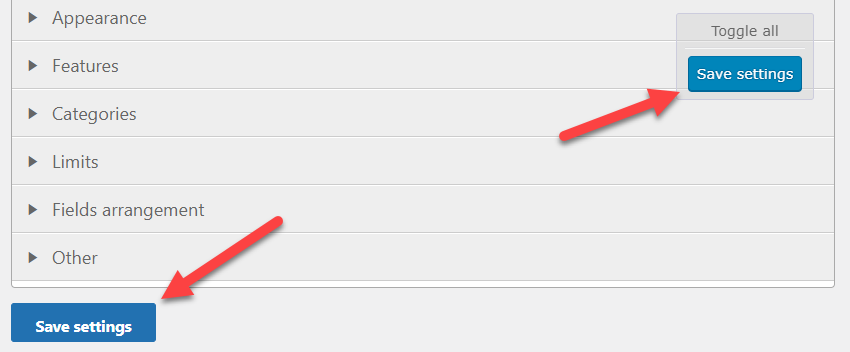
Then click the button Save Settings.
Result On the Front-end
When the download is created, and somebody downloads it for the first time, there will appear a field that shows the expiration date. In our case, it will be the date 3 days after the first download.

Customizable Expiration Date
Another way, you can let the download author setup the specific expiration date for his download. In the same place in plugin settings, find and turn on the option Enable download expiration.
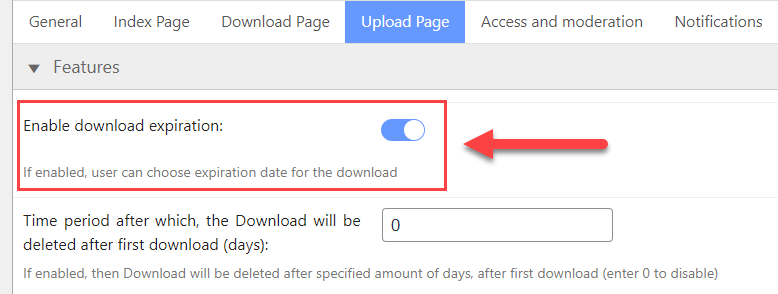
Have a note that the option Time period after which, the Download will be deleted after first download (days) must be disabled - set 0 to disable it.
Now click the button Save Settings.
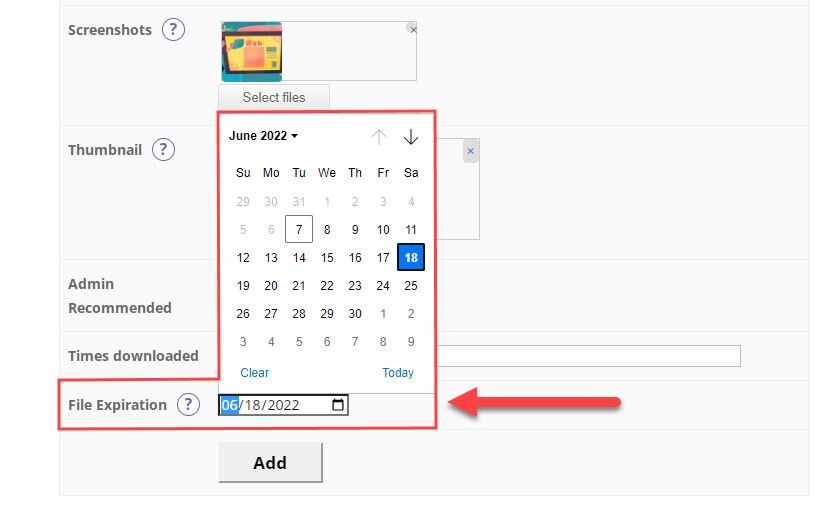
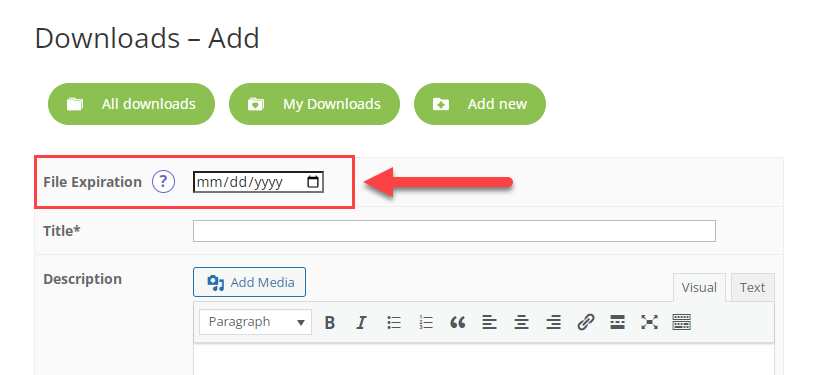
After this, the field for setting up the expiration date will appear in the upload form on the front-end. The download author will be able to set the specific expiration date for his download.
TIP
Learn more about the process of creating a download in this use case guide: WordPress File Manager Plugin (CMDM) - Use Case - Creating Library of Content From Scratch
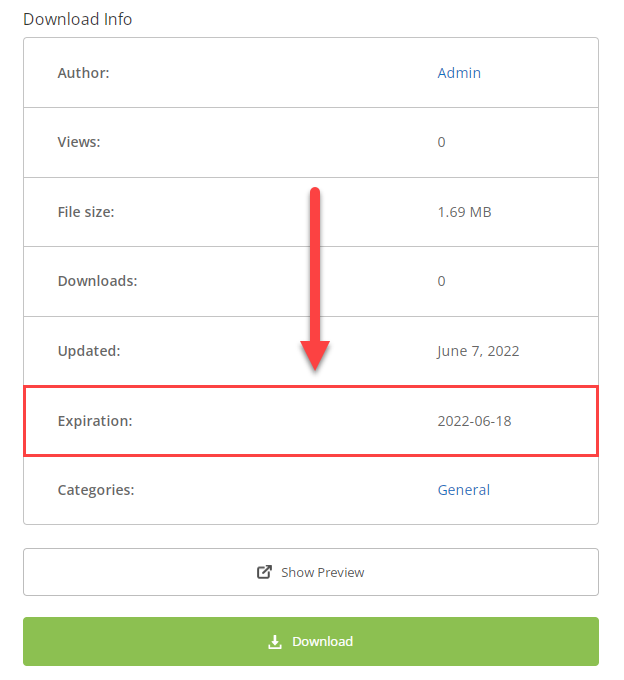
When the download is created, the expiration date will be visible on the download page in the field Expiration.
TIP
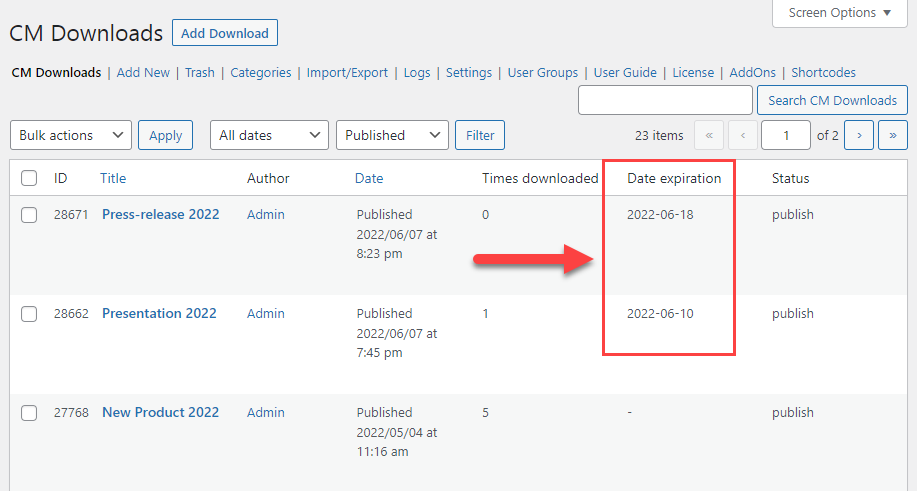
You can monitor expiration dates in the table with the list of all downloads in the column Date expiration.
Extra Settings
The WordPress File Manager plugin has a few more additional settings for configuring the expiration date.
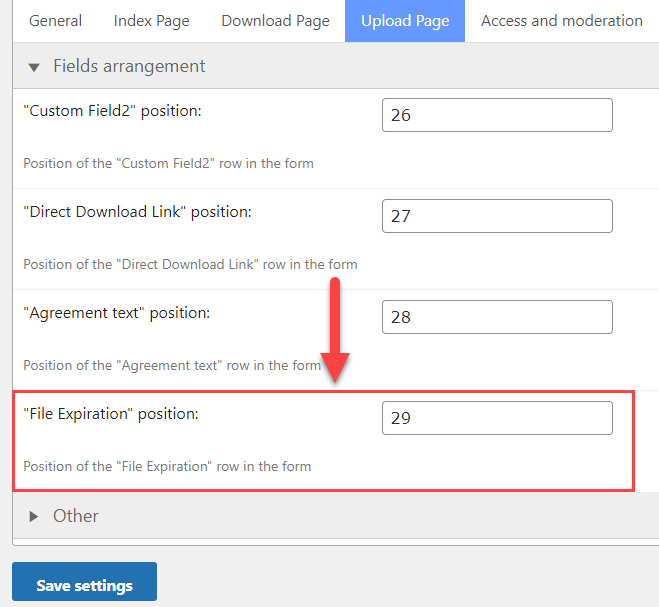
Fields Order In the Upload Page
You can change the order, how the fields are placed in the upload form. It can be configured in plugin settings under the tab Upload Page, in the section Fields Arrangement. By default, the field for expiration date is placed at the end of the form, and it has an order number "29". For example, if you want to place it at the beginning of the upload form, you can change its value to "1". And the field that already has this value - change to another one.
Example
Email Notification
It is possible to send an email notification in the case, when the download should expire after passing some days. The options for this email notification can be found under the tab Notifications, in the section Other. The email will be sent only to the user who downloaded the file first (except the download author).
The options are:
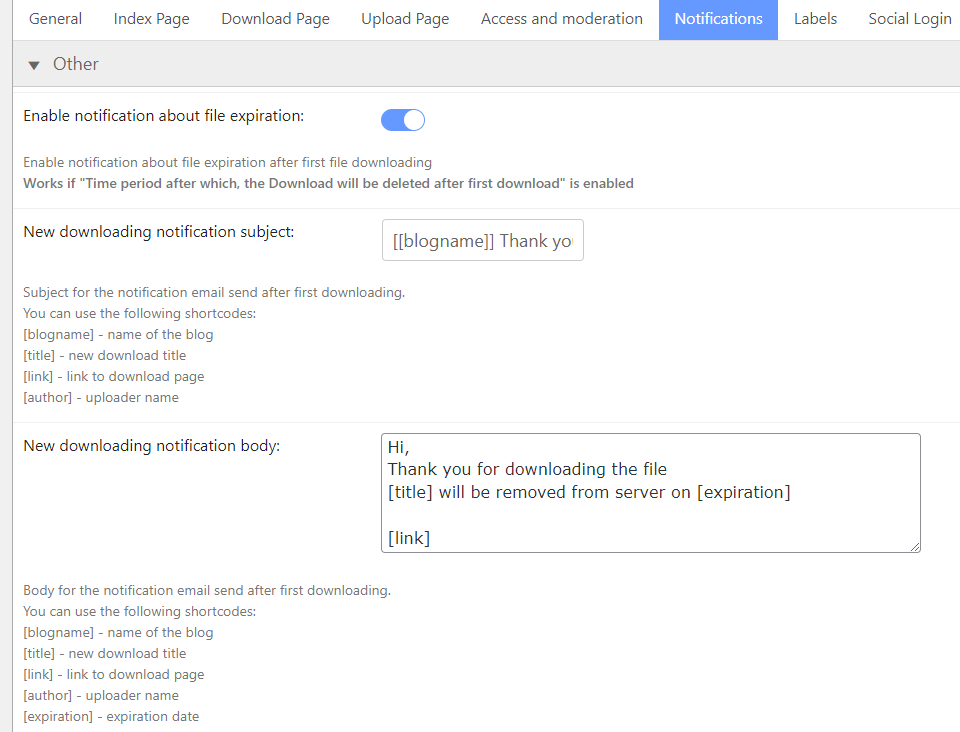
- Enable notification about file expiration - Turn on this option to send the email notification when the file is downloaded for the first time and the expiration date is set up. This email notification works only if the option Time period after which, the Download will be deleted after first download (days) is enabled.
- New downloading notification subject - Edit the subject of the email. You can use the following shortcodes for adding dynamic content:
[blogname]- Name of the blog[title]- Title of the download[link]- Link to the download page[author]- Name of the download author
- New downloading notification body - Edit the body of the email. You can use the following shortcodes for adding dynamic content:
[blogname]- Name of the blog[title]- Title of the download[link]- Link to the download page[author]- Name of the download author[expiration]- Expiration date of the download
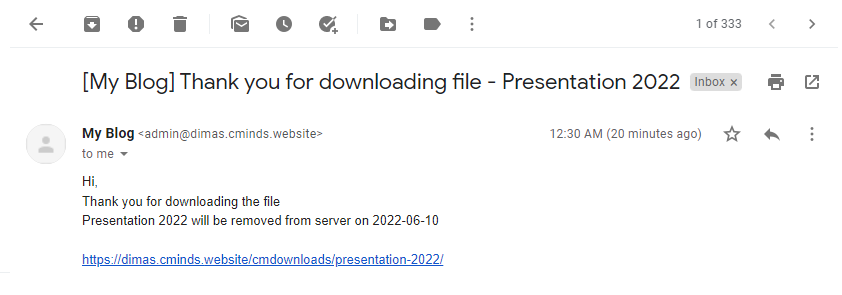
Example of the Email Notification
Labels
You can edit the labels that are displayed in the upload page and download page. Navigate to the tab Labels.
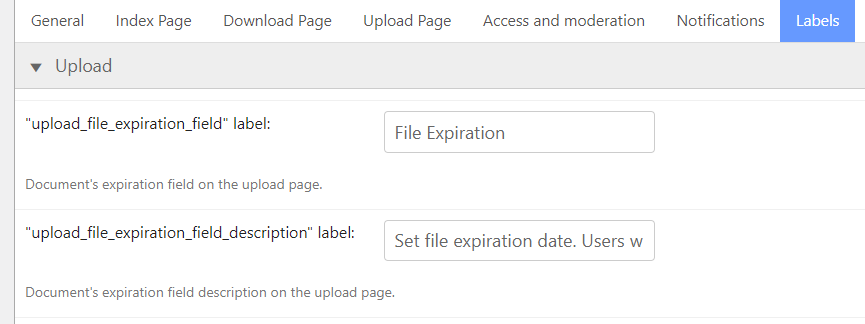
The labels that are related to the upload form can be found in the section Upload. The labels are:
-
"upload_file_expiration_field" label - This label is responsible for the name of the field.

Label for the option name -
"upload_file_expiration_field_description" label - This label is responsible for a description in the tooltip.

Label for the option description


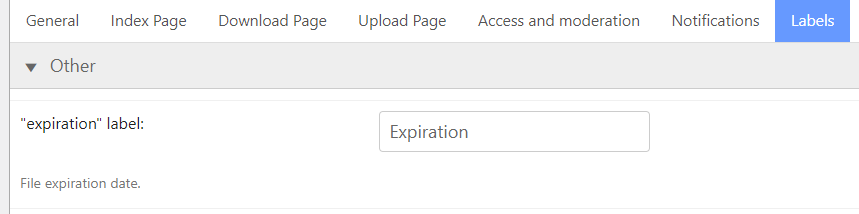
And one more label can be found in the section Other.
-
"expiration" label - This label is displayed on the download page.

Label for the expiration field on the download page

Don't forget to click the button Save Settings after editing the options.
Following these instructions, you should be able to setup expiration dates for downloads.
TIP
Learn more about how to automatically delete expired files from the file storage of your site: WordPress File Manager Plugin (CMDM) - Settings - Cron
 |
More information about the WordPress File Manager Plugin Other WordPress products can be found at CreativeMinds WordPress Store |
 |
Let us know how we can Improve this Product Documentation Page To open a Support Ticket visit our support center |