RSS Post Importer - Set Up - 4) How the Posts Are Displayed (Post Template)
Step 4 - How the Posts Are Displayed (Post Template)
Video version
Video Tutorial - Getting Started With RSS Post Importer
Step by step
- Adding The Feed.
- Choosing How The Plugin Will Handle The Feed. Involves keywords that will be excluded, date limit, and more.
- Choosing How The Plugin Will Handle Each Post. Involves word limit and HTML removal.
- Choosing Where and How Will The Feeds Be Posted. Involves post status, tags, categories, featured image, excerpt, author and more.
Once the RSS is imported the RSS Post Importer plugin works to Export the post onto your own site. The following settings determine how this output will appear and what attributes it will have.
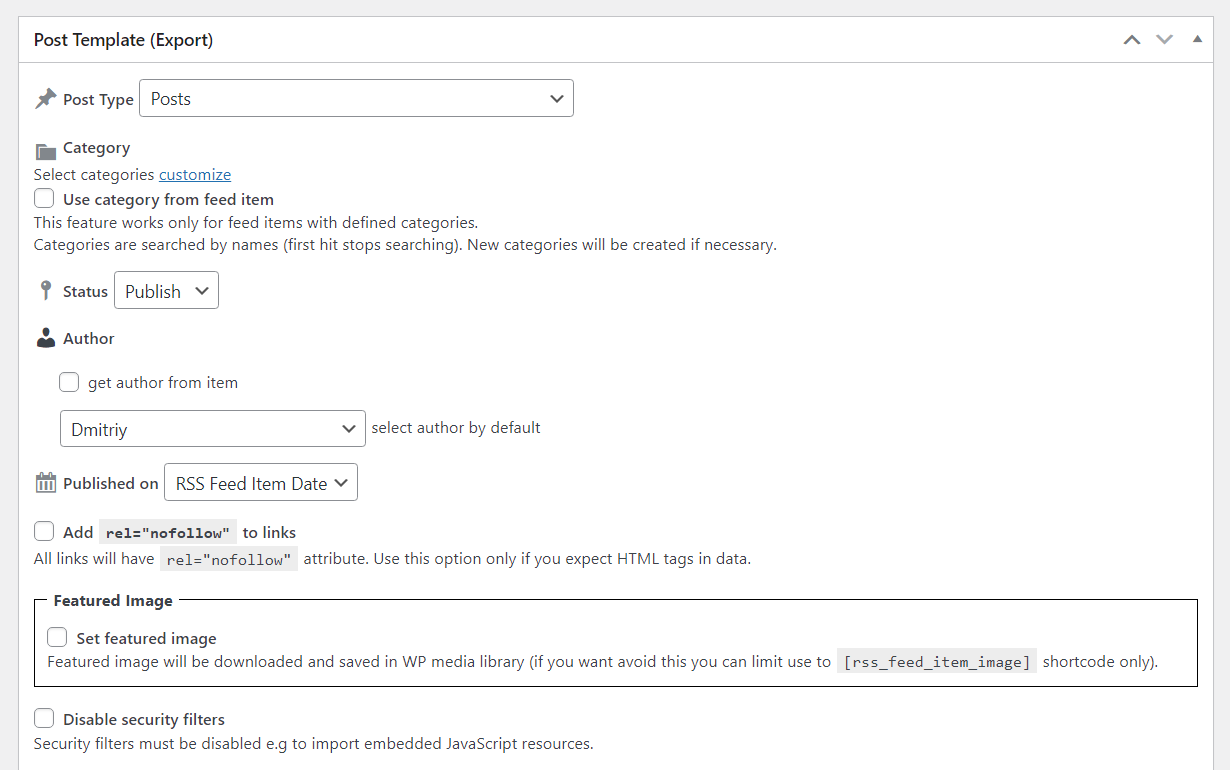
- Post Type - Choose what kind of post it will be. A page, a custom post type or something else. The default is a WordPress post.
- Category - The category that imported posts will fall under can be configured here. This applied only if the post type created on your site is a regular "Post".
- Alternatively, the checkbox below can be checked to Use category from feed item. Doing this will use the original category. If this does not exist on your site, it will create it.
- Categories cannot be created manually here in the Post Template section. To add new categories this must be done before in Posts → Categories.
- Alternatively, the checkbox below can be checked to Use category from feed item. Doing this will use the original category. If this does not exist on your site, it will create it.
- Status - Determines the publish status of the Post. It can be published automatically, saved as a draft or held for revision. It can also be set as private.
- Author - Chooses between:
- Get author from item - Try to fetch the authors of the RSS item and set them as the author.
-
Select author by default - Setting a Site user as the Author.
Note: How the Author Fetching Works

Fetching the author If the option Get author from item is checked, the fetched author from RSS source (XML file) is compared with the list of existing users on your site. If fetched author's username or email matches the username or email of one of your site users, then that user will be set as the post author. If there is no matching users on your site or if the option Get author from item is not checked, then the default user that is chosen in the dropdown Select author by default will be set as the post author.
Important: the plugin does not create new users on your site based on fetched post authors from RSS source (XML file).
- Published on - Choose between the original publication date and the Import date as the date to be used for the publication date to appear on your site.
- Add
"nofollow"to links - Adds the nofollow attribute to links in the post. This is important for search engines that are indexing your site in case you don't want them to follow the links included in the important articles. -
Set featured image - Downloads and saves the featured image to the WordPress media of your site. Once found, it will also be set as the featured image for the saved post. You can also use the featured image as a shortcode using the following [rss_feed_item_image].
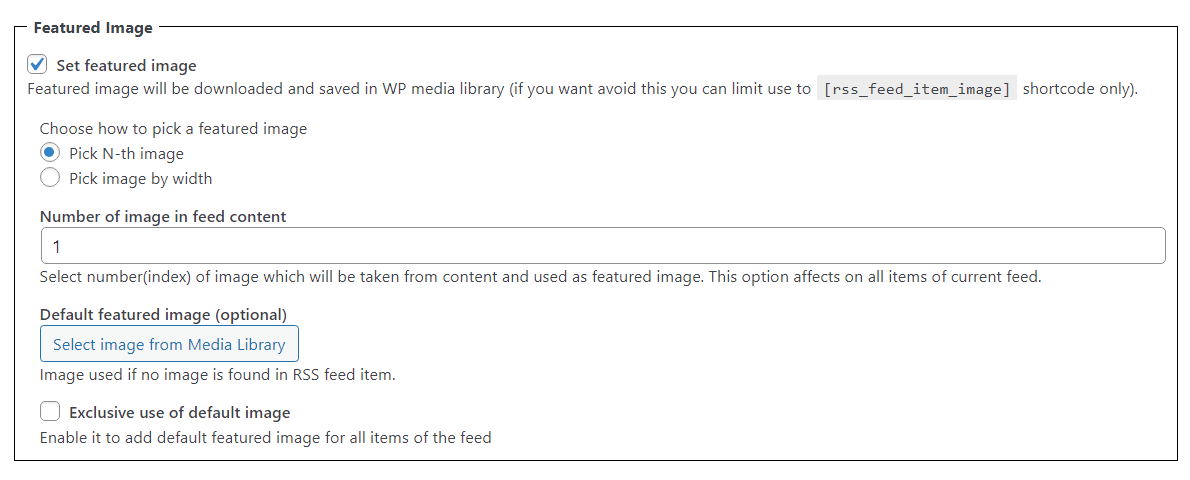
Featured image settings - Choose how to pick a featured image - There're 2 ways how you can fetch the featured image:
-
Pick N-th image - Define which image should be used as the featured image. "1" means first image, "2" the second and so on. This option affects all items of current feed.

Choosing N-th image -
Pick image by width - Define the minimum width of the image that you want to fetch from the feed. Note: this option was introduced in version 1.7.1.

Choosing image by the width
-
- Default featured image (optional) - You can choose the default featured image if the image wasn't found in the feed.
- Exclusive use of default image - When this option is selected default image will be set as featured image despite the presence of any image in the fetched article.
- Choose how to pick a featured image - There're 2 ways how you can fetch the featured image:
- Disable security filters - Some content requires the disabling of security filters.


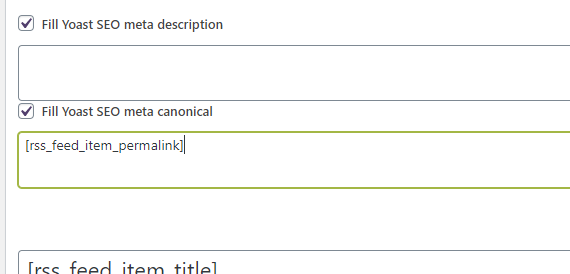
Fill Yoast SEO Metadata
If you are using the Yoast SEO plugin, you can fill the meta description and canonical data. This applies to both free and premium versions of Yoast.
You will find this field at the bottom part of the add/edit page. When "Fill Yoast SEO meta canonical" is active, it usually contains post permalink but now you can change it.
Altering the Template
The Template can be altered using the shortcodes shown in the panel or with some manually entered text. You can also apply the relevant parameters to each of the shortcodes.
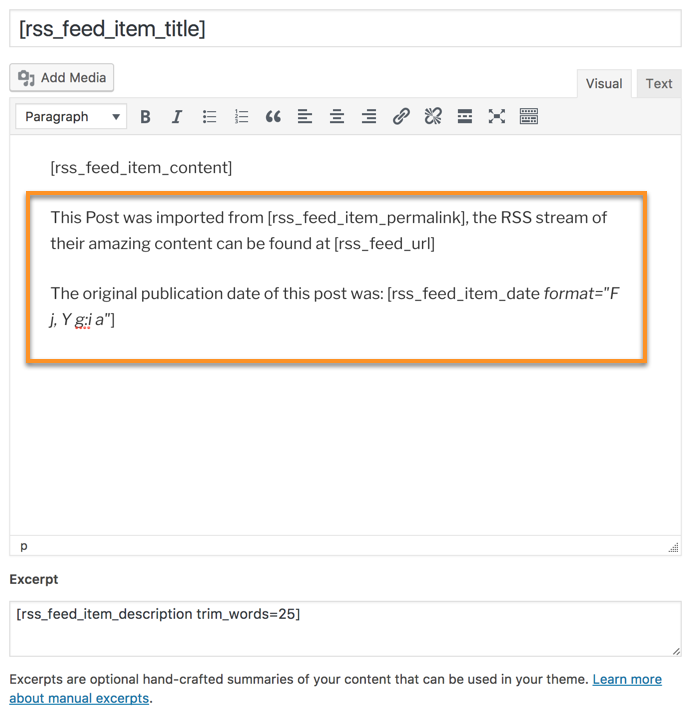
Tip 1 - Making sure the plugin imports paragraphs and line breaks
When including the content of the post, consider using [rss_feed_item_content] instead of [rss_feed_item_description] .
That's because of the content [rss_feed_item_content] "understands" paragraphs and line breaks.
[rss_feed_item_description] , on the other hand, imports the content in a single line as raw text.
Additionally, you can choose to "strip all HTML tags" for both description and content (check RSS Post Importer - Set Up - 3) Choosing What's Important in the Post)
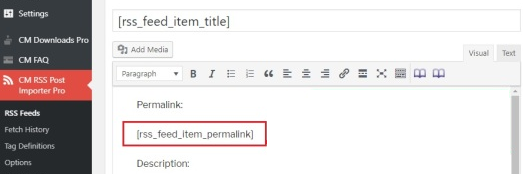
Tip 2 - Link To Source
If you would like to create a link with the original title and URL, you can use the shortcodes inside an HTML code.
- Example with the visual editor:
-
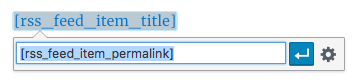
Example with HTML code:
<a href="[rss_feed_item_permalink]">[rss_feed_item_title]</a>
Tip 3 - Showing Video From YouTube Feeds
If you are working with a YouTube RSS feed and would like to automatically show the videos, add the [rss_feed_item_permalink] shortcode into the content.
In the resulting post, the shortcode will be replaced with the actual video.
Excerpt
At the end of the panel, you will also find the Excerpt field. The excerpt is a hand-crafted summary of the content (learn more).
By default, it contains a shortcode to set a Word Limit. You can alter the number in the shortcode to define how many words will be captured as the excerpt. So, for instance, the following shortcode will import 30 words from each post as their excerpts:
[rss_feed_item_description trim_words=30]
Take note that every post will follow this rule.
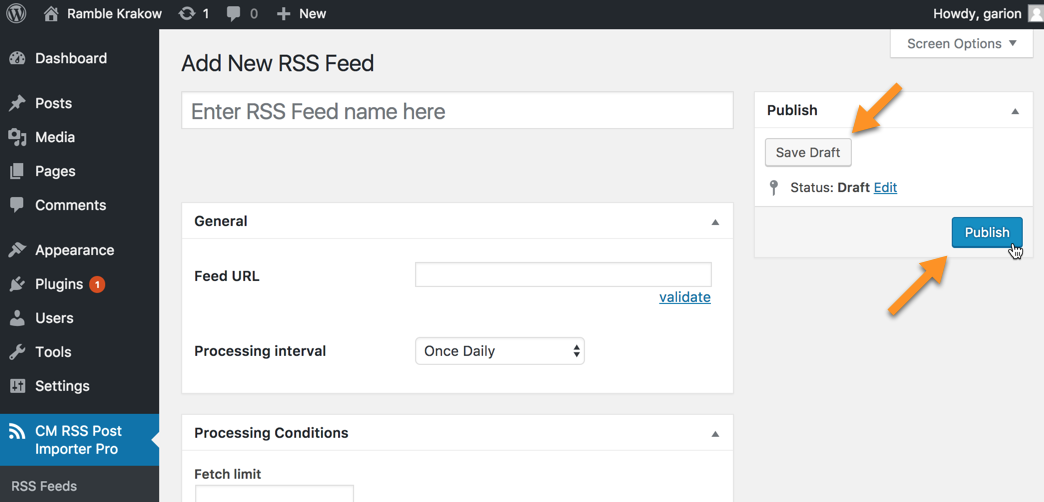
Don't Forget To Save!
After completing the configuration for the Feed remember to Save. Either as a Draft by clicking 'Save Draft' or as a Published Feed by clicking 'Publish' on the upper right of the page.
Step by step
- Adding The Feed.
- Choosing How The Plugin Will Handle The Feed. Involves keywords that will be excluded, date limit, and more.
- Choosing How The Plugin Will Handle Each Post. Involves word limit and HTML removal.
- Choosing Where and How Will The Feeds Be Posted. Involves post status, tags, categories, featured image, excerpt, author and more.
 |
More information about the RSS Post Importer plugin for WordPress Other WordPress products can be found at CreativeMinds WordPress Store |
 |
Let us know how we can Improve this Product Documentation Page To open a Support Ticket visit our support center |