WordPress Glossary Plugin (CMTG) - Use Case - How to Quickly Optimize the WordPress Glossary Plugin for Large Glossaries
Use Case - How to Quickly Optimize the WordPress Glossary Plugin for Large Glossaries
Note: This guide covers features from:
- WordPress Glossary plugin - This document uses version 4.4.1.
Introduction
The WordPress Glossary plugin allows you to create a site with a complete glossary of terms. Each term definition can appear on mouse hover across the whole site.
The plugin includes a wide range of settings, and it’s not always clear which ones should be enabled or disabled - especially when the goal is to optimize glossary performance.
To simplify this process, we’ve added an option that automatically adjusts a group of settings to improve speed and efficiency.
Use Case Assumptions
In this example use case guide we will consider how to optimize your glossary with one button and which options are changed in this case.
We consider that you have already bought the plugin, but not installed it yet.
It follows:
- Installing the plugin
- Quick recap
- Enabling glossary optimization
- Which options are automatically changed?
- End result
Installing the Plugin
The process is the same for all CM plugins and add-ons.

- Download the plugin from your customer dashboard.
- Log in to WordPress and navigate to the WordPress Admin → Plugins settings.
- Click on Add New.
- Activate it and add the license.
Learn more: Getting Started - Installation And First Steps
Quick Recap
In this use case we will cover only on the glossary optimization. If you want learn more about how to configure the plugin and create your glossary, please, refer to this use case guide:
Enabling Glossary Optimization
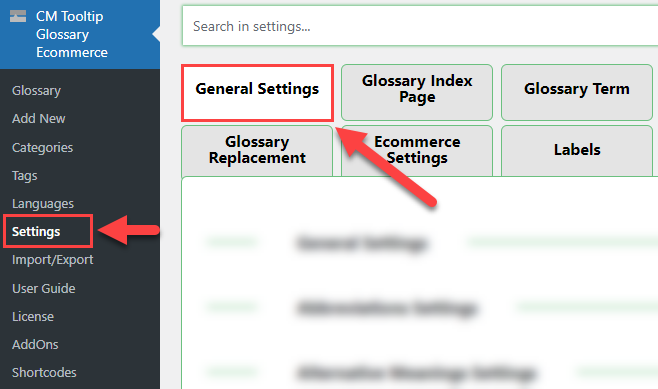
To enable this option, navigate to the Admin Dashboard → CM Tooltip Glossary → Settings → General Settings tab.
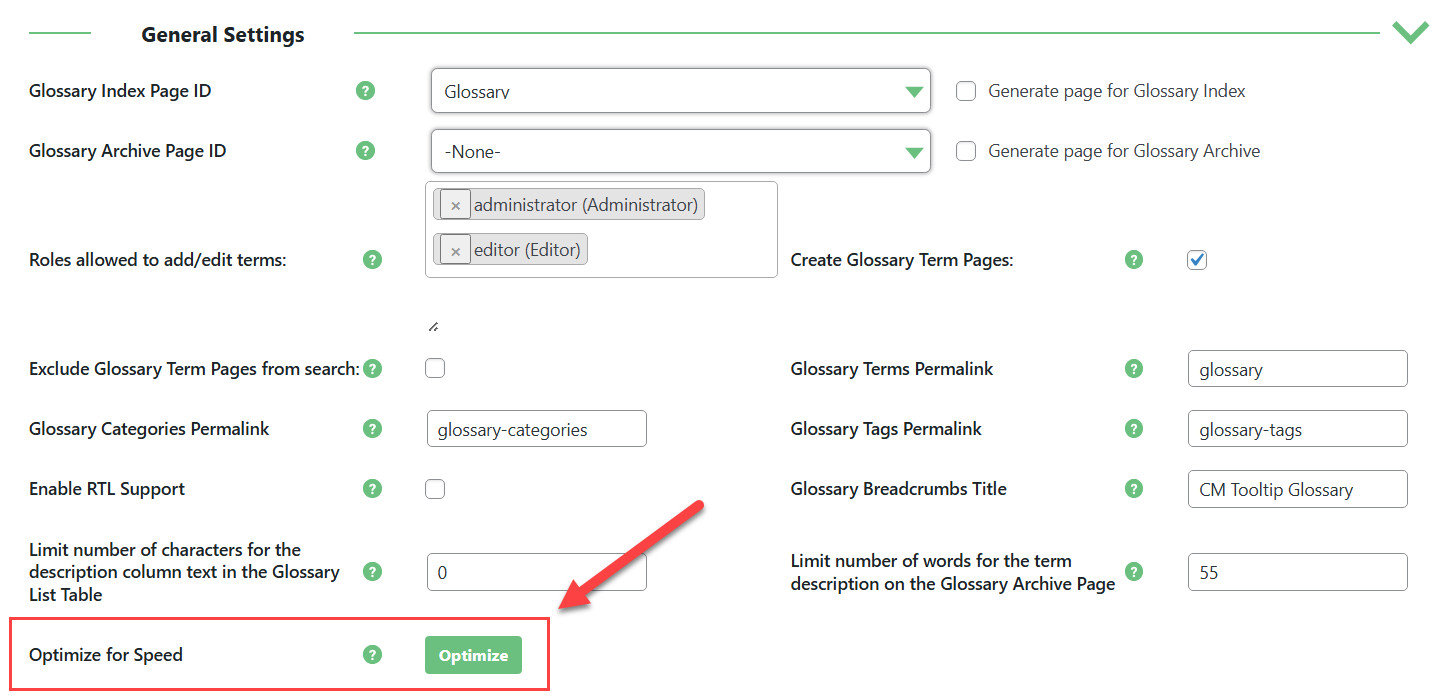
Under the General Settings section, find the option Optimize for Speed. Click the button Optimize to automatically configure the relevant settings.
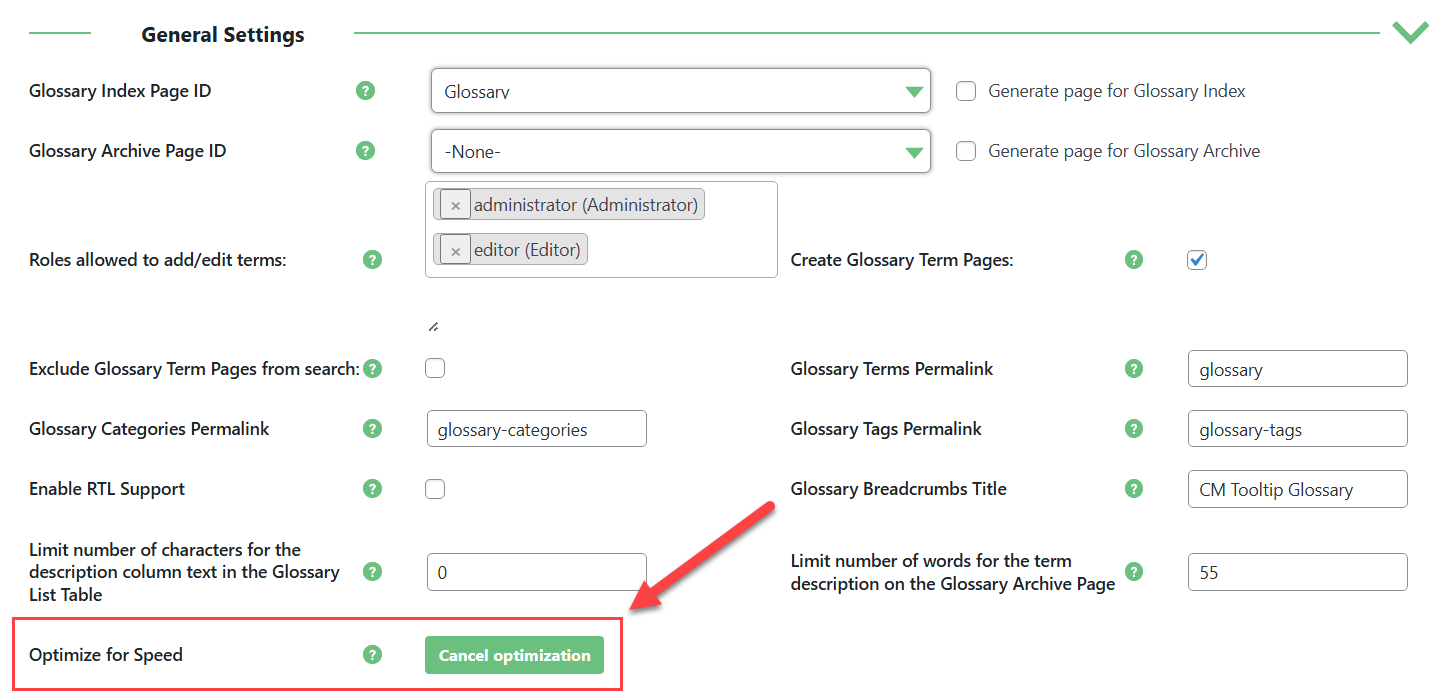
If you want to revert to your manually configured performance settings, you can click the button button Cancel optimization.
Which Options Are Automatically Changed?
The options that are re-configured automatically are located in different tabs and sections. So let's review these options and where they're located.
Performance & Debug Section
Most of the options are located in the Performance & Debug section, under the same tab General Settings. The options and their states are:
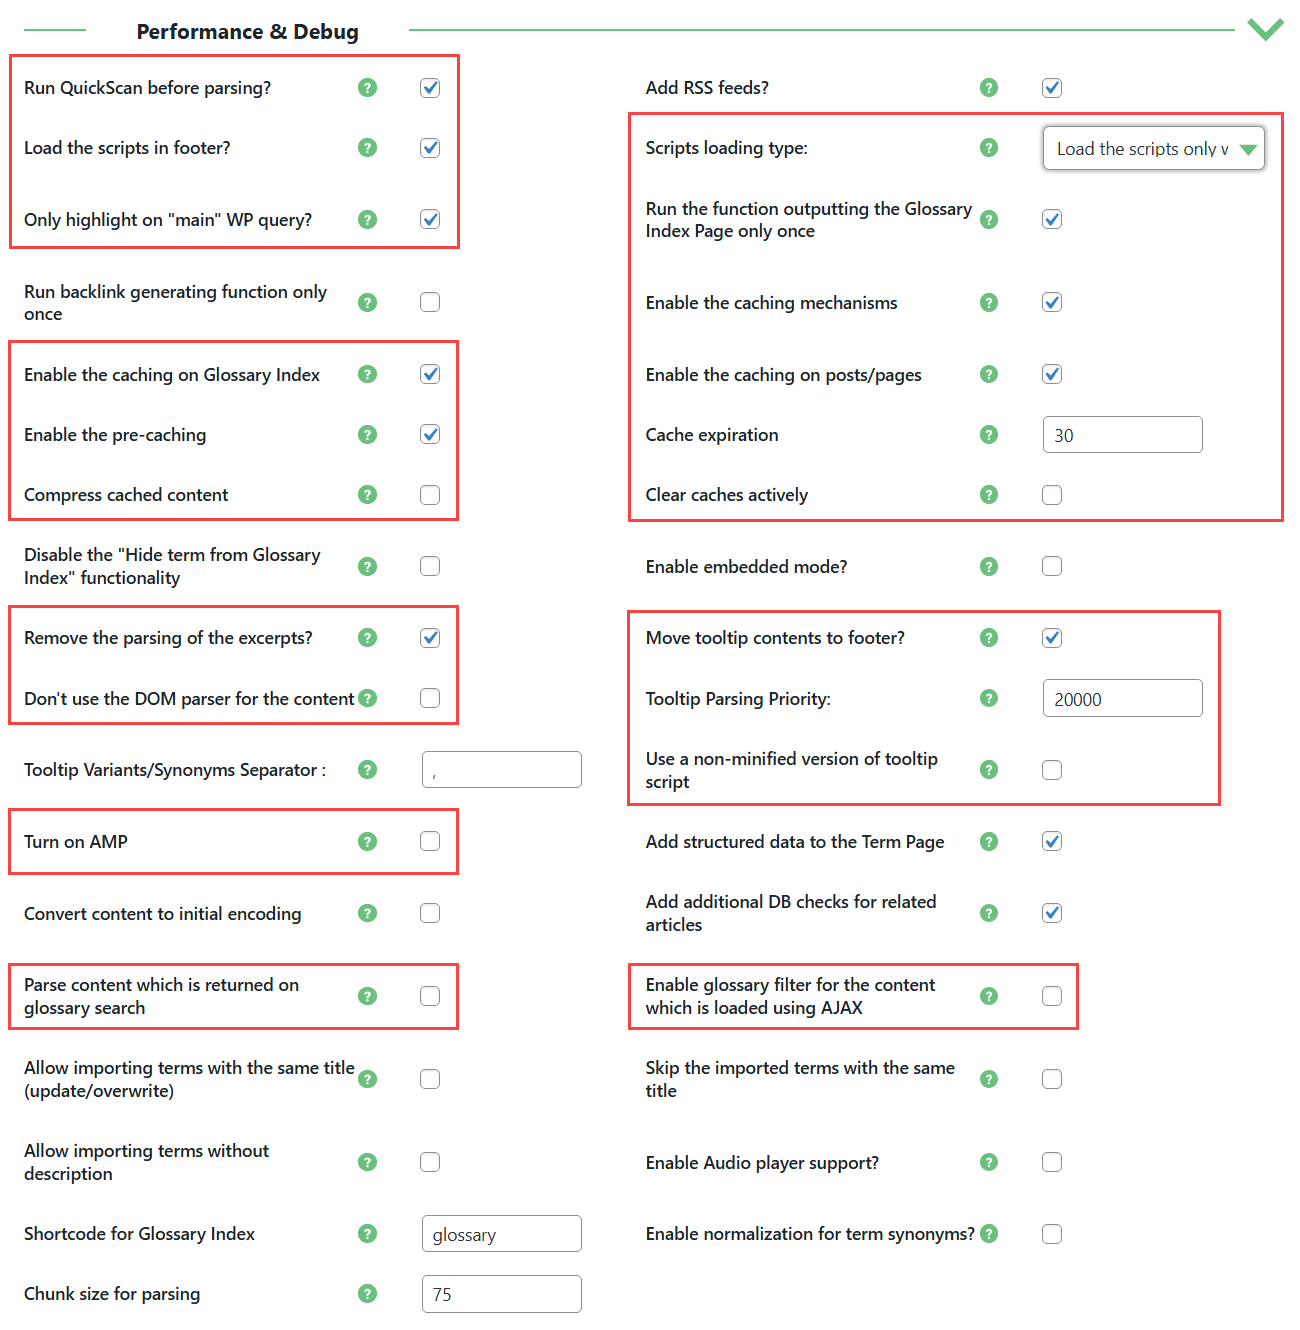
- Run QuickScan before parsing - Enable. This option allows to improve performance for large glossaries (thousands terms) and long pages.
- Load the scripts in footer - Enable. Delays script loading to speed up initial page render.
- Scripts loading type - Choose the option "Load the scripts only when tooltips are detected". This option helps in cases when tooltips are not displayed for AJAX loaded content.
- Only highlight on "main" WP query - Enable. Some themes are using more than one query on each page (eg. for some data manipulation) which results in the terms being parsed only on the first "main" query and not on the one which outputs the data on the screen. This is most often the case in the themes using page builders.
- Run the function outputting the Glossary Index Page only once - Enable. Reduces redundant executions of the same function.
- Enable the caching mechanisms - Enable. Improves performance by storing and reusing parsed content.
- Enable the caching on Glossary Index - Enable. Speeds up the index page by caching it.
- Enable the caching on posts/pages - Enable. Caches parsed posts/pages to avoid repeated processing.
- Enable the pre-caching - Enable. Generates cache in advance to speed up first page loads.
Note: enabling the option Enable the pre-caching is well for smaller glossaries, but if you work with a large glossary which contains 1000+ terms, we recommend you to manually disable the option Enable the pre-caching, as enabling it can slow down the performance.
- Cache expiration - Set to "30" days. Reduces frequency of cache regeneration, improving efficiency.
- Compress cached content - Disable. Avoids extra server load for compression - useful when disk space isn't an issue. Note: this option is available in Ecommerce version only.
- Clear caches actively - Disable. Prevents frequent cache invalidation, which can hurt performance
- Remove the parsing of the excerpts - Enable. Skips excerpts to reduce parsing workload.
- Move tooltip contents to footer - Enable. Speeds up initial page load by moving tooltip data to the bottom of the page.
- Don't use the DOM parser for the content - Disable. Keeps using the faster native parser instead of slower DOM-based parsing.
- Tooltip Parsing Priority - Set the value to "20000". Ensures glossary parsing runs later, avoiding conflicts and unnecessary early processing.
- Use a non-minified version of tooltip script - Disable. Loads minified script for faster transfer and execution.
- Turn on AMP - Disable. Disables AMP to avoid feature limitations and extra processing.
- Parse content which is returned on glossary search - Disable. Skips parsing glossary results, reducing processing time.
- Enable glossary filter for the content which loaded using AJAX - Enable. Ensures terms are highlighted in dynamic content without affecting static performance.
Term Highlighting Section
Next section with options which we will consider is Term highlighting. The options and their states are:
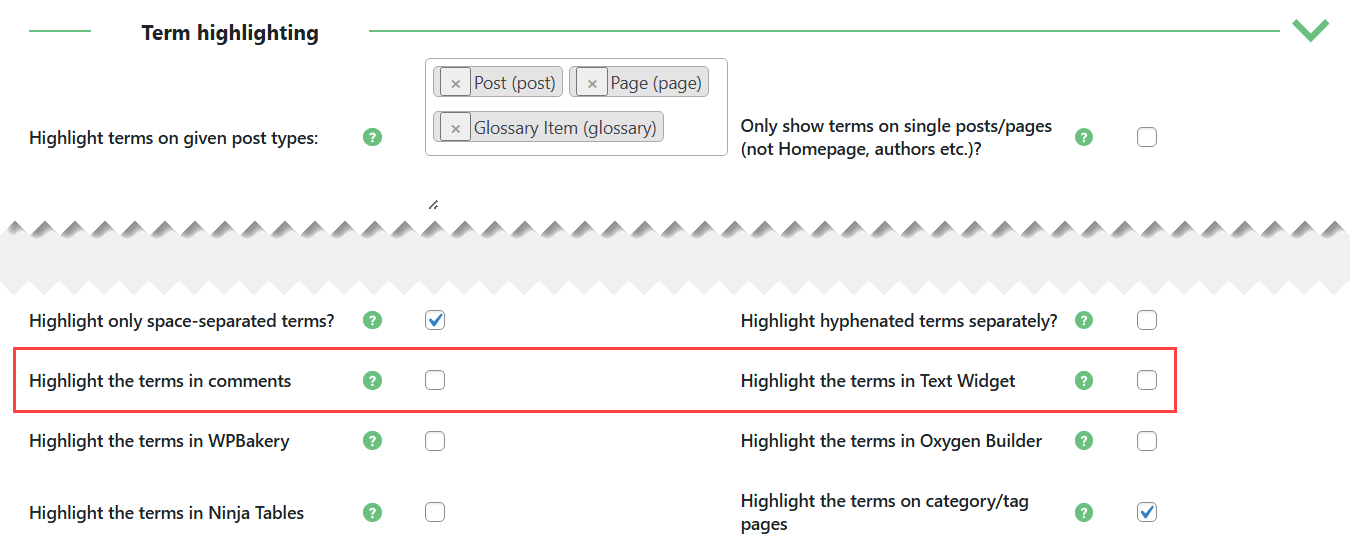
- Highlight the terms in comments - Disable. Skips processing terms in comments, which rarely needs tooltips.
- Highlight the terms in Text Widget - Disable. Avoids unnecessary parsing of widgets, improving performance.
Glossary Index Page Settings Section
Next options are located under the Glossary Index Page tab.

Needed options are can be found under the Glossary Index Page Settings section:
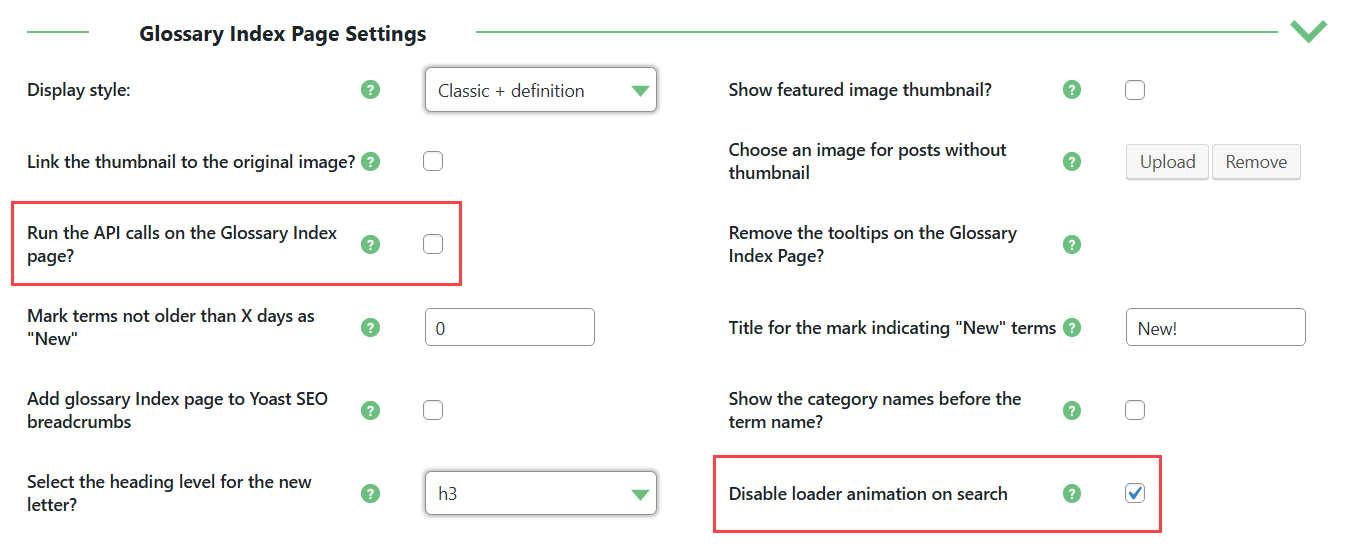
- Run the API calls on the Glossary Index page - Disable. Skips API requests on index page, reducing load.
- Disable loader animation on search - Enable. Removes animation for faster response and rendering.
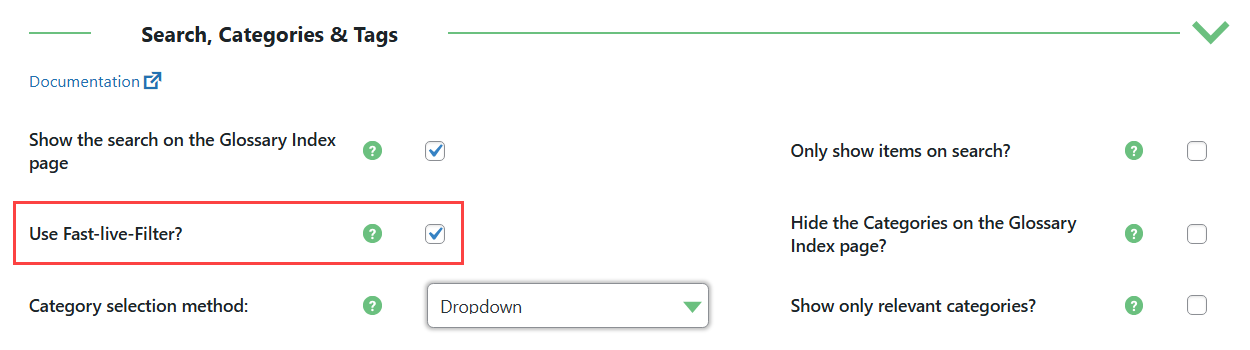
Search, Categories & Tags Section
Next section with options is Search, Categories & Tags.
Pagination Section
- Use Fast-live-Filter - Enable. Speeds up filtering with a lightweight JavaScript-based method.
And one more section here is Pagination.

- Paginate Glossary Index page (items per page) - Set the value to "100". Limits terms per page to reduce load time.
- Pagination type - Choose the option to "Server-side". Processes pagination on the server for better scalability and speed.
Tooltip - Animation Section
Next tab we need is Tooltip.

Two last options are located in the Tooltip - Animation section.

- Tooltip display animation / Tooltip hide animation - For both settings choose the option "No animation". Removes visual animations to reduce browser workload and make tooltips appear instantly.
Note: if you work with large glossary which contains 1000+ terms, we recommend you to disable the option Enable the pre-caching, as enabling it can slow down the performance.
End Result
Following instructions found in the plugin and guides you should be able to optimize the glossary performance on your WordPress site.
 |
More information about the WordPress Glossary Plugin Other WordPress products can be found at CreativeMinds WordPress Store |
 |
Let us know how we can Improve this Product Documentation Page To open a Support Ticket visit our support center |