WP Popup Plugin (CMP) + Forms Builder Add-on - Use Case - Adding Popup Forms to Your Site
Use Case - Adding Popup Forms to Your Site
This guide requires:
- Pro version of WP Popup Plugin - version 1.5.6
- Popup Forms Builder Add-on - version 1.0.3
Introduction
WP Popup Plugin allows you to show different kinds of popups on your website.
Use Case Front-End
Example of the popup with the form that the user needs to fill in:

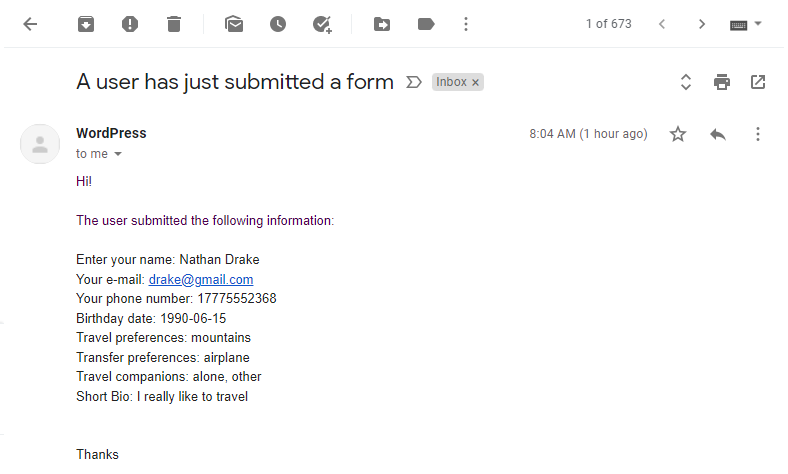
Example of the email with user's information:
Use Case Assumptions
In this example use case guide, we'll cover how to create and display WP popup form on your site.
We consider that you have already bought the plugin and addon, but not installed them yet.
It follows:
- Installing the plugin
- Plugin settings
- Building a WP popup form
- Adding the form to the popup campaign
- End result
Installing the Plugin
The process is the same for all CM plugins.

- Download the plugin from your customer dashboard.
- Log in to WordPress and navigate to the WordPress Admin → Plugins settings.
- Click on Add New.
- Activate it and add the license.
Learn more: Getting Started - Plugin Overview
Plugin Settings
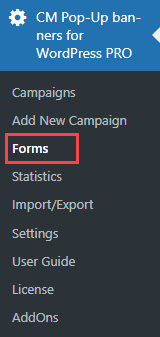
First, let's start with the configuring the WP Popup plugin and add-on. Navigate to Admin Dashboard → CM Pop-Up banners for WordPress PRO → Settings.

There you can find two tabs.
General
First tab is General. The options are:
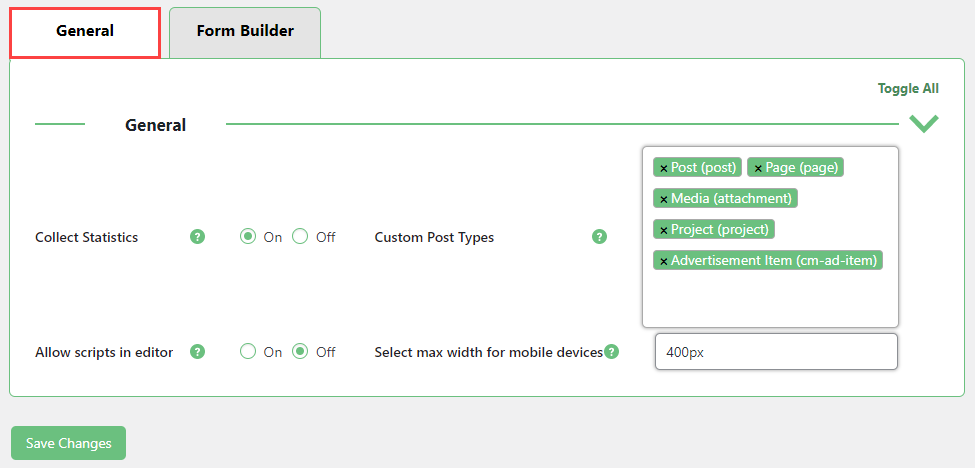
- Collect Statistics - Enable this option to collect the statistics about views and clicks for popup campaigns.
- Custom Post Types - Select post types on which you want to display popup campaigns. Showing a specific campaign on a custom post type also depends on each campaign settings.
- Allow scripts in editor - If enabled, the invalid HTML tags and tag attributes will not be stripped.
- Select max width for mobile devices - Allows to set the max popup width for mobile devices. Campaign popups can have different dimensions on devices smaller than this value. Will apply to all popup campaigns.
Form Builder
Second tab is Form Builder - it is displayed only when the Popup Forms Builder Add-on is activated. Here you can configure the labels that appear in forms:
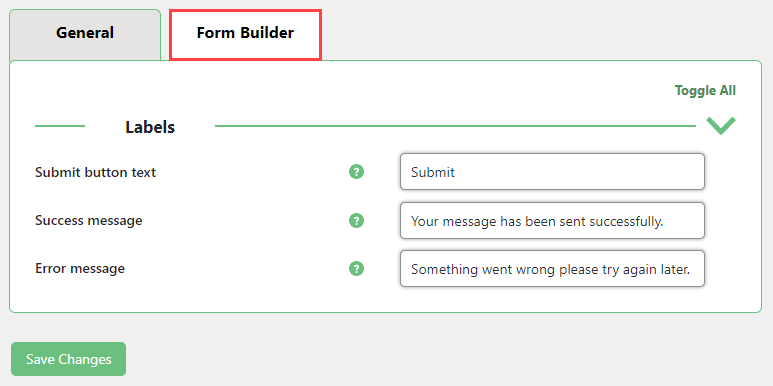
- Submit button text - Displayed in the form.
- Success message - Displayed when the form is successfully submitted.
- Error message - Displayed when an error occurs during submission.
Click the button Save Changes after editing the plugin settings.
Building a WP Popup Form
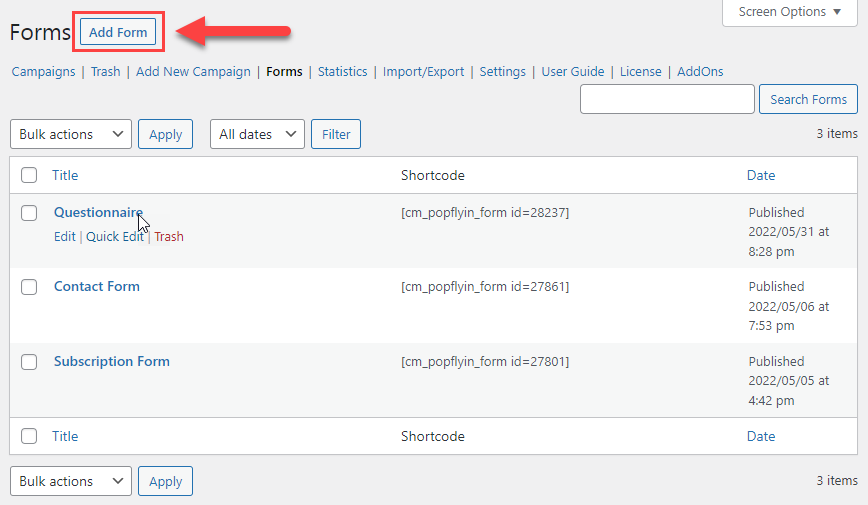
Next step - we need to create a form that will be displayed in the popup. To create it, navigate to Admin Dashboard → CM Pop-Up banners for WordPress PRO → Forms. Note: this menu item is displayed only when the Popup Forms Builder Add-on is activated.
You can see the list of all created by you forms on that page. You can filter, search them and apply bulk actions. Hovering the mouse near their title shows shortcuts.
To create a new one, click the button Add Form above the table.
In the middle of the page you can see a few blocks for configuring the form:
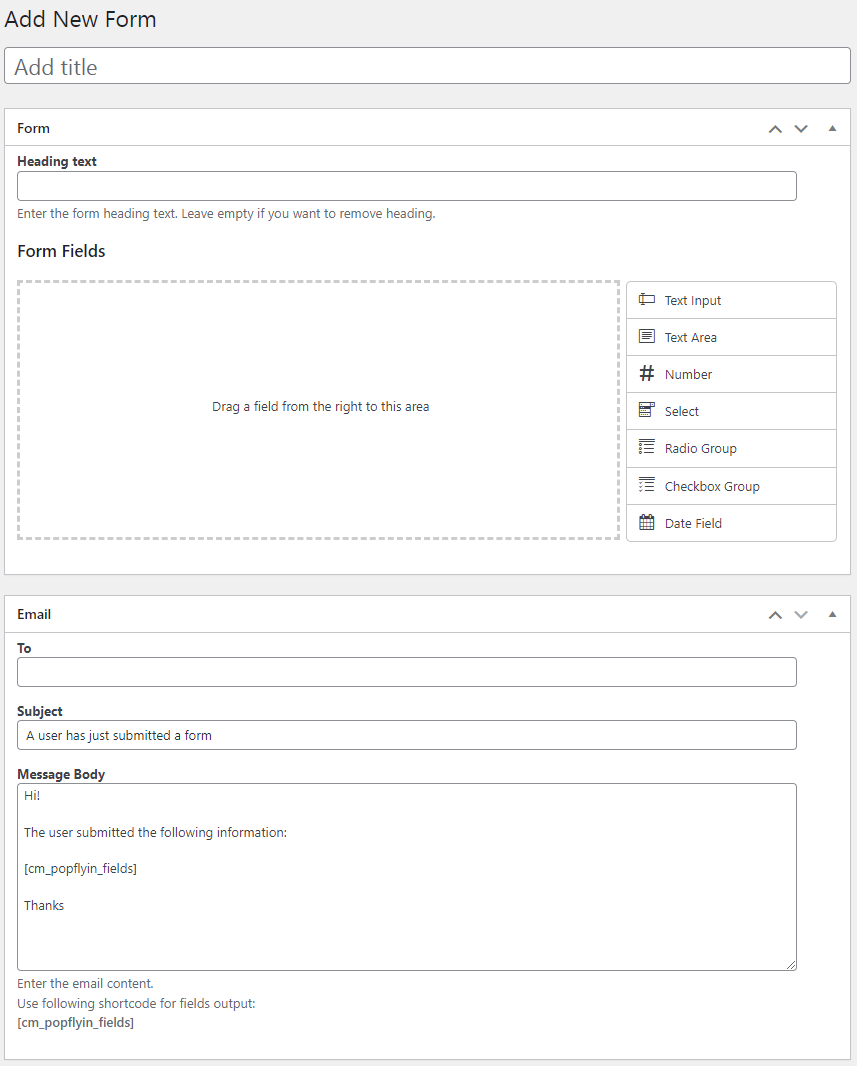
First, add the title to the relevant field. This is for internal use only, it will not be displayed on the front-end.
Next box is Form. This is where you can add and customize different types of fields. Enter the title for the form that will be displayed on the front-end in the field Heading text.
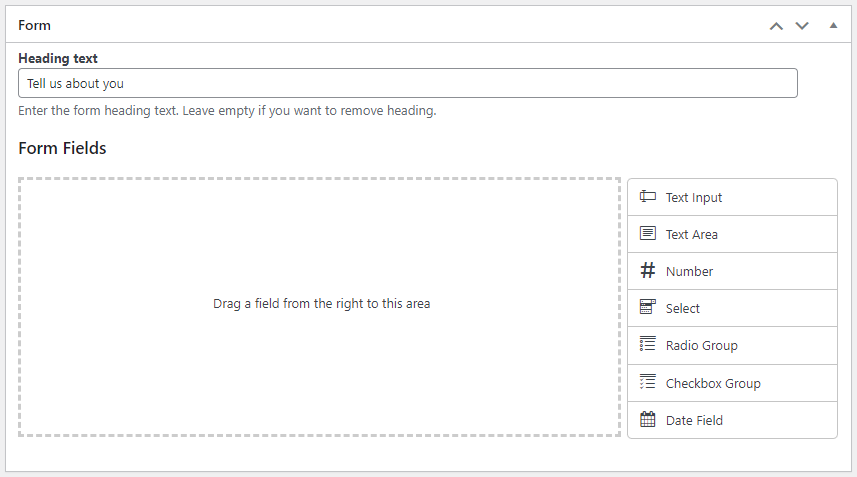
To add fields to the form, drag needed fields from the list on the right and drop them in the Form Fields area.
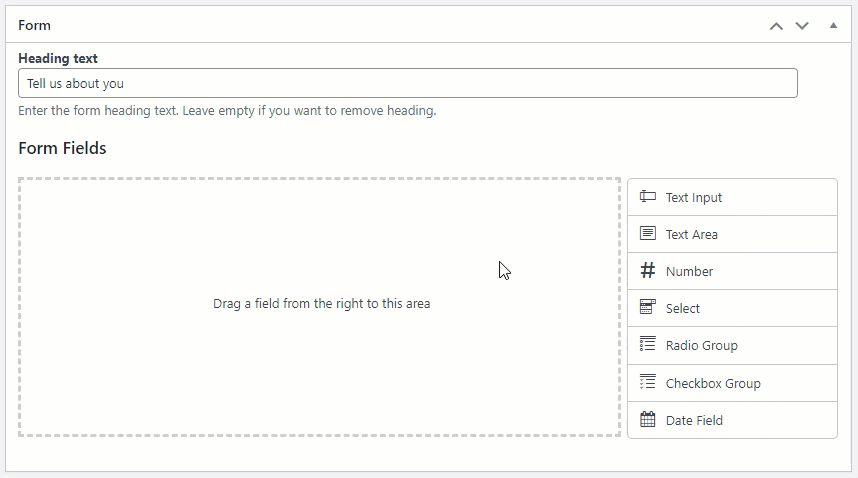
All fields have a menu in the top right corner where you can Edit, Copy or Remove the field:

The following settings are available for all fields:
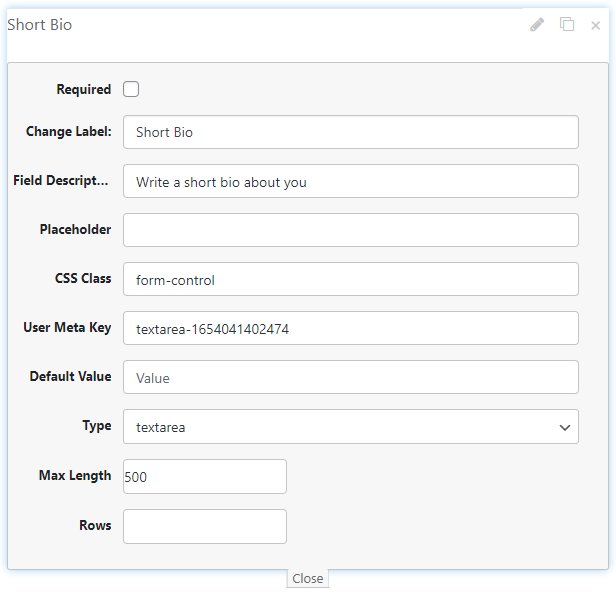
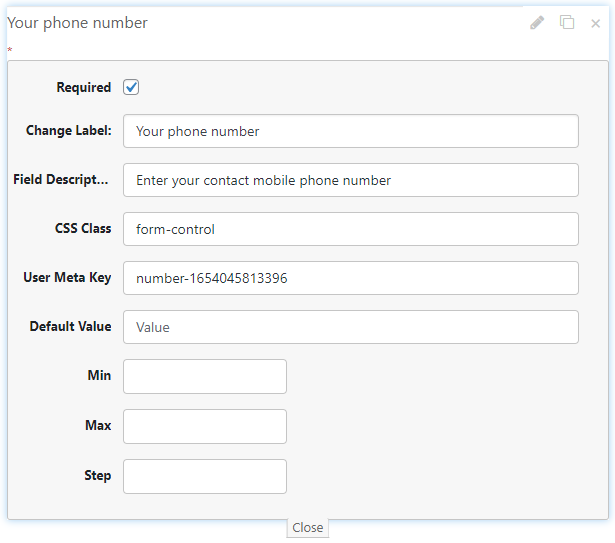
- Required - To mark a form field as required, check the box at the very top of the field settings.
- Change Label - This option changes the label for the field. Keep this short and descriptive.
- Field Description - With this option you can add additional information about the field. The text is displayed as a tooltip when the visitor hovers over the field.
- CSS Class - You can change the style of your field to better match your WordPress theme by adding custom CSS classes. Classes needs be separated by a space. Note: It is not recommended to remove existing classes. Only remove these if you have a custom design that you want to use instead.
- User Meta Key - This key is a unique identifier that sets fields apart. For instance, two separate text fields will be differentiated by their Meta Key. Note: Only the admin can see it and it's recommended to change this to something more easily remembered. The key can include alphanumeric characters and underscores.
Some fields can have additional fields, we will consider them later.
Form Field Types
Now let's add the fields to our form.
Text Input
This field is for short text information. It has the following additional fields:
- Placeholder
- Default Value
- Type
- Max Length
Let's make the first field required, where the user should enter his name.
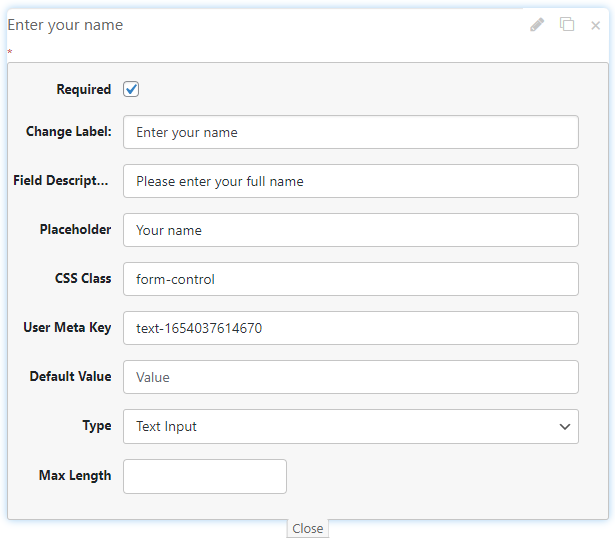
And let's add the second Text Input field that will ask the user to enter an email address. To add an email validation, we choose the email option in the dropdown Type.

Text Area
The field Text Area is designed for longer text content than the field type Text Input. So, let's add a field, where the user can provide some short info about himself. This field has the same additional fields as in Text Input, plus one more field - Rows, which lets limit the amount of allowed rows.
Number
The field Number allows to enter the info that contains only digits. Let's add for entering the phone number. You can also use additional fields Default Value, Min, Max and Step in cases when you need to limit some specific range - let's keep these fields empty for our case.
Select
The field Select allows users to choose answers from the provided list. If you check the box Allow Multiple Selections, the user will be able to choose more than one option from the list. Otherwise the list will look like a dropdown where the user can choose only one of the options.
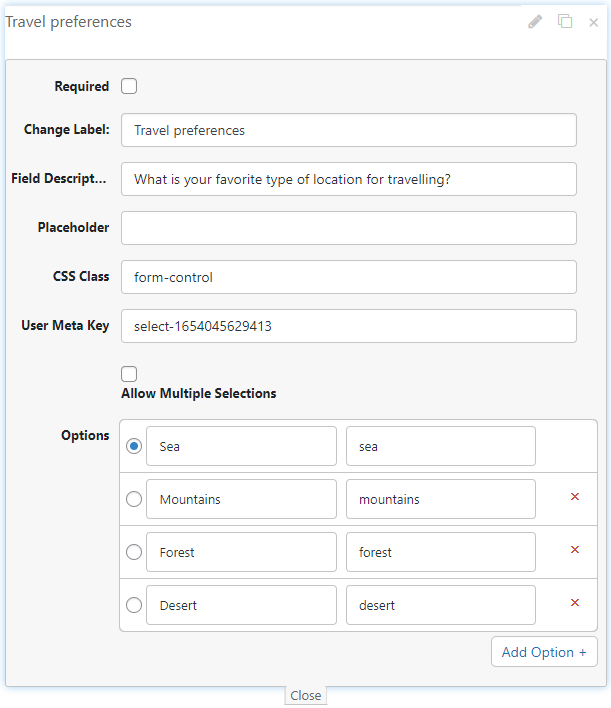
The admin can add any amount of possible options by clicking on the button Add Option + or delete not needed options by clicking on the X-button for the relevant option. Each option has two important input fields - Label and Value. The text in the Label field will be shown in the select list. You can also choose any option as predefined.
Radio Group
Next field that we add is Radio Group. It allows users to choose one of the provided options in the radio buttons list. The same as in the previous field, the admin can add any amount of possible options by clicking on the button Add Option + or delete not needed options by clicking on the X-button for the relevant option. You can also choose some option as predefined.
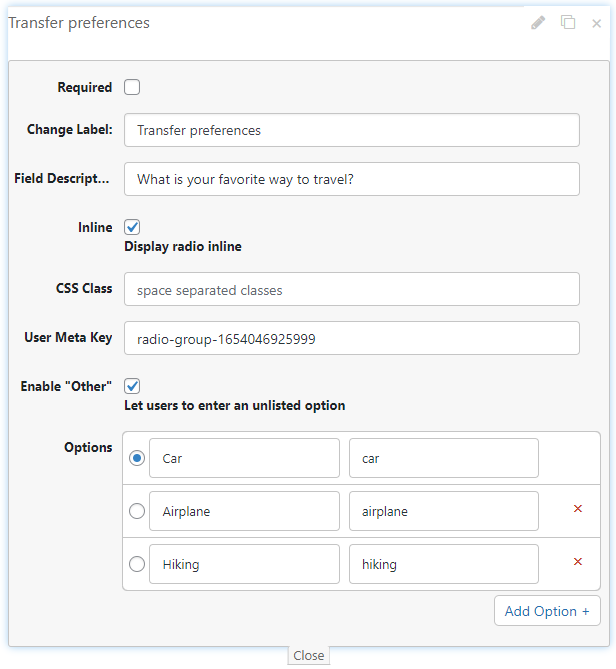
This field has two more additional options:
- Inline - If enabled, the radio buttons will be displayed in horizontally. Otherwise, the list will be displayed vertically.
- Enable "Other" - If enabled, the option "Other" will be automatically added to the end of the provided options.
Let's enable both of these options for our case.
Checkbox Group
The field Checkbox Group lets users choose a few options from the provided list. The field has two additional fields as in the previous field - Inline and Enable "Other", and one more option - Toggle. If Toggle is enabled, the list will look like a list of switches, otherwise it will look like a list of checkboxes. Let's enable this option for our case.
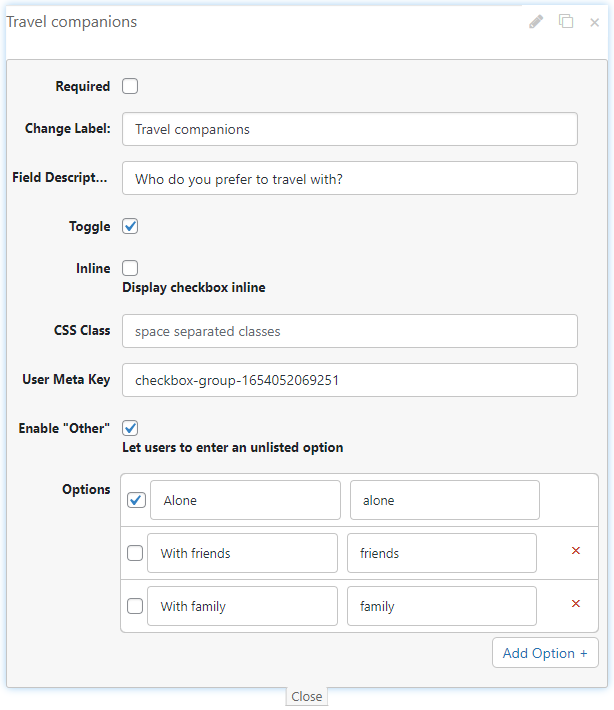
The same as in the previous field type, the admin can add any amount of possible options by clicking on the button Add Option + or delete not needed options by clicking on the X-button for the relevant option. You can also choose some options as predefined.
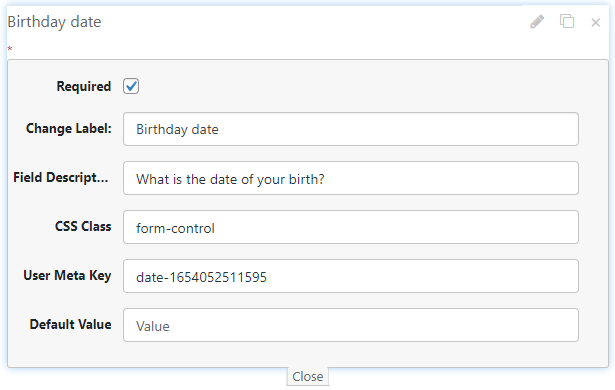
Date Field
One more type of field that you can add is Date Field. It allows users to choose the date in the calendar. Let's add it to our form to ask users provide their birthday date and make it required.
Changing the Order of Fields In the Form
You can change the order of the added fields by simple dragging them and dropping to the needed place. So let's change the order of some of them.

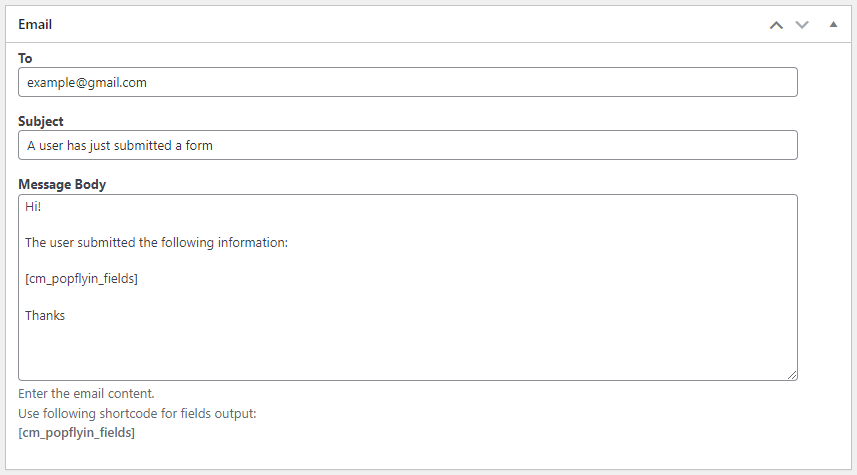
Email Template
Next box is Email. Here you can edit the email template that will contain the info that users provide, and here you need to the email address where to send the collected info. It has 3 fields:
- To - Here you set the email for sending collected information.
- Subject - Here you can edit the email subject.
- Message Body - Here you can edit the email body. Important: The email body must contain the shortcode
[cm_popflyin_fields]as it will be replaced by the collected information.
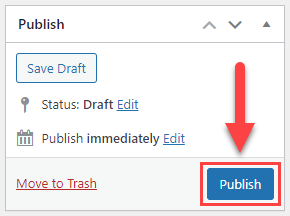
Now click the button Publish to create the form.
Adding the Form To the Popup Campaign
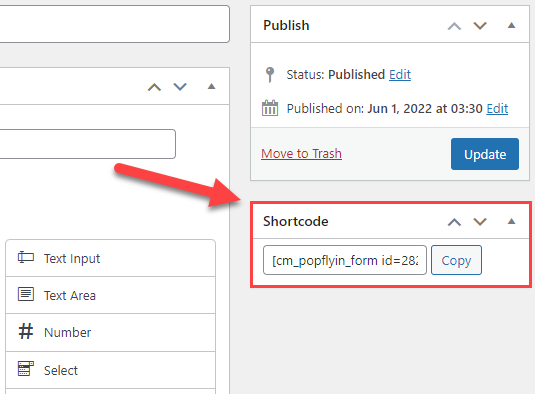
Each created form has a shortcode that you need to add to the popup for displaying the form on the front-end.
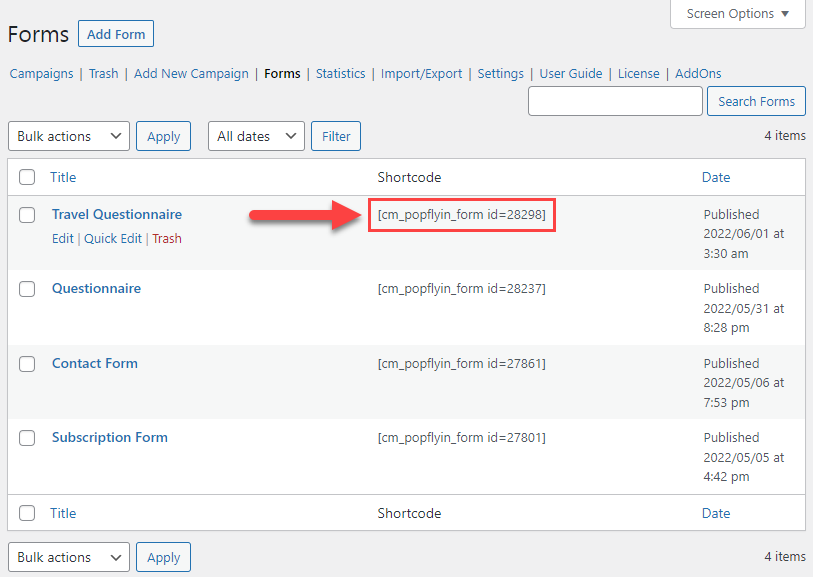
You can find this shortcode in two ways:
1) On the page of creating/editing the form, in the metabox Shortcode. For the convenience, it has the button Copy that you can use for copying the shortcode.
2) In the table with the list of created forms, you can find a shortcode for each form:
Now let's head to creating the popup campaign. Navigate to Admin Dashboard → CM Pop-Up banners for WordPress PRO → Campaign → Add New Campaign.
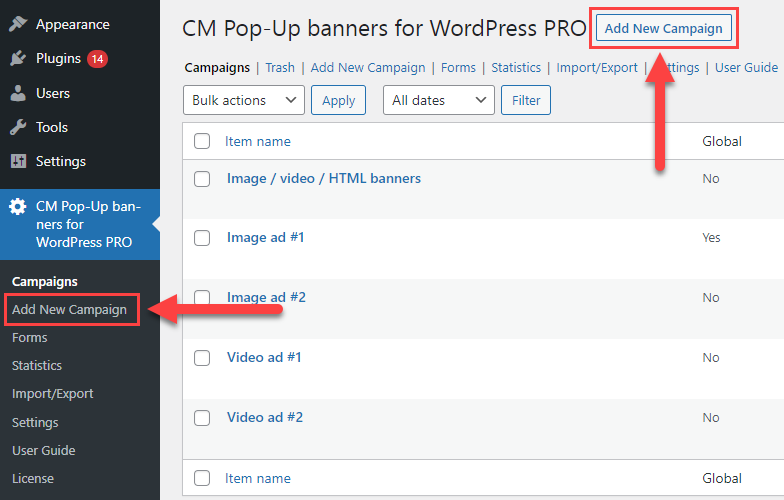
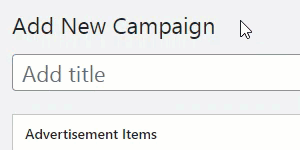
On the Add New Campaign page, first you need to give a name to the campaign in the field Add Title.
Second step - you need to create a banner in the box Advertisement Items. You can add any number of banners using the button +Add Advertisement Item. For our case with the form it's enough to have only one banner.
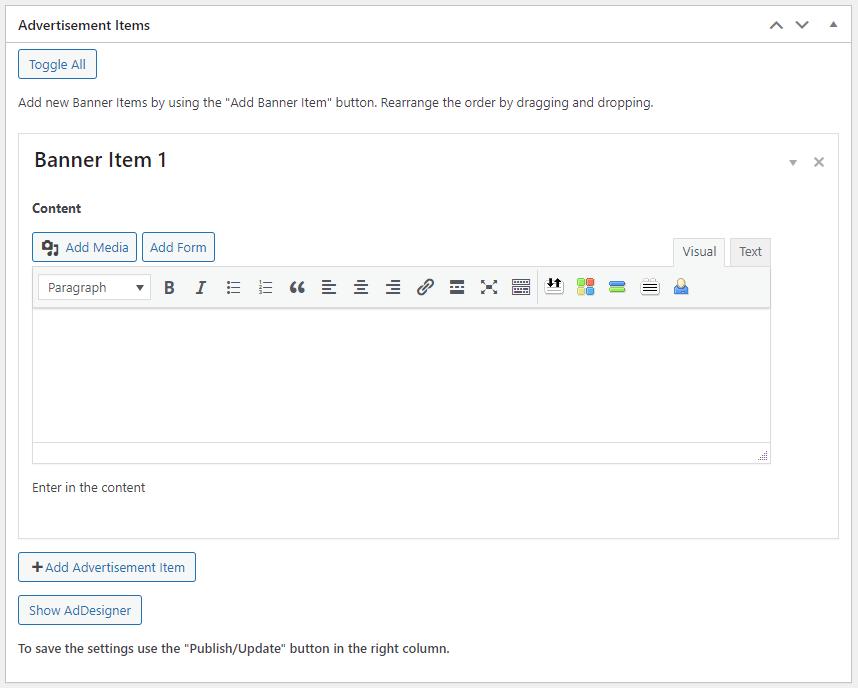
You can add the form to the banner in two ways.
1) Paste the shortcode that you've copied earlier into the Content area.
2) Click on the button Add Form above the Rich Editor and choose needed form in the list - the relevant shortcode will be added automatically:

Next step - we need to configure campaign options in the box Campaign - Options. For this use case we will need only a couple of them.
First - under the tab Basic Visual let's choose the Pop-Up type of the popup in the dropdown Type.
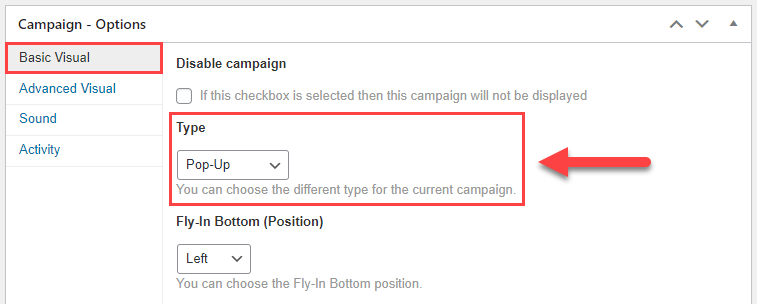
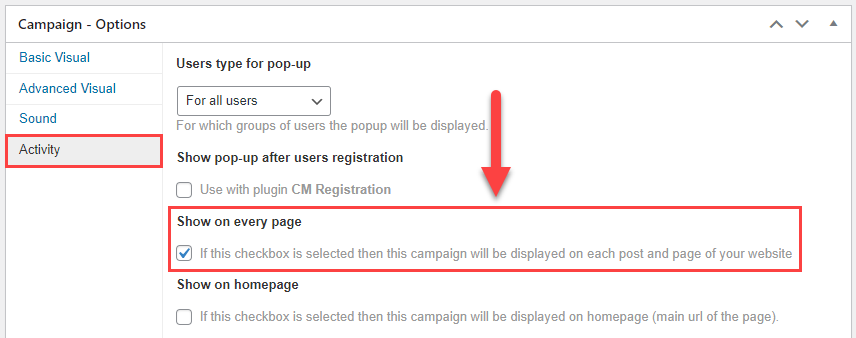
Second - under the Activity tab let's enable displaying the campaign on all pages by checking the box Show on every page.
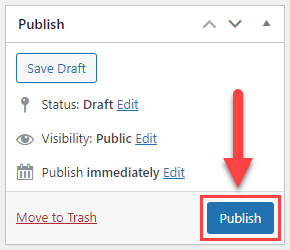
Then click the button Publish to create the popup campaign.
Learn More
There are lots of different options for customizing the appearance and behavior of the popup campaign. You can learn more detailed about the whole process of configuring the campaign in this use case guide: WP Popup Plugin (CMP) - Use Case - Adding Popups With Image, HTML and Video to Your Site
The campaign with the form is created, now let's see the result on the front-end.
When any page on the site is loaded, the popup with the form will appear. The user fills in needed information and clicks the button Submit.

After that, the user's information will be sent to the email address that you've set:

End Result
Following instructions found in the plugin and guides, you should be able to create and display forms in popups on your site.
Use Case Front-End
Example of the popup form that the user needs to fill in:
Example of the email with user's information:
 |
More information about the WP Popup Plugin Other WordPress products can be found at CreativeMinds WordPress Store |
 |
Let us know how we can Improve this Product Documentation Page To open a Support Ticket visit our support center |