WordPress User Submitted Posts - Use Case - How to Let Your Users Submit Posts in Their PeepSo Profiles
Use Case – How to Let Your Users Submit Posts in Their PeepSo Profiles.
Note: This guide covers features from:
- WordPress User Submitted Posts - This document uses version 2.3.2.
- PeepSo - This document uses version 4.0.1.0.
Video Use-Case
Introduction
The WordPress User Submitted Posts is a plugin that allows logged in users submit posts, review drafts and upload images via a customizable form.
This plugin also integrates with PeepSo and allows users to create posts straight in their profiles. The user can see the list of created by him posts in his profile and he can see posts created by other users in their profiles.
Use Case Front-End
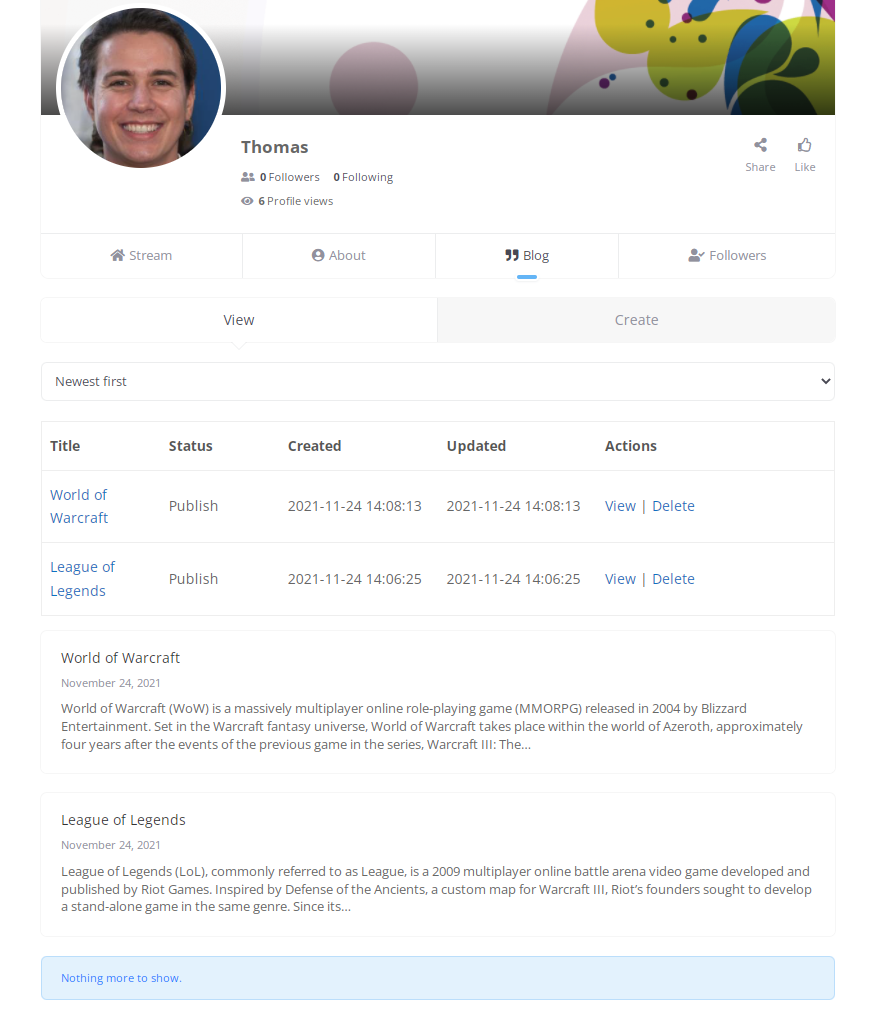
The list of user's posts and the user dashboard:
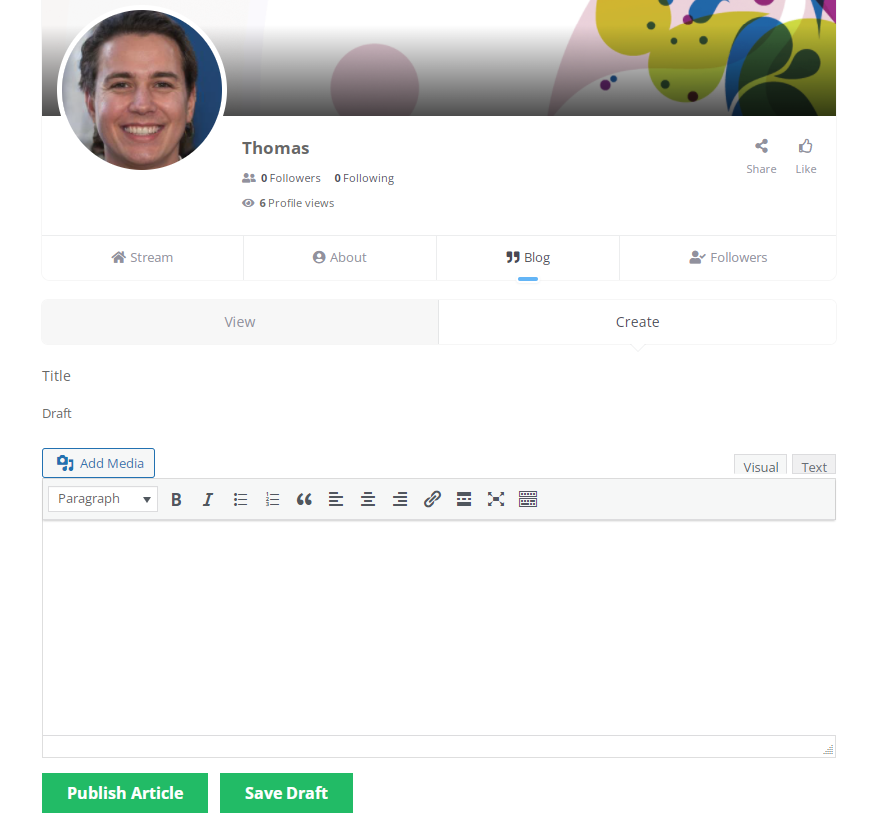
The form for creating posts:
Use Case Assumptions
In this example we will consider how to configure integration with PeepSo to let users create posts in their profiles.
We consider that you have already bought and configured the base plugin WordPress User Submitted Posts, but not installed PeepSo yet.
TIP: Still New to WordPress User Submitted Posts?
This article focuses on the social platform integrations. If you haven't already configured the plugin yet, check this guide:
It follows:
- Installing the plugin
- WordPress User Submitted Posts recap
- Initial setup - PeepSo
- Integration settings
- Adding the user dashboard to PeepSo template
- User roles allowed to create posts
- Editing posts
- End Result
Installing the Plugin
The process is the same for all CM plugins and add-ons.

- Download the plugin from your customer dashboard.
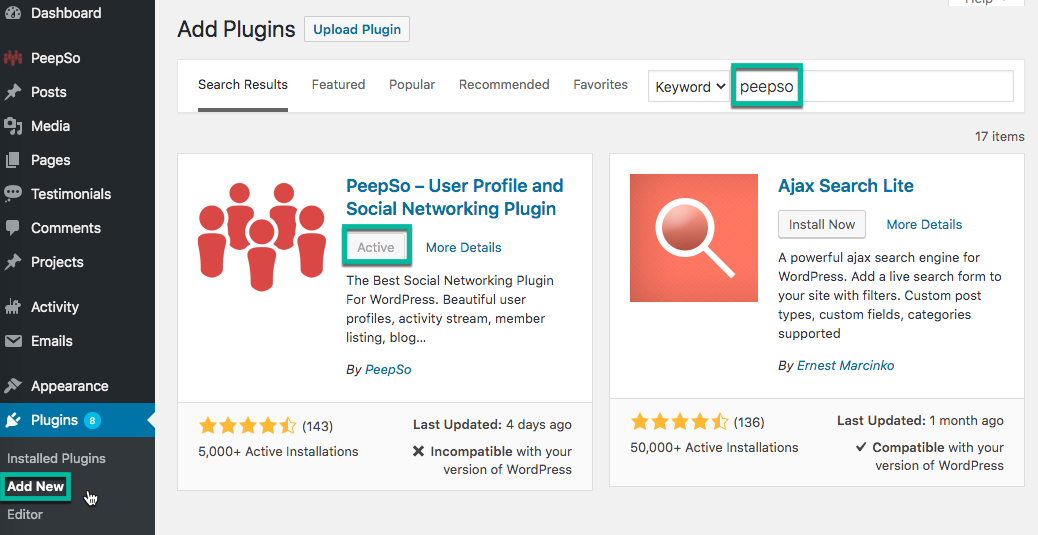
- Log in to WordPress and navigate to the WordPress Admin → Plugins settings.
- Click on Add New.
- Activate it and add the license.
Learn more: Getting Started - Plugin Overview
Quick Recap
If you need help with the setting up:
- Pages needed for plugin work:
- Post Editor Page
- User Dashboard
- Settings:
- General Settings
- Form Settings
- Notifications
- Labels
Then check the relevant article:
Initial Setup - PeepSo
What is PeepSo?
PeepSo is a free WordPress plugin that allows you to create a social platform similar to Facebook.
How Do I Install PeepSo?
PeepSo can be downloaded from the WordPress back-end.
Once installed, follow its documentation for the initial setup.
Integration Settings
When you installed and configured both plugins, it's time to configure the integration.
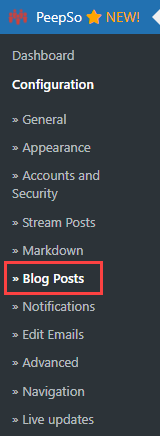
Navigate to Admin Dashboard → PeepSo → Configuration.

Then head to the Blog Posts tab.
There you need to enable two options:
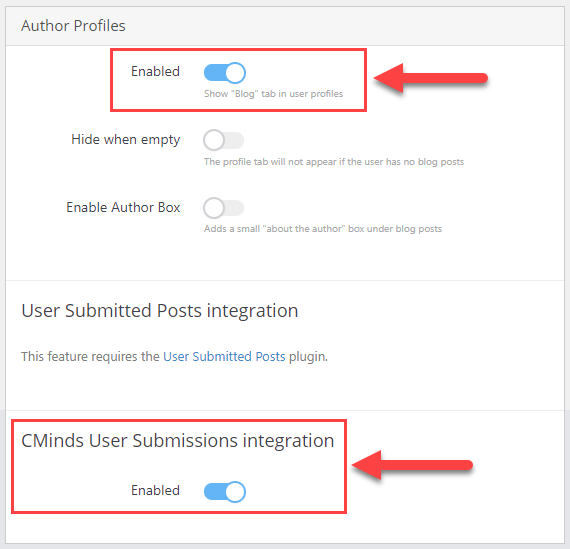
- Author Profiles - For displaying the Blog section in Peepso profile.
- Cminds User Submissions integration - For displaying the form for creating posts in PeepSo profile.
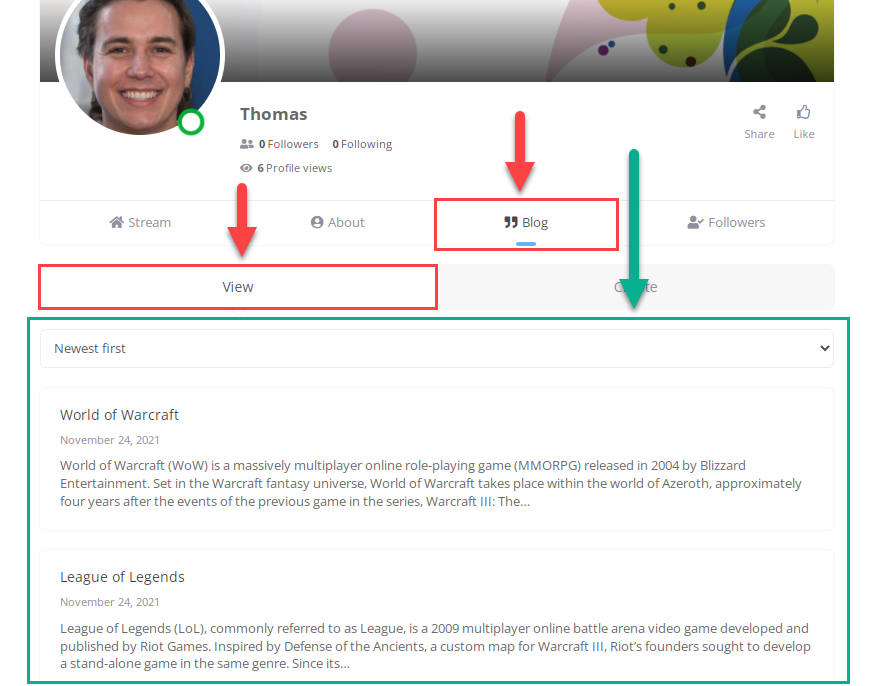
The base integration is complete and the users can access the Blog section in their PeepSo profiles. They can see their posts under the View tab:
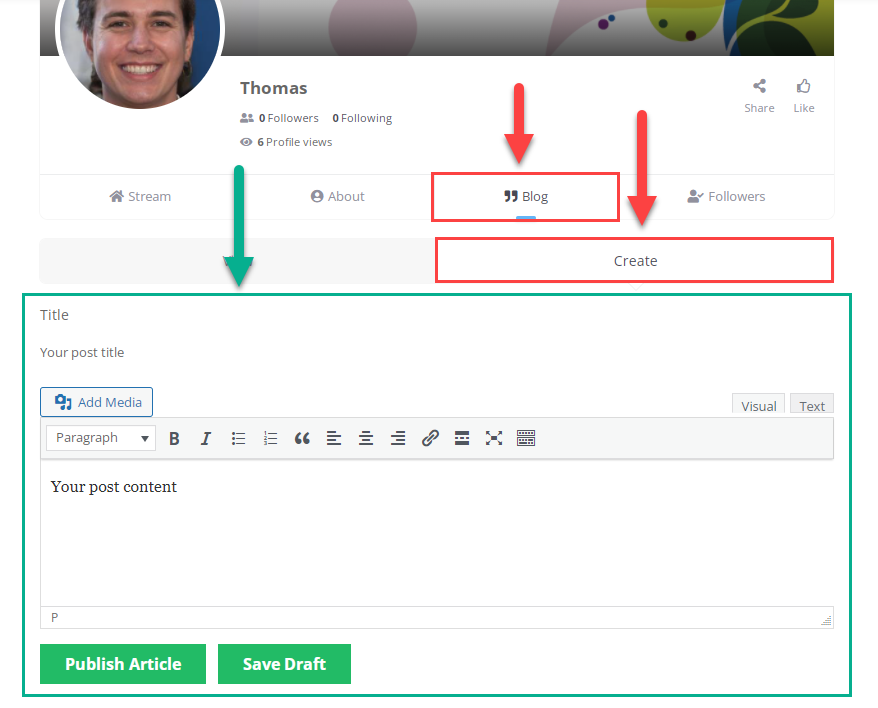
And under the Create tab they can create their own posts:
Adding the User Dashboard to PeepSo Template
To give users the ability to manage their posts, we need to add a user dashboard to the profile. So, it's necessary to override the PeepSo template and add the [cm_usersp_posts_list] shortcode.
This is an advanced process that requires:
- Access to the file directory of your site (for example, you can use for this WP File Manager).
- Some knowledge of CSS and browser console
TIP
Find out what is the override file - read the guide from PeepSo: Overriding the PeepSo Template
Step by Step
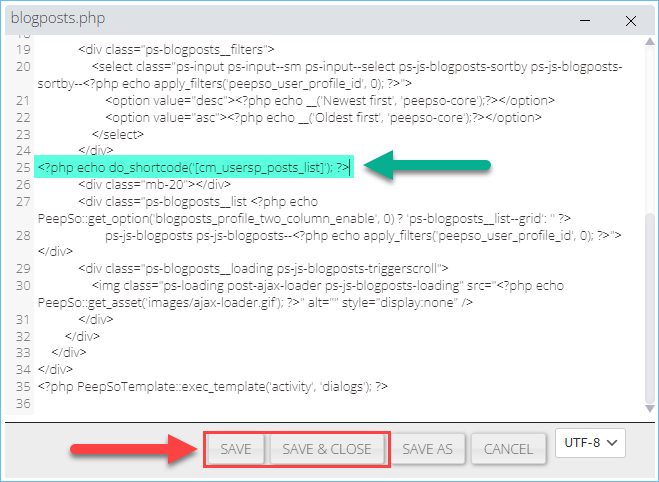
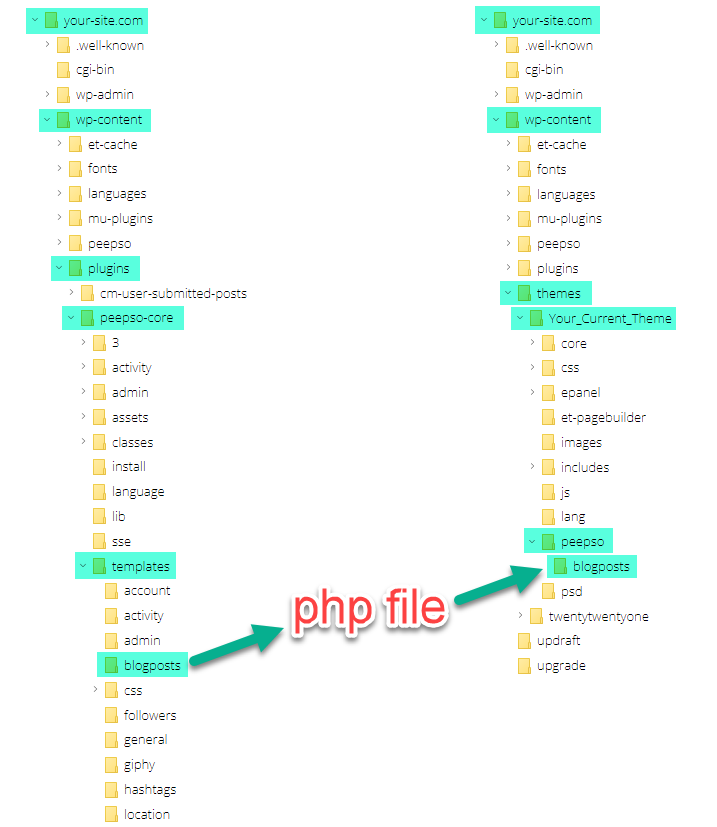
We will consider this process on the example of the "blogposts.php" file. This file is responsible for displaying elements in the Blog section - the View tab.
- Locate the override file in ROOT/wp-content/plugins/peepso-core/templates/blogposts
- Copy the "blogposts.php" file.
- Paste the file to ROOT/wp-content/themes/YOUR-THEME/peepso/blogposts. Note: You might need to create the missing folders, in case if you do this for the first time.
- Open the file for editing.

- Add
[cm_usersp_posts_list]shortcode where you need with the help of do_shortcode Example:<?php echo do_shortcode('[cm_usersp_posts_list]'); ?>Let's add it under the filtering bar and above the posts list as shown on the screenshot, and don't forget to save the changes by clicking the relevant button:
Workflow
Let's see the result:
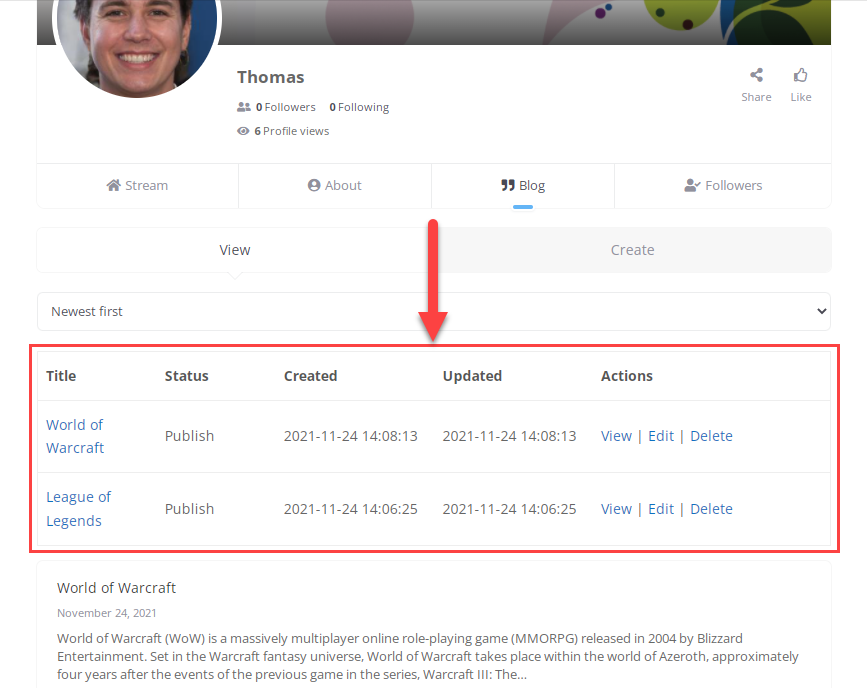
Now the user should be able to manage his posts.
And here are a couple of reminders, in case if you skipped them during the basic plugin configuration.
Reminder #1 - User Roles Allowed to Create Posts
Don't forget to define, which user roles are allowed to create and edit posts. You can do it by navigating to Admin Dashboard → CM User Submitted Posts → Settings → General Settings tab:
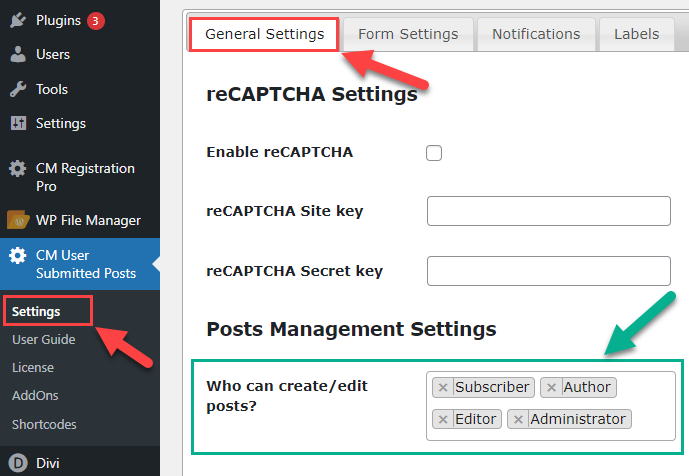
Don't forget to click the Save Changes button on the bottom of the page.
Reminder #2 - Editing Posts
To enable the possibility of editing posts, you need to do a few actions.
- Create a page that contains a shortcode
[add_post_form]. This shortcode is responsible for displaying the form for creating and editing posts. -
Navigate to Admin Dashboard → CM User Submitted Posts → Settings → General Settings tab. Enable the option Allow to edit posts. Then in option Editor Page choose the page created in the previous step, and click the Save Changes button on the bottom of the page.

Allowing users to edit their posts

End Result
Following instructions found in the plugin and guides, you should be able to integrate WordPress User Submitted Posts with PeepSo.
Use Case Front-End
The list of user's posts and the user dashboard:
The form for creating posts:
 |
More information about the WordPress User Submitted Posts plugin Other WordPress products can be found at CreativeMinds WordPress Store |
 |
Let us know how we can Improve this Product Documentation Page To open a Support Ticket visit our support center |