WordPress Travel Map Plugin (CMMRM) - How To - Highlight Locations On Click
How To Highlight Locations On Click
Since the version 5.0.3 of the WordPress Travel Map plugin, you can let users highlight locations on the route page by clicking on them either on the map or in the list.
Front-end Example
Settings
To enable this feature, navigate to Admin Dashboard → CM Maps Route Manager Pro → Settings → Route Page tab.

Scroll down to the section Marker and turn on the option Enable highlight marker list on click, then save the changes.

TIP
Don't forget to add locations to your route.
To do this, while creating a route click the button Add markers above the map, then add needed locations to the map. You can move them by dragging and dropping. Below the map you can change the name of each location and add a description.
You can also change other location details. Learn more: WordPress Travel Map Plugin (CMMRM) - Adding Route Locations Markers

Front-end Example
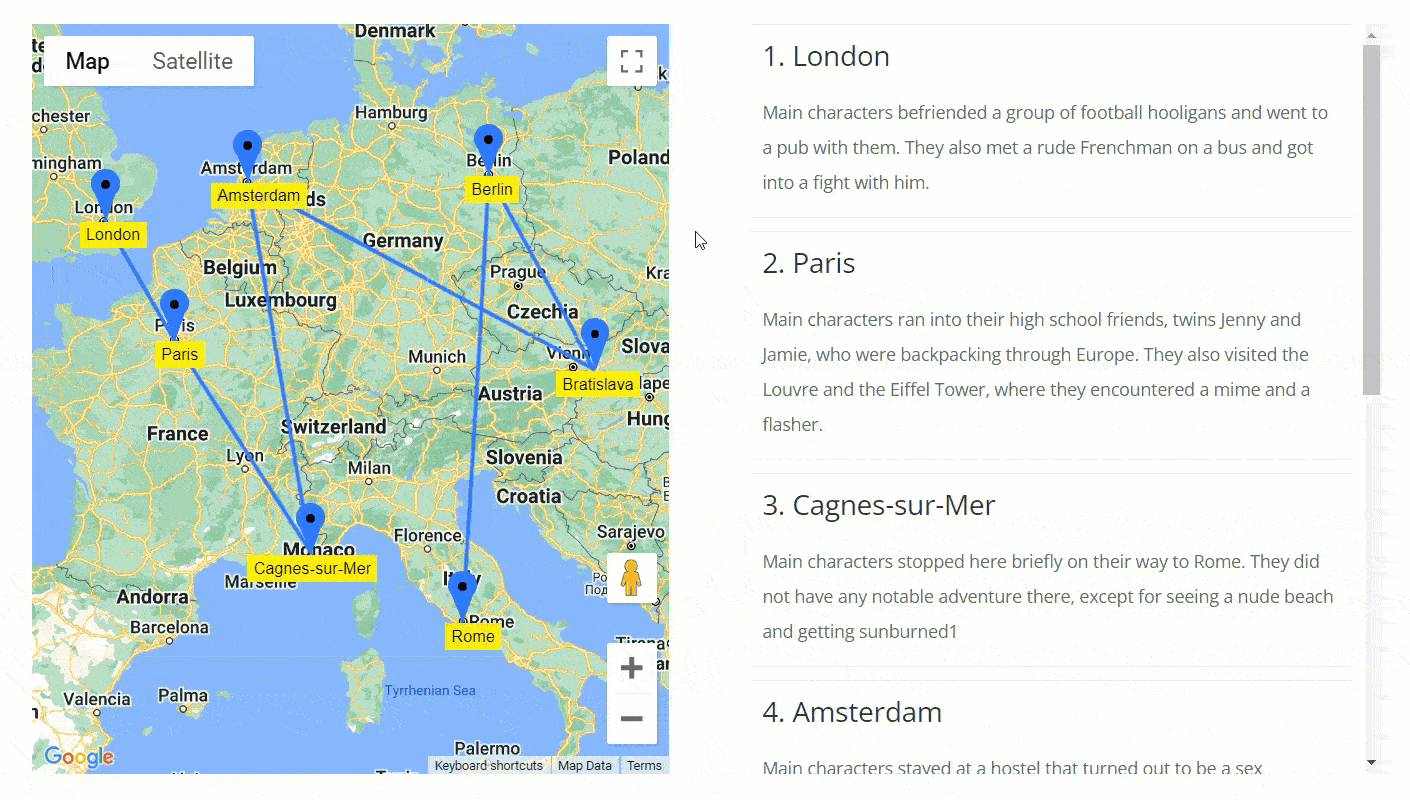
Now the user will be able to highlight locations on the route page by clicking on them in the list or on the map.
Highlighting locations on the map by clicking on them in the list:
Hghlighting locations in the list by clicking on them on the map:

TIP
To show tooltips with info for each location as it is shown above, you need to enable the option Show info window for the location on the Route Page tab in the plugin settings.
Below this option you can also configure what should be displayed in the tooltip. Learn more: WordPress Travel Map Plugin (CMMRM) - Settings - Route Page

How To Display the Locations List Next to the Map
As the most convenient way of using this option is when the locations list is displayed next to the map, let's learn how to do this.
You create a custom route page template using shortcodes.
For this case we need the following shortcodes:
- [route-map-canvas] - to display the map.
- [route-locations] - to display the list.
- height - this parameter that allows to define the height of the list in pixels.
We use the Divi theme, so we created two Code blocks next to each other and added there needed shortcodes:

After saving this page, we need to specify it as a template for the route page.
Navigate to Admin Dashboard → CM Maps Route Manager Pro → Settings → Route Page tab. Using the option Custom page for a single route, choose the needed page.

Then save the changes.
You can enhance the route page template with other details using other shortcodes.
Learn more about the plugin shortcodes: WordPress Travel Map Plugin (CMMRM) - Shortcodes
 |
More information about the WordPress Travel Map Plugin Other WordPress products can be found at CreativeMinds WordPress Store |
 |
Let us know how we can Improve this Product Documentation Page To open a Support Ticket visit our support center |